 Plant As Deco
Small Room Decor
Rain Shower Heads: Types, the Arm Swap and Pressure Truth
By Plant As Deco · Updated 22 November 2026
A rain shower head is the one bathroom upgrade that photographs like a spa and behaves like physics. The wide spray needs real household pressure behind it to feel good, and on a weak supply it reads as a drizzle. This page reads your pressure first, then picks the head, the arm and the finish honestly, including the ten-minute renter swap and the parts bag that undoes it all.
Weekend-ready: $45–$125 for the head, the arm and the tape, one hour of swapping. The original parts go in a labeled bag, and they go back in at move-out.
1. The pressure trade, said plainly
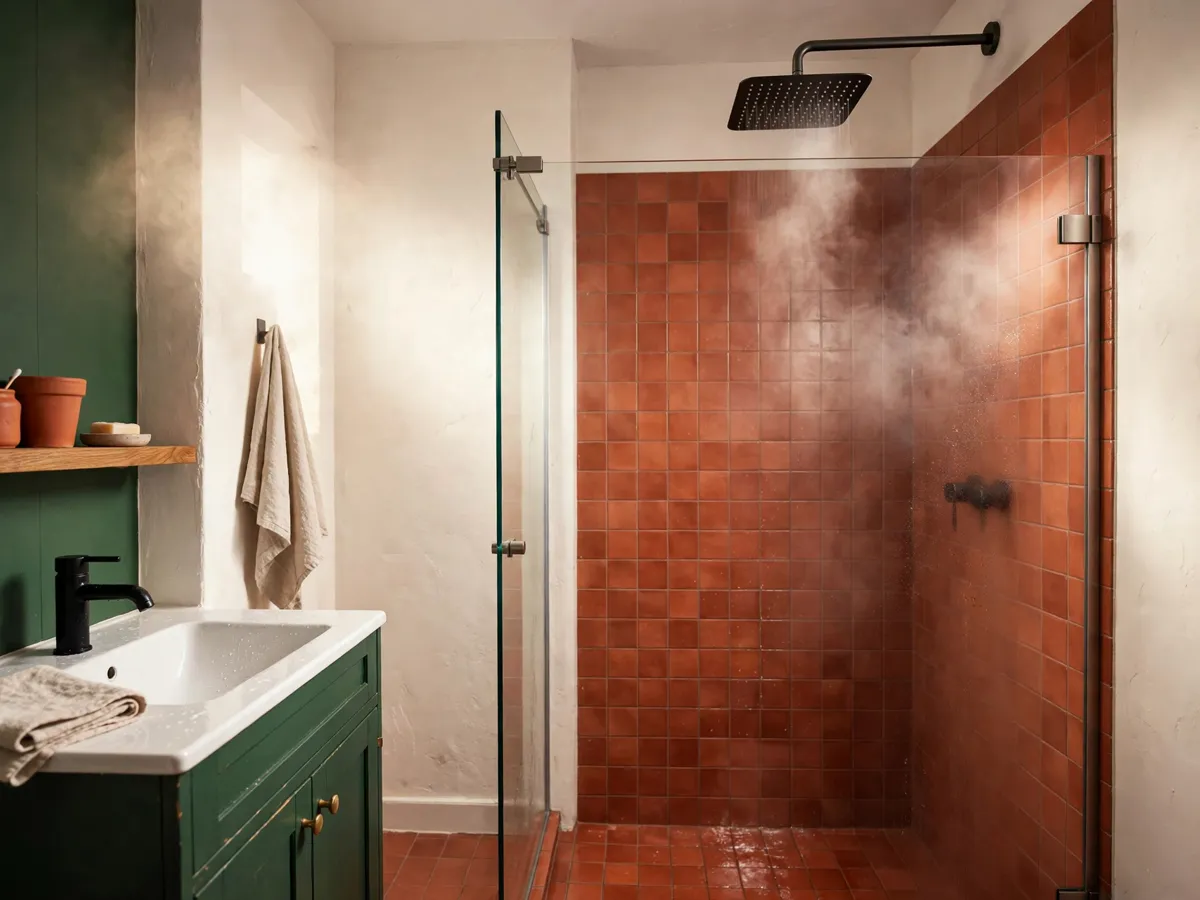
A rain head trades force for coverage. A standard head pushes its water through a small face, so each stream leaves with speed behind it. A rain head spreads roughly the same water across a face four times wider, and every one of those hundreds of openings gets a thin, slow share. On a supply with decent pressure behind it, the result is the soft, heavy rain people want. On a weak supply, the result is a wide, warm drizzle that wets your shoulders and stings nothing.
That is the whole decision, and it deserves the first section of this page. The head cannot invent pressure; it can only spend what arrives. If your current shower already feels weak, the wide face makes the weakness softer and wider, never stronger. If your current shower feels strong bordering on pushy, you have the surplus a rain head spends well.
So the order of operations here: read the pressure first, buy second. Renters get one honest path, the wall-arm swap, and one honest no, the ceiling mount. Both are below, with the wrench work in between.
Cost: $0 to understand. Time: 5 minutes, and it decides every dollar on this page.
2. Read your pressure first: the bucket check
Before any shopping, stand under your current shower and read it honestly. Does the spray reach the far wall of the stall with some force, or does it fall within arm length and die? Does shampoo rinse out in a minute, or do you stand there working it through? A shower that rinses hair quickly has the surplus a rain head spends. A shower that already dribbles will drizzle worse under a wide face.
The bucket check makes it concrete without instruments. Run the current shower into a bucket and count slowly to ten, then look at the level. Do the same in a shower you already trust, one that feels strong every time, and set the two levels side by side. The comparison is usually obvious in one look, and it is the honest version of a number you cannot get any other way without a gauge.
The low-pressure verdict, before any recommendation: if your shower reads weak, either skip the wide rain head, or size down to the smallest face (the 8-inch) and keep expectations modest. The upgrade that helps a weak stall is a different one, a small high-efficiency head with a narrow spray pattern. No head on any shelf fixes the pipe behind the wall, and a rain head on weak pressure is a wide drizzle with better marketing.
Cost: $0 and one bucket. Time: 10 minutes, and compare against a shower you trust, or the read means nothing.
3. The water math: a wider spray, not more water
Here is the myth worth correcting early. A wide head does not waste more water per minute than the head you have. Shower heads sold in the US are built to a flow cap around two and a half gallons a minute, and a rain head meets the same cap. The water a wide head uses each minute is roughly the water your current head uses. What changes is the spread: the same volume divided across a wider face, with less force behind each drop.
That single sentence explains both halves of the experience. The soft rain feel on a strong supply is the same water arriving slower and softer. The drizzle on a weak supply is the same water arriving slower still. A bigger head at the same pressure spreads the same water thinner, always, in every bathroom.

The honest water note is about time, and flow is only half of it. A wide, soft spray rinses shampoo slower for most people, and a slower rinse means a longer shower, which is where any extra water actually shows up. If long hot showers are already the household habit, that is the real cost of the upgrade, and it is worth naming before the box arrives rather than after the water bill does.
Cost: $0. Time: 2 minutes of math, and it corrects the water waster story you have heard.
4. The five head types, one decision each
The flat square or round head, 8 to 12 inches, is the classic look: a clean rectangle or circle sitting flat overhead. Decision: buy it where the bucket check already proved real pressure, because the flat face spends the most spray area of the five.
The round head with a slight dome or dished face curves a few degrees and varies its hole sizes, so the spray reads closer to actual droplets than to needles, and it loses less spray area than the flat face. Decision: the pick when you want the rain feel, and a few more dollars buys it.
The ceiling-flush mount sits level with the ceiling, and the water falls straight down in the photograph version of rain. It needs plumbing above the ceiling line, attic access or opened drywall, and a bracket tied to framing. Decision: an owner project with a plumber, never a renter one.
The wall-arm rainfall is a rain shower head with an arm doing the ceiling's job: an extension or S-shaped arm replaces the short standard arm and carries a wide head out over you from the existing wall fitting. No pipe moves inside the wall. Decision: the renter pick, and the reason this page exists.
The combo head pairs a rain face with a detachable handheld on a dock, so hair rinses under the narrow spray and shoulders soak under the wide one. Decision: the compromise for households split on the rain feel, and the only pick here that flatters a weak supply, because the narrow pattern stays one switch away.
Cost: $25–$100 across the five types. Time: 10 minutes of deciding, and the type sets the whole install.
5. The wall-arm conversion: the renter pick
The conversion is one arm. The standard shower arm is a short chrome pipe that angles out of the wall and holds the head low and close. An extension arm, $15 to $40, is longer, swings the head out a foot or more, and drops it overhead, which turns the same wall fitting into a rainfall setup with no pipe work behind the tile.
Two details pick the arm. Reach: in a narrow stall a longer arm puts the head above your body instead of against the wall, and too much reach puts it into the door track or the opposite wall. Angle: a fixed arm holds one slope, while an arm with a ball joint at the head lets you tip the face, which matters under a sloped ceiling or where the tall person in the house needs the clearance.
The fitting is the same standard thread as the arm that came out, so the swap is a one-wrench job, covered step by step two sections down. The original arm goes into a zip bag with its old head, and it goes back in at move-out, which is what makes this route renter-safe in most leases. For the wider bathroom refresh around it, the small bathroom decor guide covers what else earns its keep in the same room.
Cost: $15–$40 for the arm. Time: 30 minutes with the wrench, and 10 minutes to restore the original at move-out.
6. The ceiling mount: the honest no
The ceiling mount is the true rainfall look, and it is also the honest no for most readers here. The pipe has to run above the ceiling to a drop-ear elbow anchored to framing, which means opening drywall, running pipe, patching, and painting. On a top floor that means the attic. Between floors, it means opening the ceiling of the room below yours.
That work sits behind drywall, which is where the renter line is drawn for good. A lease that quietly tolerates a swapped arm will not tolerate an opened ceiling, and no rain head is worth that conversation at checkout. Even for owners, the ceiling head is a decision to make with a plumber, priced by the job, and we do not quote labor here.
One more honest limit, even when the install is done: a flush ceiling head aims straight down, it cannot be aimed, and it wets a wider circle than a wall-arm head. In a small stall that circle finds the door gap and the ceiling light. The wall arm gets you most of the rain with a quarter of the consequences, and it aims.
Cost: $0 to cross it off the list. Time: 5 minutes, and the plumber route is priced by the job.
7. The arm swap, step by step
Replacing an arm is a genuine beginner job: one wrench, one roll of plumber's tape, and about half an hour. Work through it in order.
Water off first. Most showers have no shut-off at the arm, so either close the bathroom stops if the unit has them, close the main, or simply keep everyone out of the bathroom for the hour. Opening the pipe spills the cup of water sitting in the arm, and nothing worse.
Towel in the tub. The towel catches the old arm when it lets go and pads the tub finish so a dropped wrench costs nothing.
Grip and direction. The arm unscrews from the wall fitting counter-clockwise as you face the wall. Set the wrench on the flats close to the wall with the jaws wrapped in a cloth, and never lever from the head end, because the arm bends before the joint gives.
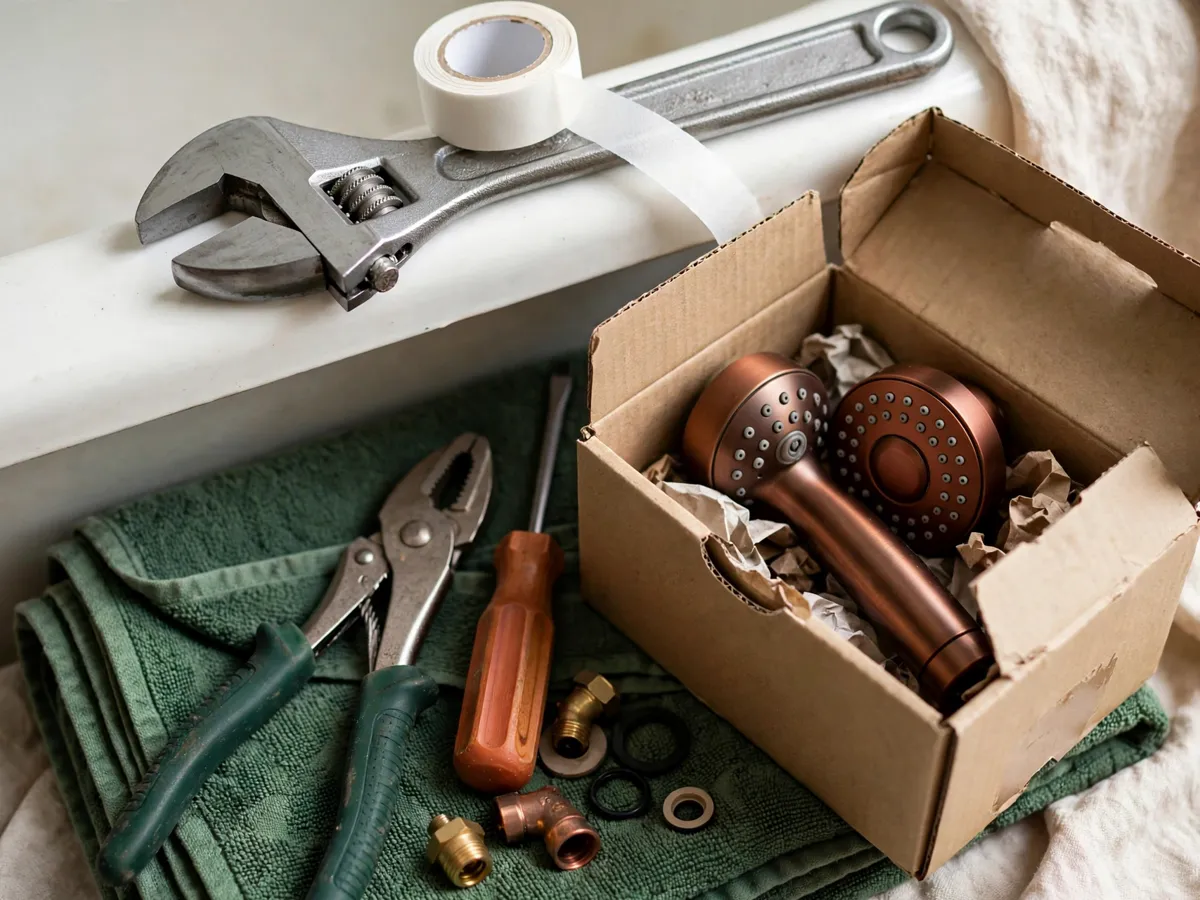
Tape the threads. Clean the male threads on the new arm, then wrap plumber's tape three times around, clockwise as you face the end of the pipe, so tightening sweeps the tape on rather than peeling it off.
Seat the arm. Start the new arm by hand so the threads engage straight, run it in until it seats, then give it a quarter turn with the wrench on the flats near the wall. Hand-tight plus that quarter turn is the whole tension story: enough to seal, and two more turns is how a wall flange cracks.
Head on, then test. Thread the head onto the arm with a wrap of tape, snug it by hand plus a small turn with the wrench, turn the water on, and watch the wall fitting with dry hands. A slow weep there means a half turn more, and it never means four.
Cost: $2–$5 for the tape. Time: 30 minutes, and if the old arm will not budge, penetrating oil and patience beat force, because a snapped arm turns a wrench job into a plumber visit.
8. Spray quality: the face decides the feel
The rain feel lives in the faceplate more than in the diameter. A thin, flat face with a few hundred identical small holes gives the needle spray: fast, thin jets that sting the scalp and read as pressure rather than rain. A dished or domed face with varied hole sizes slows the water and forms actual droplets, and that difference is what separates a head that pours from a head that rains.
At the honest end of the market, the price tracks the face. The basic chrome model with the thin flat face sits on the $25 to $40 shelf: it delivers the look, and in a strong shower it can read fine. The dished-face models sit around $40 to $80 and carry the droplet feel. Above that mid-range, the honest read is that the money goes into finish, name and packaging, and the spray physics stops changing, because a faceplate is still holes and angles however premium the box.
One feature earns its cost in a small bathroom: a face with rubber nozzles you can wipe. Mineral build-up wipes off a flexible face in seconds, and the next section is the reason that matters more with a rain head than with any head you have owned before.
Cost: $40–$80 for the dished-face version worth having. Time: 5 minutes reading the face before you buy, and it decides the feel for years.
9. Hard water and the vinegar soak
Hard water is the slow failure mode of every rain head, and it announces itself as a ragged spray. A few holes clog, the neighbors aim sideways to compensate, and within weeks the rain has a wind direction. The wide face carries more holes than a standard head, which means more holes to clog and a pattern that goes uneven sooner.
The fix is the vinegar soak, and it costs about a dollar. Fill a sandwich bag with white vinegar, raise it over the head, seal it against the rim with a rubber band, and leave the face submerged for a few hours or overnight. Brush the holes gently with an old toothbrush, run the shower hot, and the pattern evens out.
The wipe-able rubber face from the last section makes this rare: run a thumb across the wet face after a shower and the rubber flexes, pushing the mineral out of the holes. In a hard-water area, wipe weekly and soak monthly. In a soft-water area, a soak every few months holds the pattern. The tell is the spray, not the calendar: when the pattern goes ragged, soak it, and skip the replacement.
Cost: $1–$3 in vinegar and a rubber band. Time: 10 minutes hands-on, plus the overnight soak.
10. Size: the 8-inch is the small-bathroom pick
The 8-inch face is the small-bathroom pick, and the large shower head, the 12-inch, is the upgrade the stall has to earn. A 12-inch face wets a circle over a foot wide, and in a narrow stall that circle lands on the door gap, the floor outside the enclosure, and sometimes the ceiling light, which is a worse combination than it sounds in a room with an exhaust fan and a bath mat.
Three checks before sizing up. Door and glass: where does the spray circle land with the door shut, and does the gap drip? Ceiling light and fan: a wide head on an overhead arm sits close to the fixture in a small stall, and mist reaches it. Enclosure: a 12-inch face wants a full glass panel or a weighted curtain, and an open half-stall with a light curtain will leak.
Ceiling height cuts the other way. The rain face wants to sit above the tallest head in the household with room to spare, and an 80-inch ceiling plus an arm plus a 12-inch face leaves a six-foot-plus household ducking and clipping the head on the way in. Short ceilings call for short arms and the 8-inch face. The light over the stall is its own question, and the warm lighting guide for small spaces covers placement that flatters a small bathroom.
Cost: $0 to measure. Time: 10 minutes with a tape, and it picks the whole box before the money moves.
11. Finish: match the trim you already have
Chrome, brushed nickel, matte black, in that order of how often they already live in your bathroom. The rule that saves the project: match the trim that is already there. The faucet, the tub spout, the towel bar, the metal frame on the mirror: the room already picked a finish, and a head that argues with it reads as the piece that does not belong.
The common read, and a preference rather than a law: a bathroom finished in one metal reads finished, and a bathroom mixing chrome and brushed nickel and black reads as a work in progress to most eyes. A deliberate two-finish scheme is a designer move. An accidental one reads accidental.
The honest behavior of each. Matte black shows hard-water spotting worst and looks newest for the first month. Brushed nickel hides water spots best and reads warm, which suits a cozy scheme. Chrome is the cheapest, matches the most rentals, and shows spots in between. In a rental, chrome is usually the answer already, because developer-grade trim is chrome, and the head disappears into the room. If the mirror above the sink is the next thing on the list, the small bathroom mirror guide picks sizes and frames that agree with the same trim.
Cost: $0 to check the faucet. Time: 2 minutes, and it is the cheapest decision on the page.
12. What a rain head does not fix
Three hopes a rain head cannot pay, and they are worth the honesty before the box arrives.
It does not raise pressure. It spends what the pipe delivers, and every wide face lowers the force behind each drop. A weak shower stays weak, wider.
It does not heat water faster. The heater works at the same pace either way, and the first cold minute stays exactly as long as it has always been.
And the one nobody expects: a rain head can make a weak water heater feel weaker. The wide spray wets more skin at once, the shower reads cooler, and the natural move is to open the hot tap further. On a small or shared tank, that is the recipe for the last five minutes going lukewarm. If the shower already ends cold, fix the heater, the tank, or the shower schedule before the head, because none of these are head problems. They simply arrive with the head, since the head is what changed.
Cost: $0. Time: 5 minutes of honesty, and it saves the return trip to the store.
13. The honest cost line
The whole upgrade, priced in parts. A basic chrome rain head with a flat face runs $25 to $40 and delivers the look with the needle spray. A dished-face rain head runs $40 to $80 and delivers the droplet feel, and it is the one worth the money. The extension arm runs $15 to $40, and the tape costs a couple of dollars.
So the real weekend runs $45 to $125 in parts: a dished head, an arm, and the tape, an hour with one wrench. The combo rain-plus-handheld head runs $50 to $100 and replaces both the rain experience and the rinse. What costs real money is the ceiling-mount install, which is plumber territory, quoted by the job, and we do not quote labor rates here.
And the honest note from the spray section stands at every price point above the mid-range: the money goes into finish and name, and the water behaves the same. Buy the face, match the trim, and stop there.
Cost: $45–$125 in parts, the honest version. Time: one hour of swapping, and the parts bag is the insurance for the deposit.
14. The renter exit
The wall-arm swap is the renter-safe version, and the exit is what makes it safe. Keep the original arm, the original head, and any washers in one zip bag, label it with a marker, and store it with the moving box or the under-sink bin. The bathroom returns to stock in ten minutes with the same wrench at move-out. Photograph the bag once, and the photo answers any deposit question before it is asked.
The line that does not move: anything behind the wall. Opening drywall, moving pipe, or adding a ceiling mount is landlord work, with written approval and usually a plumber, and the ceiling is not yours to open. If the lease is silent on fixture swaps, a short written note, the arm swap, the original kept, the restoration promised, prevents the dispute that silence creates.
For the rest of what makes a rental bathroom feel finished without opening anything, the cozy apartment decor guide covers the moves that travel with you at the end of the lease.
Cost: $1 for the zip bag and marker. Time: 10 minutes at move-out, and photograph the bag once.
Before you unscrew anything: copy this
- Pressure read honestly: strong showers get the wide face, weak showers size down or skip
- Head size fits the stall: 8-inch for small, 12-inch only where the enclosure earns it
- Finish matches the faucet and the towel bar, not the wishlist
- Arm picked for reach and angle, not the longest one on the shelf
- Water off, towel in the tub, cloth on the wrench jaws
- Original arm, head and washers in one labeled zip bag, photographed once
Cost: $0 to check. Time: 5 minutes, and the swap after it goes fast.
Questions renters ask
Does a rain shower head need good water pressure?
Yes, and honestly so. A wide face spreads the same water thinner, so the rain feel needs a supply with force to spare. Run the bucket check first: if your current shower rinses hair quickly, the rain head will read well. If it dribbles, size down to an 8-inch face or keep the head you have.
Can a renter install a rain shower head?
With a wall-arm conversion, usually yes. An extension arm replaces the standard arm at the same wall fitting, the original parts go in a labeled bag, and the swap reverses in ten minutes at move-out. The ceiling-flush mount is the no: it needs pipe above the ceiling and opened drywall.
Do rain shower heads use more water?
Not per minute. Shower heads sold in the US are built to a flow cap around two and a half gallons a minute, and a rain head meets the same cap, it just spreads the water wider. The honest catch is time: a soft wide spray rinses slower, and longer showers are where extra water shows up.
What size rain shower head fits a small bathroom?
The 8-inch. It fits a standard stall, keeps the spray circle off the door gap and the ceiling light, and leaves headroom under an 80-inch ceiling. The 12-inch large shower head wants a full-width enclosure and the ceiling height to match.
Why does my rain shower head spray unevenly?
Hard water. A few clogged holes send the rest sideways and the pattern goes ragged. Soak the face in a bag of white vinegar for a few hours or overnight, brush the holes gently, and run the shower hot. In a hard-water area, expect the soak monthly and wipe a rubber nozzle face weekly.
Save these on Pinterest
Pin the bucket check first, because it is the step that decides whether the box gets ordered at all. Then pin the arm-swap steps and the vinegar soak, the two routines that keep the upgrade honest for years. The rest of the small-bathroom ideas live in the small bathroom decor guide and the Small Room Decor collection.