 Plant As Deco
Small Room Decor
Renter-Friendly Wall Trim: Architecture You Can Peel Off
By Plant As Deco · Updated 14 November 2026
A small rental bedroom usually has the same four walls as an empty box: flat paint, a window, a door, and nothing else. The rooms that feel different have architecture — trim lines running up the wall, a rail line near the ceiling, a frame drawn around a doorway — and none of it needs a contractor. The renter versions of these lines come as thin molding strips with adhesive backs, and they give a plain wall depth without changing its color or its pattern. This page covers what trim does to a small room, the three projects that peel off clean — batten strips, a picture rail, and a frame around a door — and how to place the lines so the room gets bigger instead of busier. It is a different move from a single painted wall, which the accent wall guide covers, and different from printed pattern, which the wallpaper guide owns; trim is the third option, and it works when the other two are off the table.
Weekend-ready: $40–$150 per wall, one afternoon to one weekend. Adhesive strips carry the whole project — renter-safe throughout.
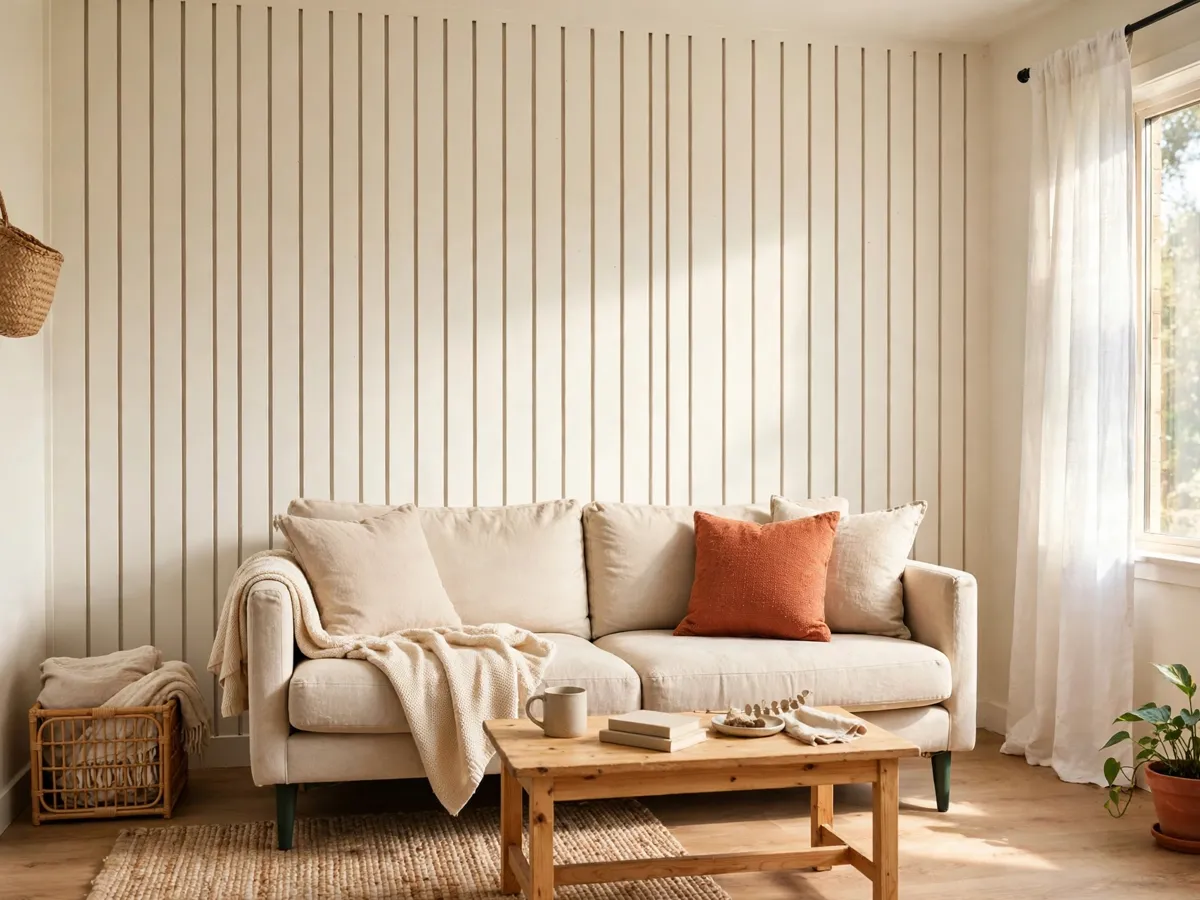
1. Why trim gives a small room a frame
A plain wall gives the eye nothing to land on, so it reads as one flat surface and the room reads as a box. Trim lines change that with geometry alone. Vertical strips running floor to ceiling carry the eye upward, and the wall reads taller than the tape measure says. A horizontal line near the ceiling runs the full width of the wall, and the room reads wider. Which one you want depends on which dimension the room is short on: a room that is narrow gets the horizontal line, a room with a low ceiling gets the vertical strips. The safest first move in a small space is trim painted the same color as the wall — the paint-match route — because the lines add depth through shadow without adding a second color to a room that is already small. Contrast trim, where the strips are a different color from the wall, has its place: on a wall that already works, or in a room big enough that a bold line reads as one gesture rather than ten. In a room under ten feet wide, matched trim wins almost every time.
Cost: $0 to decide. Time: twenty minutes of looking at which dimension the room is short on.
2. Peel-and-stick batten strips: the geometry project
Batten is the pattern of vertical molding strips that classic board-and-batten walls are built from, and the renter version is a thin strip — MDF or PVC, usually one to two inches wide — with adhesive already on the back. The strips are the cheap part; the work is the math, and the math is what separates even batten from wobbly stripes. Measure the wall width and divide by the number of gaps you want at eight to twelve inches each: a ninety-six-inch wall with ten-inch gaps takes nine strips and ten spaces. Mark the center of the wall first, then work outward one gap at a time so any leftover fraction of an inch lands at the two edges, where corners hide it, instead of at one end. Cut each strip with a small hand saw and a miter box, dry-fit it against its marks, then peel and press. On a wall with builder-grade paint or a texture that does not grip, a few dots of extra adhesive along the strip are the honest fix. For move-out: a hair dryer on low heat softens the adhesive line, and a slow pull at a low angle brings the strip off with the paint staying on the wall. The soft vinyl strips release cleaner than the stiff MDF ones; buy the flexible kind if your lease ends this year.
Cost: $40–$100 per wall. Time: one afternoon for one wall, measured and pressed.

3. Picture rail and door frames: two weekend projects
A picture rail is a single horizontal molding strip mounted sixty to eighty inches from the floor — high enough to clear furniture, low enough that a chair rail style hook on its top edge hangs art at the right height. The renter version is the same strip with adhesive and a few small supports, and what it buys you is the ability to move art around the wall without a new hole every time: the hooks slide along the rail, the cord drops down, and a room can be rearranged in an afternoon. It pairs naturally with the hanging heights in the art placement guide, because the rail sets the ceiling for the arrangement and the cords set the height of each frame. The second project is frame molding around a doorway or window: four strips cut at forty-five degrees and pressed around the opening to draw a wider frame than the builder gave it. The door reads larger, the wall around it reads intentional, and the whole project is measured, cut, and pressed in a weekend. Do the door frame first if the room has no art yet — it changes the room with no furniture at all.
Cost: $25–$60 for a picture rail, $30–$70 for a door frame. Time: one weekend afternoon each, measured and cut.
4. Trim color and the light that makes it show
Trim only reads as architecture if the light gives it a shadow, and the color pairing decides how loud the lines are. The two safe pairs are: off-white trim on a saturated wall color — cream strips over sage, terracotta, or deep blue — which turns the whole wall into one framed piece; and colored trim on a white wall, where the strips themselves carry the accent and the room stays light. Both pairs are calm; a dark strip on a dark wall is the one that disappears, and a bold strip in a room under ten feet is the one that gets busy. The light matters as much as the paint: a picture light or a small uplight aimed along the trim turns each strip into a line of shadow, and that shadow is what makes the wall read as having depth. A plug-in sconce with a warm bulb does the same job with no wiring, and the full list of those is in the warm lighting guide. Set the light before you judge the trim — the same strips look flat at midday and architectural at night.
Cost: $20–$60 for the light. Time: one evening of moving the lamp until the shadow line lands right.
What we would skip
Skip textured walls and chalkboard paint — adhesive strips need a smooth surface to grip, and both of those release the strip within weeks. Skip high-contrast trim in a room under ten feet wide, because bold lines in a small room divide the wall into stripes the eye has to count. Skip real crown molding, the kind that gets nailed and caulked into the ceiling joint: it is the nicest of all these looks and it is not a renter project, since removing it takes the ceiling paint with it. Skip running batten strips over outlets and switch plates — plan the layout so strips land beside the plate, with the small cut left for a filler strip if the math forces it. The one thing worth the extra ten dollars is the flexible vinyl strip rather than the stiff MDF one, because the flexible strip is the one that peels off clean on the day you actually need it to.
Cost: $0. Time: the decisions that keep the trim smooth, matched, and out of the outlets.
Honest costs: strips, adhesive, and the saw
One wall of peel-and-stick batten runs $40–$150: the strips are roughly $2–$5 per linear foot, a tube of extra adhesive is $5– $10, and a miter box with a small saw is $15–$25 if you do not own one. A picture rail is $25–$60 in strip and hooks, and a door frame is $30–$70 depending on how wide the opening is. Paint, if you go the paint-match route, is a sample pot at $5– $15 per color. The ceiling for a full renter room — one batten wall, one picture rail, one door frame, and a light — lands around $150 total, which is less than a single piece of furniture and changes more of the room than most furniture does. If the wall you are starting with needs its own color first, the accent wall plan is in the accent wall guide, and the patterned-paper alternative that sits beside trim is in the wallpaper guide.
Cost: $40–$150 per wall. Time: one afternoon per wall, measured and pressed.
Before you peel the backing: copy this
- Gaps of 8–12 inches, measured and divided before any strip is cut
- Strips pressed from the wall center outward, edges last
- Trim painted to match the wall in any room under ten feet wide
- Flexible vinyl strips for a lease that ends within the year
- A hair dryer and a slow pull planned for move-out day
Cost: $0 to check. Time: fifteen minutes of measuring, before the first strip is touched.
Questions renters ask
Does peel-and-stick trim damage the paint when it comes off?
On a smooth wall with builder-grade latex paint, flexible vinyl strips pulled slowly with low heat from a hair dryer come off clean. Fresh paint, matte finishes, and cheap flat paint are the risk cases — test one strip in a hidden corner, let it sit a week, and pull it before committing a whole wall.
What adhesive is safe on painted walls?
The adhesive already on the back of the strip, plus a few dots of removable mounting adhesive where the wall needs extra grip. Permanent construction adhesive holds better and ruins the wall at move-out; anything labeled removable or repositionable is the renter-safe choice.
How long does a batten wall take to install?
One afternoon for one standard wall: twenty minutes of measuring and dividing, an hour of cutting and dry-fitting, and an hour of peeling, pressing, and leveling. The second wall goes faster because the math is already done.
Will trim make a small room look busier?
Matched-color trim will not — the lines add shadow, not color, so the wall keeps one tone and gains depth. The busier version is high-contrast trim with tight gaps under eight inches, which turns the wall into stripes the eye has to count. Keep the gaps even, keep the paint matched, and the room reads calmer than the plain wall it started from.
Save these on Pinterest
Pin the layout math first — gap width, center-out, paint-match — because those three decisions are the whole project and the rest is an afternoon. The paint colors that pair with off-white trim are in the accent wall guide, the floor that goes under a finished trim wall is in the renter flooring guide, and the no-drill art hardware that hangs from a picture rail is in the renter wall guide.