 Plant As Deco
DIY Home Projects
Crochet Tote Bag Pattern for Beginners: The No-Sag Bag
By Plant As Deco · Updated 16 November 2026
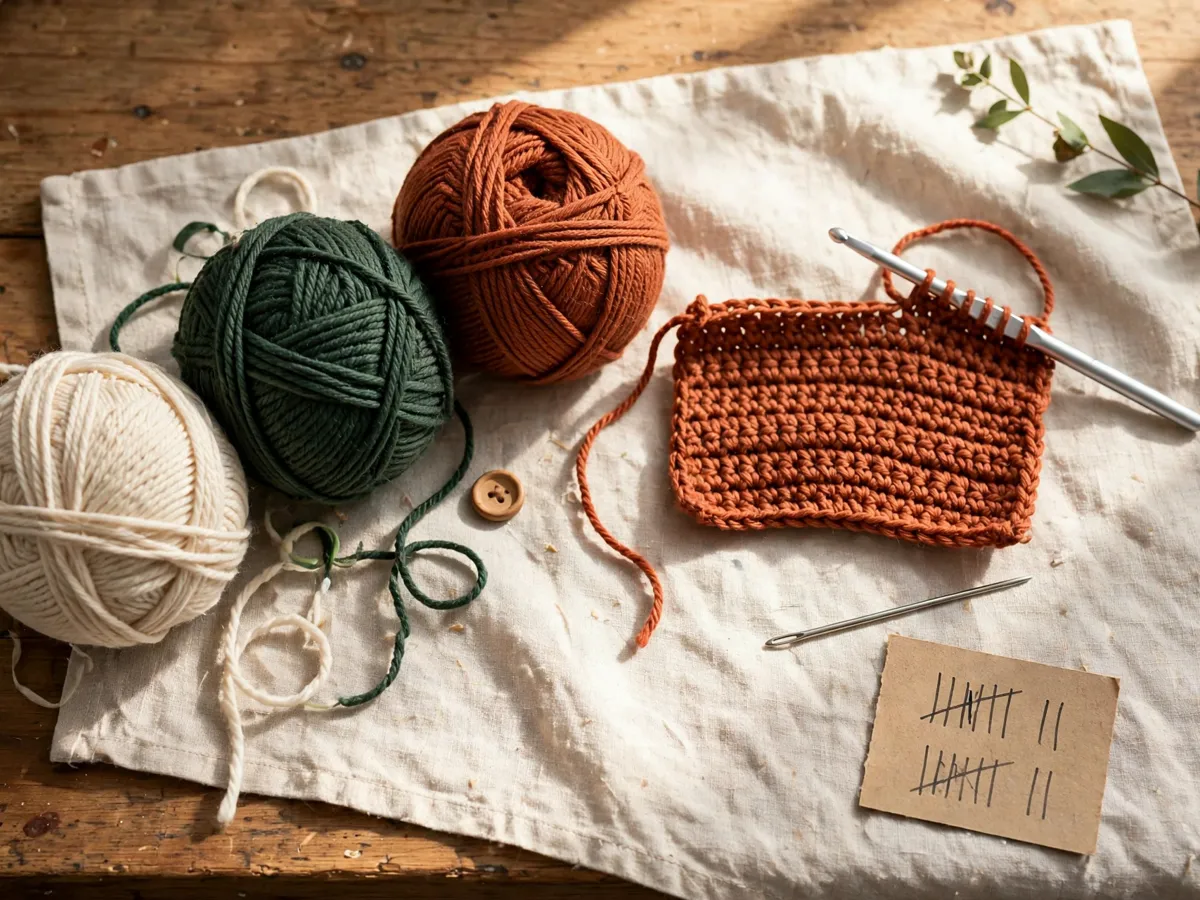
A crochet tote is the cheapest bag you will ever own and the most honest first crochet project: one hook, cotton yarn, and two stitches you learn in an evening. The enemy is not difficulty — it is stretch. A tote made from soft acrylic with a loose hand sags into a hammock by the second grocery run. This page fixes that before you buy anything: cotton yarn matched to the right hook, a base that stays flat, walls you can build straight or from granny squares, and straps with enough rows to hold. You only need the chain stitch and single crochet for the plain version; the granny-square version adds the double crochet, and nothing else.
One boundary so you buy the right thing once: this page is all yarn. Stitch counts here do not transfer to fabric, and fabric measurements do not transfer to yarn. If you would rather sew the same bag from canvas, the tote bag sewing guide has the cut list and strap math for that craft.
Weekend-ready: $15–$35, one weekend. Cotton yarn and one hook — no machine, nothing to print, renter-safe.
At a glance
- Who it is for
- A first crochet project, with no experience needed for the straight-wall version.
- What you need
- Cotton yarn, one hook, a yarn needle and scissors. No machine, no printed pattern.
- What it costs and takes
- $15–$35, one weekend: an evening to learn the stitches, a day to build the bag.
1. Buy cotton yarn and the right hook
Yarn choice decides whether the bag holds its shape, so it comes before every stitch. Buy cotton, not acrylic. Acrylic is soft and cheap, but it stretches under weight and never fully springs back — that is the whole sagging-tote problem in one fiber. Cotton is stiffer, washes well, and keeps the shape you crocheted. Look for the word cotton on the ball band and skip anything labeled super soft or baby without a fiber content you can read.
Weight matters next. Worsted-weight (#4) cotton is the beginner default: firm fabric, clear stitches you can count, and every craft aisle carries it. Bulky or chunky (#5) cotton builds a market tote in half the rows and feels sturdy, but it eats yarn fast and the finished bag weighs more on your shoulder. Pick one weight and stay in it — mixing a chunky wall with a worsted base gives you two gauges in one bag and a seam that puckers.
The hook follows the yarn, not the other way around. The ball band prints a suggested hook; go one size smaller than it says. A tighter gauge is exactly what a bag wants: dense fabric that groceries cannot poke through. An aluminum hook is fine, and an ergonomic handle is worth it if your hand cramps — it costs a few dollars more and pays for itself by row twenty.
| Yarn | Hook to buy | Small tote (10 x 12 in) | Market tote (16 x 17 in) |
|---|---|---|---|
| #4 worsted-weight cotton | 5.0–5.5 mm (US H-8 to I-9) | 120–150 yards, 1 skein | 220–260 yards, 2 skeins |
| #5 bulky/chunky cotton | 6.0–6.5 mm (US J-10 to K-10.5) | 90–120 yards, 1 skein | 150–190 yards, 2 skeins |
Read the band before the bag goes in the cart: the yardage per skein is printed there, and two dye lots of the same color can disagree in daylight. Buy both skeins from the same lot for a market tote. A yarn needle (blunt, big eye) and scissors finish the kit — the needle weaves in ends and joins panels, and it costs less than the coffee you will drink while weaving.
Cost: $12–$30 for yarn, $3–$8 for the hook. Time: 20 minutes in the aisle — read the band twice, buy once.
2. Crochet a base that stays flat
The base is a single-crochet rectangle, and it sets the stitch count for the whole bag — get it right and every later section is just repetition. Chain until the chain measures the width you want minus one inch (crochet relaxes wider than the starting chain), then count your chains and write the number down. Work single crochet back across, chain 1 to turn — the turning chain does not count as a stitch — and repeat. The base depth wants 2–3 inches for a small tote and 3–4 inches for a market tote.
Step 1: make a slip knot and chain to the tape. For worsted cotton on a 5.0 mm hook, a 10-inch small-tote base starts around chain 40, a 14-inch everyday base around chain 54, and a 16-inch market base around chain 62. Step 2: single crochet into the second chain from the hook and across. Step 3: chain 1, turn, single crochet across — that is one row. Step 4: repeat to depth, counting stitches at the end of every fifth row. Step 5: fasten off, leaving a 6-inch tail for weaving.
Work into the back bump of the starting chain — the little ridge on the underside — instead of the front loops. It takes one extra minute and gives the base a clean bottom edge that does not gape. Mark the first stitch of each row with a scrap of contrasting yarn until the edges feel automatic; the marker is the cheapest mistake insurance in crochet.
Three failure modes, all fixable. Curling in the first three rows is normal — single crochet cups before the fabric has weight, so keep going to row six before judging it. A trapezoid means stitches were added or dropped at the edges, which is why you count every fifth row; if row ten has two more stitches than row one, pull back to row five. Wandering edges mean the last stitch of the row is hiding — it sits sideways and looks finished when it is not, so turn the work and check before the turning chain.
Cost: $0, yarn already bought. Time: 1–2 hours — the slowest section to learn, the fastest to repeat.
3. Pick your wall: straight rows or granny squares
Two honest routes from here, and both end at the same bag. Straight walls keep going in single crochet from the base count — no new stitch, no joining, the fastest path to a finished tote. Granny squares are the classic look: small patterned motifs joined into panels, and each square is a ten-minute project that travels well. Pick straight walls for a first bag you will actually finish this weekend. Pick squares for a bag that looks handmade on purpose and forgives leftover yarn.
Straight walls: keep the base stitch count and crochet around instead of back and forth once the base is done — work one single crochet into the end of each row around all four sides to start the first round, then spiral or join each round with a slip stitch. Build to 12 inches for the small tote and 14–15 inches for the market tote, then stop. Because rounds have no turning, the fabric stops striping and the sides stand up on their own.
Granny squares: each square is chain 4 joined into a ring, then three rounds of double crochet clusters with chain-2 corners. A three-round square in worsted cotton lands near 4 inches; in chunky yarn near 5 inches. Plan the panel from that: a market front of 16 x 14 inches wants 4 squares wide by 3 tall in worsted (12 per side, 24 total), and a small 10 x 12 front wants 3 wide by 3 tall (9 per side, 18 total). Make all the squares first, then join — an assembly line beats finishing one panel, admiring it, and losing steam.
Join squares with a yarn needle and whipstitch, right sides up, matching stitch for stitch along each edge. Count the edge stitches on both squares before the needle moves: two squares with different counts join into a pucker no blocking fixes. If the squares vary by a quarter inch, dampen them, pin them square on a towel, and let them dry — that evens out everything except a genuine count mismatch.
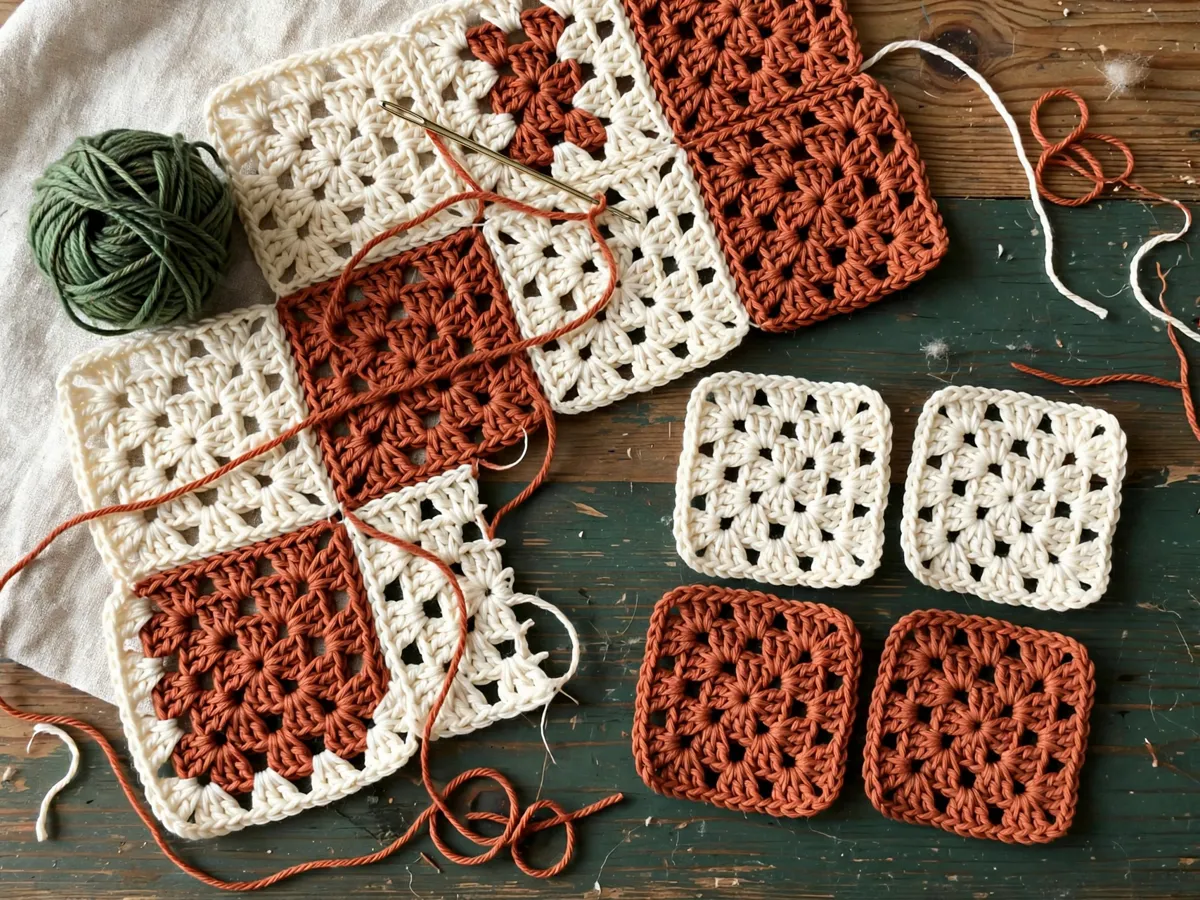
The failure to watch is the gappy center: a starting ring chained too loosely leaves a hole you can poke a finger through, and the whole square leans. Chain 4, not 6, join with a slip stitch, and pull the tail snug before round two. The second is the tight-corner square — chain 2 at each corner, exactly 2, because chain 3 corners flare and chain 1 corners cup.
Cost: $0. Time: 2–4 hours — straight walls run shorter, squares run longer but travel better.
4. Join the sides and even the top
Step 1: fold the wall fabric so the two side edges meet, right sides facing out if you want the seam visible as a design line, facing in if you do not. Step 2: whipstitch up each side with the yarn needle, one stitch into each edge stitch, keeping the seam straight by checking every few inches that the edges still align. Step 3: attach the base the same way if you built it separately, easing the corners so they sit flat instead of dog-earing.
Step 4: even the top. The top edge of joined crochet is never perfectly level — some stitches stand taller — so crochet two rounds of single crochet around the opening. The first round evens the edge, the second gives the straps something firm to anchor to. If the total stitch count is uneven, add or skip one stitch spaced along the back panel only; nobody inspects the back, and one eased stitch disappears while a wavy front edge never does.
The seam failure is a too-tight join: cinching the whipstitch pulls the sides into a rope and the bag narrows toward the middle. Keep the joining tension matched to the fabric — the seam should lie as flat as the wall beside it. If a side puckers, pull the join out and redo it loosely rather than stretching the fabric to match; yarn forgives a redo, but it remembers a stretch.
Cost: $0. Time: 45–60 minutes — slow seams beat fast ones here.
5. Make straps that do not stretch
Straps are where crochet totes fail, so they get their own engineering. A single chain row stretches to nearly twice its length under groceries — the classic handle that starts at the shoulder and ends at the elbow. A working strap has at least two rows: chain to length, single crochet back along the chain, then one or two more rows on top of that. Three rows in worsted cotton makes a strap about an inch wide that holds; two rows is the honest minimum.
Step 1: decide the length before chaining. A 24-inch strap is a hand carry, 26 inches sits at the shoulder for most adults, and 28 clears a winter coat. Step 2: chain until the chain measures 2 inches longer than the target — crochet shortens under its own weight, and a strap that starts exact ends short. Step 3: single crochet back, then add the second and third rows. Step 4: make the second strap by counting, not by measuring — same chain count, same rows, so the pair matches exactly.
Step 5: anchor each strap with a 2-inch overlap inside the bag, each end set about 3 inches in from a side seam. Sew through all layers with the yarn needle in a box with an X inside it — the same box-X that holds sewn straps — and go around twice. A single line of stitching pulls out in the first week of carrying; the box spreads the load across the whole overlap. Lift the bag body out of the way while you sew so the needle never catches the opposite side.
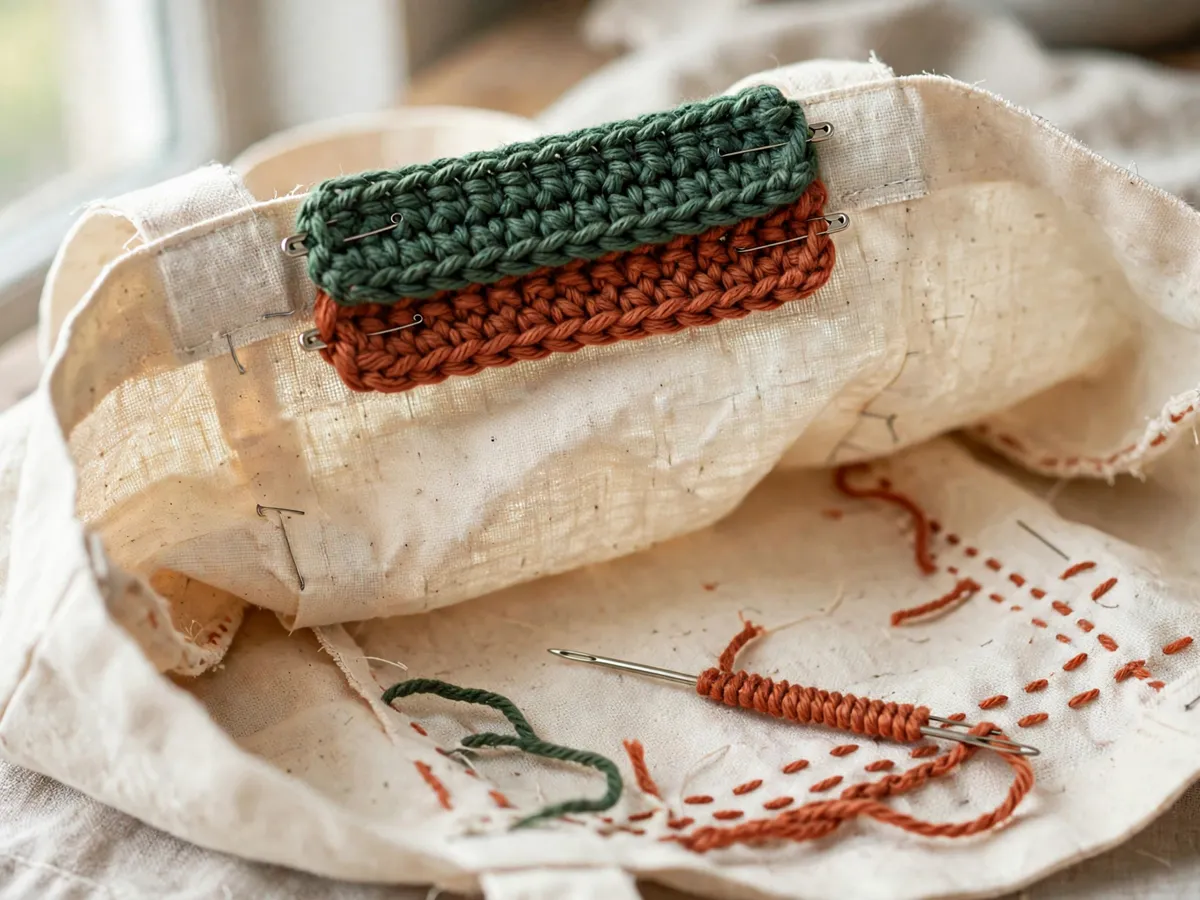
Two more failures worth knowing. Uneven straps come from measuring instead of counting — chains lie, counts do not, so match the numbers. A strap sewn too close to the top edge tears out under load; the 2-inch overlap is the whole strength of the joint, and skimping it to save yarn spends the bag. If a finished strap still gives a little, that is cotton settling — it stops after the first wash, which the next section covers.
Cost: $0. Time: 45 minutes to 1 hour — count, do not measure, or the pair will disagree.
6. Line it or carry it open
Decide by what the bag will carry. Groceries, a library stack, beach towels: carry it open, because nothing small enough to fall through is going in. Keys, a phone, loose change: add a lining, because single crochet has holes and granny squares have bigger ones. There is no wrong answer, but there is a wrong surprise — keys on the sidewalk.
The no-machine lining is a fabric rectangle folded into a pouch. Cut cotton fabric to the bag’s width plus 1 inch by twice the depth plus 2 inches, fold it in half, and sew the two side edges with a hand backstitch. Slip it inside, fold the top inch over the bag’s top round, and whipstitch it down with the yarn needle through the fold. It takes one evening TV episode and holds everything the holes would have lost.
Skip the zipper on a first bag. A zipper means measuring, pinning, and a kind of stitch this page does not teach, and a drawstring top or an open tote covers every beginner use. If the bag is a gift and you want it to look finished, a sewn lining with a proper hem is the upgrade — and that is exactly what the tote bag sewing guide teaches, with the seam allowance math included.
Cost: $0–$8 for a half yard of cotton if you line it. Time: 30–45 minutes by hand, or zero if you carry it open.
7. Weave the ends, wash it, shape it
Step 1: thread every tail onto the yarn needle and weave it through the backs of at least six stitches, change direction, and go through four more. Ends woven in one straight run work loose in the wash; the direction change is what locks them. Step 2: trim flush — no knots, because a knot is a lump that pushes through the fabric and a woven end holds without one.
Step 3: wash cold and lay flat to dry, shaped the way you want it to stay. Cotton relaxes in the first wash, which means a market tote grows about an inch — crochet the base an inch short on purpose and let the wash do the last bit of sizing. Never hang a wet crochet bag: water plus gravity stretches straps faster than a year of groceries. Step 4: once dry, load it with what you actually carry and check the straps. This is the fitting — better to find out now, with the yarn needle still out, than at the store.
Cost: $0. Time: 20 minutes plus drying — the wash is part of the sizing, not an afterthought.
What we would skip
Skip acrylic yarn for anything that carries weight — it is the sagging tote in fiber form, and no stitch pattern compensates. Skip T-shirt yarn for the first bag: fast to hook, but heavy on the shoulder and nearly impossible to pull back when you miscount. Skip chain-only straps, however quick they look; two rows is the minimum that holds. Skip buying blocking boards and special pins before the first bag — a towel and household pins square a granny panel just as well.
Skip the second bag before the first one is finished. A plain single-crochet tote in one cotton color, carried for a week, teaches more than three half-built market bags in three weights. If hooks turn out not to be your thing, the sewn version of this bag is the same afternoon with scissors instead of a hook.
Weekend checklist
- Cotton yarn bought, enough yardage, same dye lot
- Hook one size smaller than the band suggests
- Base chained to the tape, count written down
- Edges counted every fifth row, no trapezoid
- Walls matched — same count, same height both sides
- Top edge evened with two single-crochet rounds
- Two straps, same chain count, anchored with a box-X
- Ends woven twice with a direction change
- Washed cold, dried flat, loaded with real cargo
Questions beginners ask
How much yarn does a crochet tote take?
A market tote takes 220–260 yards of worsted-weight cotton, which is 2 skeins, or 150–190 yards in chunky. A small tote takes 120–150 yards of worsted, 1 skein.
What hook size for a crochet tote bag?
5.0–5.5 mm for worsted-weight cotton, 6.0–6.5 mm for chunky. Go one size smaller than the ball band suggests so the fabric comes out dense.
Why does my crochet tote stretch out?
Usually the fiber or the gauge: acrylic stretches, and a loose hand makes open fabric. Cotton yarn, a hook one size down, and straps with at least two rows fix all three causes.
Do I need to line a crochet tote?
Only if it carries small things. Groceries and towels are fine open; keys and change want the folded fabric pouch from section 6.
Can I make this if I have never crocheted?
Yes with the straight-wall version — chain and single crochet only. Save the granny-square version for bag two, since squares add the double crochet and joining.
Save these on Pinterest
Pin the yarn and hook table — it is the buying decision the whole bag depends on. The rest of the plan-led builds live in the DIY Home Projects collection for cut lists, material lists and beginner tool checklists you can finish in a weekend. Make the small one first, carry it for a week, then hook the market size.