 Plant As Deco
DIY Home Projects
Removing Paint From Concrete: Scraping, Heat and Strippers
By Plant As Deco · Updated 22 November 2026
Paint on concrete comes off in layers, and the layer count decides the whole job. One peeling coat on a garage floor is an afternoon of scraping. Three bonded coats on a basement slab is a stripper job that runs over two weekends. This guide walks the full ladder: reading the surface, testing for lead before anything else, the tool list with honest costs, and the dust rule that matters more than any tool on the shelf.
Weekend-ready: $25–$110 for tools and materials, one afternoon per 50 sq ft. Test for lead first if the home is pre-1978.
1. What the job actually involves
Before choosing a method, read the surface. Concrete holds paint differently than wood or drywall, because the surface is porous, hard and slightly uneven. Paint sits in the pores and in the low spots of the texture, so it does not peel away in long clean strips the way it does off a board. It flakes in small chips, crumbs and dust. That single fact shapes every step below: the work produces fine debris from the first minute, and controlling that debris is as much of the job as removing the paint.
Start by counting the layers. Scrape a small corner with a putty knife and look at the edge of the paint under a bright light. A single coat reads as one flat band of color with concrete showing where it has already flaked. Multiple coats show as stacked bands, often with different colors, and the oldest layer at the bottom is the hardest one to move, because it has had the longest time to bond. Write the count down. It picks your method: one loose coat scrapes off by hand, a bonded single coat usually needs heat, stacked coats almost always call for a chemical stripper.
Then check the condition of the paint. Press a scraper at a low angle and push. Paint that lifts in flakes and crumbs is already failing, and the job is mostly mechanical removal. Paint that refuses to lift, or that comes off in tiny hard specks, has bonded well, and no amount of pushing will take it without heat or chemistry. Note also what the paint is sitting on: an interior slab, a garage floor that was painted without a concrete primer, or a porch slab that has seen weather. Floors painted without prep often release in large patches, which makes the job easier than the layer count alone suggests.
Finally, decide what comes after. A floor that will be repainted or sealed does not need to come out spotless; it needs to be flat enough for the next coat to sit evenly. A floor that will be left bare needs the stubborn residue lifted too, because any remaining paint reads as a stain from across the room. Knowing the destination stops you from over-working patches that the next coat would hide anyway.
Cost: $0 to read the surface, plus $8–$15 for a putty knife if the drawer has none. Time: 15 minutes per 50 sq ft to count layers and test adhesion. One caveat: judge from several spots across the floor, not one corner, because adhesion changes near doors, drains and walls where moisture has worked under the paint.
2. Lead and silica first: the checks before any scraping
Two things on this job are genuinely hazardous, and both are easy to handle badly. The first is the paint itself. Homes built before 1978 in the US may have lead paint, and a garage, basement or porch slab in an older home is exactly where it turns up. Lead paint dust and chips are harmful if swallowed or breathed, and children and pets pick both up off the floor faster than adults do. Before any scraping, heat work or stripping on a pre-1978 home, test the paint. A home lead test kit from a hardware store gives a first answer, and a certified laboratory test of a scraped sample gives a firmer one. If the test comes back positive, this stops being a weekend job. Lead paint removal on a surface this size is work for a certified lead-safe professional, and the honest advice is to leave it to them rather than to learn the safety protocol yourself.
The second hazard is the concrete itself. Concrete dust contains crystalline silica, and breathing fine silica dust over repeated exposures can scar the lungs. A paint removal job makes concrete dust constantly, because every scraper pass and every lifted chip carries grit with it. The method that manages both hazards at once is simple and unglamorous: keep the work wet and capture the dust as it is made. Dampen the section before you scrape, mist it again whenever the surface dries, and vacuum the slurry and chips as you go. Water weighs the dust down so it never becomes airborne in the first place.
On masks, be honest about what they do. An N95 respirator filters the air you inhale while you work, and it is the minimum worth wearing for any scraping session, but it does nothing for the room after you leave, and it does not capture everything. A mask is the last layer of protection, behind wet methods and vacuuming, not a replacement for them. If you find yourself relying on the mask because the work has gone dry and dusty, the method has slipped, and the fix is to re-wet and vacuum rather than to upgrade the mask.
These two checks also decide the stopping point. This guide is written for confirmed non-lead paint on slabs where wet scraping and HEPA vacuuming are practical, which is most painted garage floors and porch slabs. Any pre-1978 slab that tests positive for lead, any surface where you cannot control the dust (a finished basement with carpeted rooms above, a shared wall with a neighbor), and any job larger than a weekend of work belong with a pro. That is not a sales line; it is what the layer count and the test results tell you.
Cost: $10–$25 for a lead test kit, or $30–$75 for a lab sample test. Time: 30 minutes for a kit test, a few days if you send a sample out. One caveat: test the oldest layer, not the newest, because the coat you remove last is the one that carries the lead risk.
3. What you need before starting
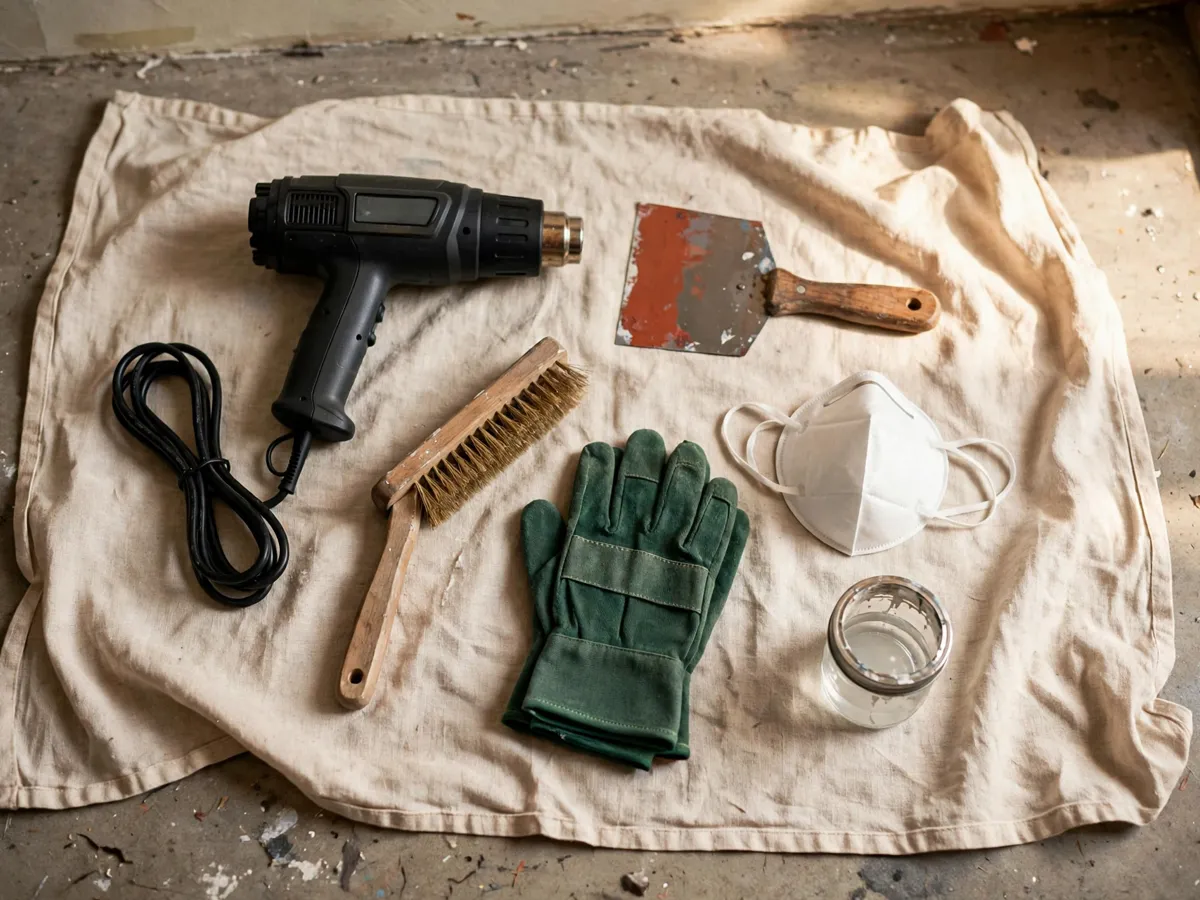
The tool list is short, and most garages hold half of it already. What follows is the full list with honest prices, split into what the job needs and what makes it faster. If you are still putting together a basic kit, our beginner tool kit checklist covers the pieces that carry over between projects.
- Two scrapers. A wide paint scraper, 3 or 4 inches, at $6–$12, for open floor, and a stiff putty knife at $4–$8, for edges and tight patches. This is the pair that does most of the work on a single loose coat, and it is the pair you will use again on any future floor job.
- A heat gun, $25–$60. Needed only when the paint is bonded. A basic two-setting model is enough; the work never needs the top of the dial. If a section is small and the budget is tight, rent or skip it rather than buying one for a single patch.
- Chemical stripper, $15–$40 per gallon. One gallon covers roughly 50 to 100 sq ft per application, so read the label rate before buying. Needed only for stubborn stacked coats or a bonded layer the heat gun will not shift.
- Acid brushes and cheap natural-bristle brushes, $4–$8. For laying stripper on thickly, which no roller does well. Buy disposable ones; stripper ruins brushes.
- A HEPA shop vacuum. This is the one item that separates a controlled job from a dusty one, and it is the item to buy rather than skip. A wet/dry vac with a HEPA filter runs $90–$150; a HEPA filter cartridge alone is $30–$60 if you own a wet/dry vac already. An ordinary dry vac without HEPA exhausts the finest particles straight back into the room air, which is worse than not vacuuming at all.
- N95 respirators, $2–$5 each. Buy a small pack and treat them as consumables. Change one when breathing gets hard or the outside is visibly dirty.
- Nitrile gloves and safety glasses, $8–$15.Gloves matter most on chemical days; glasses matter from the first scraper pass, because flakes fly.
- Canvas drop cloths and plastic sheeting, $10–$25.Canvas holds the chips near the work; plastic seals doorways on indoor jobs so the rest of the house stays clean.
- A spray bottle and a stiff deck brush, $12–$18.The spray bottle keeps the work wet, which is the silica rule from section 2 in tool form. The deck brush scrubs residue after stripping.
- Degreasing cleaner, $8–$12. The final clean before repainting or sealing uses it; see section 9.
- Metal scrap pail and heavy trash bags, $5–$10.Chips, sludge and used stripper waste all need somewhere to go the moment they are made, which is the whole habit this job teaches.
Two items deserve a line about what they do not do. A wire wheel on a drill strips paint from concrete fast and raises a dust cloud faster; it is a tool for an outdoor slab with a wind and a distance from doors, and it is not the tool for a room. And a pressure washer handles an outdoor slab well but only where the runoff can leave legally; on most porches the paint water has to go somewhere that local rules may not allow, so check before renting one.
Cost: $25–$60 for the scrape-only minimum (scrapers, gloves, glasses, drop cloth, spray bottle); $90–$180 adding the HEPA vacuum and heat gun that a full job wants. Time: 20 minutes to gather and stage it. One caveat: if the budget forces a choice, the HEPA vacuum beats the heat gun, because dust control protects you on every method while heat helps on only one.
4. The method ladder, step by step
Removing paint from concrete is a ladder, not a single method. You climb one rung at a time and stop when the surface reaches the state the next coat needs. Skipping rungs wastes money; climbing higher than the floor needs wastes weekends. The ladder, in order:
- Clear and protect. Empty the space, lay canvas drop cloths over anything staying, tape plastic sheeting across doorways on indoor jobs, and set the scrap pail by the work zone. Ten minutes here saves an hour of cleanup later.
- Confirm the lead question. On any pre-1978 home, the test from section 2 comes back before this ladder starts climbing. On newer homes, move on.
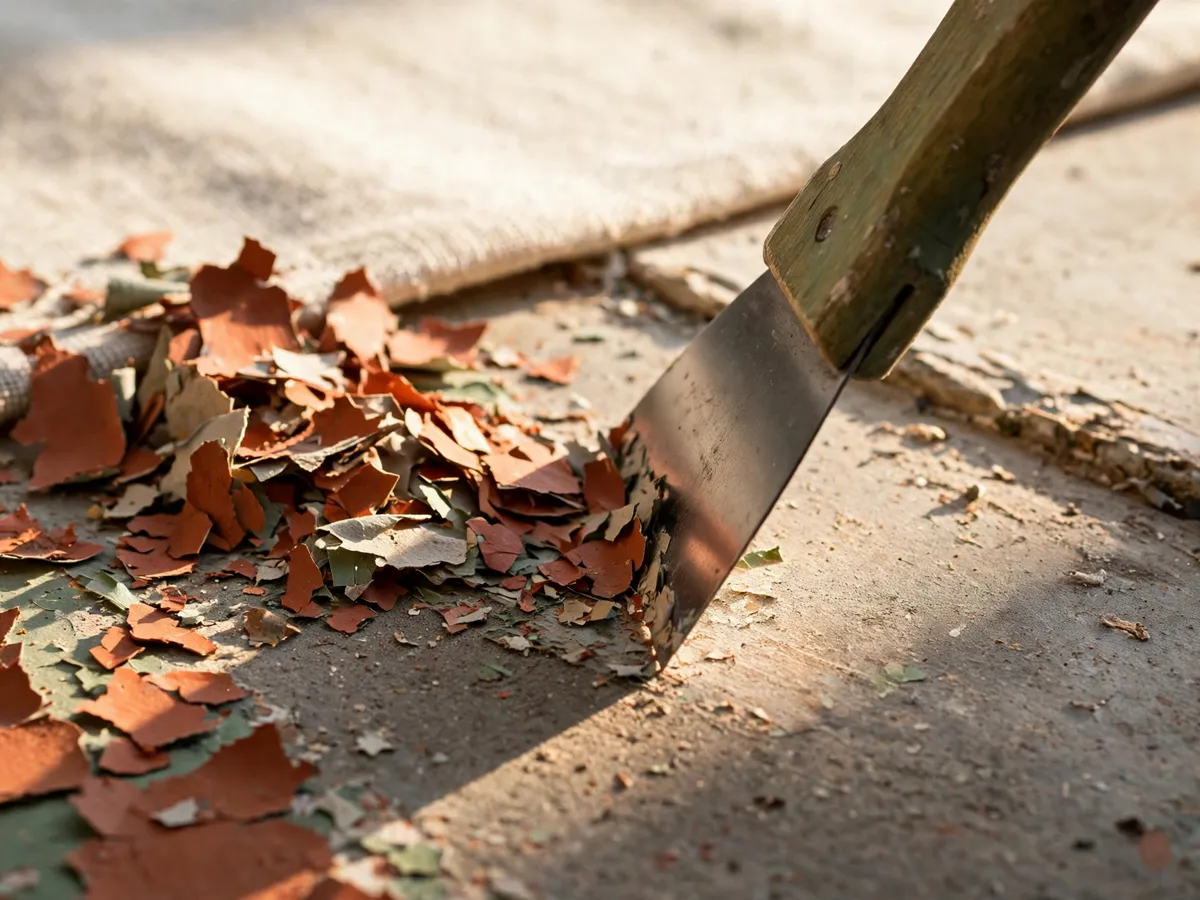
- Wet and scrape the loose layer. Dampen a 3x3 ft section with the spray bottle, let the water sit a minute, then push the wide scraper at a low angle. Loose paint lifts in flakes that fall onto the wet floor and stay there. Vacuum the section when the flakes stop lifting. This rung alone clears a badly failing floor.
- Heat the bonded patches. On paint that the scraper slides across without lifting, the heat gun softens the film so the scraper bites. Work the same 3x3 ft section, sweeping the gun constantly and scraping behind it. Section 7 carries the technique and the fume rules.
- Strip the stubborn layer. Where heat still leaves a bonded film, usually the bottom coat of a stacked job, lay chemical stripper thickly, give it its dwell time, and scrape the softened film off. Section 8 covers the types and the disposal rules.
- Vacuum, then judge. After each rung, vacuum the section wet-or-dry as the method requires, then look at it in raking light (a flashlight held low across the floor). Judge whether the next coat needs rung five repeated, or whether the surface is ready for the final clean.
The 3x3 ft section size is the discipline that makes the ladder work. A small wetted zone is easy to keep wet, easy to vacuum before it dries, and small enough that you never walk flakes from the work area across a clean floor. Large rooms read as one big job and end up half-dry, half-scraped and fully dusty. One section finished completely, then the next, and the room finishes faster than it looks like it should.
Know where each rung ends. Scraping stops when two full passes lift nothing new. Heat stops when the scraper bites under the film with moderate pressure. Stripping stops when the bottom coat has softened and lifted, and a second application is only worth it if the first left film the scraper moved in patches rather than powder. A rung that stops producing change has done its job; climb or stop.
Cost: $0 to run the ladder on a scrape-only floor; $40–$100 in materials when heat and stripper rungs get used. Time: one afternoon per 50 sq ft on a single-coat job, two weekends when the stripper rung carries the floor. One caveat: climb rungs in order, because starting with stripper on a floor that would have scraped clean spends the most money on the least work.
5. The vacuum rule
Here is the rule that outlasts every method in this guide: vacuum as you go, and never dry-sweep the dust. It sounds like housekeeping advice, and it is actually the safety method of the whole job. Paint flakes and concrete grit accumulate from the first scraper pass, and every minute they sit on the floor they are waiting for a foot, a breeze or a broom to launch them into the air you breathe.
Dry sweeping is the failure mode. A broom pushes dust off the floor and into the room, where the largest particles fall within a few feet and the finest ones hang for hours. On this job that airborne mix carries both hazards from section 2: silica from the concrete and, in an older home, lead from the paint. Once airborne, fine dust settles onto everything in the room, and cleaning it up takes longer than the stripping did. This is why a broom never touches this floor, from the first chip to the last.
The working rhythm is simple. Finish a 3x3 ft section, vacuum it before starting the next one, and vacuum the drop cloth edge and the pail rim while the nozzle is in your hand. On wet-work sections (scraping under a mist), vacuum the slurry with a wet-capable vac or mop it into the pail, depending on what the machine allows; on dry sections, the HEPA vacuum takes the chips directly. Between sections, keep the work zone floor damp so nothing dries into dust while you work elsewhere.
The vacuum itself matters as much as the habit. A shop vacuum with a HEPA filter captures the fine fraction and keeps it in the can; an ordinary vac sends the finest particles back out through the exhaust. If the only machine available is a non-HEPA vac, wet methods become the primary defense and vacuuming moves outdoors onto a slab where the exhaust can disperse, and even then the room is better served by misting and mopping than by dry vacuuming indoors.
Cost: $30–$60 for a HEPA filter cartridge if a wet/dry vac already lives in the garage, $90–$150 for the machine if not. Time: two minutes per 3x3 ft section. One caveat: a vacuum only protects you while its filter is seated correctly, so check the fit before the first pass of the day.
6. Scraping: technique
Scraping is the rung everyone starts on and the one most people work harder than they need to. The technique has four parts: the angle, the pressure, the blade, and the water.
Angle. Hold the scraper low, around 30 degrees to the floor, closer to shaving than to chiseling. A steep angle digs the corner of the blade into the concrete and leaves gray gouges that read as stains once the dust settles. A low angle rides over the texture and catches the paint film standing above it. When the blade starts chattering or catching, that is the angle climbing; drop it back down.
Pressure. Let the blade do the work in short pushes rather than one long haul. Paint on concrete fails in small chips, so a series of short strokes collects more film per minute than a full-body shove, and it keeps the blade from skittering off a high spot. Work toward yourself on open floor and toward the pail, so the flakes fall where the vacuum will find them.
Blade care. A scraper blade dulls faster on concrete than on wood, because it is riding grit all day. Keep a second blade or a small file at hand; when the edge starts polishing the paint instead of lifting it, swap or touch up in two minutes. A dull blade is how gouges happen, because the natural reaction to a blade that slides is to push harder, and pushing harder is what digs.
Keep the work wet. This carries the silica rule into the technique. Mist the section before scraping, mist again whenever the sheen disappears, and let the water sit under the blade. Wet paint film lifts in softer pieces, wet grit does not go airborne, and the floor tells you when it is right: a damp surface shows the flakes sticking in place instead of skating away from the blade.
Edges and corners take the putty knife rather than the wide scraper, worked at the same low angle. Where paint meets a wall, a drain ring or a doorway threshold, a short stiff blade reaches what the wide one skips. Expect these border zones to hold out longest; they are where the paint was applied thickest and where water pooled longest when it was first laid down.
Cost: $10–$20 for the scraper pair and a spare blade. Time: 30 to 60 minutes per 50 sq ft of loose paint, longer on bonded patches that send you up the ladder. One caveat: stop and swap a dull blade the moment it starts sliding, because the gouge it leaves lasts longer than the paint did.
7. Heat gun: what it does and does not
Heat is the middle rung: it softens a bonded paint film so the scraper can bite where it previously slid. Sweep the gun slowly across a patch about the size of your scraper blade, watch for the film to lose its sheen and slightly bubble, then scrape immediately while it is soft. The gun leads, the scraper follows a beat behind. On paint that responds well, a working rhythm forms in a few minutes and the patch comes off in curling chips rather than powder.
What heat does not do is matter as much as what it does. It does not remove paint by itself; without the scraper behind it, a heat gun accomplishes nothing except warming the floor. It does not soften every paint: modern acrylic films and many epoxies release poorly with heat, which is why section 4 sends heat to patches, not whole floors. And it does not know what is in the paint, which brings up the two hard limits.
The temperature discipline is low and constant. A two-setting gun spends this job on the lower setting; the work needs the film softened, not scorched. Concrete holds heat poorly, so scorching comes from dwelling: a nozzle parked in one spot too long bakes the paint dark and can leave a heat mark on the slab. Keep the gun moving, sweep in circles rather than lines, and never point it at one place while your attention is elsewhere.
The fume warning is honest and simple. Heating any paint releases fumes, and old films in particular can release strong ones as they soften. Work with the door open and a fan moving air out of the space, take breaks outside the room, and stop if the air starts to sting. If there is any chance the paint contains lead, the answer is different and shorter: heat guns are not used on lead paint at all, because heat vaporizes lead into the air. On a pre-1978 home, section 2 runs first and its result governs this whole section.
Cost: $25–$60 for the gun. Time: 5 to 10 minutes per stubborn patch, so the rung is measured in patches rather than in floor area. One caveat: if a patch has not softened after two patient passes on the low setting, the film is one heat refuses, and the stripper rung is the honest next step rather than a higher dial.
8. Chemical strippers, honestly
Stripper is the last rung, used where scraping and heat have both stopped producing change, usually the bottom coat of a stacked job. Described generically, three families exist, and the indoor floor job mostly lives with the third.
- Solvent-based strippers. Fast-acting and strong-smelling, with solvents that flash off quickly. They work quickly, and that is exactly the problem indoors: the vapors collect in a garage or basement with the door cracked, and ventilation that keeps the air honest is hard to hold for the hours a floor job runs. If a solvent product is the only option, it belongs on an outdoor slab with real airflow, not a room.
- Caustic (alkaline) strippers. Water-based pastes built around strong alkali. They lift old oil-based films well, but they attack skin and eyes the same way they attack paint, they can etch or dull a finished concrete surface, and the residue needs neutralizing before the next coat goes on. Their place is a rough slab where the finish does not matter, with full protection worn.
- Peel-away style strippers. The slow family: a paste applied thickly, covered so it stays active, left for its labeled dwell time (hours, sometimes overnight), then lifted with the softened paint stuck to the cover. They smell less and evaporate less, which makes them the practical choice for an indoor floor, and the trade is patience rather than speed.
Whichever family fits, the fastest-acting product is rarely the right pick indoors, and that is the honest center of this section. Speed in a stripper is speed in its vapors. The peel-away family earns its place on a floor exactly because it trades a slow overnight dwell for air you can work beside. Read the label for the dwell time and the coverage rate before buying, and buy to the rate: one gallon covering 50 to 100 sq ft per application means a 200 sq ft garage floor wants two to four gallons, and running out mid-floor mid-dwell is the mistake that leaves a half-stripped patch (see section 12).
Application follows the same shape every time. Lay the paste thickly with a cheap natural-bristle brush, twice as thick as it looks like it needs, because a thin film dries out and stops working before its dwell time ends. Cover the area as the label directs so the paste stays active. Wait the full labeled time even when the surface looks ready early; the bottom coat is the slow one, and the label time is written for it. Then lift or scrape the paste and softened paint together, dropping the waste into the pail. A second application is normal on stacked coats.
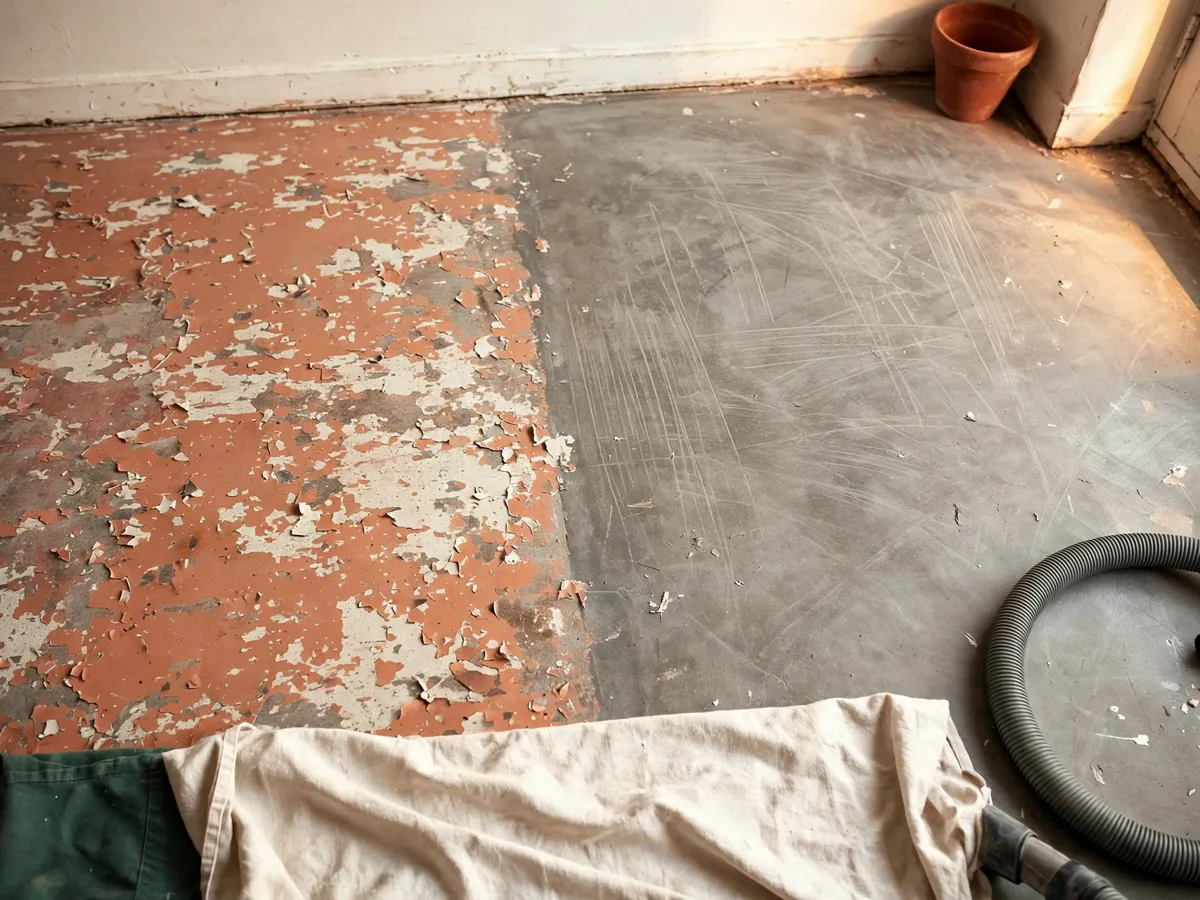
After the last application, neutralize or rinse the slab exactly as the label states (the caustic family especially leaves residue that fights the next coat), then let the floor dry fully. Disposal follows local rules rather than the trash can: paint sludge and used stripper waste are exactly the kind of household hazardous waste that most counties collect at a drop-off site, and the label or the county waste site names the right route. Wet methods from section 2 keep working here too: rinse residue onto the drop cloth and into the pail rather than across the floor.
Cost: $15–$40 per gallon, so $30–$160 for a two-car garage floor depending on the layer count, plus $4–$8 in disposable brushes. Time: the dwell runs hours to overnight, so plan a two-day rhythm: apply in the evening, lift in the morning. One caveat: never let a paste dry out mid-dwell, because dried paste is spent paste and the application has to run again from the start.
9. The final clean
Once the paint is off, the floor is not ready for its next coat yet. What remains is a fine gray residue: concrete powder, dust from the removal work, and in a garage, years of tire residue and oil haze that no one noticed under the paint. Any coating laid over that residue bonds to the dust rather than the slab, and peeling returns within a season. The final clean is the step that makes the removal work last.
Vacuum the whole floor one more time, slowly, with the HEPA machine, edges included. Then wash it with a degreasing cleaner diluted per the label, working in the same 3x3 ft sections and scrubbing with the stiff deck brush. Rinse each section and pull the water with a wet vac or a squeegee toward a drain or a pail. Grease spots need the cleaner worked in and blotted rather than flooded; a garage floor that has seen cars wants a second pass on the parking lanes. Let the slab dry completely, a full day in a basement, faster with airflow, because moisture trapped under a new coating is the other classic cause of peeling.
One more step belongs to the next project rather than this one. Bare concrete that will be painted or sealed is usually etched first, an acid wash that opens the surface pores so the coating can grip. It is a real step with its own safety and disposal rules, and it deserves its own guide rather than a rushed paragraph at the end of this one; the instructions on the coating product state whether the surface you have reached needs it.
Cost: $8–$12 for degreasing cleaner, $5–$10 for a squeegee or a wet-vac rental if the garage lacks one. Time: an afternoon for 50 sq ft of wash, plus a day of drying. One caveat: the clean is done when a white cloth wiped across the dry floor comes away white, and not before.
10. The small-space version
Not every job is a garage floor. A balcony slab, a covered porch corner or a garage patch the size of a parking spot runs the same ladder with three adjustments, and each one makes the job cheaper and faster than the full-room version.
First, the budget shrinks honestly. A patch of 20 to 50 sq ft needs one scraper pair, one quart of stripper if the rung is reached at all, and often no heat gun, because a small area is worked patiently by hand before any tool purchase earns itself. The whole kit for a small-space job can stay under $35, and if the HEPA vacuum is the household question, a small job is also the case where an outdoor slab with sun, wind and distance from doors makes wet-scraping alone a workable dust plan.
Second, the section discipline changes shape rather than shrinking away. A balcony still gets divided, but into halves or thirds by a chalk line, and the same wet-and-vacuum rhythm runs per half. Small slabs often slope toward a drain, which is a gift: rinse water and slurry move where you want them, and the pail stage disappears on the outdoor jobs where runoff is permitted. Check that permission (see the runoff note in section 3) before washing anything outdoors.
Third, decide whether the paint needs to come off at all. On a small slab, the honest question is whether the destination needs bare concrete. A balcony that will hold potted plants and a chair may only need the loose flakes lifted, a scrub and a seal, rather than a full strip to bare slab. The ladder in section 4 stops at the rung the destination needs, and on a small surface that rung is often lower than it looks.
Cost: $25–$70 all-in for a small-space job, kit included. Time: one afternoon per 20 sq ft of genuinely stubborn floor, half that where the paint is already failing. One caveat: a small space is still a silica job, so the wet method and the vacuum rule do not shrink with the floor.
11. The renter-friendly version
Renters arrive at this guide differently: the painted floor is usually a decision the landlord owns, not yours. A painted floor is a fixture. It came with the unit, and stripping it changes the unit, so removing paint from an interior floor in a rental is landlord-permission territory, not a weekend decision. The conversation is simple and worth having in writing: some landlords would rather a tenant strip a failing floor before it is repainted, some have a painter coming anyway, and some want nothing touched. Ask before the first scraper pass.
What a renter can do without permission is manage what sits on the floor. Flaking paint under a rug or along a wall is a daily nuisance, and the renter-safe response is containment rather than removal: vacuum flakes with the household machine as they appear (wet-wipe after on older homes), lay an inexpensive rug or interlocking floor panels over the worst patch, and photograph the floor so the condition is documented when you move in and move out. If the paint is peeling badly enough to matter, that is a maintenance request, and the right person to strip it is whoever owns the slab.
There is one negotiable middle ground: a garage patch. In some buildings, a garage space is treated as personal territory rather than finished unit space, and a landlord may allow a small patch job there while refusing the interior floors. That is exactly the small-space job from section 10, with the permission conversation first and the layer count deciding the method after. A patch that stays contained to the garage, rung one and maybe two, is the version most likely to get a yes.
Cost: $0 for the containment route, $25–$70 for a permitted garage patch. Time: an afternoon for containment, the section 10 schedule for a permitted patch. One caveat: put any permission in writing, even a short message, because move-out conversations go better with a dated record of what was agreed.
12. Common failure modes, and the fix for each
Most jobs on concrete fail in the same few places. Each one below names the failure, the cause and the fix, because on a floor, catching a failure early is the difference between a two-minute correction and a weekend repeat.
- Gouged concrete. Gray trenches where the blade dug in. Cause: a steep scraper angle or a dull blade pushed harder to compensate. Fix: drop the angle below 30 degrees and swap or sharpen the blade; shallow gouges mostly disappear under the next coat, and deep ones fill with patch compound during the repainting project.
- A dust cloud. Fine gray haze over the work zone. Cause: the section dried out, or a broom or non-HEPA vac touched the floor. Fix: stop work, leave the room, let the dust settle for a couple of hours, then return and mist before resuming; correct the habit, not the symptoms, by re-wetting each section before the blade touches it.
- Stripper on skin. Tingling or a burn feeling during paste work. Cause: gloves off, or a torn nitrile glove. Fix: flush the area with cool running water for several minutes and swap gloves before returning to work; paste strippers are alkali, and they keep working on skin the way they work on paint.
- Scorched concrete. Dark heat marks on patches where the gun lingered. Cause: the nozzle parked in one spot, or the setting climbing instead of the patience dropping. Fix: stay on the low setting, keep the gun sweeping, and treat the marks like gouges; most hide under a new coat.
- A half-stripped patch. A bare slab ring around an island of stubborn paint. Cause: the rung stopped early on that spot, the paste dried mid-dwell there, or the layer count was judged from one corner. Fix: re-read the island with the section 1 method (layers, condition), then re-run the ladder on it, wet and small, rather than flooding the whole floor with a stronger method for one patch.
One failure does not appear in the list because it is not recoverable by technique: working confirmed lead paint with any method in this guide. That is why the test in section 2 runs before the tools come out, and why the honest answer to a positive test is a certified pro rather than a careful amateur attempt.
Cost: $0 to read this section; a gouge or a scorch costs a patch compound repair later, and a dust cloud costs an afternoon of settling and cleanup. Time: five minutes on the first read, a habit within the first two sections. One caveat: every failure above is cheap to avoid while the work is wet and small, and expensive to fix after it has dried and spread.
13. Cost and time, honestly
The real spread is wide because the layer count sets it. Here is the honest picture by job shape, using the prices from section 3 and the schedules from the sections above.
| Job | Cost | Time |
|---|---|---|
| One loose coat, 50 sq ft (scrape-only) | $25–$60 kit | One afternoon |
| Bonded single coat, 50 sq ft (scrape plus heat) | $90–$120 with the gun | One to two afternoons |
| Stacked coats, 200 sq ft garage (full ladder) | $130–$180 | Two weekends |
| Balcony or patch, 20 sq ft (section 10) | $25–$70 | One afternoon |
| Renter containment plan (section 11) | $0–$40 | One afternoon |
Two honest notes sit behind those numbers. First, the HEPA vacuum is most of the price of the bigger kits, and it is the one purchase that outlives this project: a wet/dry machine with a HEPA filter earns its shelf space on every dusty job the house will ever see. Second, the time estimates assume the layer count was read correctly. A floor that turns out to carry more coats than section 1 counted simply moves one band down the table, and the two-weekend garage job that becomes three is the common form of that discovery.
What the table does not price is the pro route, because quotes vary too much to state here. The moments the table should not be used at all: a positive lead test, a surface where dust cannot be controlled, and a floor too large for the schedule you actually have. Those are the cases where hiring beats the kit.
Cost: $25–$180 across the job shapes above. Time: one afternoon to two weekends. One caveat: buy stripper to the label coverage rate, because the difference between the low and high ends of the material cost is almost always the layer count, not the brand.
14. Five questions this guide already answers
What is the easiest way to remove paint from concrete?
The easiest way is the lowest rung that works on your floor: wet the section, scrape at a low angle, vacuum as you go. On paint that is already flaking, that alone finishes the job. Bonded paint needs the heat rung from section 7, and stacked coats need the stripper rung from section 8. Starting with the ladder in section 4, one rung at a time, keeps the work small.
Does vinegar remove paint from concrete?
This guide does not use it. Vinegar is a mild acid and has no place among the three stripper families in section 8, and a remedy that softens paint only slightly while adding another liquid to the floor is not worth the dwell time. The methods here (scrape, heat, stripper) are the ones that produce change per hour on a slab.
How do you know if the paint is lead paint?
You test it. On any home built before 1978, a hardware-store lead test kit gives a first answer and a lab test of a scraped sample gives a firmer one, as section 2 describes. Test the oldest layer, and if the result is positive, hand the job to a certified lead-safe professional rather than proceeding with this guide.
Is a heat gun safe on concrete?
On the slab itself, yes, with the discipline from section 7: low setting, constant sweeping motion, never parked in one spot. The two cautions are the fumes (ventilate the room) and the paint (never use heat on confirmed or possible lead paint, because heat vaporizes lead).
Can you repaint over paint on concrete instead of removing it?
Sometimes. A well-bonded coat can be repainted over after cleaning, but loose and flaking paint must come off first, because the new coat bonds to the loose film and peels with it. The reading method in section 1 tells you which floor you have, and the final clean in section 9 is the step that makes either route last.
Save these on Pinterest
Pin the method ladder and the failure-modes list. Those are the two pages to have open while the work runs, one to keep the rungs in order and one to catch the mistakes while they are still cheap. This guide and the rest of the DIY home projects collection sit alongside it, with tool checklists and plan-led builds for the projects that come after the floor.