 Plant As Deco
DIY Home Projects
DIY Shoe Rack Plans: Stackable, Wall-Mounted and Rotating
By Plant As Deco · Updated 22 November 2026
An entryway shoe rack lives in the kicking zone. This plan builds a two-tier stackable pine rack from two boards, with the cut list arithmetic shown, then covers four variants: rotating, wall-mounted, cardboard and bench. For renters, small entryways and honest budgets.
Weekend-ready: $36–$62, one afternoon. Two pine boards, screws and glue. Freestanding and renter-safe.
1. What a shoe rack has to survive
A shoe rack is not decor furniture. Decor furniture is touched with fingertips and dusted on Sundays. A shoe rack stands where the door opens, takes a foot shoved into the last pair, catches wet soles on a rainy Tuesday, and gets a corner of its shelf stepped on when someone balances pulling a boot off. Whatever the material, the structure has to take those loads without wobbling, and the finish has to take the water without lifting.
Wet soles are the quiet one. A pine shelf left raw will take on moisture at the end grain, darken unevenly, and eventually roughen. A shelf sealed with two coats of a water-based finish wipes dry and stays smooth. The step-off-edge load is the sharp one: a foot pushing down on the front edge of a shelf, not the middle. A shelf screwed through its ends only can lever the joint loose over months. The fix is boring and cheap: a stretcher under the front edge, and pilot holes.
Entryway furniture also has to survive moving. A rental entryway changes every year or two, and the rack that survives is the one that comes apart into flat tiers that fit in a back seat. That is why the primary build here is a stack of two identical tiers, not one tall unit with one long side panel. For a bench that takes the same abuse while adding a seat, the entryway bench plans build covers the seat-height version.
Cost: $0. Time: 5 minutes to watch how the household actually uses the entryway. One caveat: the family member who kicks hardest never reads the plan.
2. Sizing it honestly
Three dimensions decide the build, and each comes from a shoe, not from a plan. Width per pair: a men's shoe runs about 9 inches side to side on the shelf (the box is narrower, but shoes sit at their widest), a women's flat about 7. So a 36 inch shelf holds 36 divided by 9, or 4 pairs of men's shoes, and 36 divided by 7, or 5 pairs of flats. One pair of sneakers per 9 inches is the honest planning number, and a shelf that must hold 8 pairs needs to be about 72 inches long or two tiers deep.
Depth by shoe type: most shoes run 10 to 11 inches front to back, so a nominal 1x12 at 11-1/4 actual depth carries them with the heels inside the edge. Winter boots run 13 to 15 inches and need a 16 inch shelf (a 1x16 does not exist in common stock, so boots get a 16-inch-deep plywood shelf or sit on the top tier facing the room). Height per tier: shoes need 5 to 6 inches of clearance to slide in without scraping, and a 1x12 panel on edge gives a 12 inch bay, which is generous. Height clearance is where a DIY rack wins over a store rack: sneakers with tall collars fit without folding the collar.
Then count the household, honestly. A two-person household with everyday rotation owns 10 to 14 active pairs per season. That is 2 tiers of 36 inch shelves holding sneakers (12 to 15 pairs), or 1 tier plus a boot spot. The rack that always fails is the one sized to the pairs people wish they used, not the pairs by the door. Count the pile on the floor tonight and add two.
Cost: $0. Time: 10 minutes with a tape and the actual shoe pile. One caveat: count the shoes by the door, not in the closet.
3. The primary build: a two-tier stackable pine rack
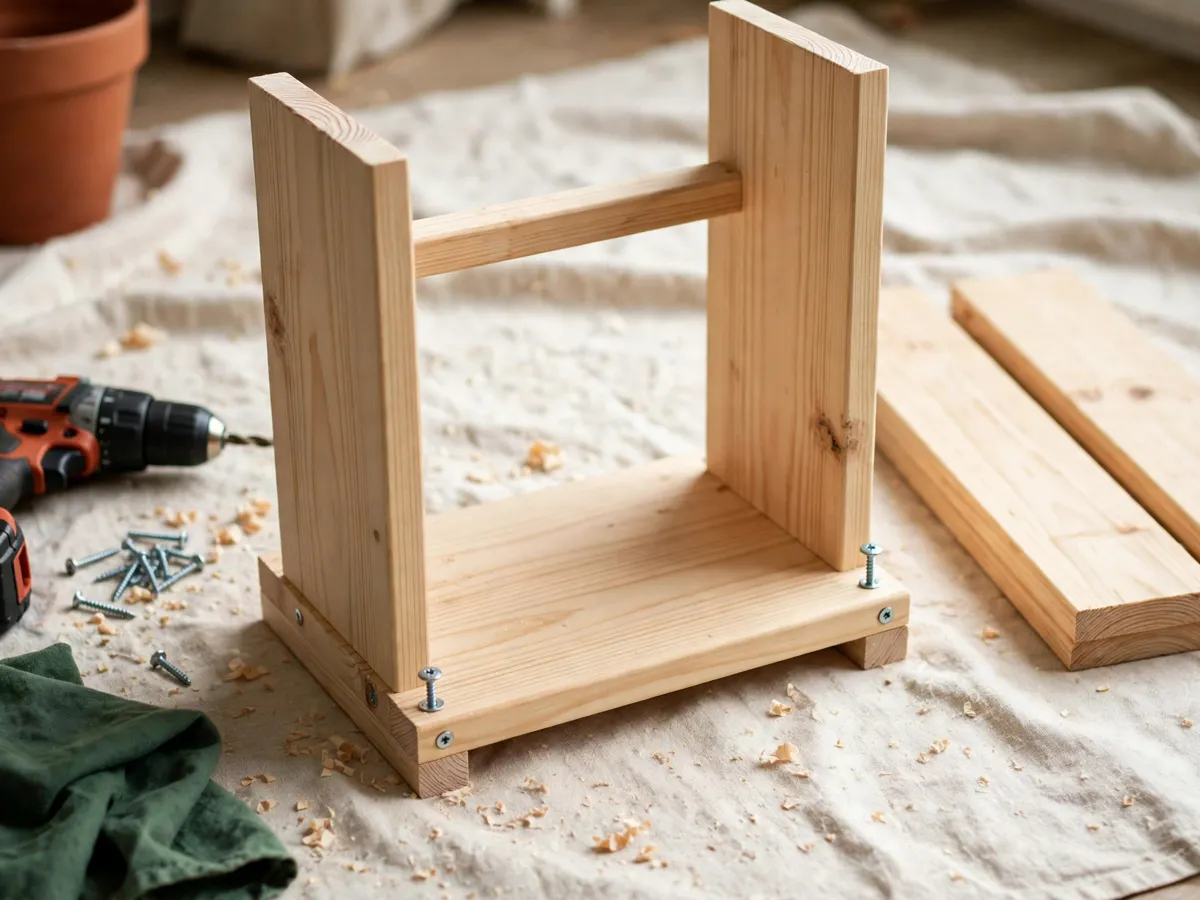
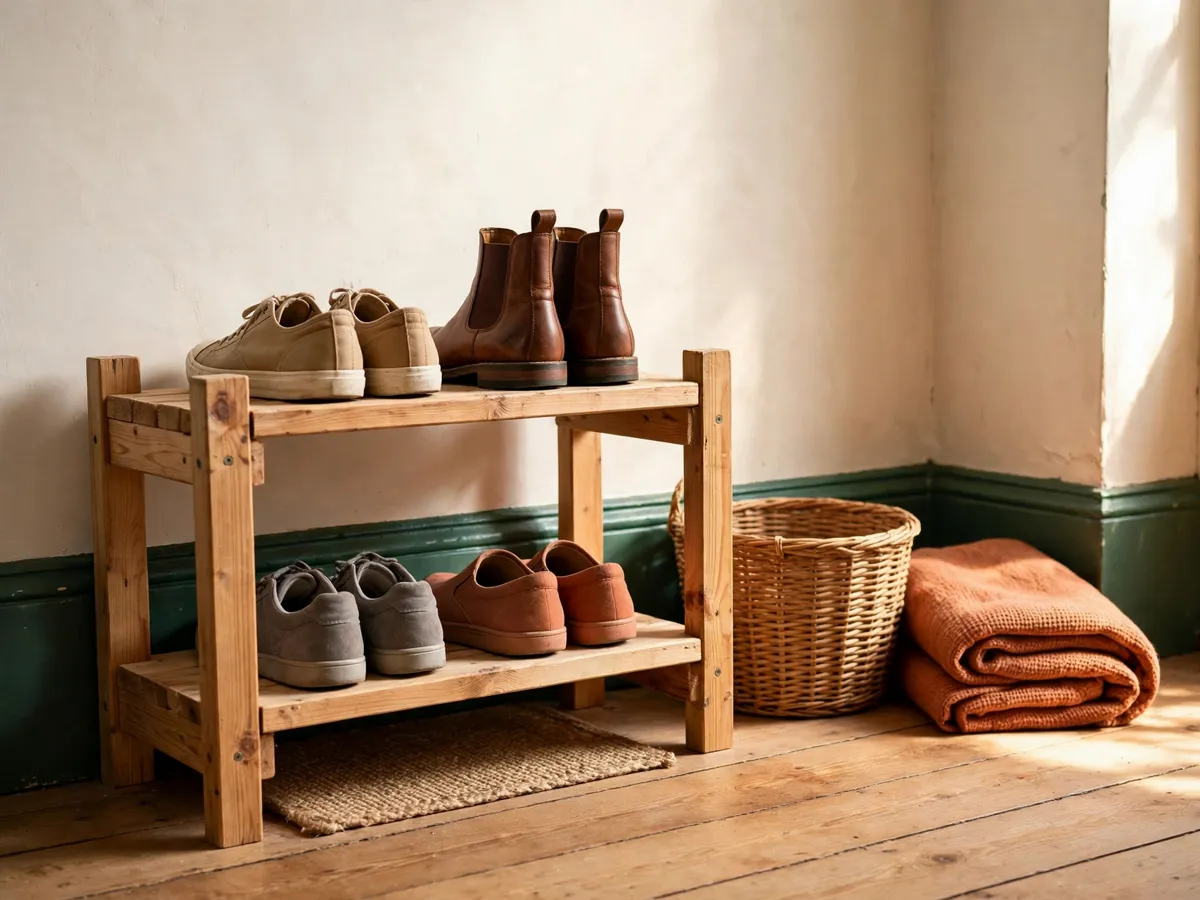
The build is one tier, built twice. Each tier is two side panels (the supports) with a shelf between them and a stretcher across the front. Stack the second tier on the first, and the two index together with short rails so the stack cannot slide. No part is longer than 36 inches, so every cut fits a balcony or a living room floor, and the whole rack disassembles into two tiers for a move.
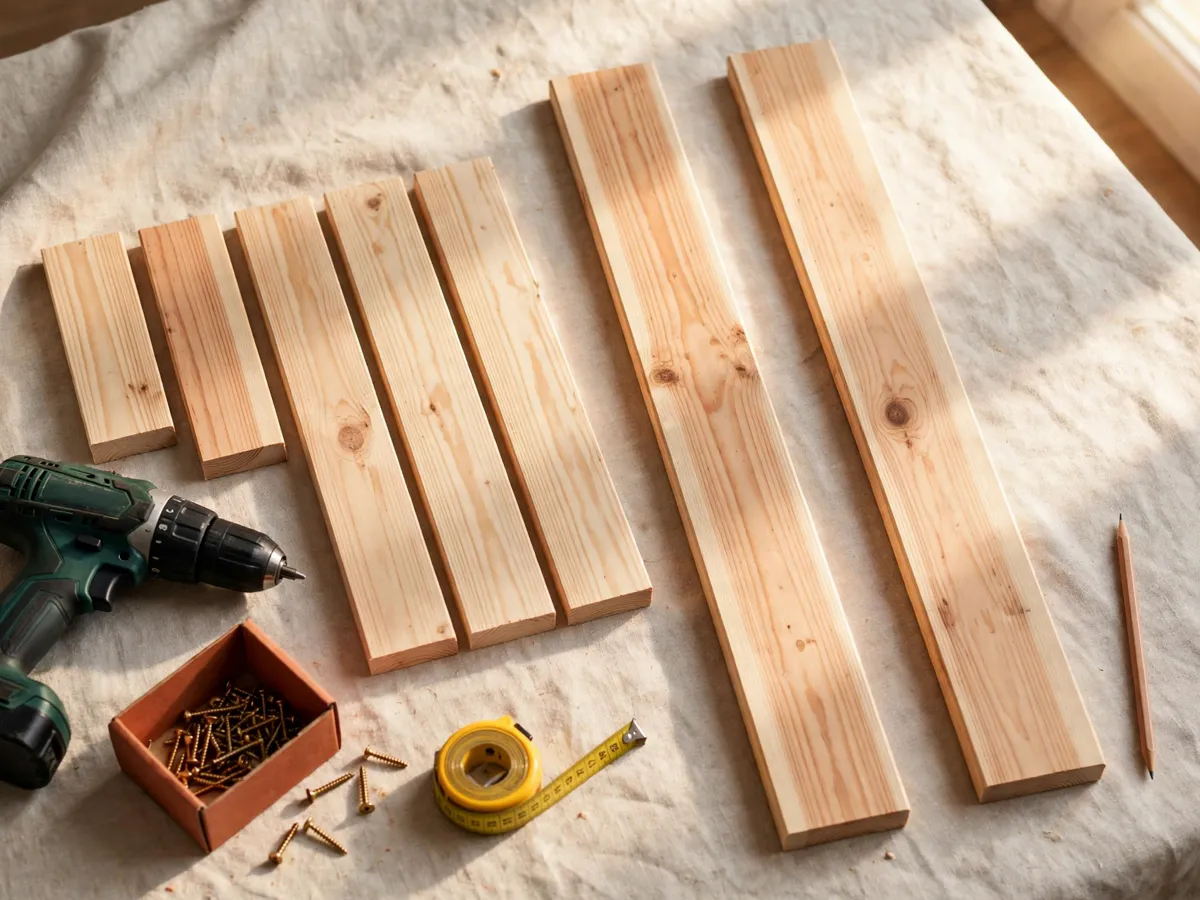
| Part | Finished size | Qty | Cut from |
|---|---|---|---|
| Side panels (per tier) | 12 x 11-1/4 x 3/4 in | 4 | 8 ft 1x12 pine |
| Shelves | 34-1/2 x 11-1/4 x 3/4 in | 2 | 8 ft 1x12 pine |
| Front stretcher (per tier) | 34-1/2 x 1-1/2 x 3/4 in | 2 | 8 ft 1x2 pine |
| Index rails (top of lower tier) | 4 x 1-1/2 x 3/4 in | 4 | 8 ft 1x2 pine |
Where the numbers come from. The side panels are 12 inches tall, giving an 11-1/4 inch clear bay after the shelf thickness (12 minus 3/4), which slides a sneaker in without scraping. The shelf is 34-1/2 inches long: 36 inches of outside width minus two panel thicknesses (2 times 3/4 is 1-1/2), so it drops between the panels with the rack reading 36 inches wide overall.
The board count. The 1x12 list needs 4 panels at 12 inches (48 inches) and 2 shelves at 34-1/2 (69 inches), so 117 inches of cut length. Add 6 kerfs at about 1/8 inch (3/4 inch total) and the need is 117-3/4 against the 192 inches two 8 foot boards offer. That is 6 board-feet of pine per board (a 1x12 runs one board-foot per foot), 12 board-feet total, with a 71 inch offcut left for a future project or the next tier. Two 8 ft 1x12 boards ($9 to $16 each, $18 to $32 the pair). The 1x2 list needs 2 stretchers at 34-1/2 (69) and 4 index rails at 4 inches (16), 85 inches plus 6 kerfs against 96, so one 8 ft 1x2 ($3.50 to $6.50).
Fasteners and consumables. Each tier: 4 screws through each panel into the shelf ends (8 per tier), 2 through each panel into the stretcher (4 per tier), and the upper tier adds 2 screws per index rail (8 total), so 8 + 8 + 8 is 24 screws of 1-1/4 inch, well inside a 100 count box ($4 to $7). Yellow wood glue ($3 to $5), sandpaper at 120 and 180 grit ($4 to $6), 8 felt pads ($3 to $5). Budget: $36–$62 with the drill and saw already in the house.
Cost: $36–$62 in material. Time: 30 minutes marking and cutting, 2 hours assembly. One caveat: sight down every 1x12 at the yard, because one warped panel twists the whole tier.
4. Assembly, step by step
Tools: a tape and sharp pencil, a speed square, a drill with a 1/8 inch bit, a circular saw or a fine-tooth hand saw, a clamp (or a stack of books and a flat weight), 120 and 180 grit sandpaper, and wood glue. Nothing in the build needs a table saw, and every cut is a square crosscut under 36 inches, so a straightedge guide clamped to the board is the accuracy tool. The beginner tool kit checklist covers which of these earn a spot in a small apartment.
- Cut all parts for one tier and label them: two panels (P1, P2), one shelf (S), one stretcher (F). Cut the second tier only after the first sits square, because the second copies the first.
- Mark a line across each panel 3/4 inch down from the top edge on the inside face. The shelf sits on the panel edges with its top face flush to the panel tops, so the line is a glue spread guide, not a resting ledge: this is a flush-face build.
- Dry-fit: shelf between the panels, ends flush, stretcher across the front edge, inset about 1 inch up from the bottom. Measure both diagonals of the frame. Equal diagonals mean square; a difference is fixed now by tapping a corner, not after the screws.
- Drill a 1/8 inch pilot hole 3/4 inch back from the panel edge at each screw position, then run a thin glue line and drive 4 screws through each panel into the shelf edge, two near the front, two near the back, 2 inches in from each shelf end so the screws never sit at the end grain.
- Pilot and drive 2 screws through each panel into the stretcher ends. The stretcher does two jobs: it stops the frame racking into a trapezoid when the rack is nudged, and it catches the front edge of a shoe shelf so a foot on the edge levers into structure, not into two screws.
- Square check: set the tier on the flattest floor in the house. It must sit on all four panel corners without rocking. A rock is sanded off the offending corner, never shimmed with cardboard.
- Build the second tier identically. Sand both to 180 grit with the grain, breaking every sharp edge, especially the shelf front edge, which hands touch twice a day.
- Screw the 4 index rails flat to the top face of the lower tier, one pair near the front, one near the back, inset 1-1/2 inches from each end so they trap the upper tier panels. Drop the upper tier between the rail pairs and load it.
Cost: $0 beyond the material list. Time: about 2 hours with one glue pause. One caveat: pilot every screw, because pine splits at the end grain and one split panel is a new board.
5. Why stackable beats one tall unit
The index rails are the whole idea. Four short 1x2 blocks screwed to the top face of the lower tier form a rectangle that the upper tier panels drop into, so the stack cannot slide front to back or side to side, and it still lifts apart in one motion with no unscrewing. A stack joined with screws would be stronger in theory and worse in practice: it stops fitting in a back seat, and a rental move turns into a disassembly afternoon.
Stackability also buys height control. One tier by the door for a two-pair household, two for a household of four feet, three if boots live on top in winter and the stack reads as a wall of shoes by February. The footprint never changes, so the wall measurement taken once stays true as the household grows. And a lower center of gravity beats a taller one in the kicking zone: a 25-1/2 inch two-tier stack (12 + 3/4 + 12 + 3/4) is stable on its own weight, while a 40 inch single unit wants a strap to the wall.
Cost: $0 (the rails are in the cut list). Time: 15 minutes to index the stack. One caveat: a third tier is the limit on this footprint without a wall strap, because the stack tips before it slides.
6. The rotating variant: lazy susan shoe rack
The rotating shoe rack is the one people search for and the one that disappoints most often, so here is the honest version. The build: a plywood disc (two 24 inch discs glued face to face for stiffness, or one 3/4 inch disc at 30 inches), mounted on a 12 inch or 18 inch lazy susan turntable bearing ($12 to $28), with vertical 1x4 dividers rising from the disc like spokes and a center post holding a second disc above. Shoes sit in the wedges between spokes, and the whole carousel spins so the back shoes come to the front.
The footprint math is where the disappointment lives. A 24 inch disc has a circumference of about 3.14 times 24, or 75 inches, and one ring of shoes at 9 inches a pair is 75 divided by 9, or about 8 pairs per ring. Two rings hold 16 pairs on a 24 inch circle, which is 576 square inches of floor, or 36 square inches per pair. The straight rack in section 3 holds 12 pairs in 432 square inches, which is the same 36 square inches per pair. The rotating rack buys zero extra density. What it buys is access: no reaching past the front row, and no dead back corners, which matters in a deep closet more than a shallow entryway.
Why it is not the primary build. A full-height carousel needs a plumb center post, a bearing rated for the load, discs cut as true circles (a jigsaw wanders), and dividers that do not rack as the stack spins. Each of those is a step past a beginner weekend: this is the second or third build, not the first. For a first build with a spinning part, the beginner woodworking plans index sorts what belongs in a first project.
Cost: $40–$85 (bearing, half sheet plywood, 1x4 stock). Time: a weekend, not an afternoon. One caveat: the bearing carries the load, so never cheap out on it; a sticky bearing makes the whole rack worse than a static shelf.
7. The wall-mounted variant
The wall-mounted version frees the floor and keeps the mop under the shoes. The simple path: two 2x2 cleats screwed into wall studs, shelf boards on top. The floating path: a hollow shelf box that slides onto a steel plate or a French cleat bolted to studs. Either way, the wall does the holding, so the load math changes from floor weight to pull-out force on the fasteners.
Load honesty. Studs hold: two 3 inch screws per shelf bracket into a stud carry a shelf of shoes without question. Drywall alone does not, no matter how expensive the anchor: a plastic sleeve anchor rated for 25 pounds in drywall holds a picture, not a shelf a foot steps on when reaching. If a stud does not land where the shelf needs it, use a toggle bolt rated above the load and treat it as a one-time install, or move the shelf to the stud. The honest test after mounting: push down on the front edge with a hand. Any movement means re-mount before the shoes go on.
Renter rules. Some leases allow anchoring into studs with a patch at move-out; many do not allow anything. The middle path is the French cleat into exactly two studs: two holes per stud, four holes total to patch, and the cleat carries the shelf with no visible hardware. Where no wall holes are allowed at all, stay freestanding and lean a tall rack against the wall with felt pads at the contact points, or take the bench variant in section 9. The floating shelf cut list guide covers the same stud math for a hollow-box shelf.
Cost: $14–$40 (cleats or plate, screws, anchors). Time: 45 minutes including stud finding. One caveat: renter rule first, build second, because the lease decides the variant.
8. The cardboard variant
The cardboard shoe rack is the zero-budget path and it is better than its reputation, if the limits are respected. The material is double-wall cardboard, the kind shipping boxes and appliance cartons are made of, which has a fluted core between two face layers. Single-wall gift-box cardboard is not in this class. The joinery is hot glue ($4 to $8 for a glue gun and sticks) plus triangular cross-braces cut from the same sheets.
The build that holds: fold the cardboard into L-shaped channel beams (flat cardboard is weak, folded channels are stiff), cut the shelves from doubled sheets glued face to face with the flute directions crossed, and glue a triangle brace under each unsupported shelf corner. Honest capacity: sneakers and flats, up to about three pairs per 18 inch span, a few pounds per pair. It survives months on a closet floor or a dorm corner.
What it never holds: boots, anything wet, anything a foot steps on, and any tier above eye level that could fall on one. Cardboard loses structure the moment it takes on water, and a wet sole parked on a cardboard shelf is a slow collapse. So the cardboard rack belongs in the bedroom closet as the overflow tier, not by the front door where the rain arrives. If a shoe rack by the door is the problem, pine is the floor of honesty.
Cost: $0–$8 if the boxes are free. Time: about an hour. One caveat: it is a closet rack, not an entryway rack; wet soles are the failure mode.
9. The bench-top variant
The bench variant is a cubby box with a solid top, and it is the best entryway build of the set when there is room, because it replaces both the rack and the chair people balance on. The box: two sides, a back, two or three cubby dividers, and a seat top, sized to the wall. The seat sits at 18 inches, the height a person of average height pushes off from without using hands, and the cubbies run the depth of the box with open fronts so shoes slide in from the standing side.
Sizing to the same shoe math. Each cubby wants 9 to 10 inches of width for one pair of sneakers side by side, or 18 inches for two pairs. A 36 inch box with two dividers gives three 11-1/2 inch cubbies (36 minus two 3/4 inch dividers is 34-1/2, divided by 3), each one pair wide, each one tier tall in a bench-height box. That is 3 pairs in the box plus 2 to 3 on a shelf above if the wall allows. For the full build with the lift seat and the hinge, the entryway bench plans page carries the complete cut list.
Cost: $55–$95 (a half sheet of 3/4 inch plywood plus a 1x3 frame). Time: a full day. One caveat: the seat must carry a person, so the top is plywood or 2 layers of pine, not a single 1x12.
10. Finish choices
Pine takes finish unevenly, so the decision matters on a rack that will see water.
| Finish | Cost | Time, two coats | Best for |
|---|---|---|---|
| Water-based poly, satin | $14–$26 | 40 min plus 6 h dry | Wet soles, wipes dry |
| Danish or tung oil | $9–$18 | 30 min plus 8 h dry | Warm tone, easy repairs |
| Stain then clear topcoat | $18–$38 | 90 min plus 24 h dry | A walnut tone over cheap pine |
| Left raw | $0 | 0 | Dry closets only, patinas fast |
For an entryway rack, the water-based poly is the honest default: wet soles are a weekly event, and a poly film wipes dry without taking the moisture in. Oil is the choice for a bedroom-closet rack that will stay dry, and it is the easiest finish to repair (sand the mark, wipe more oil). Left raw is a look, and it is the one that punishes rain. Whatever the route, seal the shelf top faces and the front edges first, because end grain and front edges take the water.
Last: 8 felt pads ($3 to $5) on the panel bottoms. They protect a hard floor from the rack sliding when a pair is yanked out, and they stop the scrape of pine on tile that announces every shoe change in a quiet apartment.
Cost: $0–$38 by route, $3–$5 for felt pads. Time: 30 to 90 minutes plus drying. One caveat: skip raw pine in a rainy climate entryway, it is the one finish water beats.
11. Variations by skill
The one-board single tier. One 8 ft 1x12: two 12 inch panels, one 34-1/2 inch shelf, one 34-1/2 inch stretcher ripped from the offcut. It holds 4 to 5 pairs, costs about $12, takes 45 minutes, and is the true first build. The math is the same as the two-tier cut list with half the parts.
The in-closet narrow rack. Cut the shelf at 16 inches instead of 34-1/2 for a 16 inch closet floor gap, one pair per tier. Depth stays 11-1/4. Use the offcut from the entryway build: 71 inches is four 16 inch shelves plus panels, so a second rack comes nearly free from the first build's waste.
The boot rack. Same footprint, taller bays: cut the side panels at 16 inches instead of 12, so the bay clears 15-1/4 (16 minus 3/4) for ankle boots, and store knee boots on the top tier facing out. Depth is the honest limit: boots need 14 to 15 inches front to back, so the shelf is 3/4 inch plywood ripped at 16 instead of a 1x12.
Cost: $0–$12 for the one-board tier, $0 for the closet rack from offcuts. Time: 45 minutes to 2 hours. One caveat: the boot rack changes the depth, not just the height, or the boots hang off the back edge.
12. Common failure modes and fixes
The failure modes, in the order they show up
- Racking wobble. The frame lozenges under a side nudge because there is no diagonal or front bracing. Fix: the front stretcher in the cut list, plus a square check at every assembly step.
- Shelf sag. A 3/4 inch shelf spanning 34-1/2 inches with no center support slowly bows under stacked shoes. Fix: a 1x2 cleat under the shelf front edge, or a center divider that cuts the span in half.
- Split pine. A screw driven without a pilot hole near a board end splits the panel, and the split grows with the kicking. Fix: a 1/8 inch pilot for every screw, and screws 2 inches in from board ends.
- Failed wall anchors. A plastic anchor in drywall alone lets go under a downward pull on the shelf edge. Fix: screws into studs, or a toggle bolt rated above the load, never a bigger plastic anchor.
- Sliding stack. An unindexed two-tier stack walks sideways over a month of use. Fix: the 4 index rails, or a strip of non-slip shelf liner between the tiers as the zero-tool version.
Cost: $0–$12 for the fixes. Time: none on build day if planned in, an hour each after. One caveat: every failure here is a 10 minute fix during the build and a rebuild after the shoes are loaded.
13. Cost and time, honestly
The headline number, $36 to $62, is two pine boards, a 1x2, screws, glue, sandpaper and felt pads, assuming the drill and saw are in the house. Line by line, with the variants beside it.
| Build | Cost | Active time |
|---|---|---|
| Two-tier stackable pine (this plan) | $36–$62 | About 2-1/2 hours |
| One-board single tier | $12–$18 | 45 minutes |
| Rotating lazy susan | $40–$85 | A weekend |
| Wall-mounted shelves | $14–$40 | 45 minutes |
| Cardboard closet rack | $0–$8 | About an hour |
| Bench-top cubby box | $55–$95 | A full day |
The finish is the one line that scales: $0 for raw pine in a dry closet, $38 for a stained and topcoated entryway rack. Add the felt pads either way. And the offcut from the 1x12 pair is 71 inches, which is a one-board single tier for the bedroom closet almost free, so the honest total for the household can be two racks from one shopping trip.
Cost: $36–$62 for the primary, $0–$95 across variants. Time: one afternoon for the primary. One caveat: the spare-board logic from bigger builds does not apply here; the 71 inch offcut is the spare.
14. Common questions
How wide should a shoe rack shelf be per pair?
About 9 inches of shelf width per pair for men's shoes and about 7 for women's flats. A 36 inch shelf therefore holds 4 pairs of men's shoes or 5 pairs of flats, which is the arithmetic behind the 36 inch shelf in this plan.
How deep should a shoe rack be?
12 inches of shelf depth fits most shoes, which is why the plan uses a nominal 1x12 at 11-1/4 actual inches. Boots need 14 to 15 inches, so a boot rack uses a 16 inch plywood shelf instead, with knee-high boots stored on the top tier.
Is a rotating shoe rack worth building?
Only for access, not for capacity. A 24 inch disc holds about 8 pairs per ring at 36 square inches of floor per pair, the same density as a straight rack. The carousel earns its cost in a deep closet where the back row is unreachable, and it is a second or third build because of the bearing, the plumb post and the circular cuts.
Can I mount a shoe rack without drilling into the wall?
Yes: keep it freestanding. The stackable plan in this guide sits on its own weight, and two tiers at 25-1/2 inches are stable without a strap. If wall mounting is allowed, a French cleat into two studs means four holes to patch at move-out; if the lease forbids holes, freestanding is the honest answer.
Can a cardboard shoe rack actually hold shoes?
Double-wall cardboard with hot glue and triangular braces holds sneakers and flats, a few pairs per span, for months in a dry closet. It does not hold boots, anything wet, or any load a foot steps on, so it belongs in the bedroom closet rather than the entryway where wet soles arrive.
Save these on Pinterest
Pin the cut list and the failure-modes box, the two pages that decide whether the rack survives the first month of kicking. For more builds that share the same tool list, the full DIY projects index links bench plans, shelf plans and first-workbench builds.