 Plant As Deco
DIY Home Projects
DIY Tool Kit Checklist for Beginners: Buy in This Order
By Plant As Deco · Updated 19 November 2026
The hardware store sells beginner tool kits as a box of forty pieces, and forty pieces is exactly the problem: half of them are filler, the drill is the weakest item in the box, and the whole kit gets replaced within two years. A tool kit that lasts is assembled one decision at a time. This page is the checklist in the order the money should leave your wallet — the ten hand tools first, one drill, then nothing else until a project asks for it.
Weekend-ready: $110–$230 all-in for the starter tier, one shopping trip. Renters: every tool here is apartment-safe — no shop needed.
1. The starter kit: ten pieces that earn their space
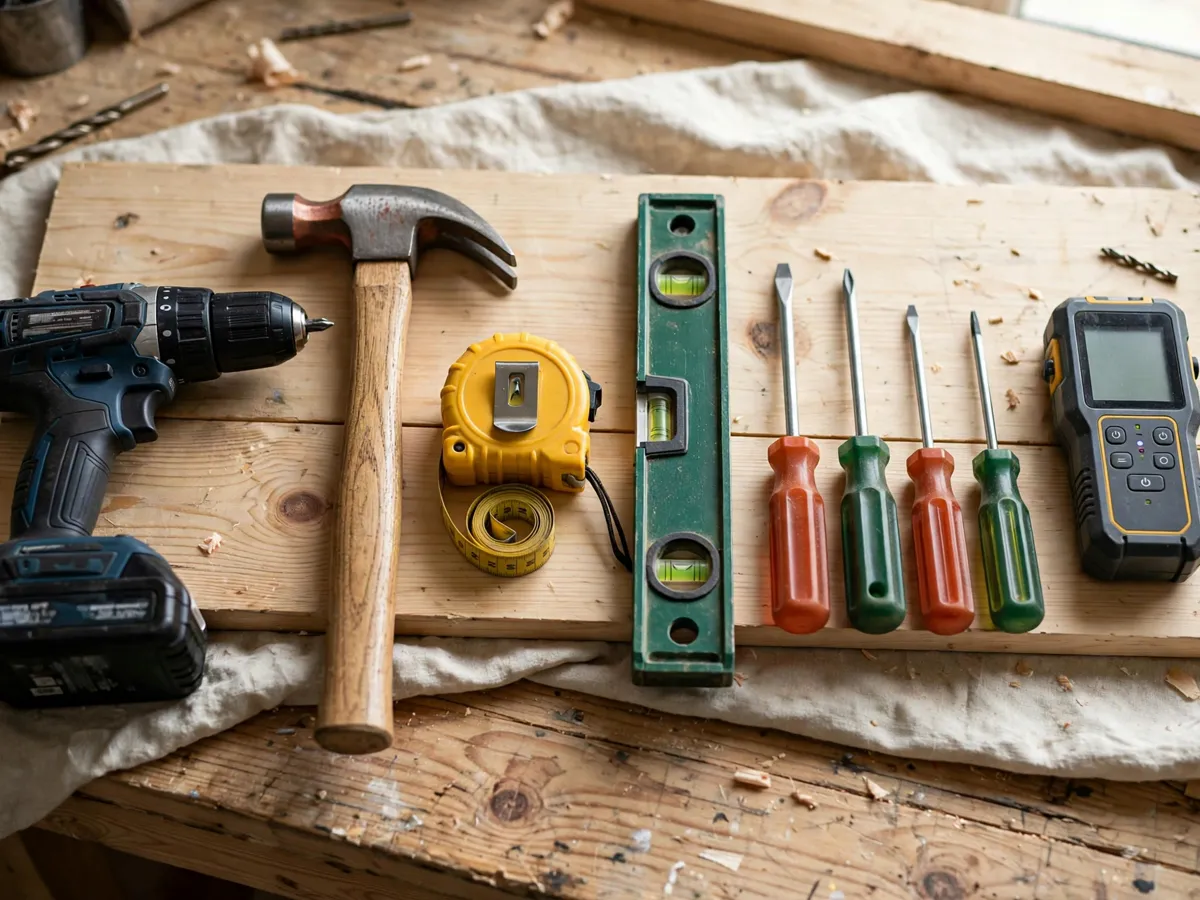
Ten tools cover the first year of apartment DIY — hanging shelves, assembling furniture, tightening hinges, building a simple box. Each one below earns its drawer space by doing a job nothing else in the kit does. Buy them one at a time if the budget is tight; the order is also the priority order:
- 19 or 25-foot tape measure — the tool every project touches first. A lockable blade and a hooked end that reads inside and outside measurements.
- Claw hammer, 16 oz — the weight that drives a nail without bouncing and pulls one without leverage gymnastics. Fiberglass handle absorbs shock better than wood.
- Screwdriver set, 6-12 pieces — Phillips #1 and #2, flathead 3/16 and 1/4, plus a square-drive #2. These four cover the fasteners in most flat-pack furniture.
- 24-inch torpedo level or box level — the tool that decides whether the shelf looks built or looks stacked.
- Stud finder — the difference between a shelf bolted to wood and a shelf bolted to half an inch of drywall.
- Utility knife — opening boxes, trimming shims, scoring cut lines. Blades are replaceable; buy the tool once.
- Combination square — marks 90 and 45 degrees, checks depth, scribes a line along a board. The layout tool every cut depends on.
- Adjustable wrench, 8-inch — holds a nut while the driver turns the bolt; one size adjusts to a dozen.
- Needle-nose pliers — gripping, bending, pulling staples, retrieving a dropped screw from a gap.
- Sandpaper assortment, 80/120/220 grit — three sheets each of three grits covers everything from rough mill marks to a finish-ready surface.
That is the whole hand kit. Everything beyond this list is a response to a specific project, not a purchase to make in advance. The beginner woodworking plans guide shows how each of these gets used on a real build.
Cost: $65–$120 for all ten at mid-tier prices. Time: one store trip, 30 minutes of shelf-reading.
2. The measuring tools come before the cutting tools
Every beginner mistake I have made traces back to layout, not cutting: the board cut to the wrong mark, the shelf hung a half inch off level, the bracket screwed into air. The measuring tools are the cheapest part of the kit and they decide whether the expensive tools produce anything worth keeping.
The tape measure and the combination square do most of the work. The tape reads the room; the square transfers that number onto the board and checks the cut afterward. Between them sits a marking knife or a sharp pencil — a cut line a pencil width wide is a decision, not a measurement. The level is the third measuring tool: a torpedo level for brackets and a 24-inch box level for shelves, because a shelf hung by eye reads as crooked the moment anything sits on it. Level the bracket, not the wall — walls lean.
The stud finder belongs in this group even though it finds nothing you measured. Drywall hides framing 16 inches apart, and a stud finder turns that hidden grid into visible targets before any drill starts. The floating shelf cut list guide runs the full measure-mark-cut sequence on a real shelf build.
Cost: $25–$45 for tape, square, finder and pencil together. Time: 10 minutes to learn the stud finder.
3. Hand tools: quality where the hand meets the tool
Hand tools have a quality rule: spend where the hand actually grips. A cheap hammer handle blisters in an afternoon; a cheap screwdriver tip chews screw heads and strips corners. The mid tier — not the budget bin, not the contractor brand — is the right zone for a first kit.
Screwdrivers deserve the extra dollars. A hardened tip that bites the screw instead of skating out of it is the difference between driving fifty screws and driving forty screws plus ten ruined ones. Test in the store: the tip should enter a screw head and turn it without lifting out under light pressure.
The hammer is the tool beginners buy wrong most often. A 20 oz hammer feels powerful and exhausts a wrist in half an hour; a 12 oz feels precise and takes twice the swings. Sixteen ounces is the balance point for household work — enough head to drive a 3-inch nail, light enough to swing one-handed until the job is done.
Pliers, wrench and utility knife can be the budget tier without regret. Their jobs are grip and cut, not precision, and the failure mode of a cheap pair of pliers is a loose jaw, not a ruined project.
Cost: $40–$75 for the hand set at mid tier. Time: 20 minutes of handle-testing in the aisle.
4. The first power tool: one drill, one battery
A drill/driver is the first power tool and for most apartments the only one for a long time. It drives screws, bores pilot holes, mixes paint with an attachment, and — with a hole saw — cuts openings. Every project on this site assumes one.
Buy a cordless 12V or 18V drill/driver with a single battery and a charger, bundled with a driver bit set. Twelve volts is enough for everything a shelf or a bench asks and weighs half of an 18V; eighteen volts buys headroom for the day the kit grows. The brand matters less than the battery platform — once the first battery is bought, the next tool from the same line shares it, and that is where the savings live.
The bit set matters as much as the drill. A driving set — Phillips #2 and #3, square #2, torx, a countersink, and a small assortment of twist bits from 1/16 to 3/8 — covers the fasteners and pilot holes the first year of projects generates. Buy the set once rather than buying single bits at the register.
One caution for renters: drilling means patching. Wall anchors that spread behind the drywall hold a shelf without finding a stud, but leaving a quarter-inch hole is still leaving a hole. Photograph the wall before drilling and keep the spackle tub with the kit. The workbench plans for beginners page is where the drill graduates from fasteners to joinery — and where the first saw cut usually happens, because a workbench top starts with boards the store saw cut to your cut list.
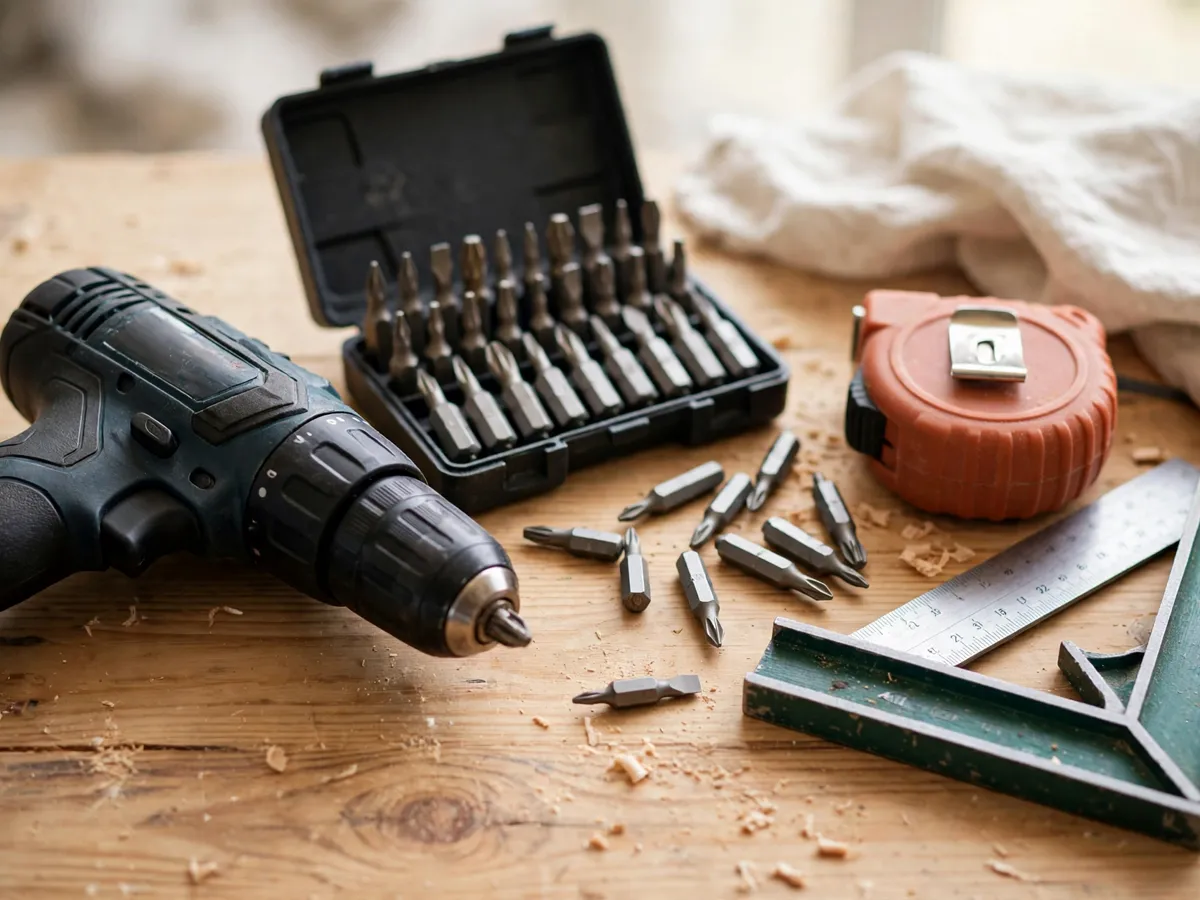
Cost: $60–$110 for drill, battery, charger and bit set. Time: 30 minutes to charge and learn the clutch dial.
5. What to skip until a project asks for it
The tools that crowd a beginner kit are almost all premature. Each one below earns its purchase only when a specific project demands it — and the project always announces itself before the purchase, which is the point:
- Circular saw — until a project needs a cut longer than two feet, a handsaw or the store's cutting service handles it. Most lumber yards cut to length for a few dollars or free; the first saw you own should be the one a project names, not the one the aisle advertises.
- Jigsaw — until a project has a curved cut in it. Straight work needs no curves; shelves and boxes are all straight work.
- Orbital sander — until sanding by hand takes more than one evening. Three grits of sandpaper and a cork block finish a crate; a bookcase is where the sander earns itself, and a random-orbit sander leaves no swirl marks a beginner has to sand out twice. Hand-sanding a crate with a sanding block takes an evening, which is the honest price of skipping the sander for now.
- Impact driver — until lag bolts and long structural screws show up. The drill already drives deck screws; the impact is power the first year rarely needs.
- Oscillating multi-tool — until something needs cutting in place, flush to a surface. Beautiful tool, rare job.
- A clamp set beyond two — two spring clamps cover the first glued joints; a full clamp wall is a workshop-scale purchase that waits for the workshop.
The honest test before any power purchase: name the project and the cut it needs. A named project justifies the tool; a named someday is not a project. The same rule covers clamps — a kit needs none until glue joins two parts, and then two spring clamps ($8 a pair) hold the joint while the glue cures. The tools a beginner actually uses in year one fit in one drawer — this page is that drawer.
Cost: $0 to skip. Time: zero — that is the entire point of the list.
6. Tool storage: one box, one drawer, one wall strip
A beginner kit that lives in five places gets used in none. The storage plan is deliberately boring: one toolbox that holds the hand kit, one drawer for the drill and battery, and — when the kit outgrows the drawer — one pegboard strip above it. The pegboard wall organization guide covers the wall step when the drawer overflows.
A 16-20 inch toolbox with a tray lid holds the ten hand tools with room for sandpaper and a box of wall anchors. The tray lid matters: the small things that get lost — bits, blades, pencils, drivers — live in the tray, not the bottom of the box. Cost: $15–$35.
The drill wants its own spot because it is the tool that leaves the box most often. A drawer slot with the charger inside it means the battery goes back on charge every time the drill goes home, and a drill that starts every job charged is a drill that gets used. A bedroom drawer or a closet shelf both work — the drill does not care where, only that it is the same place.
Cost: $15–$35 for the box. Time: 10 minutes to set the drawer.
7. Budget breakdown in three tiers
Three tiers, at big-box prices for a mid-size US market; treat these as the shape of the spend rather than a quote. All three tiers hold the same ten hand tools and one drill — the difference is where the dollars concentrate.
- Starter tier — $110 to $160. Budget-tier hand tools ($35–$50), a 12V drill kit with bits ($60–$90), a toolbox ($15–$25). Everything on this page, nothing beyond it. This tier builds shelves, crates and flat-pack furniture without complaint.
- Mid tier — $160 to $230. Mid-tier screwdrivers and hammer ($60–$75), an 18V drill platform ($80–$120), a stud finder worth trusting ($25–$35). The tools feel better in the hand and the battery platform has room to grow.
- Growth tier — when a project names a tool. A circular saw ($60–$100) arrives with the first bookcase; a sander ($40–$70) with the first finish piece; an impact driver ($70–$120) when structural screws show up. Each one rides an existing battery platform, which is why the platform choice in section four was the real decision.
The pattern across all three tiers: measuring and driving tools get the dollars first, cutting tools wait for the project that names them, and the battery platform is bought once and borrowed by everything after.
Realistic all-in for the starter tier: $130–$145. Time: one shopping trip.
8. Maintenance basics: five minutes a month
A beginner kit asks for almost nothing, and the little it asks for fits in one monthly pass. Wipe metal tools dry before they go back in the box — rust is a moisture problem, not a quality problem, and a garage-humidity apartment kills more cheap tools than hard use ever does. A silca-gel pack in the toolbox does the rest.
Blades and edges get one check: the utility knife replaces its blade when it tears rather than cuts; the combination square keeps its slide lock snug; sandpaper retires when the grit glazes shiny. A drill battery stores at partial charge, not empty and not on the charger for weeks — the manual's one paragraph on storage is worth reading once.
The screwdriver tip is the wear item to watch. A rounded tip chews screws, and chewing one screw head teaches the lesson faster than any paragraph here. Replace a worn driver bit the day it starts skating; the set spares are for exactly this.
Cost: $5 for silica packs and spare blades. Time: five minutes a month.
9. First projects that use exactly this kit
The kit is complete when it finishes a project without a hardware-store detour. Three first projects use nothing beyond the starter tier, in rising order of ambition:
A floating shelf is the classic first build — measure the wall, find the studs, cut the board to the store's cut list, drive four screws. The kit does every step, and the floating shelf guide carries the numbers. A one-board crate comes next: six cuts, glue and nails, and the hammer and square do most of the work — the one-board crate plan is the walk-through.
The third project pairs the kit with the garden: a planter box or a simple trellis, same tools, outdoor lumber. The garden tool overlap is real — the same tape, square and drill build the raised bed, and the gardening guides pick up where the carpentry ends.
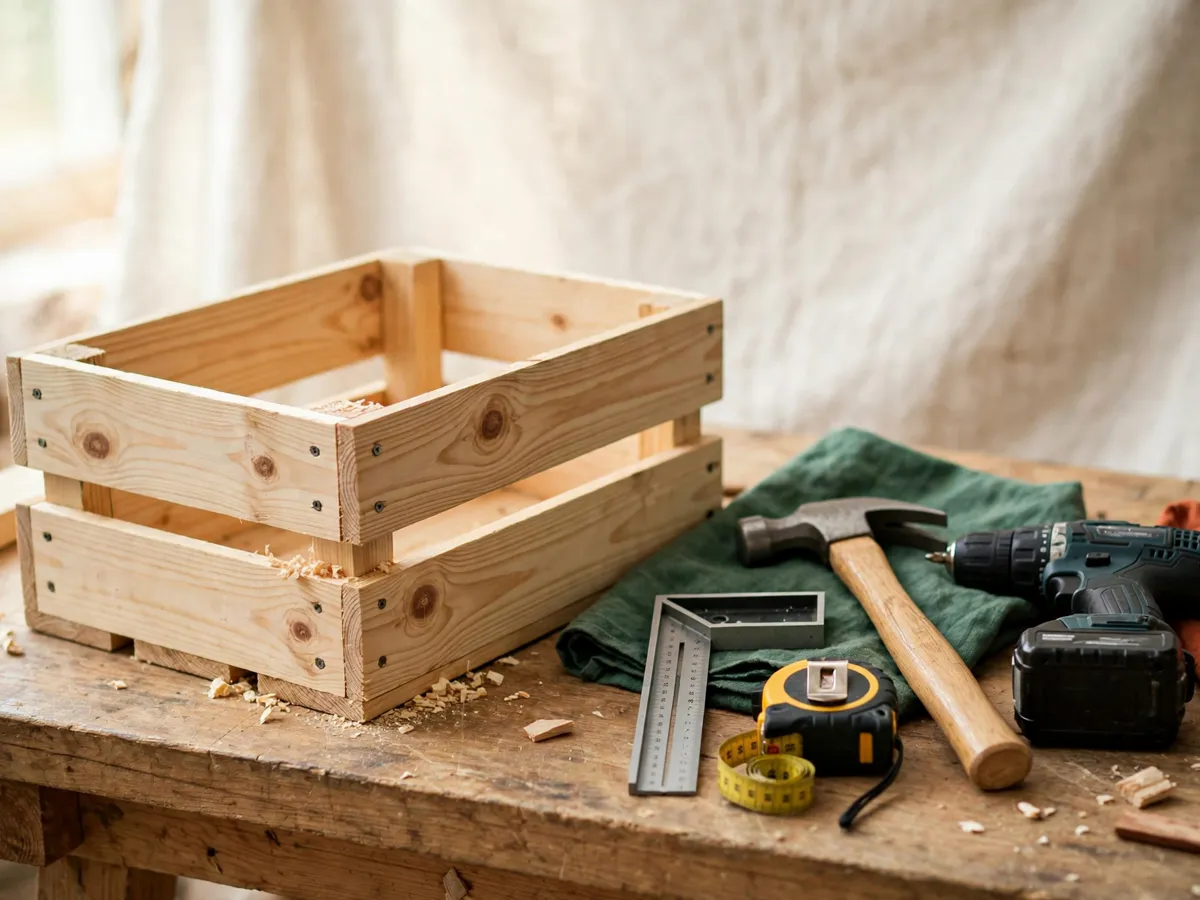
Cost: $15–$60 in lumber per project. Time: an afternoon each.
What we would skip
- The 100-piece starter kit box. Forty of the pieces are duplicates, the drill is the weakest on the shelf, and the case does not fit anything else you buy later. Two good purchases beat one stuffed box.
- A table saw in a first-year apartment kit. It needs the space, the budget and the projects of a second-year workshop — and a store's cut service covers straight cuts until then.
- Tool subscription boxes and mystery tool lots. The kit works because every piece has a named job; a mystery tool by definition has none.
- Buying a second battery before the first one dies. One charged battery covers an apartment afternoon; the spare earns its place only when a project outruns a charge.
- Precision measuring tools for carpentry that measures in eighths. A machinist square and digital calipers are wonderful and unnecessary — the combination square is the tool this stage of work actually uses.
Cost: $0 to skip. Time: two minutes of reading that saves a drawer of regret.
10. What it costs, honestly
The starter kit, line by line, at big-box prices for a mid-size US market; treat these as the shape of the spend rather than a quote. The line that surprises people is how little the whole kit costs when nothing premature rides along.
- Measuring — $25 to $45. Tape measure $10–$20, combination square $8–$15, stud finder $10–$25 (the basic magnetic model is enough), pencil free from the checkout bin.
- Hand tools — $35 to $75. Hammer $12–$25, screwdriver set $10–$30, pliers $8–$15, adjustable wrench $8–$12, utility knife $7–$15, sandpaper assortment $8–$12.
- Drill kit — $60 to $110. 12V drill/driver, battery and charger bundled $50–$80, driver and twist bit set $15–$30.
- Storage — $15 to $35. One 16-20 inch toolbox with a tray lid.
- Consumables — $10 to $20. Wall anchors and screws assortment, spackle tub, silica pack, spare utility blades.
Realistic all-in: $145–$285 depending on tier, and the starter version of every line is the right buy for year one. Compare that to the 100-piece kit at the same price: same money, half the capability, no battery platform.
Realistic all-in for the starter tier: $130–$160. Time: one afternoon of shopping and drawer-setting.
The beginner tool kit checklist
- Tape measure, 19 or 25 feet, lockable blade — the first tool out of the box on every job.
- Combination square — marks, checks and scribes; the layout backbone.
- Stud finder — finds the framing before the drill does.
- Claw hammer, 16 oz, fiberglass handle — drives and pulls without wrist tax.
- Screwdriver set with Phillips #1/#2, flathead 3/16 and 1/4, square #2 — the flat-pack furniture set.
- Needle-nose pliers and an 8-inch adjustable wrench — grip and hold.
- Utility knife with replaceable blades — boxes, shims, score lines.
- Sandpaper 80/120/220 and a cork block — hand sanding that covers year one.
- Cordless 12V or 18V drill/driver, one battery, one charger, driver and twist bit set — the only power tool of year one.
- One toolbox with a tray lid, one drawer for the drill, spackle and wall anchors — the kit that goes back where it lives.
Cost: $110–$230 across tiers. Time: one shopping trip, one drawer.
Common questions
What is the first tool a beginner should buy?
The tape measure. It is on every project, it is the cheapest quality buy in the store, and it teaches the habit everything else depends on: measure before you cut, buy, or drill. The drill is the first power tool and the hammer is the first hand tool people reach for, but the tape is the first tool the work actually needs.
Is a 12V drill enough, or do I need 18V?
For apartment DIY — shelves, furniture, crates, wall anchors — a 12V drill/driver is enough and noticeably lighter in the hand. Eighteen volts buys headroom for long structural screws and large bits, and it is the right platform if a circular saw or impact driver is already on the roadmap. The honest answer: choose the platform for the tools you will buy second, not the drill you are buying now.
How much should a beginner spend on a first tool kit?
$110 to $160 covers the complete starter tier — ten hand tools, a 12V drill kit, a toolbox and consumables. Mid tier runs $160 to $230 with better-handling drivers and an 18V platform. Anything under about $80 forces a compromise on the drill or the screwdrivers, the two places quality actually shows; anything over $250 at this stage usually means premature power tools.
Are cheap tool kits worth buying?
Piece by piece, yes; as a boxed set, no. The budget tier of individual hand tools — pliers, wrench, utility knife — is a genuine bargain because those jobs forgive simple steel. The 100-piece boxed kit is the bad version of the same idea: the pieces are thinner than buying the same categories separately, the drill is the weakest in the lineup, and the case never fits what comes next.
Where should I store tools in a small apartment?
One toolbox for the hand kit, one drawer for the drill and its charger, and a pegboard strip on the wall when the drawer overflows. The box lives in a closet, under a bed, or on top of the wardrobe — the location matters less than the habit of the kit going back in one place. A kit that lives in one spot is a kit that gets used; a kit scattered across five spots is five reasons to improvise with a kitchen knife instead.
Save these on Pinterest
Pin the buy-order checklist — the ten hand tools, the one drill, and the tier that matches your budget — so the hardware aisle does not talk you into forty pieces you cannot name. This guide and the rest of the DIY project guides live together there.