 Plant As Deco
DIY Home Projects
DIY Pegboard Panel Wall Organization: A Beginner Tool Wall
By Plant As Deco · Updated 18 November 2026
A pegboard panel is the cheapest way to turn a bare garage wall or a blank workroom wall into storage that shows every tool at once. The build here is one 2 ft by 4 ft hardboard panel raised off the wall on 1x2 furring strips, screwed into studs where they fall and carried by toggles where they do not, with a hook for every daily tool, a row of small bins for the small parts and traced outlines so a missing screwdriver shows up at a glance. The whole thing is a weekend afternoon, and every decision below — panel, standoff, hook layout, bins, paint — comes with its honest number.
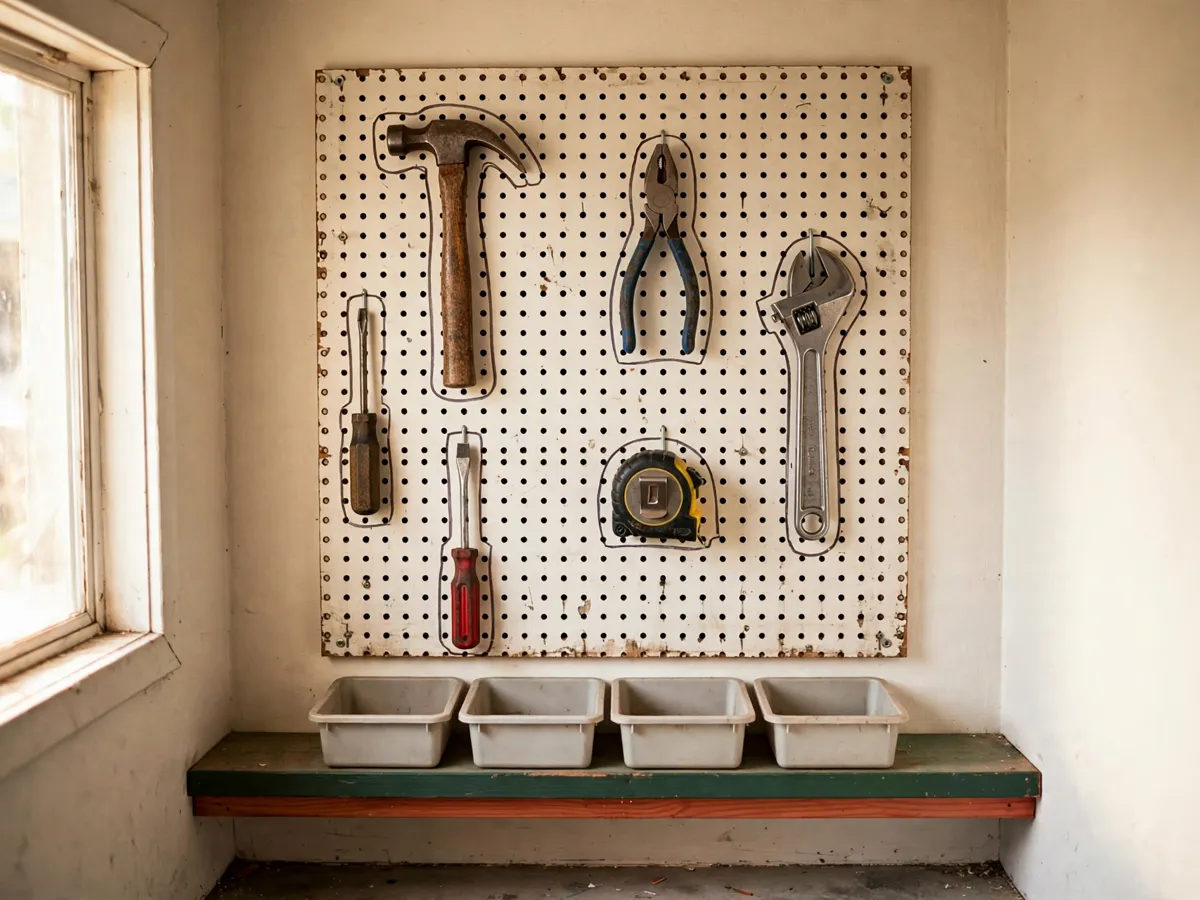
The build at a glance
One page, one panel, ten steps. The system is a 2 ft by 4 ft sheet of 1/8-inch hardboard pegboard with holes drilled on 1-inch centers, held 3/4 inch off the wall by two or three horizontal 1x2 furring strips, each strip a spacer that lifts the pegboard clear of the drywall, with the strips screwed into wall studs and the panel screwed to the strips. The standoff is the whole secret: a pegboard hook engages only if its shoulder can sit behind the panel face, and against bare drywall there is no such space, so hooks lift out on the first pull. With the standoff, the same hook holds through years of grabbing a drill one-handed.
The build suits a first-hour DIYer. The parts are one panel, two boards and a box of screws; the cuts are straight crosscuts a lumber counter will make for free; and the accuracy that matters is a level pair of strips. A drill, a saw, a level and about four to five hours cover it, and the pegboard grows easily — a second panel beside the first reuses the same layout logic and no new theory. Everything hangs on the wall you already own, so the whole system is also one of the few big-feeling storage wins a renter can roll back to a few patched screw holes.
Weekend-ready: $35–$110, one weekend afternoon. The hardboard panel build lands near $50 with a hook assortment worth having; the metal-panel upgrade reaches the top of the range.
A pegboard panel or a garage cabinet?
Both a pegboard panel and a garage cabinet store tools on a wall, and they are not rivals — they are answers to two kinds of stuff. A panel shows everything and needs one lift to reach, which fits what you touch weekly: hammer, drill, tape, square, the scissors that wander. A cabinet hides what you rarely touch and what dust or rust would ruin: spray cans, spare fluids, the overflow that would clutter a visible wall.
The honest split for a small garage is a pegboard panel where the work happens and a low cabinet nearby for everything closed. If the cabinet is the bigger question — doors, shelf spans, whether to build or buy — the garage cabinet ideas guide carries that whole decision (linked in the skip list below), and this page carries the open wall beside it. The same logic works indoors: a panel on a workroom or craft-corner wall plays the role a closed cabinet could not, because seeing the tools is the point when someone in the house is still learning where things live.
Choose the panel when three things are true. First, the items hang or fit in a bin. Second, the wall can accept the screws described below — and even a stretch of drywall with no stud works, because toggles carry the panel itself, with the load rules riding in the anchoring section. Third, the household benefits from tools being visible, which is why a workroom wall beats a drawer for anyone still building the put-it-back habit. Anything loose, coiled or leaky — paint thinner, a wet umbrella, a bag of stone dust — wants a cabinet or a shelf with a lip instead of a hook.
Cost: $0 to decide. Time: ten minutes walking the wall. Caveat: anything stored loose, coiled or leaky wants a cabinet or a lipped shelf, never a hook.
Measure the wall and lay out the panel
The panel is fixed at 2 ft by 4 ft, so the layout question is where it goes and how high. Stand back and mimic the work: reach up as if lifting the drill you use most. The band between your eyes and your elbows is where daily tools should land, so the top of the panel goes about 5 ft to 5 ft 6 in off the floor for an average adult, lower in a craft corner used from a stool. Height is a usability choice, not a decoration: a tool kept at eye level gets put away every time, and a tool stored overhead quietly migrates into a drawer.
Trace the studs before the panel goes anywhere. Studs in a newer-build wall run at 16 in on center, so a 4-ft panel hung with its ends centered over two studs spans three of them — left, middle, right — and the horizontal strips can catch all three when the layout starts from the stud marks rather than from the panel edge. Find each stud with a finder and confirm the mark with a magnet, then draw a vertical pencil line taller than the panel and snap or draw the strip lines across them with a level. The bracket and anchor details for a plain floating shelf belong to another page, picked up in the skip list below.
Then plan the zones on paper before a single hole is drilled. Two horizontal rows of hooks at comfortable reach; a bin row low or at one end; power tools near the outlet side of the wall. Trace the big items — drill, level, plane — at final size with a marker once they are hanging, because a traced outline is the shadow-board habit that makes a missing tool visible at a glance and makes putting things away automatic.
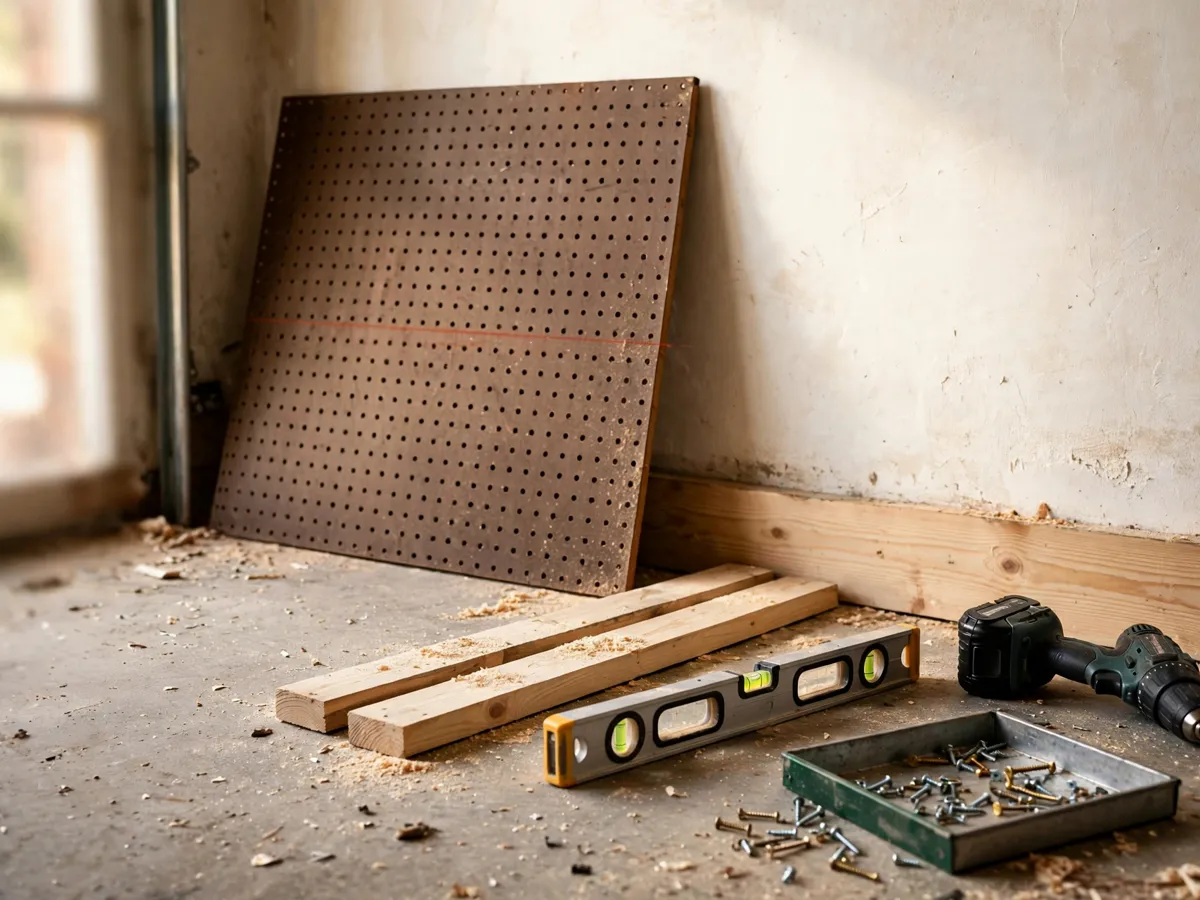
Cost: $0. Time: 20–30 minutes with a finder, tape and level. Caveat: check for electrical boxes and water lines behind the wall before drilling; an outlet inside the panel footprint changes the whole layout.
Cut the strips and mount the panel
Two straight crosscuts are the whole job: an 8-foot 1x2 cut into two 4-foot strips, or three strips if the panel will hold heavy rows across its full height. A circular saw against a marked line does it, a handsaw does it slower, and the lumber counter at any big-box store will cut it for nothing. Sand the cut ends with a sanding block so no splinters wait behind a bin.
Screw the strips to the wall first, horizontally, one near the top of the panel line and one near the bottom, each fastened with #8 by 1-1/4 in screws into every stud they cross — two stud hits per strip minimum, three when the middle stud lands inside the run. Level each strip before its second screw seats, because a strip out of level shows in every later row. Each board acts as a spacer: the 3/4-inch standoff it creates is what lets a pegboard hook's shoulder sit behind the panel face instead of flush against the wall, and a flush hook falls out on the first upward pull.
With the strips level, set the panel against them, line its edges to your pencil marks, and drive #8 by 1-1/4 in screws with a countersink bit at each corner plus at mid-span — six screws for a 2 ft by 4 ft panel, more if a heavy zone wants them. Let each countersunk screw head sit just below the surface without crushing the hardboard; the material is only 1/8 in thick and an over-driven screw dimples it. If a panel edge lands where no stud exists, do not fill the gap with more screws into hollow wall — they spin and hold nothing. That case is the next section.
Cost: panel $12–$20, one 8-foot 1x2 $3–$5, a screw box $6. Time: about 90 minutes including transferring the layout. Caveat: a strip screwed into drywall alone holds nothing — every strip screw must land in framing.
Anchoring when no stud lines up
Sometimes the pegboard must go where the framing is not: beside a garage door, on the wall between windows, over a finished bench nook. A 2 ft by 4 ft hardboard panel is light on its own — under 10 lb — so the panel itself is carried by four to six toggle bolts without drama. A toggle anchor rated to roughly 25–50 lb in 1/2-inch drywall carries the panel comfortably; buy each anchor by its load rating and never by price, and put one near every panel corner plus one at mid-height on each side. Read the anchor rating off the pack before drilling, because two toggles of the same diameter can carry very different loads.
The panel carrying itself is a different question from a hook carrying a tool, and that distinction is the load honesty of this build. The panel spreads a point load across its whole face; a single hook concentrates it into one small patch of drywall. A hook under a 5-lb hammer is fine anywhere on a toggle-held panel, mid-span between studs included. A hook loaded toward 20 lb should land on a strip, because the strip ties the load into the framing rather than into the drywall sheet the toggle grips. This is why the layout starts with the strips and only then the hooks — the heavy positions get planned onto the strips, and the toggles handle the rest. The same rule repeats for a floating shelf on the same wall, and the placement guide picked up in the skip list below covers drywall anchors in that context.
Two more anchor cases worth naming. On brick or block, a masonry anchor sized by the same load logic works, and expect the job to run an hour longer with a hammer-drill bit. And on plaster over lath, a toggle is still the right hollow-wall anchor, but probe gently first — old plaster crumbles at the hole edge, and a strip into real framing matters twice as much there.
Cost: six toggles about $8. Time: 30 extra minutes. Caveat: a toggle carries the panel, never a 20-lb hook — route heavy hooks to the strips.
The hook assortment worth buying
Hooks are where the cheap version of this project fails. Bent-wire hooks in the thinnest assortment have two defects: the wire flexes under a real tool, and the tips scratch every panel face they touch. The assortment worth having — $20–$45 — is stamped or Loop-style steel with a coated or finished tip, and it includes straight hooks for saws and levels, angled hooks for drills and staplers, curved hooks for cords and clamps, and at least one wide hook that spans two holes.
That two-hole span matters because of load. Hardboard pegboard with holes on 1-inch centers takes 1/4-in pegs, and a single 1/4-in peg in 1/8-inch material is a small lever arm — a 15-lb cordless drill on a single hook is at the edge of what the panel tolerates, especially at a panel edge far from a strip. The fix is structure, not hope: either a hook that spans two holes and spreads the load, or a strip-backed position where the screw path ties into the framing. Both answers cost nothing extra if you plan them during the layout step.
Match the hook shape to the tool, not the other way round. A drill hangs best nose-down on an angled hook with the battery flat; a handsaw lies across two straight hooks; a clamp collection shares one long curved hook. A bin can stand in for a whole row of hooks: one shelf-style bin at the bottom of the pegboard catches tape, gloves and the box of bits that never has a home, and it holds the loose things no hook can carry. Buying the assortment before the layout wastes money on shapes nobody uses — buy hooks the week you plan the zones, then stand back and see what still has no home.
Cost: $20–$45 for an assortment worth having. Time: an hour of rearranging with the tools in hand. Caveat: if a tool drags when you lift it, the hook is in a dead spot — move it onto a strip before the habit of yanking sets in.
Zones, bins and the label habit
The layout rule from the measurement section becomes a sorting rule here: eye level means daily drivers, above shoulder means weekly items, below elbow means bulk and backlog. On a 2 ft by 4 ft panel that maps to two hook rows in the middle of the panel for what you touch every project, a sparse top row for the weekly tools, and the bottom band given to the bin row. The same height logic organizes any wall in the house, which is why a coat rail by the front door sorts itself the same way at different heights — the entryway version is picked up in the skip list below.
Small parts live in a row of bins, not loose cups. Each bin carries one category: screws, anchors, drill bits, blades — one category per bin, because a bin labeled fasteners becomes a junk drawer at arm height within a month. The bins must carry a lip that hooks over the panel; loose plastic tubs on hook wires tilt and tip the first time a hand rummages in them. Clear bins show contents, but a solid bin with a proper label teaches the system faster than a clear one nobody reads.
Labels are one word, written by hand or printed in large type: SCREWS. ANCHORS. BITS. BLADES. The bedrock rule of the label habit is that a label too small or too clever does not get read, and a label nobody reads organizes nothing. One word per bin, big enough to catch from three feet away, does more for the wall than any storage upgrade. And leave one empty hook slot per zone — a gap in each row is what lets the system absorb the next new tool without a redesign, which is the difference between a wall that works for years and one that starts to sprawl.
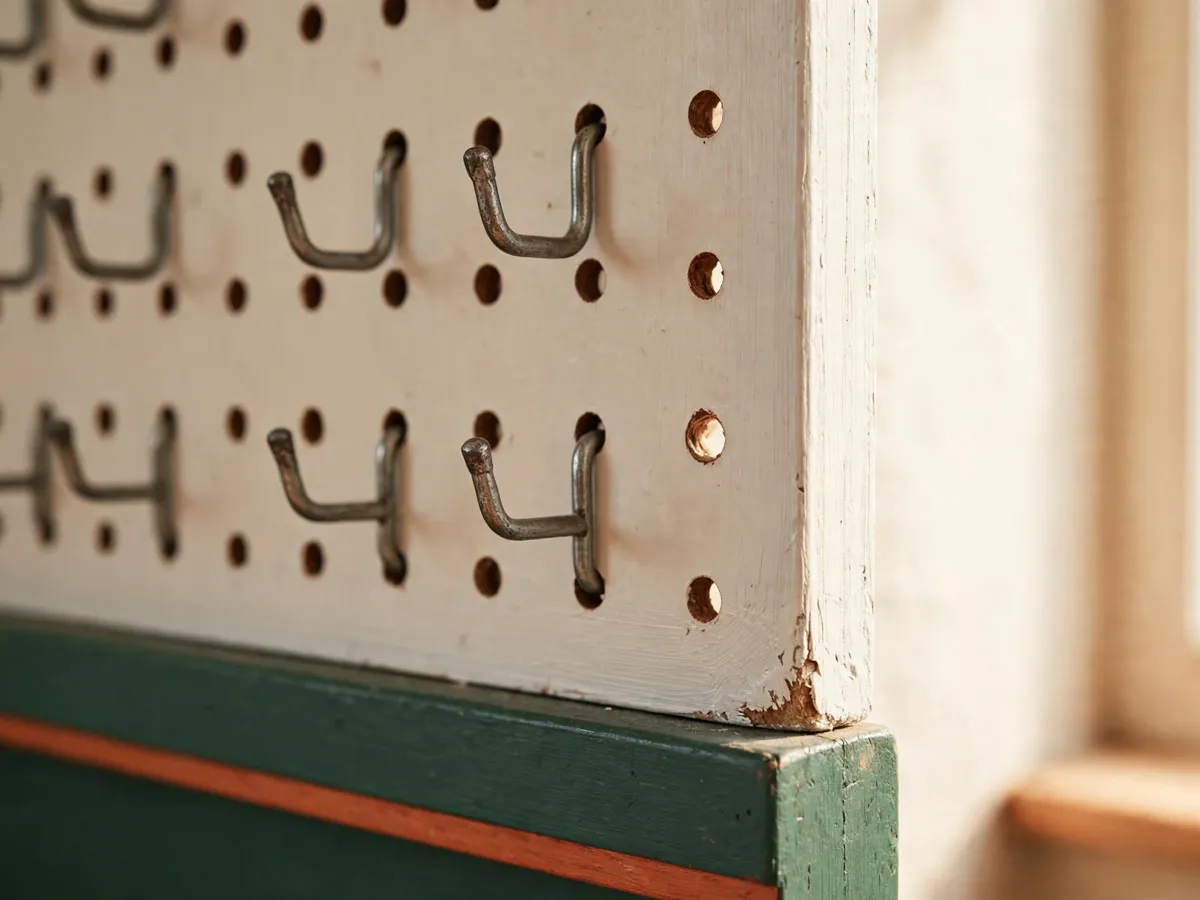
Tools that live below the panel belong to the bench underneath. The bench itself — casters, top thickness, a vise — is its own build, linked in the skip list below; this page only asks that the bench stay shallow enough to leave hook clearance in front of the panel.
Cost: a bin row $10–$18, label tape $4. Time: an hour of sorting. Caveat: do not label by project ("treehouse screws"); label by category, because projects end and categories do not.
Paint without filling the holes
Painted pegboard looks sharper against a finished room, and the paint step is also where panels get ruined. A brush is the cause: bristles carry paint into the perforations, and the rack of 1-in holes shrinks a size with every stroke, until a 1/4-in peg no longer seats. Roll instead, with a small 4-inch foam roller, lay each coat thin, and let the roller do several light passes rather than one heavy one.
Between coats, clear the holes while the paint is still soft: a toothpick poked through each partially bridged perforation, or a quick blast of compressed air across the face, restores the hole before it hardens shut. Two coats maximum — a third coat is where panels lose their peg fit for good. Water-based latex cleans up easily and stays flexible, which is what a thin hardboard sheet wants; oil-based paint films harder and can crack at the hole edges when the panel flexes.
Paint before mounting if the panel is brand new, flat on a bench with a drop cloth, because a flat panel takes an even thin coat and the holes drain instead of pooling. Paint after mounting only for touch-ups. Do the same treatment on the 1x2 strips so the finished wall reads as one piece, and let everything cure a full day before the first bin and shelf row go back up.
Cost: a sample pot covers a panel for $6–$10. Time: two thin coats in an afternoon. Caveat: a brush puddles into the perforations — roll, thin, two coats, and clear the holes between.
What the three tiers cost
The ranges below are early-2026 US big-box prices for new stock, rounded, and they assume a drill and a saw are already in the house. Each tier is named so the budget matches the wall you are actually building.
| Tier | What it includes | Total |
|---|---|---|
| Panel + furring | 2 ft by 4 ft hardboard panel $12–$20, 1x2 strips as spacers $3–$5, screws and toggles about $14 | $25–$40 |
| + hooks worth having, bins, labels, paint | hook assortment $20–$45, bin row $10–$18, label tape $4, sample pot $6–$10 | $65–$120 |
| Metal panel upgrade (steel pegboard) | steel panel and frame in place of hardboard, magnetic accessory option, same strips below | $70–$110 |
Tools, if you own none. A drill or driver runs $60–$120, a circular saw $50–$120, a 24-inch level $15–$30, a countersink bit $8, a sanding block $6, and a finder $15–$30 — about $155–$325 once, and every later build on the DIY Home Projects collection reuses all of it.
Cost: as tabled, tools excluded. Time: one weekend afternoon, 4–5 hours, or two evenings split at the paint step. Caveat: prices move with the season, so treat the ranges as budget lines rather than a quote.
What this page skips
- The garage cabinet itself. Doors, spans and the build-or-buy question live in the garage cabinet ideas guide; this page only draws the boundary between the two.
- Shelf brackets and hidden-rod mounts. Bracket choice and the anchor details behind them belong to the floating shelf cut list, including the finder walkthrough.
- Where to hang a hook rail in a hallway. Height bands, clearance and placement thinking are the shelf placement guide's subject; this page mounts one kind of wall system, not that one.
- The bench below the panel. Casters, top design and the vise question are covered in the beginner workbench plans. Keep the bench shallow and the panel keeps its clearance.
- The entryway version. A coat-and-bag rail by the front door is different storage with different heights; the small entryway ideas guide owns it.
- A French cleat system. Cut cleats carry heavier shop tools than a hardboard panel ever should, and mixing the two systems on one wall doubles the layout work for no extra capacity.
Cost: $0 to skip. Time: the ten minutes of boundary-drawing that keeps an afternoon honest.
The afternoon plan, hour by hour
- Hour 1 — find and mark. Locate the studs at 16 in on center with a finder, confirm with a magnet, draw the strip lines with a level, and decide the panel height against your reach.
- Hour 2 — cut and screw. Cut the 1x2 into two strips (circular saw or a free store cut), sand the ends, screw the strips into the studs with #8 by 1-1/4 in screws, checking level before each second screw seats.
- Hour 3 — hang the panel. Set the panel on the strips, countersink six #8 screws at the corners and mid-span, and add toggles at any edge that missed the framing.
- Hour 4 — hooks and zones. Sort tools by daily, weekly and bulk, press each tool to the panel, hook it, then trace it with a marker. Shift any loaded hook onto a strip-backed spot; give every heavy tool a two-hole span.
- Hour 5 — bins and labels. Mount the bin row, split small parts one category per bin, write one-word labels, and leave one empty hook slot per zone. Paint, if you are painting, happens before this hour on a future afternoon.
Cost: $0 to follow. Time: 4–5 hours total, and nothing except the paint benefits from waiting.
Questions this panel raises
How much weight does a hardboard pegboard actually hold?
The panel carries hand tools and small parts; a 15-lb cordless drill on a single hook is at the edge. Anything approaching a 20-lb load should hang from a strip-backed hook or one that spans two holes, and the genuinely heavy gear belongs on a steel pegboard panel or a shelf rail screwed into studs. The panel spreads loads; hooks concentrate them, so the hook position decides the limit.
Can I mount pegboard without furring strips?
No. The strips are the spacer that makes the whole system work: a pegboard hook's shoulder needs room behind the panel to engage, and mounted flat to bare drywall the hooks pop loose on the first lift. The 1x2 spacer costs a few dollars and one hour, and it doubles as the strong point that carries heavy hooks into studs.
What anchor holds a panel where there is no stud?
Toggle bolts, labeled by load: a toggle rated to about 25–50 lb in 1/2-inch drywall carries the panel itself at four to six points. What a toggle cannot do is back a single heavy hook, so route loaded hook positions onto the strips and let the toggles carry the sheet. Masonry walls take masonry anchors under the same load logic.
Do I have to paint pegboard, and what kind?
Painting is optional; bare hardboard is fine in a garage. If you paint, roll thin coats with a small foam roller, clear the holes with a toothpick or a blast of air between coats, and stop at two coats so the 1-in hole grid keeps its size. A brush puddles into the perforations and shrinks every hole.
How do I keep hooks from falling out?
Three honest fixes, in order of cost: keep the 3/4-inch standoff so the hook shoulder engages properly; use stamped steel hooks with a tight 1/4-in peg fit instead of bent wire; and position frequently-grabbed hooks so the pull direction is straight out, not up. If a hook still works loose where tools get yanked, a dab of removable thread adhesive on the peg tip holds it without marking the panel.