 Plant As Deco
DIY Home Projects
DIY Floating Desk Wall Mount: A Fold-Away Cleat Build
By Plant As Deco · Updated 18 November 2026
A wall-mount desk is the one piece of furniture that hands a small bedroom its floor back. The build here is a single 36 by 18 inch top hung on a beveled 1x2 cleat at about 29 inches, with knee clearance under it and no legs in the way, and it folds up against the wall on one hinge when the room has to be a bedroom again. This page carries the mount: the height math, the stud decision, the load limit, the cable channel that has to go in before the cleat, and honest costs. How the finished desk looks belongs to a decor page, and this one stops at how it holds.
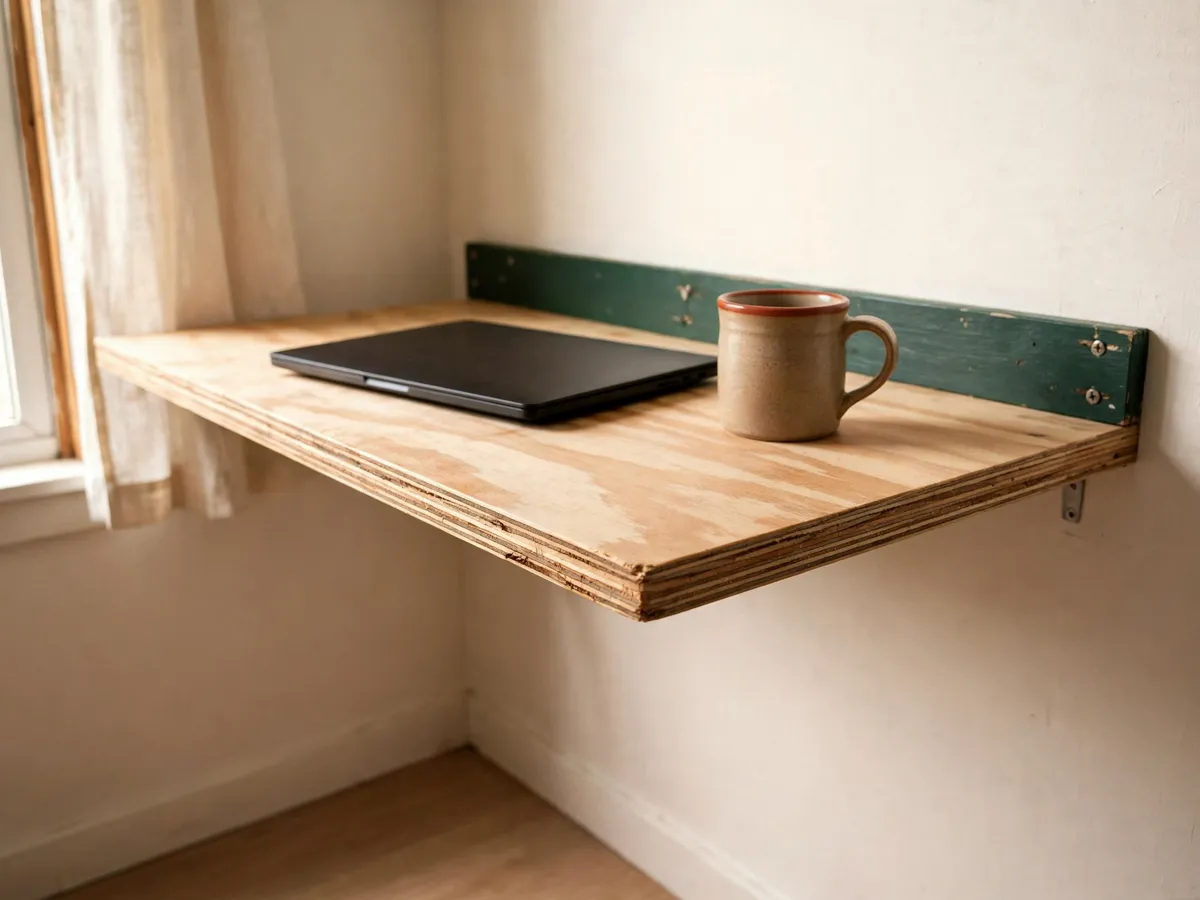
The build at a glance
Three parts, one wall. A 36 by 18 inch desk top in 3/4-inch plywood, at the depth the span math assumes. A 1x2 cleat beveled to about 15 degrees and screwed to the wall across three studs. A pair of short cleat blocks on the underside of the top, set near the ends so the middle stays clear. Hang the top on the cleat and you have a desk with no legs and no frame, at a height you chose rather than one a factory chose. Add one 4-inch butt hinge per block and a removable prop leg, and the same desk folds up flat against the wall in about three seconds.
This suits a first wall build with a real load on it. A shelf holds books; a desk holds a laptop and both forearms, and the load section below puts that in numbers. What matters is a level cleat at the right height, measured up from a floor that is not flat. A nightstand hides that mistake; a floating desk cannot, because there is nothing underneath to blame. One loose screw at the cleat shows in the top within a week.
Weekend-ready: $60–$150, two evenings or one weekend afternoon. The cleat-and-plywood desk lands near $85 with a sanded, sealed top; the bracket route and the fold-up hardware push the same build toward the top of the range.
Cleat or bracket: choosing the mount
Two ways to mount this desk, and they are not interchangeable. The first is a French cleat: a 1x2 board beveled to about 15 degrees, run along the wall, with the mating piece on the top's underside. The second is a pair of steel furniture brackets, each about 10 inches and rated near 50 lb, bolted to the wall and to the board above them.
The cleat wins for a desk, and the reason is spread. A 36-inch run of cleat lands on three studs when the layout starts from the stud marks, so the load enters framing along the whole back edge. Your forearms lean on the front, far from that line, and the top resists because the cleat holds it across its width rather than at two pinpoints. It also lets one person hang the top alone: tilt it into the wall, let it ride down the bevel, done.
The bracket is faster and it point-loads the board. Two brackets catch a stud only where they land, and between them a 3/4-inch top is a bridge over nothing. On a laptop that reads as a slow dip over months; on a lean of both elbows, immediately. The bracket route is the compromise for a wall where a full cleat run will not fit, and it works only when every bolt finds framing or a rated drywall anchor behind it.
Pick by the wall, then by the load. Three studs inside the run and a straight back edge: build the cleat. One stud, or a bowed wall: two brackets, each into a stud or a proper anchor, and accept the narrower margin. The toggle-versus-plastic walkthrough belongs to the floating shelf build, named in the skip list rather than re-taught.
Cost: cleat stock $4–$8; two steel brackets $20–$45. Time: fifteen minutes to decide. Caveat: a bracket rated 50 lb flat against the wall is a different number at the tip of its arm, so read the rating printed for the load position you are using.
Height and knee clearance, before you cut
Set the height first, because the cleat position, the top's width and the knee space all follow from it. For a person about 5 feet 10 inches tall, a comfortable writing surface sits at 29 to 30 inches. The rule of thumb is elbow height: stand at the wall, bend the elbow to a right angle, measure from the floor to the underside of the forearm. That is the finished desk height, and it beats a table of averages, because shoulders differ more than heights do.
The cleat lands lower than the top. Its upper edge sits at the finished height, minus the thickness of the top, minus about 3/8 inch of working clearance. On a 3/4-inch plywood top at a 29-inch surface, that is roughly 27 to 27-1/2 inches off the floor. Mark that line twice, because the cleat is the one part you cannot adjust once a screw is driven.
Measure up from the floor at three points along the run. Left, middle, right. A 1/4-inch difference across 36 inches is invisible to the eye and impossible to ignore once the desk is up: the top sits crooked and a mug creeps forward. Where the floor is out, level the cleat to the high point and shim the low end with a thin offcut, rather than dropping the surface below the elbow line.
Knee clearance is the number people discover too late. You need at least 23 inches of width and 24 inches of height under the top, which is why the cleat blocks sit near the ends instead of running the full width. A continuous block across the middle steals knee height exactly where knees are. Sit on a chair at the wall before you cut anything and check the clearance.
Depth and the chair share the same decision. An 18-inch depth fits a laptop and a notebook with the front edge clear of your knees; go deeper and the top pushes past the seat, so you reach around it. Check the depth against the wall run too: a corner desk needs an inch of side clearance, or the top never seats.
Cost: $0. Time: 15 minutes with a tape, a pencil and a level. Caveat: write the height and the depth on the wall in two places; a single mark gets lost behind the board.
Cut and size the desk top
The target is a 36 by 18 inch top, 3/4 inch thick. Two routes get you there and they cost different things.
Route one, and the one to pick: 3/4-inch plywood. A 2 by 4 foot project panel cut to 36 by 18 lands near $30 to $60 depending on face grade, and it comes back from the lumber counter flat and dimensionally steady. This build takes plywood because the span under a desk top is the whole argument, and a solid sheet gives one honest surface across it.
Route two: two 1x12 pine boards glued edge to edge. A 1x12 is a true 11-1/4 inches, so two give about 22-1/2 inches of width, not 18, and you must rip one board narrower. Pine stock runs about $15 to $25 for both boards. It is cheaper and it looks better under a clear finish, but it moves with the seasons, so the glue joint can open at one end across a winter. If you want the pine look, glue to about 22 inches, rip back to 18, and treat the shorter span as the trade.
| Part | Material | Finished size | Qty |
|---|---|---|---|
| Desk top | 3/4 in plywood | 36 x 18 in | 1 |
| Wall cleat | 1x2, beveled about 15 degrees | 34 in long | 1 |
| Underside blocks | 1x2, matching bevel | 3 1/2 in long | 2 |
| Fold-up hinge | 4 in steel butt hinge | 4 in each | 2 |
| Prop leg | 1x2 offcut | about 20 in long | 1 |
No table saw is required. A circular saw against a clamped straightedge cuts the top to width, and the store will make the 36-inch rip and both crosscuts free from a sheet. Ask for the cut oversize by an eighth and take the last bit off with a sanding block, because a store cut is rough and the top has to meet the wall cleanly.
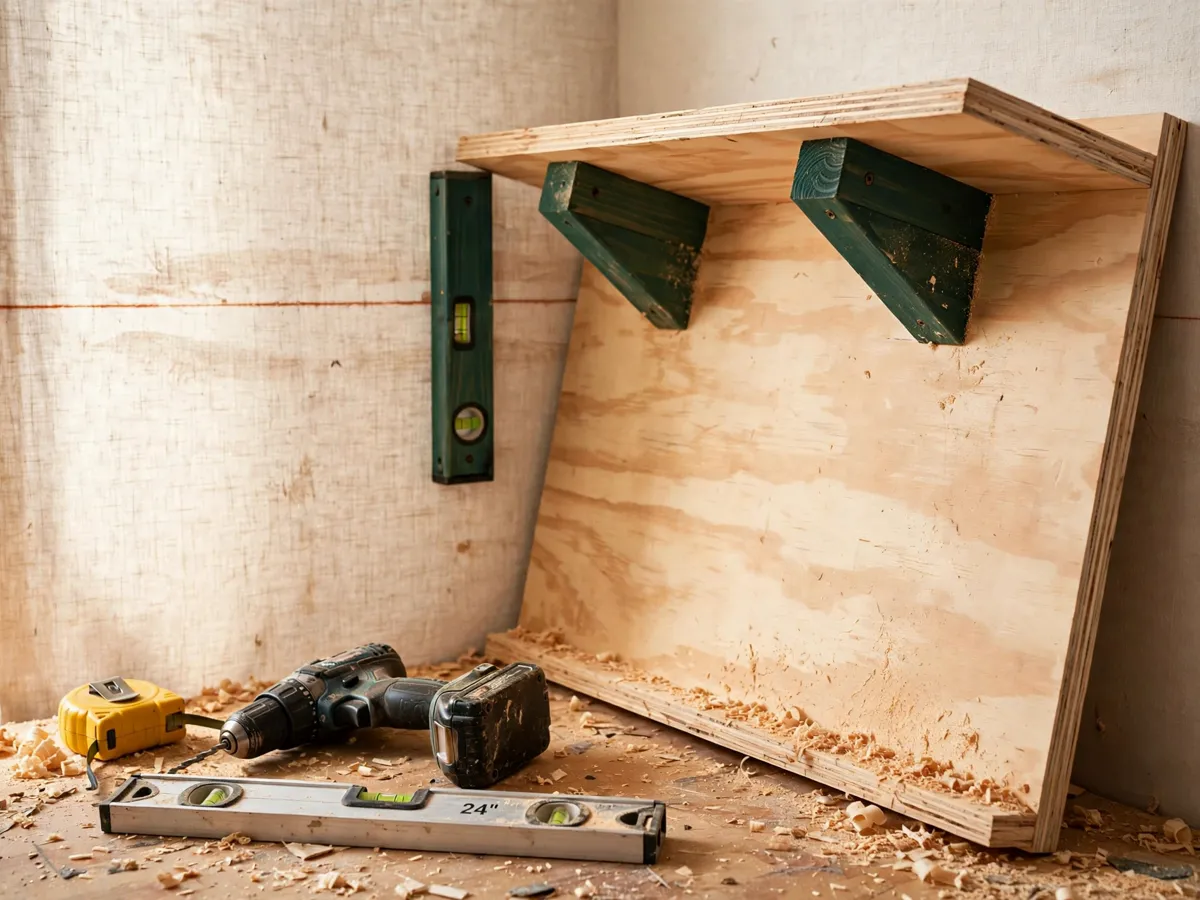
Cost: plywood panel $30–$60, or two 1x12 pine boards $15–$25; one 8-foot 1x2 about $3–$5. Time: 45 minutes at the saw and the sander. Caveat: mark the top's underside with the wall side before you cut, because a plywood panel has a good face and a bad one, and the bad one belongs against the paint.
Mount the cleat level, and tilted back
Find the studs before anything else. Newer walls run framing at 16 inches on center, so a 34-inch cleat placed with care crosses three of them. Locate each with a finder and confirm the mark with a magnet against the drywall screws, then draw a vertical pencil line taller than the cleat. Snap the cleat line across those marks with a level at the height the previous section set.
The tilt separates a desk from a shelf. A shelf can sit dead level. A desk wants its back edge pushed about 1/8 inch closer to the wall than its front, so the top leans back as you type instead of tipping forward. Cut that taper into the wall cleat with a hand plane, or shim it with a thin offcut, and check by laying the top on the cleat and sighting the front edge: it should sit still. A desk that creeps forward every time you rest your wrists is a cleat cut backwards.
Drive the fasteners in the right order. Pilot every hole and countersink it, so each 2 1/2-inch screw sinks into the thin 1x2 without splitting it. Start the middle screw, check level, then seat the two ends, because a cleat pulled out of level by its last fastener has to be re-hung. Three screws into framing carry a 36-inch top with room to spare.
Then the blocks on the top. Screw the two short mating pieces to the underside near the ends, aligned so they drop onto the wall cleat with the taper seated home. Keep them out of the middle: that is the knee space. Countersink those holes too, and sand the front edge with a round-over so the edge that meets your forearms is not a knife.
Cost: screws and a countersink bit about $10. Time: 60 to 90 minutes, and about 20 of those are the level and the taper. Caveat: have a second pair of hands hold the top while the cleat is levelled for real, because the hang is the one step nobody can do alone.
Load and sag: what a desk actually carries
This is the section a shelf page does not need and a desk page cannot skip. A laptop weighs 3 to 5 lb. Both forearms on the front edge add 10 to 15 lb of live load, held there for an hour at a time, in the worst place for a cantilever: as far forward from the cleat as the top's depth allows. The design load for this build is about 25 lb at the front edge, sustained, and every number below is chosen against it.
16 inches of cantilever is the limit for 3/4-inch plywood. An 18-inch top, with its cleat line set about 2 inches in from the back edge, overhangs that line by roughly 16 inches, and that is as far as this thickness reaches honestly. A 20- or 24-inch top on the same cleat needs a mid-span support or a front leg, and that is a different build. Depth breaks a desk, not width.
36 inches between supports is where a 3/4-inch top starts to flex visibly under 25 lb. Two cleat blocks set near the ends land about 30 to 32 inches apart, which keeps the span under that point, and it is why the blocks come in pairs rather than one long rail. Press the middle of a hung top before you trust it: a quarter-inch of movement you can feel is one you will see in the finish line within a year.
What it will not carry. A screen is not this desk's load, and an arm or a stand clamps to a wall or a table with its own rating. That handoff belongs to the small home office ideas page. Nor is this desk a step, a ladder, or a bench to sit on; the cleat is sized for arms and a laptop, and the honest ceiling is the 25-lb figure above. In a garage corner the same top gets treated as a shelf for paint cans, which is a load at the wrong end of the board.
Cost: $0. Time: five minutes of pressing on the hung top. Caveat: no rating applies to a build made at home, so the structure is the proof — three stud hits, a level cleat, a span under 36 inches, and a top that does not move when you lean.
Cables and power, planned before the mount
A floating desk sits tight to the wall, and that is why the cable work happens first. A charger brick is about 1 inch tall. If it lands behind the top, the desk cannot seat on its cleat and hangs 1 inch proud of the wall from then on, with the laptop sliding toward the gap.
Run one channel inside the cleat footprint. A 1-inch adhesive cable channel, or two adhesive clips spaced along the run, mounted below the cleat line, holds the charger and the cable bundle flat in the zone the top will cover. Route the drop to the nearest outlet at the side of the run, outside the desk's width, so nothing crosses behind the board. Then check clearance with the channel in place and the top laid on the cleat.
Leave a service loop and one label. A short slack loop at the outlet end lets you lift the top off the cleat for a repaint. A piece of label tape on the cable, naming what it feeds, saves the next person the tug test. Beyond that this page stops: a routing system and the light rules belong to the small home office page, and a desk that folds up has no business carrying a setup that cannot fold.
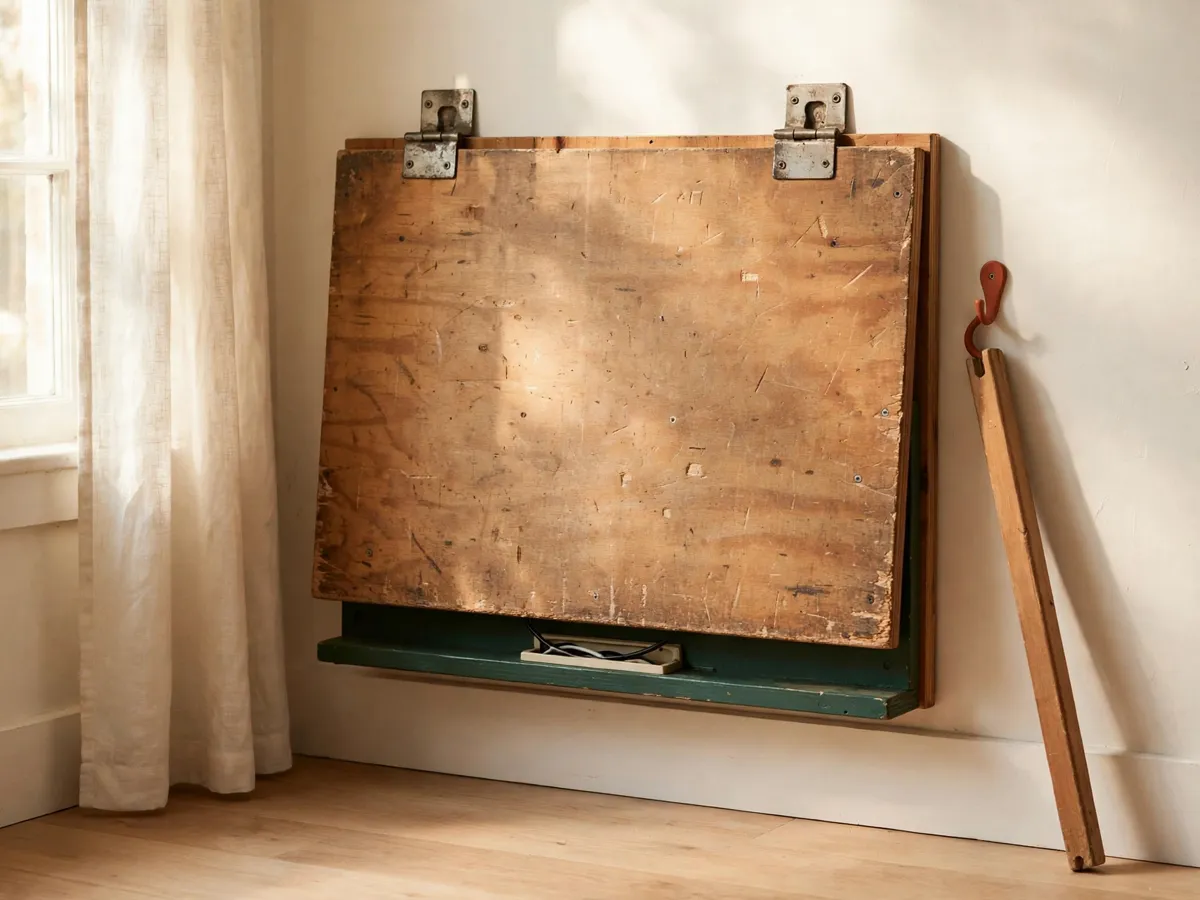
Cost: a cable channel $8–$14, two clips $4, label tape $3. Time: 20 minutes before the cleat goes up. Caveat: an outlet inside the cleat footprint changes the whole layout, so move the desk or move the outlet with an electrician, and do not cut around a box.
The wall above the desk
The 24 inches of wall between the top's back edge and eye level is the most useful square footage this build gets, and the standard answer is a 2 by 2 foot pegboard panel above the desk. It holds headphones on a hook, a pen cup in one small bin, and a spare cable spool on a curved hook, which is everything a desk user reaches for daily, and nothing on the surface.
Keep the panel clear of the desk's fold. If the top swings up on its hinge, the panel's bottom edge has to sit above the arc, a measurement to take with the top hung, not a guess off a plan. Set one low bin on the panel so a reaching hand does not cross the work surface.
The panel build itself — the furring standoff, the hole grid, the hook assortment and the anchor rules for a wall with no stud behind it — is a whole page, and it is the sister to this one. Read the pegboard wall guide for it. This page stops at the clearance.
Cost: a small panel and hooks $25–$45. Time: an afternoon, after the desk is hung. Caveat: hang the desk first, then set the panel height against the fold arc, in that order.
What the desk costs
The ranges below are early-2026 US big-box prices for new stock, rounded, and they assume a drill and a saw are in the house. Each tier is a real version of the same 36 by 18 inch top.
| Tier | What it includes | Total |
|---|---|---|
| Cleat route, sealed top | plywood top, 1x2 cleat and blocks, screws and a finish coat | $45–$85 |
| Bracket route hardware | two 10-inch steel brackets, rated anchor bolts, the same top | $20–$45 |
| Fold-up add | two 4-inch butt hinges, the prop leg, a hook to hold it | $18–$35 |
Tools, if you own none. A drill or driver runs $60–$120, a circular saw $50–$120, a level of at least 24 inches $15–$30, a speed square $10–$15, a countersink bit $8, a sanding block $6, and a finder with a magnet $15–$30. That is $165–$335 once, and every later build in the DIY Home Projects collection reuses all of it.
Time, honestly. Five to seven hours across two evenings, or one weekend afternoon plus an evening for the finish. The cutting is quick; the levelling, the taper and the hang are the hours.
Cost: $60–$150 as tabled, tools excluded. Time: 5–7 hours. Caveat: lumber moves with the season, so treat every range here as a budget line rather than a quote.
What this page skips
- Bracket types and stud finding. Hidden rods, heavy-duty shelf brackets and the finder walkthrough live in the floating shelf cut list; this page only borrows its anchor rules.
- Where a wall-mounted thing belongs. Head-height bands, sight lines and the crowding question are the shelf placement guide's subject. A desk has its own height rule.
- The cleat join taught slowly. The bevel, the mating angle and the dry fit are walked through on a bench in the entryway bench plans. Read it first if a 15-degree cut is new to you.
- How the desk looks. Styling, the chair, and the drop-leaf decor treatments that hide a work surface are the small bedroom desk ideas page. This one ends at the sanded edge, and an office chair is their decision, not the wall's.
- Screens, arms and lighting. Anything that clamps to a surface or hangs on an arm has its own load math, and the small home office page carries it. This build is a board on a cleat, sized for a laptop and a notebook.
Cost: $0 to skip. Time: the ten minutes of boundary-drawing that keeps a weekend honest.
The build checklist, hour by hour
- Evening one, first hour — measure. Take the elbow height off the floor at three points along the wall. Mark the finished surface line at 29 to 30 inches and the cleat line at about 27 to 27-1/2. Locate the studs, confirm with a magnet, and draw three vertical lines.
- Evening one, second hour — order and cut. Have the 36 by 18 top cut at the counter, or rip two 1x12 pine boards to width yourself. Crosscut the 1x2 into the 34-inch cleat and two 3 1/2-inch blocks. Sand every edge to 120 grit.
- Evening two, first hour — cable, then cleat. Stick the cable channel inside the cleat footprint. Bevel or shim the 1/8-inch back tilt into the wall cleat, pilot and countersink, then drive three 2 1/2-inch screws into framing, levelling between the middle screw and the ends.
- Evening two, second hour — blocks and hang. Screw the two underside blocks near the ends with the mating bevel facing out. With a second pair of hands, tilt the top onto the cleat and check the front edge for drift. Confirm knee clearance by sitting down, not by measuring.
- Weekend afternoon — finish, load test, wall above. Seal or paint the top in two thin coats, sanding between. Once it is dry, press 25 lb at the front edge with both hands and watch the span. Add the two 4-inch hinges and the prop leg only after the plain desk passes that test, then hang the panel above the fold arc and set one bin low on it.
Cost: $0 to follow. Time: 5–7 hours, split as above, with the finish coat as the one step that cannot be hurried.
Questions this desk raises
Can I hang a desk without hitting a stud?
You can, but not on a plastic plug. A 25-lb sustained load at the front edge wants the back edge held into framing, so the honest answer is a cleat across three studs. Where framing will not cooperate, use two 10-inch brackets, each on a rated toggle anchor, and keep the top under 30 inches wide.
How thick does the top have to be?
3/4 inch, which is really 23/32 in plywood. A thinner panel cantilevered 16 inches flexes under a laptop alone, and the sag is permanent once the fibers take the set. On the pine route, glue two boards and rip to an 18-inch depth, which measures a true 3/4 inch and behaves like the plywood version.
Will it hold a laptop, a lamp and a notebook?
Yes, inside about 25 lb at the front edge. A laptop is 3 to 5 lb, a small clamp lamp is under 3 lb, and a notebook with one pen bin is nothing. The weight that matters is your arms, and the cleat spread across three studs is what makes that survivable. Set the lamp toward the back edge, near the cleat line.
Does the fold-up version weaken the desk?
It changes the mechanism, so test it before you trust it. One 4-inch steel butt hinge per cleat block, plus a removable prop leg of 1x2 offcut, turns the top into a fold-up that clears the floor. The hinges carry the board's own weight, the leg takes the front edge, and the load path is only as good as the screw holes per leaf. Tighten them after the first week.
Can I hang it high enough to work standing?
Not one board doing both jobs. A counter-height surface sits near 40 inches, and at that height the same 16-inch cantilever flexes far more under a forearm. Pick the height for the chair you actually use, and let the small home office page cover the two-desk arrangement that beats a compromise on a single cleat.