 Plant As Deco
DIY Home Projects
DIY Wall Art: Big Canvas, Wood Panel and Moss Pieces
By Plant As Deco · Updated 22 November 2026
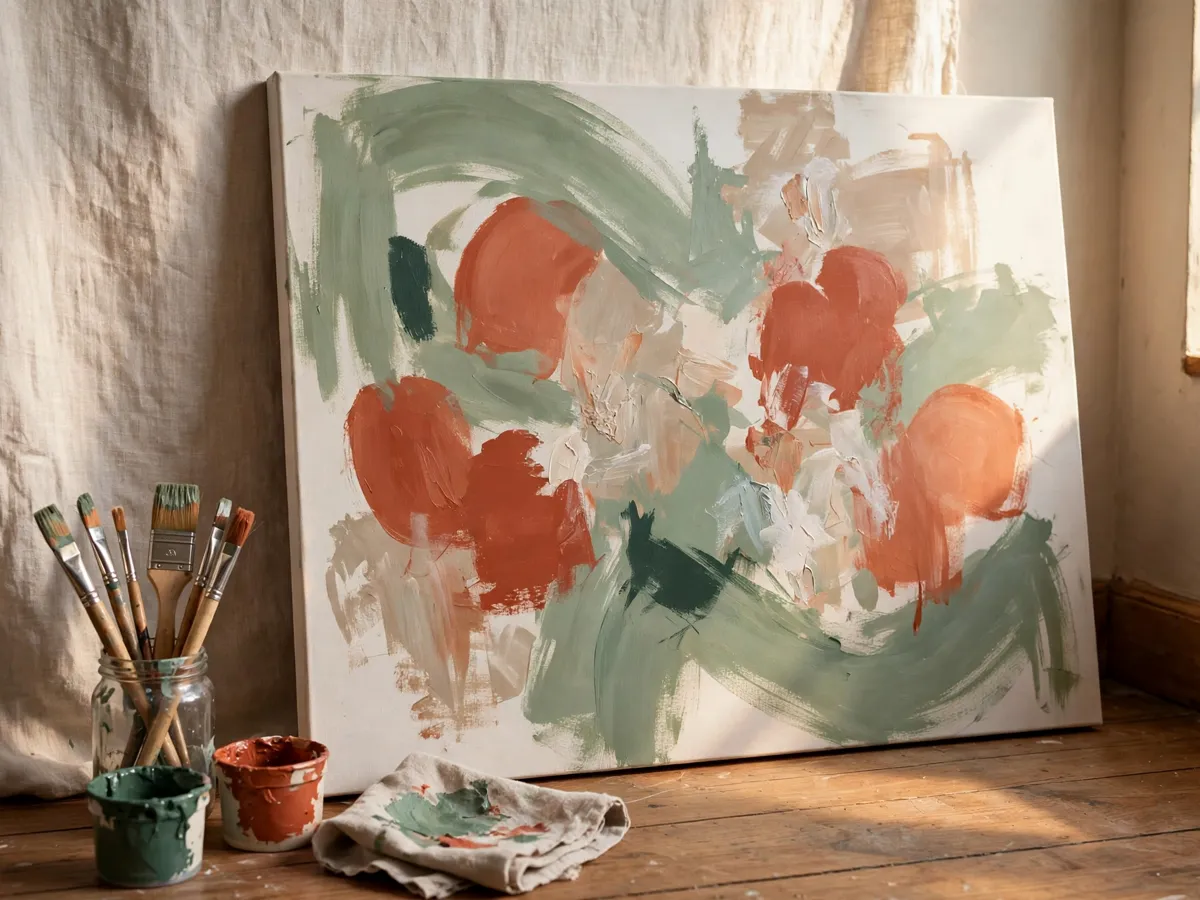
Big wall art is where store prices punish size: a 24x36 canvas runs $60 to $150 and climbs steeply from there. This guide makes large pieces on a table: an abstract canvas from prep to sealer, geometric wood panels, preserved moss, fabric and found wood, with the composition and color rules that keep a piece looking intentional.
Weekend-ready: $30–$68 per piece, one afternoon. Most pieces hang from one nail or a pair of adhesive strips.
1. Why big art costs so much, and when a $30 print wins
A 24x36 canvas at a big-box home store runs $60 to $150, and framed wall coverage of the same size passes $200. The materials are a stretched canvas, a few tubes of paint and a brush, roughly a third of the ticket; the price carries bulky shipping, showroom floor space and slow-moving stock margin.
DIY wins hardest at exactly the sizes stores punish: 24x36 and up, any narrow or tall wall a standard print does not fit, and any room whose palette no printed image matches. A painted canvas takes the exact sofa color at no extra cost.
A $30 print wins instead when the look wanted is photographic or finely detailed, because realistic painting is a years-long skill one weekend does not teach, or when a fitting image exists in a standard size.
Cost: $0 to compare, a phone in the aisle. Time: 20 minutes. One caveat: DIY pays at 24x36 and up, and buying stays cheaper under 16x20, where open-stock prints and frames are inexpensive.
2. The intentional test: what separates art from the craft-fair look
Handmade wall art fails one way in a finished room: it reads crafty. Brush skill rarely decides it. Four decisions that cost nothing do.
- Composition. Divide the piece into a rule-of-thirds grid, two lines by two lines, and let the main mark land near an intersection, not dead center. Centered motifs read as stenciling.
- Odd numbers. Three or five supporting shapes, never a pair. Even counts split attention evenly and read as a border pattern.
- One focal gesture. A single biggest mark the eye lands on first. Everything else supports it or stays out of its way.
- Negative space. A third of the surface left quiet. A composition filled edge to edge has no resting spot, and no resting spot is the craft-fair signature.
The craft-fair signature, named honestly: five or more colors fighting, a motif repeated evenly to the edges, glitter or ribbon. Intentional pieces read as marks on a ground with room around them.
The look-around-your-room step comes before paint is bought: photograph the wall straight on, pull the three dominant colors already there, and shop with that photo. Section 9 carries the full method.
Cost: $0. Time: 15 minutes with a phone. One caveat: the photo step catches color clashes that a paint chip under store lights never shows.
3. Supplies by medium, with honest costs
The five mediums below climb a ladder of effort, and all work at a kitchen table over a drop cloth.
- Canvas and acrylics. A 24x36 stretched canvas, $15 to $28. A set of 12 acrylic tubes, $10 to $25. Three brushes (a 1 inch flat, a 1/2 inch flat, a small round), $5 to $12. Mixing cup and palette come free from the recycling. Total: $30 to $68.
- Wood panel. A birch plywood panel cut at the hardware counter, or pine from the lumber aisle, $10 to $20 at 18x24. Painter's tape, $4. Sample pots of house paint or the acrylics already owned. 120 and 220 grit sandpaper, $5. Total: $25 to $45.
- Preserved moss. Boxes of preserved sheet, clump and reindeer moss, $12 to $25 each, two to three for a 12x12 panel. Plywood backing, $5 to $12. Hot glue gun with sticks or panel adhesive, $6 to $10. Total: $35 to $85.
- Fabric. Thrifted cloth, a linen throw or a canvas drop cloth, $5 to $18. A wooden dowel, $3 to $6. Optional fabric paint, $8. Total: $10 to $30.
- Found wood. Branches and offcuts from earlier builds, $0. Hanging wire or adhesive hooks, $5 to $12. Total: $0 to $15.
Buy the canvas in person: a warped stretcher bar only shows after paint as a wavy highlight nothing later flattens. Skip the easel and the fine brush set, since large marks want large cheap brushes.
Cost: $30–$68 for the canvas route, less for the others. Time: 60 minutes of shopping. One caveat: acrylic sets under $10 skimp on pigment and need three coats where a mid-price set needs one.
4. The primary walkthrough: a 24x36 abstract canvas, step by step
This is the piece the big-wall search wants: a 24x36 canvas with a quiet background, one strong focal gesture and two supporting bands. The build fits one afternoon with drying time between layers.
- Prep the canvas. Flat on a drop cloth, brush one light coat of gesso ($8 to $12) or thinned background color, which seals the weave so later layers sit on top instead of soaking in. Dry: 30 minutes.
- Choose the palette. The three room colors from the section 2 photo, each mixed with white to a muted value.
- Lay the background layer. Block in the quiet field with the lightest color, widest brush or a sponge, strokes in one direction. Texture reads as depth. Dry: 45 to 60 minutes.
- Place the focal gesture. On the imagined thirds grid, choose the intersection that catches the eye. With the 1 inch brush and the strongest color, make one sweep of three or four connected strokes across that zone, at least half the canvas width. Commit, since overworking a gesture into a blob is the most common failure here.
- Add the secondary shapes. Two or three bands or arcs in the supporting color, smaller than the gesture and echoing its angle. Stop at an odd count and leave a third of the canvas quiet. Stand ten feet back before adding more.
- Respect the dry time between layers. Touch the thickest stroke after 45 minutes: cool means ready, tacky means wait. Fresh color dragged through a tacky layer muddies both.
- Sign and seal. A small mark in one corner, pencil first then acrylic over it. Two thin coats of matte varnish ($8 to $12) protect against dust and sun, one hour between coats.
Cost: $30–$68 all in, or $15 to $28 as a repaint with paint on hand. Time: 2 to 3 hours of work, 2 hours of drying between layers. One caveat: the third-coat temptation ruins more pieces than any missed technique; one gesture and two bands is a finished composition.
5. Wood panel pieces: geometry with painter's tape
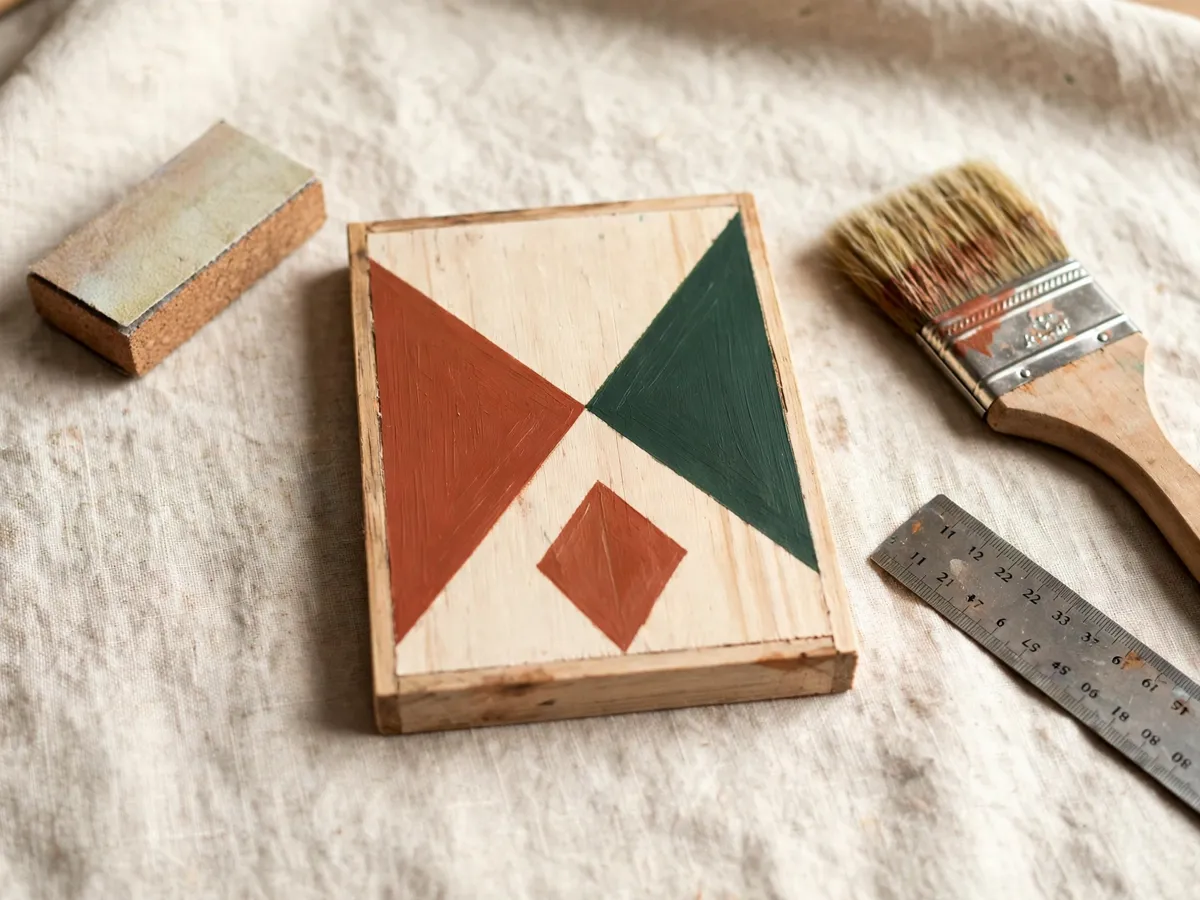
A wood panel is the opposite of a canvas: a hard, flat ground where clean lines and crisp tape edges do the composing. The surface does not flex, which makes panel the right ground for striped, arched and blocked designs. Plywood needs sealing, or the paint sits differently on each patch of grain.
- Sand the panel to 120, then to 220, dusting between grits. One coat of gesso or primer.
- Draw the design lightly in pencil: offset stripes, half circles that echo each other, or blocks in the three-color palette.
- Tape the edges, pressing the tape edge with a fingernail so no paint bleeds under.
- Two thin coats per color, 30 minutes apart. Peel the tape while the final coat is still slightly tacky, which leaves the sharpest line.
- Sand the edges after drying: one 220 pass around the border softens the factory edge and takes down fibers the paint raised. Face glossy, edges matte, which reads as a deliberate frame.
Two hanger screws and wire between them make a heavy panel hangable from one nail. Offcuts from a shelf build become small panels, the same way the one-board crate plan gets a full project from a single board.
Cost: $25–$45 per panel. Time: 2 hours of work, one hour of drying. One caveat: press every tape edge with a fingernail, since a dry-brushed edge bleeds under tape that is only laid on.
6. Preserved moss panels that need no water
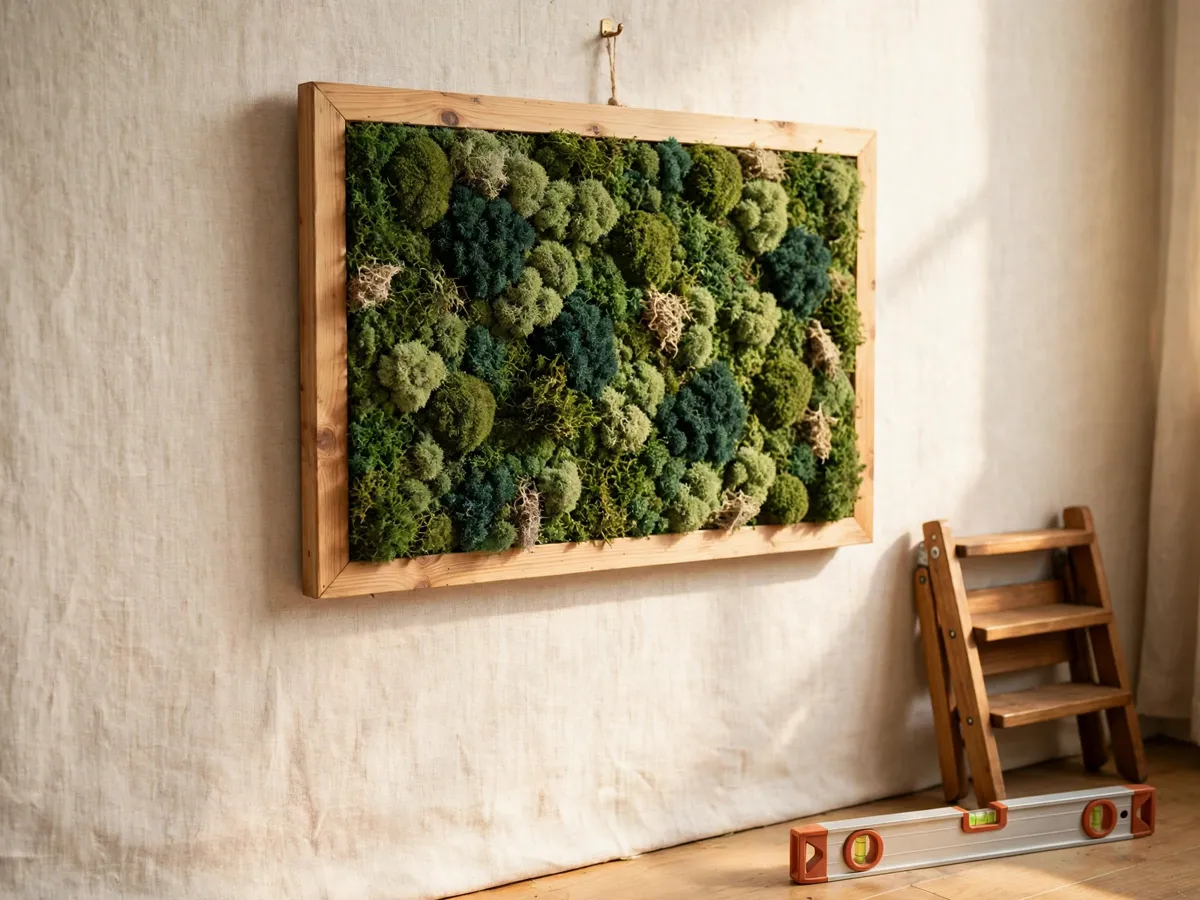
A moss panel is the medium with a plant look and none of the plant care. Preserved moss is real moss dried and treated with glycerin and dye, which holds texture and color and means it never needs water, soil or light. Live moss walls need irrigation and a waterproof back, and preserved moss is the version that belongs in a rental.
- Cut plywood to size, 12x12 is a good first panel, and paint or seal the border if it will show.
- Sketch the composition first. Moss goes on in three sizes for real variation: sheet moss as the ground, clumps as the mid layer, reindeer moss as the accent.
- Dot the hot glue in a grid, one square inch at a time, pressing each piece in while the glue is hot. Work bottom up so the piece above overlaps the one below, and keep edges natural, shaped by moss form rather than cut straight.
- Leave negative space, since solid moss reads as upholstery. The strongest panels keep a bare plywood zone, often with one painted arc under the moss.
- Mist lightly with water from a foot away to fluff the moss, then dry fully before hanging.
Placement, honestly: a north wall or a dim hallway, and never in a bathroom with a shower. Preserved moss is dyed and sealed against fading, but humidity softens the glycerin over months and the pieces sag.
Cost: $35–$85 per panel. Time: 90 minutes of glue work. One caveat: buy two boxes of preserved moss, since the low end of the range under-fills a 12x12 panel, leaving bare plywood gaps.
7. Fabric and textile wall art, the no-sew path
Textiles are the renter's fastest medium: a vintage cloth, a beautiful throw, a painted drop cloth, hung from a dowel like a scroll. The no-sew path is fabric glue and a folded rod pocket, and the only real skill is choosing cloth that already looks intentional: muted palette, simple pattern, good drape.
- Pick the cloth. Vintage kanthas and mudcloth carry the look ready-made, or paint one stripe or arc onto a plain canvas drop cloth with fabric paint.
- Cut a dowel two inches wider than the cloth, sand the ends, wax them or leave raw.
- Fold the top edge over the dowel to form the pocket, run a thin line of fabric glue along the fold, clamp until dry. No stitching anywhere.
- Tie a leather cord or jute twine to each dowel end and hang the loop from one nail. The dowel holds the top edge rigid, so the cloth hangs straight.
- Iron the cloth first, since every fold shows under light.
More fabric projects that fill walls and shelves the same way live in the fabric crafts for beginners guide, and the no-sew pillow cover uses the same glue-and-fold method at pillow scale.
Cost: $10–$30 per piece. Time: 45 minutes including glue drying. One caveat: thin polyester frays at the sides, so hem those edges with fabric glue or choose a woven cloth that holds a cut edge.
8. Found-object art: branches and offcuts, without the kitsch
The cheapest medium here is wood that already exists: a branch with a strong curve, shelf-build offcuts, paint-stir sticks saved from other projects. The line between sculpture and yard debris is the same intentional test, applied harder.
- Dry found branches a week indoors first, since green wood shrinks and loosens anything glued or wrapped to it.
- Choose one focal form, one branch or one offcut arrangement, and let the wall around it be the negative space.
- Mount on a plywood backboard, or hang a painted branch directly on two adhesive hooks with wire.
- Cut reclaimed offcuts to a short sequence of 2, 3 and 5 lengths, arranged by height, for a rhythm that repeats without becoming a fence.
The driftwood-kitsch test: shell chains, starfish, jute nets, or a branch hung with no purpose. Wood stays on the intentional side with one clear form, a sanded edge where a hand might touch, and nothing hanging from it. Offcuts painted in the room palette and arranged as a clean grid read as sculpture; offcuts left raw with a shell tied on read as a souvenir.
Cost: $0–$15 per piece. Time: 60 to 90 minutes. One caveat: branches carry bugs indoors, so bake them at 175 degrees for 30 minutes or quarantine them a month first.
9. Color decisions: pull the palette from the room
Art that fights the room fails before it is hung. Photograph the wall straight on, pick the three dominant colors already in the room (the sofa or bed, the rug or floor, the largest wood or plant tone), and build the piece from those three plus a neutral ground. A piece that carries the room's own colors looks commissioned.
The three-color cap is the discipline that prevents the craft-fair look. The ground counts as one, the focal gesture the second, the supporting shapes the third. Past four colors the piece reads as a sampler.
Test before painting: tape paper swatches, painted or colored, to the wall and live with them a day at different times, morning, afternoon, lamp light at night. Wall color changes paint color dramatically, and the swatch test catches clashes that only appear on the actual wall.
Cost: $0. Time: 15 minutes to choose, one day of swatches. One caveat: north-facing walls pull warm colors cooler, so a swatch that looked terracotta at the store window can read brown at home.
10. Sizing and hanging, including renter-friendly hardware
Size rules, quick and honest. Art above a sofa or bed takes about two thirds of the furniture's width, bottom edge 8 to 10 inches above it. A bare wall takes a piece about half the wall width. A pair hangs with a 2 to 3 inch gap, tight enough to read as one unit. Below 16x20 a piece belongs in a grid, not alone.
The centerline rule: the middle of the piece lands at eye level, 57 to 60 inches from the floor, and the math is subtractive. Measure 57 inches up, subtract half the piece height, and that mark is where the top edge belongs. An 18-inch-tall panel: 57 minus 9, so 48 inches to the top.
Hardware by weight, honestly. A canvas under 24x30 takes one nail. A 24x36 canvas takes a D-ring pair or adhesive hooks rated above its weight, since most large canvases sit around 3 to 5 pounds. A wood panel needs two hanger screws and wire. For a lease that forbids holes, adhesive strips rated for the piece weight hold a canvas or light panel on painted drywall and release at move-out.
Cost: $0–$12 for hardware. Time: 15 minutes to mark and hang. One caveat: two adhesive hooks are only renter-friendly on smooth painted drywall, since texture and fresh paint are where strips release early.
11. Variations by skill, from first canvas to combined pieces
The medium ladder climbs by skill, and each rung reuses the composition rules from section 2.
- One-color canvas. The honest first piece: a single muted color, one wide focal gesture, nothing else. Every composition rule is practiced, nothing can clash. Cost: $20 to $30.
- Tape geometry. The second piece: painter's tape stripes or half circles, two colors, following section 5. Crisp edges carry the piece, so no brush control is needed. Cost: $25 to $40.
- Layered plaster texture. The third: joint compound or modeling paste troweled over the canvas, painted in one color that catches the texture. Dimension does the composing, and a light wash of a second color settles in the low spots. Cost: $25 to $45.
- Moss plus wood. A wood panel with one preserved moss band across the lower third. Cost: $45 to $75.
- Seasonal piece. A small canvas or panel per season in muted tones, hung in a rotating pair so the wall changes with four cheap pieces instead of one expensive one. Cost: $15 to $30 each.
Cost: $15–$75 per variation. Time: 60 to 120 minutes each. One caveat: stay inside the three-color cap in every variation, since extra colors are what pull even skilled pieces back toward craft-fair.
12. Common failure modes and their fixes
The five that show up on first pieces
- The craft-fair look. Cause: more than three colors, or a motif repeated evenly with no negative space. Fix: repaint the ground quiet and keep only the focal gesture and one supporting band. Prevention: the three-color cap and the thirds grid, decided before the first stroke.
- Colors that fight the room. Cause: a palette chosen at the store instead of from the room photo. Fix: a toning wash of the ground color over the whole piece. Prevention: the swatch test in section 9.
- Canvas warping from wet paint. Cause: a very wet background layer soaking an unsized weave. Fix: weights rarely restore it, so the honest fix is a new canvas. Prevention: gesso first and thin layers.
- Moss shedding. Cause: moss glued at the tips only. Fix: re-glue sagging areas and mist lightly. Prevention: press each piece flat into a full glue dot. Some first-month shedding is normal.
- Weak hanging hardware. Cause: an adhesive strip near its weight limit, or sawtooth nails on heavy panels. Fix: switch to a D-ring pair with wire, or strips rated above the piece's weight. Prevention: the weight-based hardware table in section 10.
Cost: $0–$15 for a repaint or hardware swap. Time: 10 minutes for hardware, 45 minutes for a repaint. One caveat: canvas warp is the only one that cannot be fixed after paint dries, which is why gesso first is the step worth keeping.
13. Cost and time, honestly, per medium
The headline range, $30 to $68 for the 24x36 canvas route, assumes the tools are in the house and the canvas is store-bought, and section 3 carries the line-by-line breakdown.
- Canvas and acrylics: $30 to $68, 2 to 3 hours of work plus 2 hours of drying.
- Wood panel: $25 to $45, 2 hours plus drying.
- Preserved moss: $35 to $85, about 90 minutes of glue work.
- Fabric: $10 to $30, 45 minutes.
- Found wood: $0 to $15, 60 to 90 minutes plus a week of drying green wood indoors.
The second piece of any medium takes roughly two thirds of the first, since setup and the color decisions are already made. A gallery wall of five small panels shares one tape-and-paint session and fits a single afternoon.
Cost: $0–$85 across mediums. Time: 45 minutes to 3 hours per piece. One caveat: the moss range swings widest, since filling a panel properly takes two to three boxes and buying one underfills it.
14. Five questions that come up on every piece
What is the easiest DIY wall art for a beginner?
A one-color abstract canvas: a muted color pulled from the room, one wide focal gesture near a thirds-grid intersection, a third of the canvas left quiet. Nothing can clash. Cost: $20 to $30.
How do I make my DIY art look intentional instead of crafty?
Four decisions: place the focal mark near a thirds intersection rather than centering it, keep supporting shapes to an odd count, leave a third of the surface as negative space, and cap the palette at three colors.
Does a moss wall art piece need water or light?
No. Preserved moss is real moss treated with glycerin and dye, so it needs no water, soil or light. Keep it out of humid bathrooms, since humidity softens the treatment over months.
How big should DIY wall art be for my wall?
Above a sofa or bed, two thirds of the furniture width with the bottom edge 8 to 10 inches above it. On a bare wall, about half the wall width. Hang the centerline at 57 to 60 inches from the floor.
Can I hang heavy DIY wall art without drilling?
Yes, within weight limits. Adhesive strip pairs rated above the piece's weight hold a large canvas or light wood panel on smooth painted drywall and release at move-out when pulled slowly straight down. Textured walls and fresh paint are where they fail.
Save these on Pinterest
Pin the medium ladder, the canvas walkthrough or the failure-mode list, and come back on a rainy Sunday with the room photo already taken. More builds that fill a wall and fit a table live in the full DIY projects collection.