 Plant As Deco
Gardening & Planting Tips
Drip Irrigation for Raised Beds: Layout, Timer and Parts
By Plant As Deco · Updated 22 November 2026
A raised bed dries out faster than any other part of the garden, and a drip line is the cheapest fix that does not depend on you being home. This guide walks through one bed, four feet by eight: the parts and what they cost, the layout arithmetic, emitter spacing by soil type, the timer schedule, and the four places a drip system actually leaks. It is a setup guide, not a plumbing project - everything screws onto a faucet and comes off in the fall.
Weekend-ready: $35–$80 for one 4x8 bed, one afternoon. Set it up once, then spend the season checking instead of hauling.
1. Why drip on a raised bed
A raised bed has two watering problems, and both come from standing above the ground. First, the sides are open to air on all four faces, so the soil loses moisture faster than a garden bed at grade - on a hot week, a bed that held moisture on Monday is dusty by Wednesday. Second, the usual alternatives work against it. Watering overhead with a sprinkler wets the leaves, and wet leaves overnight are how blight and mildew get a foothold on tomatoes and squash. Hand watering with a hose works, but it is only as consistent as your week: five minutes on Tuesday, skipped Friday, a long soak Sunday, and the plants ride that rollercoaster the whole season.
Drip fixes the delivery problem. Water goes to the soil at the root zone, slowly enough that it soaks in instead of running off, and the leaves stay dry. A battery timer makes the delivery consistent, which is the part plants actually respond to. Vegetables in raised beds grow best with steady moisture, and the failure mode of most home gardens is a swing between swampy and bone dry.
Here is the honest version of the money argument, no spreadsheet promises: in a hot summer a 4x8 vegetable bed wants roughly an inch of water a week, and hauling that by hand takes four or five visits a week when the heat peaks. A drip setup that runs itself saves those visits, and saves the plants that die of thirst the week you travel. That saved trip time, plus not re-buying seedlings you lost to a missed week, is how a $40-$60 kit pays for itself in one summer. Drip does not use zero water, and the timer does not remove you from the job - it moves your job from carrying water to a weekly check, which takes about two minutes and is laid out in section 6.
Cost: $0 to decide. Time: ten minutes to read the layout section before buying anything. Caveat: the payback math only holds if you actually grow through the summer.
2. The parts you actually need
A drip kit for one bed is a small pile, and every part has one job. Nothing here is specialty plumbing; it is all push-fit and hand tight. Prices are the typical big-box or online range for generic parts - a brand-name kit can run higher for the same contents.
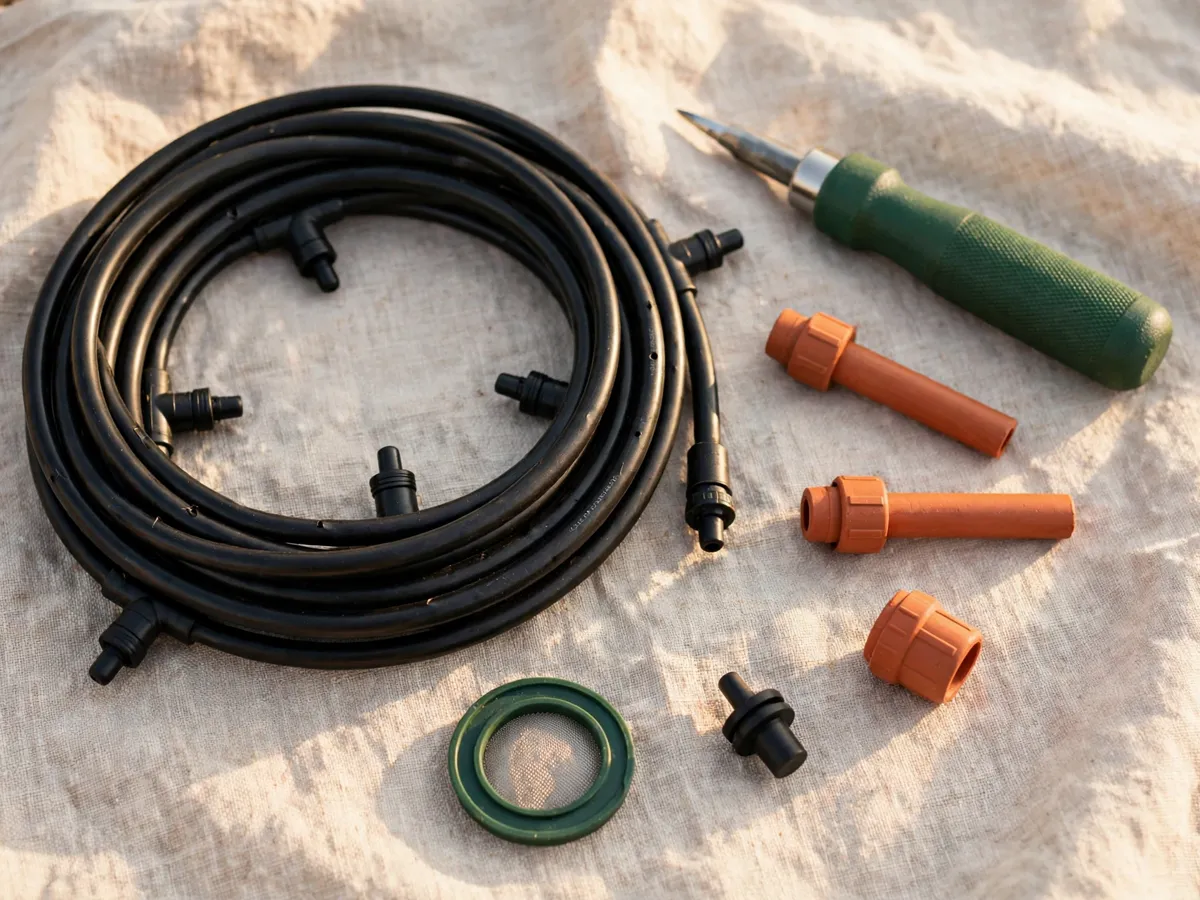
- Emitter tubing (quarter-inch). Flexible black tubing with emitters pre-installed at fixed spacing - this is the line that runs down your planting rows. $8-$15 for a 50 ft roll.
- Main line tubing (half-inch). The supply line that carries water from the faucet to the bed without losing pressure. A short length, often included in kits; $5-$10 standalone.
- Barbed fittings. Tees, elbows and couplers that push into the tubing and hold by friction. Four to six tees and a couple of elbows for one bed; a small variety pack runs $6-$10.
- Faucet adapter. Screws onto your hose bib and gives the half-inch line a start. Usually included with the timer or the kit; $3-$5 alone.
- Pressure regulator. A small inline disc that drops household pressure (often 40-80 psi at the spigot) to the 15-25 psi drip components are built for. Skip it and the barbed fittings pop off - see section 8. $3-$7.
- Filter washer. A small screen that sits in the adapter and keeps grit out of the emitters. Often a $2 add-on, and the part that decides whether your emitters clog monthly or never.
- Battery timer. A single-dial or digital unit that screws onto the faucet and opens on schedule. $15-$30 for a basic single-outlet model. This is the one part worth not buying the cheapest of.
- End caps and goof plugs. End caps close the far end of each run; goof plugs seal emitter holes you decide not to use. A couple of dollars in a fittings pack.
A pre-boxed kit aimed at raised beds bundles the first seven items and typically prices at $30-$50. A kit or buying parts one by one rarely changes the total much; the kit saves three trips to the fittings aisle. What matters is that the kit includes the regulator and filter - some skip them, and they are the two parts you cannot run without.
Cost: $35-$80 for one bed, parts on this list. Time: a 20-minute parts run if the kit box is complete. Caveat: add a spare pack of barbed tees to the cart; you will want one the day a fitting cracks.
3. Layout for a 4x8 bed: the arithmetic
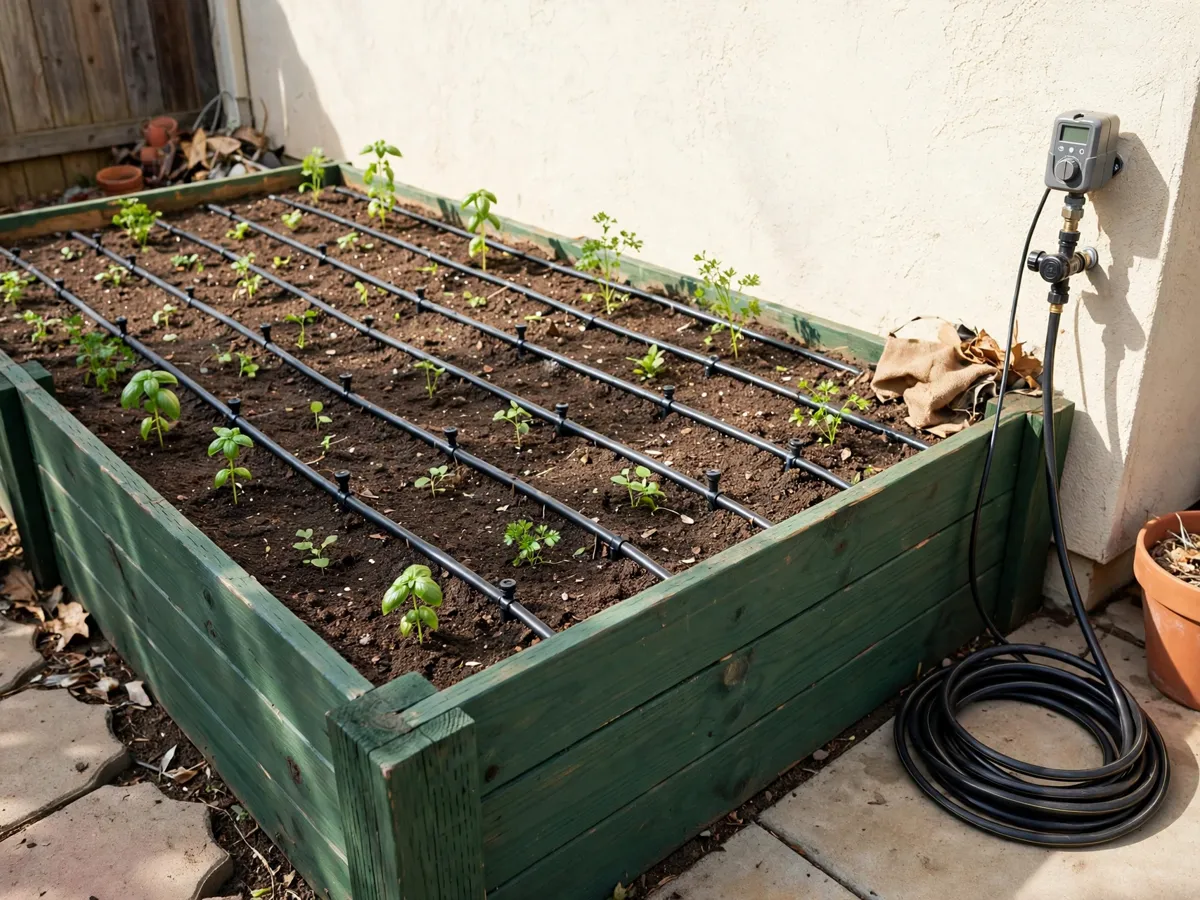
The standard layout is parallel runs of quarter-inch emitter tubing running the length of the bed, fed from a half-inch main line across the short end. Four runs, twelve inches apart, cover a 4 ft wide bed evenly: two runs near the long edges, two through the middle. Water from an emitter spreads sideways in the soil roughly as far as the emitter spacing, so twelve-inch spacing on twelve-inch centers is the dependable default.
Now the footage, because this is where kit boxes either cover you or leave you one run short. Each run crosses the 8 ft length, so one run is 8 ft. Four runs is 4 x 8 = 32 ft of emitter tubing. Add the main line from the faucet to the bed - call it 2 to 4 ft for a bed sitting near the tap - and the whole system needs roughly 34 to 36 ft of tubing. A 50 ft kit covers one 4x8 bed with about 15 ft of margin, and that margin is not waste: it absorbs the detour around a corner post, the stub at the far end you trim off, and the piece you ruin learning how barbed fittings push in. If your faucet sits more than about 15 ft from the bed, a 50 ft kit no longer covers it; buy the 100 ft kit or a separate half-inch extension and the math still works the same way.
Two layout notes before you cut anything. Runs that cross a planting path get stepped with an elbow rather than stretched, because tension on a barbed joint is what pulls it apart. And leave every run an inch or two slack in a gentle U - tubing that shrinks in cold weather pulls fittings straight out, and slack is the free fix.
Cost: included in the $35-$80 kit. Time: 20 minutes to lay runs and tape them down before cutting anything. Caveat: measure faucet-to-bed distance before ordering; it is the one number that changes the kit size.
4. Emitter spacing: 6, 9 or 12 inches
Emitter tubing comes with the drip points fixed at 6, 9 or 12 inches, and the right choice depends on your soil and how densely you plant. The emitter wets a bulb of soil around itself, and the bulbs need to overlap for the whole bed to hold even moisture.
- 12 inches is the default for most raised bed rows: tomatoes, peppers, bush beans, anything planted a foot apart. In loam that holds moisture, the bulb spreads far enough that 12 inch spacing leaves no dry stripes.
- 9 inches suits fast-draining mixes - the composty, fluffy blends a fresh raised bed often starts with - and moderately tight planting like lettuce rows or carrots.
- 6 inches is for intensive spacing, where you plant 4 to 6 inches apart to shade the soil and push yields in a small bed. Close planting drinks from a narrow band of soil, so the emitters have to be just as close.
Sandy soil changes the picture on its own: water in sand drains almost straight down and barely sideways, so the wet bulb is narrow. On sandy beds use 6 inch emitter spacing and accept that you are watering more often for shorter periods - the close spacing is how the bulbs finally link up. Clay and loam do the opposite; the bulb spreads wide, so 12 inches holds. If your bed mix sits somewhere in the middle (most bagged raised bed mixes do), the raised bed soil mixture guide explains what your fill is actually made of, and the 9 inch tubing is the safe middle buy for it.
One practical note on runoff: closer spacing does not mean more water overall, because you shorten the run time to deliver the same total. A bed on 6 inch spacing runs a shorter cycle than the same bed on 12 inch spacing, and the two deliver the same gallons. Section 7 shows how to measure that.
Cost: $0 - spacing is a buying decision, not a part. Time: five minutes to match the roll to your soil. Caveat: buy the spacing your soil needs, not the one on sale.
5. Assembly, in order
Assembly is push-fit work with hand pressure only, and the order of the faucet stack matters because the filter only works when water reaches it clean and at drip pressure.
- Screw the faucet adapter onto the hose bib by hand. No thread tape needed on these small seals; if it weeps at the thread later, a quarter turn tighter is the fix.
- Press the timer onto the adapter, then the pressure regulator below it, then the filter washer into the regulator's outlet side. Stack order from the faucet: adapter, timer, regulator, filter. The regulator protects everything downstream, and the filter last-in-line means grit never passes a screen it could score.
- Run the half-inch main line from that stack along the ground to the short end of the bed. Keep the run gentle - no kinks where it bends around a corner post; an elbow fitting beats a sharp bend.
- Punch the run holes and insert barbed tees where each of the four runs starts. Standard kits include a small punch; push the tee in with a twist rather than straight force, which is how fittings crack.
- Lay the four emitter runs 12 inches apart down the 8 ft length, push each onto its tee, and cap the far end of each run with an end cap (or fold the tubing back on itself and slide a short sleeve over the fold - the free version of the same seal).
- Flush before the first run. Open the far end caps, turn the water on without the timer schedule, and let it push air and sawdust out for a minute or two. This one step clears the punch debris that would otherwise sit in your emitters, and it is the step most skipped.
- Cap, program the timer for a short test cycle, and walk the bed while it runs. Every emitter dribbling evenly, no fitting spitting at a joint, and you are done.
Total build time on a first attempt is about an hour, most of it spent getting runs to lie flat and figuring out that the emitters face down. Secure the runs with garden staples or short sticks so a hose snag does not drag a fitting apart.
Cost: $0 beyond parts. Time: about an hour for one bed, first attempt. Caveat: do the flush with the end caps open or the debris stays in the runs.
6. The timer schedule, honestly
A battery timer turns drip from a chore into a check, and it is worth being precise about what it can and cannot do. It cannot read your soil. It applies the schedule you set, rain or heat wave, until you change it. The honest promise is consistency: the bed gets watered every day at the same time whether you are home, tired, or on vacation. That consistency is what keeps vegetables from the stress-swing that cracks tomatoes and bolts lettuce.
A working starting point for a mulched raised bed in average summer heat: run one long cycle rather than several short ones, because a deep soak pushes roots down where moisture lasts. For the four-run 4x8 layout in this guide, 20 to 30 minutes once a day is the usual neighborhood in spring, stepping to 30 to 45 minutes in peak heat - long enough for the wet bulbs to overlap and soak below the root zone. Clay soils want that split into two shorter cycles an hour apart so the water soaks in instead of standing; sandy soils want shorter cycles, more often, because their moisture window is brief. Section 7 replaces guesswork with measurement within a week.
Water early morning, ideally finishing by mid-morning. An evening schedule leaves soil damp through the night, which is slug weather and mildew weather; a midday schedule loses a chunk of the water to evaporation before it soaks in. Early morning gives the bed a full moisture reserve the plants can draw on through the hot afternoon, with dry leaves and dry soil surface by evening.
Now the discipline part. These timers run on batteries, and they fail the boring way: the battery dies mid-July, the screen goes blank, and the bed silently stops getting water while you assume the system is handling it. Check the timer weekly - glance at the screen, confirm the next-run countdown is live, and change batteries at the start of the season rather than trusting the ones in the drawer. Two minutes a week is the whole habit, and it is the difference between a system that runs itself and one that quietly quits. When heat waves or storms roll through, walk the bed and adjust by hand: the timer has no weather sense, so you are the weather service.
Winter rule, and it is non-negotiable wherever the faucet can freeze: before the first hard freeze, unscrew the timer and regulator from the faucet, open the end caps, lift the low point of the main line, and let every line drain. Water left inside a timer cracks its housing; water left in tubing splits it along its length. Coil the dry tubing, store the timer indoors, and next spring's setup takes fifteen minutes instead of a parts run.
Cost: $15-$30 for the timer, plus a set of batteries per season. Time: 15 minutes to program, two minutes a week to check. Caveat: a timer is consistency, not a gardener; the weekly look is still yours.
7. Run-time tuning: measure, then adjust
Every published schedule is a starting point, because output per emitter varies with your pressure and your tubing. Tuning takes one week and two cheap tests, and afterwards the schedule is yours, not the box's.
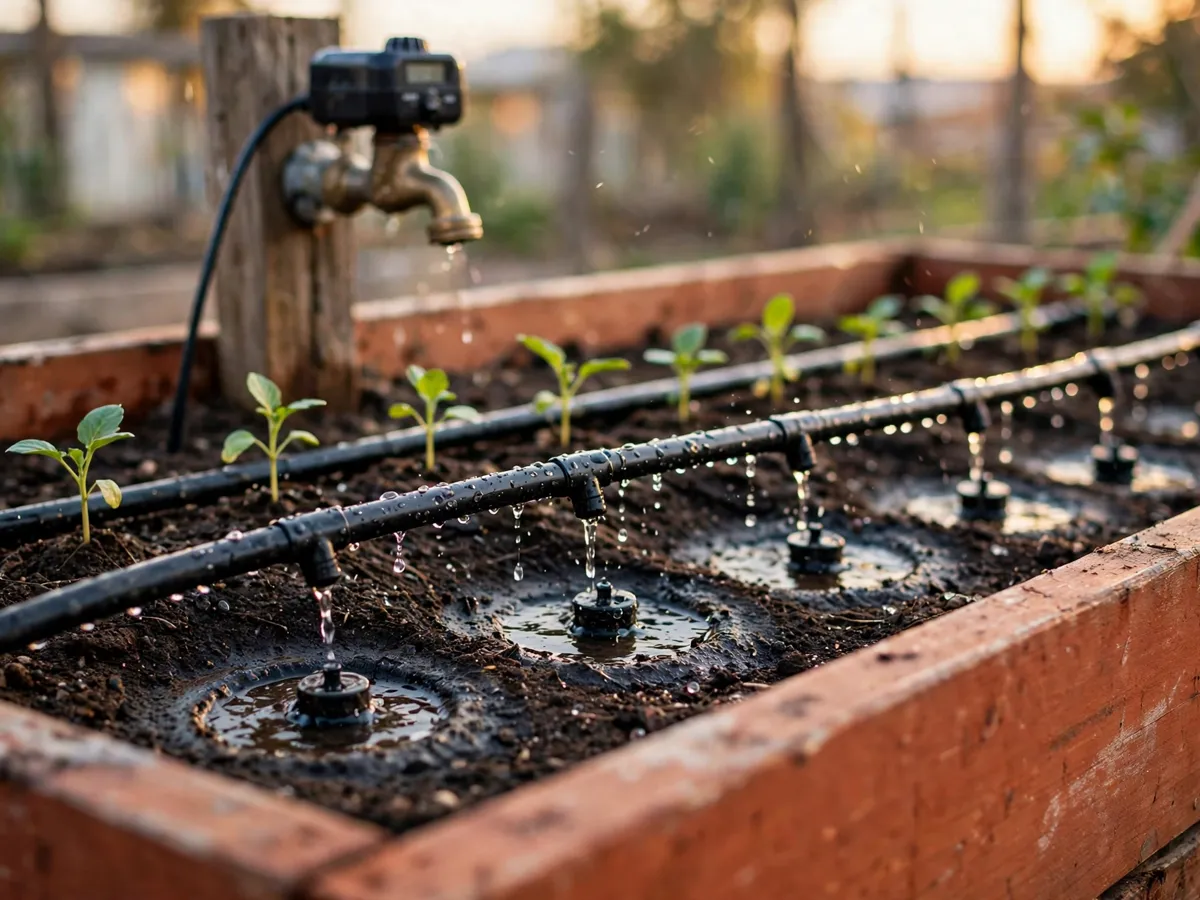
The catch-can test measures output. Set a few identical cans (tuna cans, cut milk jugs) along one run, run the system for its normal cycle, and measure depth with a ruler. Roughly an inch a week is the summer target for a vegetable bed, delivered as daily soaks; if one cycle delivers a quarter inch, four cycles a week lands an inch, and you adjust the timer up or down from there. Run the same test across two runs at opposite ends of the bed - if the far run catches half the near run, section 11 has the fix.
The finger check confirms it. A few hours after a cycle, push a finger into the soil halfway between two emitters: damp at one to two inches deep is right; dry at one inch means the run time is too short or the spacing is too wide for your soil; soggy an inch down with water pooling means the cycle is too long. Check after a few cycles rather than one, because the first cycle of a dry bed wets less deeply than the third.
Heat is the adjustment, not re-design. When a heat wave pushes past the high 80s day after day, add run time or a second daily cycle rather than rethinking the layout; when nights turn cool in fall, step the schedule back down. Plants tell you faster than rules do - wilted at 4 p.m. but firm by morning is normal summer thirst, wilted at 8 a.m. is a system problem, and that distinction is the fastest diagnostic in gardening.
Cost: $0 - cans and a ruler. Time: one test cycle, about 30 minutes of mostly waiting. Caveat: re-test after changing tubing or adding a bed; output is a property of this system, not of drip in general.
8. The four leak points
Every drip failure in a small system comes from one of four places, and each has a fix that costs pocket change. Knowing them before they happen is most of the maintenance.
- Barbed fittings popping at pressure. A fitting that blows out mid-cycle was either pushed in crooked or is living downstream of a missing pressure regulator. Household line pressure is several times what quarter-inch barbed joints are built to hold. Fix: pull it, re-punch a fresh hole beside the mangled one, push the new fitting straight with a twist. Prevent: the regulator stays in the stack, always.
- Goof plugs weeping. The soft rubber plug that seals an unused emitter hole can weep a slow drip for a week before seating, especially in cool weather. A slow weep wastes little but grows algae rings in the soil below it. Fix: push the plug fully flush with a blunt tool (not a knife tip, which punctures it); if it still weeps, pull it and plug with a small piece of quarter-inch tubing as a plug.
- The filter clogging. The screen washer catches grit, and in season it catches plenty - a restricted filter shows up as weak far-end emitters first. Clean it monthly in season: unscrew, pop the screen out, rinse under the tap, brush gently with an old toothbrush. Two minutes, and it is the difference between emitters that last seasons and emitters that die in one.
- Critter chew. Mice, voles and squirrels chew quarter-inch tubing for the water inside, and a punctured run waters one hole in the soil enthusiastically while the far end dries out. Fix: slide a coupler over the chewed span, or patch with a short tube segment and two couplers. Prevent: runs lie under mulch, and leaving a shallow dish of water at the garden's edge sometimes satisfies the thirst that started the chewing.
The weekly timer check is also the leak walk: two minutes of looking at the bed while a cycle runs catches every one of these in the week it starts, which is when the fixes are all still two-minute fixes.
Cost: $0-$10 in spare plugs and couplers per season. Time: most fixes under five minutes. Caveat: a leak that appears every time the timer fires is a pressure problem, not a bad fitting.
9. Adding a second bed off the same tap
One faucet can feed more than one bed, and the honest question is whether it should feed yours. Water pressure splits between the runs you attach: a single faucet comfortably carries one 4x8 bed's four runs, and it carries two beds of the same layout only if the household pressure is generous and the beds sit close to the tap. The symptom of asking too much is specific and easy to read: emitters at the far ends of the far bed dribble while the near bed runs strong. When you see that pattern, the tap has hit its flow capacity and the honest fix is a second kit, not more tubing.
If pressure allows it, the connection is simple. Run a length of half-inch main line from the first bed's end to the second bed's short side, tee into it with a barbed tee, and lay the second bed's runs as in section 3 - same four-run layout, same spacing rules, and the same 32 ft of run tubing plus the main line between beds, which means a 50 ft kit no longer covers two beds; budget 100 ft. Keep the total run of main line from faucet to the farthest emitter as short as the yard allows, because every foot of half-inch line costs a little pressure.
Two beds on one timer is also a scheduling compromise: the whole system runs as one zone, so a thirsty bed and a shaded bed get the same water. For most gardeners that is fine - both beds are vegetables on the same watering rhythm. If one bed is herbs that like it dry and one is peppers that do not, two timers on a two-outlet adapter (or two faucets, if you have them) keeps the zones honest.
Cost: $60-$120 for a two-bed setup (100 ft of tubing plus fittings). Time: about two hours total. Caveat: the far-end dribble test decides one bed or two kits better than any spec sheet.
10. The renter version: nothing permanent
Everything in this guide sits downstream of a standard hose bib, which makes the whole system renter-legal by construction. Nothing glues, nothing screws into the building, nothing penetrates anything the landlord owns. The faucet adapter, timer, regulator and filter stack screws on by hand and unscrews the same way; the tubing lies on the soil surface held by garden staples, which pull out by hand and leave a hole a pencil would fill. On move-out day the whole system lifts out in half an hour.
Three renter-specific choices make the teardown clean. Keep every joint above ground and visible rather than buried, so nothing gets forgotten under mulch. Lay runs to the bed through the open side, not over the rail, so the tubing never needs a hole drilled through anything. And skip any fitting that would need thread tape or glue on the house side of the faucet - if a part needs sealant, there is a push-fit version of the same part.
For the move itself: drain everything (section 6's winter rule, any time of year), coil the half-inch main line loosely - kinked tubing takes a set that never relaxes - zip the fittings and timer into a bag so they travel together, and the kit either moves with you or sells used for half price, since nothing about it is tied to the property. A renter who gardens in raised beds or large pots gets the same steady-moisture benefit from this setup as an owner does, and takes it along when the lease ends.
Cost: the same $35-$80, portable. Time: 30 minutes to lift and pack the whole system. Caveat: photograph the faucet setup before disassembly; re-stacking the order from memory is how filter stages get reversed.
11. What usually goes wrong (and the fix)
The failures below are the ones that show up in the first season, and none of them mean the system was a mistake - they mean one setting is off.
- Runs that water the aisles. An emitter run that sits a hand-width off its row wets the path while the row's root zone dries. Runs were laid before planting, and the rows shifted. Fix: re-staple the runs to the actual rows; emitter tubing is flexible enough to re-route a few inches without any new fittings.
- One dry row at the far end. The classic pressure gradient: near runs soak, far run dribbles. Causes in order of likelihood: the filter is half clogged (clean it first), the main line is kinked somewhere along its run, or the system is genuinely asking more flow than the faucet gives (section 9's second-kit answer). Fix in that order, cheapest first.
- Algae in clear line sections. Sunlight plus water plus a little mineral equals green film inside the tubing, and in clear or translucent line sections it thickens until it restricts flow. Opaque tubing mostly prevents it; where it appears, the seasonal flush (open end caps, full-pressure blast, repeat) clears it, and keeping the filter clean keeps the algae's food supply low.
- Timer programming mistakes. The two universal errors: AM/PM set wrong so the system waters at 3 p.m. instead of 3 a.m., and a duration set in minutes while the dial expected hours. Both show up as a bed that behaves strangely while the timer screen looks plausible. Fix: program it once more, slowly, watching the clock readout as you set each field, then run one manual cycle and watch it start and stop.
Cost: $0 for every fix on this list except new tubing. Time: ten minutes each. Caveat: diagnose the cheap causes first; a $2 filter cleaning outscores a $30 timer replacement as an opening move.
12. Cost and time, honestly
The whole-guide budget, gathered from the per-section numbers above and priced with generic (unbranded) parts:
- One 4x8 bed, kit route. A 50 ft raised-bed kit with timer, regulator and filter, $30-$50, plus a spare fittings pack, $6-$10: $35-$60 total, about an hour to build, five minutes a week in season to maintain.
- One 4x8 bed, parts route. Buying tubing, fittings, timer, regulator and filter separately lands in the same $35-$80 window - the kit is rarely cheaper per part, but it saves a second shopping trip and the risk of a missing regulator.
- Two beds off one tap. 100 ft of tubing plus fittings and one timer: $60-$120 total, two hours to build. Only works when the far-bed dribble test passes.
- Two beds, two kits. Two 50 ft kits on a two-outlet adapter, $70-$120, with independent schedules per bed. Simpler to diagnose and the safer buy when the faucet's capacity is unknown.
- Seasonal costs after year one. A set of timer batteries ($5-$8) and a replacement filter washer or two ($2-$5). Tubing lasts several seasons drained and stored; fittings crack from sun and rough handling, which is what the spare pack covers.
Where the money goes wrong for beginners: buying the biggest kit before measuring the faucet-to-bed distance, buying a bare timer without a regulator, and replacing whole runs when a $2 plug fixes one hole. The honest ceiling for a first-year setup is about $80 for one bed done once, done right.
Cost: $35-$80 one bed, $60-$120 two beds. Time: one to two hours build, five minutes a week. Caveat: kit contents vary; the regulator and filter are the two line items to verify on the box art before paying.
Common questions
How much tubing do I need for a 4x8 raised bed?
Four runs along the 8 ft length is 32 ft of emitter tubing, plus 2 to 4 ft of half-inch main line from the faucet, so roughly 34 to 36 ft total. A 50 ft kit covers one 4x8 bed with margin for the detours and trim-offs, and it stops covering the job once the faucet sits more than about 15 ft from the bed.
How far apart should drip emitters be in a raised bed?
Twelve inches is the default for most raised bed rows in loam. Use 9 inches for fast-draining mixes and moderately tight planting, and 6 inches for intensive spacing or sandy soil, where water spreads narrowly and the wet bulbs only overlap when the emitters sit close together.
How long should I run drip irrigation on a raised bed?
Start at 20 to 30 minutes once a day in spring, stepping to 30 to 45 minutes in peak heat, then tune with the catch-can test until the bed receives about an inch of water a week. The finger check a few hours after a cycle (damp one to two inches down) confirms the setting, and a heat wave calls for more time or a second cycle, not a redesign.
Do drip timers actually work, or will they fail?
They work, and they fail the boring way: the battery dies and the schedule silently stops. A timer delivers consistency, not gardening, so check the screen weekly and start each season with fresh batteries. Drain the timer and lines before the first hard freeze, because trapped water cracks the housing and splits the tubing.
Can renters install drip irrigation on a faucet?
Yes, entirely. The system screws onto a standard hose bib by hand, nothing attaches to the building, and the tubing lies on the soil held by pull-out staples. Move-out teardown is about 30 minutes: drain, coil, bag the fittings, and the whole kit travels to the next place.
Save these on Pinterest
Pin the layout math and the timer schedule - the two pages that turn a box of tubing into a bed that waters itself. This guide and the rest of the gardening tips live together there.