 Plant As Deco
Gardening & Planting Tips
Garden Hoops for Raised Beds: Covers by Season
By Plant As Deco · Updated 22 November 2026
A set of bent tubes over a raised bed is the cheapest climate control a small garden gets. This guide covers the hardware and what it costs, the tubing arithmetic for one 4x8 bed, how to bend and set the hoops, and the three covers - frost fabric, fine mesh and clear plastic - that each do one job in one season.
Weekend-ready: $30–$75 for one 4x8 bed: tubing, clamps, stakes and one cover, one afternoon. All four covers later, around $120.
1. Why hoops on a raised bed
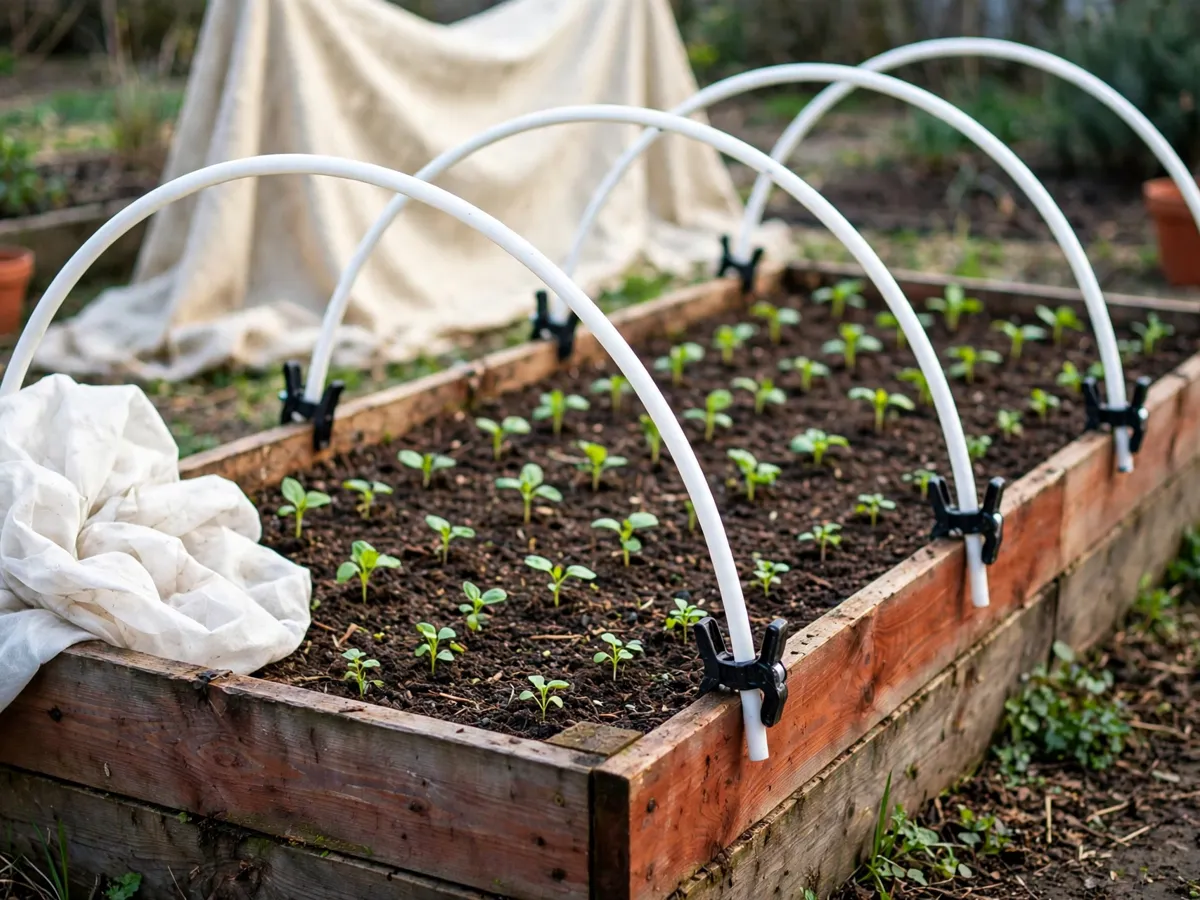
A raised bed already warms up earlier in spring than the ground around it, and it dries out faster too. Hoops add a second lever: a frame that carries a cover, close to the crop, on a footprint small enough that one person can manage it. On an 8-foot bed the whole covered space is maybe 32 square feet. That is small enough to protect with a few dollars of fabric instead of building a walk-in greenhouse.
The frame does two jobs, depending on what you clip to it. With frost fabric it holds warm air around seedlings on cold nights, which stretches the spring and fall windows by weeks on both ends. With fine mesh netting it keeps cucumber beetles, cabbage moths and other egg-layers off the leaves without any spray. The same tubes do both; only the cover changes.
One honest framing before anything else: a hooped bed is a frame, not a greenhouse. It has no heat source, no thermostat and no thermal mass beyond the soil and the air trapped under the fabric. It buys a few degrees on a cold night and a wall against insects. It does not turn February into June. Any setup that promises a full four-season growing room on bent tubing is overselling the hardware.
Cost: $0 - this is the decision section. Time: ten minutes to read it and know whether hoops fit your bed.
2. The hardware list
Four categories of parts, all generic, no brand needed. Costs below are for one 4x8 bed in a typical US price range; shop whichever retailer ships cheap to you.
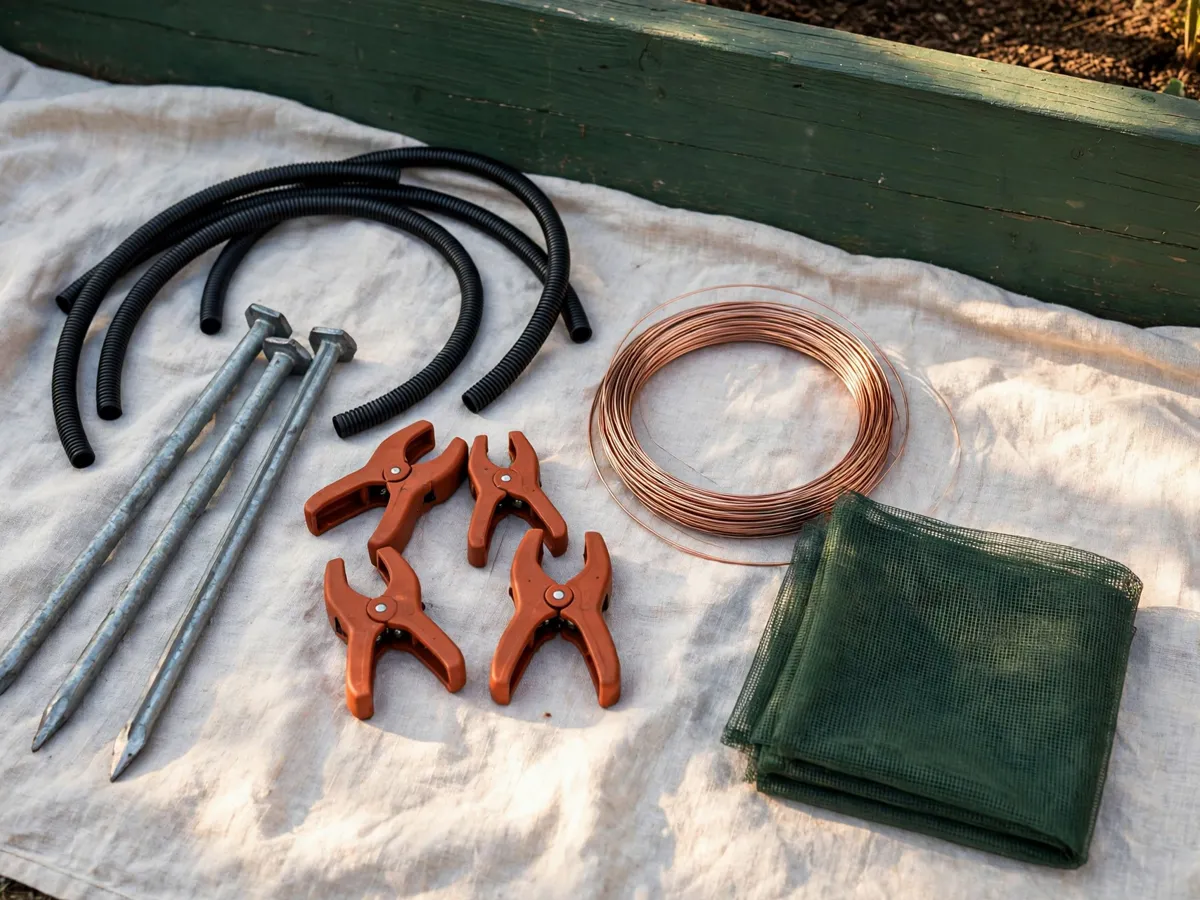
- Flexible tubing, about $10-$20. Half-inch PVC pipe or comparable flexible tubing from any hardware store, in a 25-foot or 50-foot coil. It bends into arcs by hand. This is the hoop itself, and the length math in the next section decides which coil you buy.
- Snap clamps, about $1-$2 each, 10-16 total. Rigid clips that snap over the tubing and pinch the cover fabric against it. Two per hoop end is the working minimum; more holds fabric tighter in wind.
- Ground stakes or rail brackets, about $5-$15. Short rebar stubs driven into the soil inside the bed, or metal brackets that screw to the bed rails. Either one holds the hoop ends upright. Rebar stubs need no tools; rail brackets grip a wooden bed more firmly.
- One cover, about $10-$45. Frost fabric (row cover), insect netting, clear plastic, or bird netting. The seasonal calendar section explains which one to buy first - most people start with frost fabric because spring is when the bed needs help soonest.
Here is the length decision, stated plainly, because it is the one that surprises people. A 25-foot coil of tubing is not enough for a 4x8 bed with hoops every 2 feet. That bed needs five hoops at roughly 6.5 feet of tubing each, about 33 feet total. A 25-foot coil comes up more than a full hoop short. Buy the 50-foot length; it covers the bed with footage to spare for a spare hoop or a repair.
Cost: $30-$75 for tubing, clamps, stakes and one cover. Time: one hardware store run, about 30 minutes.
3. Hoop math for a 4 ft bed
The arithmetic that decides the shopping list, step by step. The number that trips people up is the first one: an arc is longer than the straight line it spans.
- The arc is longer than the span. A hoop crosses a 4-foot-wide bed, so the straight distance is 4 feet. But the tube is bent into a curve, and a curve over 4 feet travels farther than 4 feet. Picture a semicircle: it spans 4 feet across, and half of a circle with a 4-foot diameter (a 2-foot radius) is pi times 2, about 6.3 feet of tube. Real hoops are flatter than a perfect semicircle, so the honest working number is 6 to 7 feet per hoop.
- Five hoops for an 8-foot bed. Hoops go every 2 feet along the bed so the cover has support between hoops and cannot sag into the leaves. On 8 feet that means a hoop at each end and one every 2 feet between: positions 0, 2, 4, 6 and 8 feet. Five hoops.
- About 33 feet of tubing. Five hoops at roughly 6.5 feet each is 5 times 6.5, about 33 feet of tubing.
- So the 25-foot coil is short and the 50-foot coil covers it. Thirty-three feet of tubing does not come out of a 25-foot coil. A 50-foot coil covers the bed with roughly 17 feet left over, enough for a replacement hoop after a storm cracks one.
If your bed is 4x4 instead, halve the hoop count: three hoops at positions 0, 2 and 4 feet, roughly 20 feet of tubing. A 4x4 bed squeaks by on a 25-foot coil with almost nothing to spare, which is one more reason the 50-foot coil is the better buy if a second bed is ever in the plan. Width changes the per-hoop footage; length changes the hoop count.
For planning the bed itself, the raised bed garden ideas guide covers sizes and layouts, and the metal raised garden beds guide covers the steel-panel beds that also carry hoops, usually through bracket slots molded into their rails.
Cost: $0 - arithmetic, done before shopping. Time: five minutes with a tape measure.
4. Bending and setting the hoops
Two anchoring methods, one decision about height, and about an hour of work.
Rebar stubs. Drive a short piece of rebar or any sturdy metal stake 6 to 8 inches into the soil inside the bed, about a foot in from each corner and at each 2-foot interval along the rails. Slide one end of the tubing over the stub, bend the tube across the bed, and slide the other end over the stub on the far side. The friction fit holds well enough for fabric and mesh. This is the tool-free method and the one to start with.
Rail brackets. Screw a pair of metal brackets to the inside face of the bed rail, one on each side, and seat the tubing into them. This grips harder, keeps the hoop ends exactly where you put them, and works on beds whose soil sits too shallow for stakes. It costs a drill and ten minutes per hoop.
Whichever anchor you use, bend the hoops before fixing anything: cut the tubing to about 6.5 feet, flex each length into an arc across the bed, and check that the arc clears the crop at its tallest. Even spacing is the part that matters for the cover. A gap wider than 2 feet between hoops lets fabric billow in wind until it tears at the clamps.
Height follows the crop. Low hoops, about 12 to 18 inches at the peak, suit lettuce, greens and young seedlings, and they hold fabric taut close to the plants, which traps warmth better. Tall hoops, 24 to 36 inches, suit tomatoes, peppers and kale that keep growing into fall; the cost is more tubing per hoop, so tall arcs on a 4-foot bed run closer to 7 feet each. If the plan is to start seeds under the cover and then pull it, low hoops win. The seed starting indoors guide covers what happens before the seedlings ever move out under the hoops.
Cost: $5-$15 for stakes or brackets. Time: about 60 minutes for one 4x8 bed, five hoops.
5. Row cover: the frost and insulation layer
Row cover is spun-bonded fabric, white, light enough to drape over leaves without flattening them. It is breathable: air and some water pass through, so a bed can stay covered for days without smothering. Its job is insulation. It slows the heat that the soil released during the day from escaping at night, and it buffers the coldest hour before dawn.
How much cold it buys depends on the weight of the fabric. A light cover holds a few degrees, enough to walk seedlings through a light frost. A heavier frost fabric holds more, and doubling two layers over the same hoops buys more again. What it will not do is save a tender tomato from a hard freeze; below roughly the mid-20s F, the fabric is not the tool.
The windows are early spring and late fall. In spring, fabric over new transplants lets you set them out one to two weeks earlier and keeps the soil surface from crusting after cold rain. In fall, the same cover over greens extends harvest weeks past the first light frost. Between those windows, in the heat of summer, a frost fabric does nothing useful and can overheat leafy crops; take it off and store it. Cloth degrades in sun, so an out-of-light shelf extends its life a few seasons.
Cost: $10-$25 for fabric wide enough for one 4x8 bed. Time: 10 minutes to drape and clamp.
6. Insect netting: the pest layer
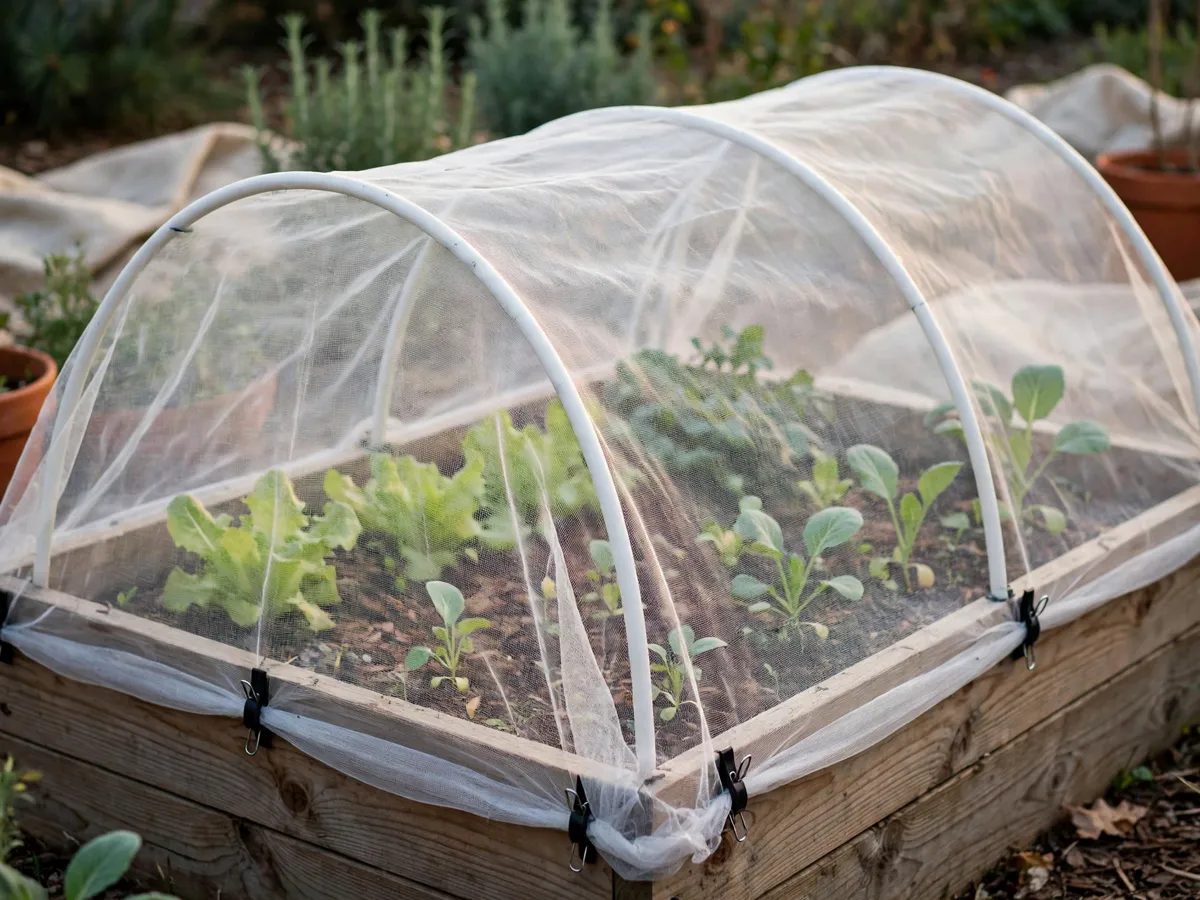
Insect netting is a fine woven mesh, tighter than a window screen. Its job is exclusion, not insulation. Cucumber beetles, cabbage moths, flea beetles and root-maggot flies land on the mesh, fail to push through, and move on; their eggs never reach the leaves. For squash family and brassica crops this is the single most effective non-chemical step, because the damage comes mostly from larvae hatching on or beside the plant.
The mesh trades light and air for that barrier. It transmits most light but less than open air, and it does not hold heat the way fabric does, so it is a late-spring and summer cover, not a frost cover. Weight it at the soil line on all four sides, no gaps: a 1-inch opening at a corner is a door for a moth. Overlap the clamps generously so wind cannot lift an edge.
The honest catch: insect netting excludes pollinators too. Bees cannot get in any more than the beetles can. For squash, cucumbers, melons and anything else in that family, either open the cover during bloom hours for a few hours midday when pollinators fly, or hand-pollinate: pick a male flower, strip the petals, and dab the center onto the female flowers, the ones with a small fruit shape at the base. Five minutes every day or two through bloom. Leafy crops and brassicas grown for leaves never need this, which is part of why mesh suits them so well.
Cost: $15-$30 for one bed-sized piece. Time: 10 minutes to install, five minutes every other day during bloom.
7. Plastic: the heat layer
Clear greenhouse plastic turns the hooped bed into a small sun-powered oven, and that is both the point and the danger. On a sunny day, light passes through the plastic, becomes heat when it hits soil and leaves, and the plastic traps that heat. Air under plastic climbs fast, 20 degrees F and more above the outside air within a couple of hours of sun, even in cool weather. That is how a plastic cover grows salad through months when open beds are frozen.
The same physics cooks plants the moment nobody opens it. A plastic tunnel left shut on a sunny March afternoon can hit temperatures that kill seedlings in hours. The venting discipline is not optional: open both ends every morning the forecast has sun, close them in late afternoon to bank heat for the night. Skip it once on the wrong day and the cover becomes the thing that killed the crop. This is why plastic is a cold-season tool, late fall through early spring, and comes off entirely once frost danger passes.
Plastic also blocks rain and watering, so lift it to water or run a line underneath, and it holds humidity that invites mold when air sits still. Cracking one end a few inches on mild nights keeps air moving. Used with that discipline, plastic is the layer that genuinely extends the season past what fabric manages.
Cost: $15-$40 for one bed of clear plastic. Time: five minutes morning and evening to vent, every sunny day.
8. Bird netting, the fourth cover
Bird netting is the coarse one: open plastic mesh with holes around an inch, floppy, cheap. It stops birds, and only birds. Strawberries, blueberries and just-seeded beds are its territory, in the weeks when fruit colors and birds start strip-feeding. Over a seed bed it also slows the worst of the seed-dusting rain.
It is not a pest solution, and it is worth being clear about that. Its mesh is far too open to exclude cucumber beetles, cabbage moths or any insect; they pass through it freely. It also does nothing for cold. It rides the same hoops as the other covers, but it is the only one whose entire job is keeping something large on the outside.
One caution: bird netting is the cover that tangles. Pull it taut between clamps rather than letting it drape loose, because loose netting traps birds and snakes that try to push through and cannot back out. Tension plus a clip every foot or so keeps the mesh flat and the wildlife outside it, not inside it.
Cost: $8-$15 for one bed. Time: 10 minutes to install; check it for trapped animals after storms.
9. Clamping and daily access
The honest attachment method is snap clamps on the tubing, and it is worth stating directly: the cover attaches to the hoops, not to the soil. Clamping fabric to the tube is what makes the whole setup workable, because the cover can slide along the hoops.
Here is the daily rhythm that makes possible. To harvest or weed, unclip the clamps along one side and slide the fabric part way up over the hoop tops, out of the way. Work the bed with both hands free. Then pull the fabric back down and re-clip. If the cover were staked to the soil with pins every foot, every harvest would mean pulling and resetting a row of pins, and after a week of that most people stop covering the bed at all, which defeats the point. Clamps to the tubing turn a chore into a ten-second gesture.
Wind management is the same system. Put a clamp on each hoop where the fabric meets the tube, and close the short ends of the cover with one clamp each, pinching the fabric to the end hoop so wind cannot funnel under. On a gusty site, add a second row of clamps along the windward side. The fabric should flap a little and lift nowhere.
One habit worth building: keep the clamps in one place. A small bin that lives beside the bed ends the twice-weekly search, and lost clamps are the usual reason a cover ends up half-attached exactly when a cold night arrives.
Cost: $10-$25 for enough clamps for one bed. Time: ten seconds to open, ten to close.
10. The seasonal calendar
The covers swap across the year. One bed, four covers, and two or three real swap moments per year.
- Late winter to early spring, February-April. Plastic over the bed to warm the soil before sowing; vent on every sunny day. Once seeds and transplants are in, frost fabric takes the cold nights, or plastic stays on for hard cold with strict venting.
- Mid to late spring, April-May. The swap moment: hard frosts pass, fabric comes off, insect netting goes on for the first pest wave. Seedling beds may carry bird netting too, since birds pull seedlings.
- Summer, June-August. Insect netting stays on brassicas and squash family (opened during bloom for pollinators), bird netting over berries as they color. Frost fabric and plastic are stored out of the sun.
- Early fall, September-October. Netting comes off as pest pressure drops. Frost fabric returns over greens and the last tender crops as nights drop toward frost.
- Late fall into winter, November-January. Plastic over hardy greens for winter harvest where winters are mild, vented on sun. In hard-winter climates most beds go bare, with hoops left in place to hold snow-load-ready fabric-free frames until spring.
The three swaps, spring-out, fall-in and the cold-plastic decision, take about ten minutes each. A bed that misses a swap does not fail dramatically; it just loses the benefit for a few weeks. For the seed end of the schedule, the seed starting indoors guide covers the weeks before plants move out to the hoops.
Cost: $0 for swaps once the covers exist. Time: about ten minutes per swap, twice a year.
11. What goes wrong
Four failure modes account for almost every dead hoop setup. Each has a fix that costs little.
- Hoops collapse under snow load. Wet snow is heavy, and half-inch tubing bows inward until the cover tears or the hoops crack at the anchor. Fix: knock snow off after each storm, and in snowy climates take plastic off in November. Fabric sheds some snow; plastic catches all of it.
- Fabric tears at the clamps. A clamp pinching one thin line of fabric concentrates all the wind load on that line, and after enough flapping it tears. Fix: fold the fabric over itself once before clamping, so the clamp grips two layers, and add clamps so no span of fabric works that hard.
- Heat spikes under unvented plastic. The classic plastic failure described above: one unvented sunny day cooks the crop. Fix: treat venting as a morning habit on every forecast with sun, and put a thermometer under the tunnel until the habit holds.
- Gaps at the soil line. Pollinators, moths and wind all enter at a loose edge. Fix: weight the cover along the soil on all four sides with boards, bricks or lengths of rebar lying flat, and re-seat any edge that a storm lifted.
Cost: $0-$10 for spare clamps and weights. Time: five minutes of inspection after each storm.
12. Cost and time, honestly
One bed, all four covers, at the ranges used through this guide: $30-$75 covers tubing, clamps, stakes and the first cover, and adding the other three covers brings the full setup to roughly $70-$120 over a year, bought as the seasons arrive rather than all at once. Time: about an hour to build the frame, ten minutes per cover swap, and five minutes of attention per day when plastic is on.
The renter math is the quiet advantage. Nothing here is permanent: pull the tubing off the stakes, unclip the fabric, and the whole kit is a bundle of tubes and folded cloth that fits in a trunk. A raised bed itself may stay behind when you move, but the hoop kit travels to the next bed. If the current bed is a rental-yard experiment, the growing vegetables in pots guide covers the container route, and hoops over a wide container row work the same way at smaller scale.
For what sits under the hoops, the raised bed soil mixture guide covers the fill that a covered bed depends on, since a cover changes how slowly that soil dries.
Cost: $70-$120 across a year for the full four-cover setup. Time: one afternoon to build, minutes a week to run.
Common questions
How much tubing do I need for a 4x8 raised bed?
Five hoops at roughly 6.5 feet of tubing each, about 33 feet total. The arc over a 4-foot span runs longer than the span itself, which is why the per-hoop number is 6 to 7 feet rather than 4. A 25-foot coil is short; buy the 50-foot length.
Can one cover do frost, insects and heat?
No. Row cover insulates against frost, insect netting excludes pests, and clear plastic builds greenhouse heat. They are different materials for different jobs. Trying to run one cover year-round gives a bed that is either too cold for the insects it should be blocking or too hot for the plants under it.
Does insect netting keep out pollinators?
Yes, that is the trade. The mesh that stops cucumber beetles stops bees too. For squash, cucumbers and relatives, open the cover for a few midday hours during bloom, or hand-pollinate with a picked male flower dabbed onto the female flowers.
How do you attach the cover to the hoops?
Snap clamps pinching the fabric to the tubing, not pins through the fabric into the soil. Clamped fabric slides along the hoops, so harvesting means unclip, slide, pick, pull back and re-clip. Clamps to the soil line would make every harvest a chore and the cover would come off permanently within a week.
Can I leave plastic on the hoops all day?
Only on cloudy, cold days. In sun, air under clear plastic can run 20 degrees F or more above outside air within a couple of hours, which kills seedlings. Open both ends every sunny morning and close them in late afternoon; plastic is a cold-season cover that demands daily venting.
Save these on Pinterest
Pin the tubing math and the seasonal cover swap - the two pages that decide whether the hoops earn their spot. This guide and the rest of the gardening tips live together there.