 Plant As Deco
Gardening & Planting Tips
Self Watering Planters: How They Work, and When They Help
By Plant As Deco · Updated 19 November 2026
A self watering planter solves one specific problem: nobody remembers to water on the day the plant wants it. It does not make a plant easier to grow, and it will not fix a pot that sits in a dark corner. What it does is move the watering decision from your memory to the hardware, so the mix stays in a narrower band of moisture for a week or two at a stretch instead of swinging between soaked and bone dry. That trade is worth it for some plants and some rooms, and a bad idea for others. This page is how to tell which camp you are in before you spend the money.
Weekend-ready: $12–$40 for a store-bought self watering planter, or about $8 in parts to build one from two nested containers. One bag of mix covers four planters.
1. How a self watering planter actually works
Nearly every self watering planter on the market is one of two designs, and both do the same thing: separate the water from the roots and let the mix pull what it needs.
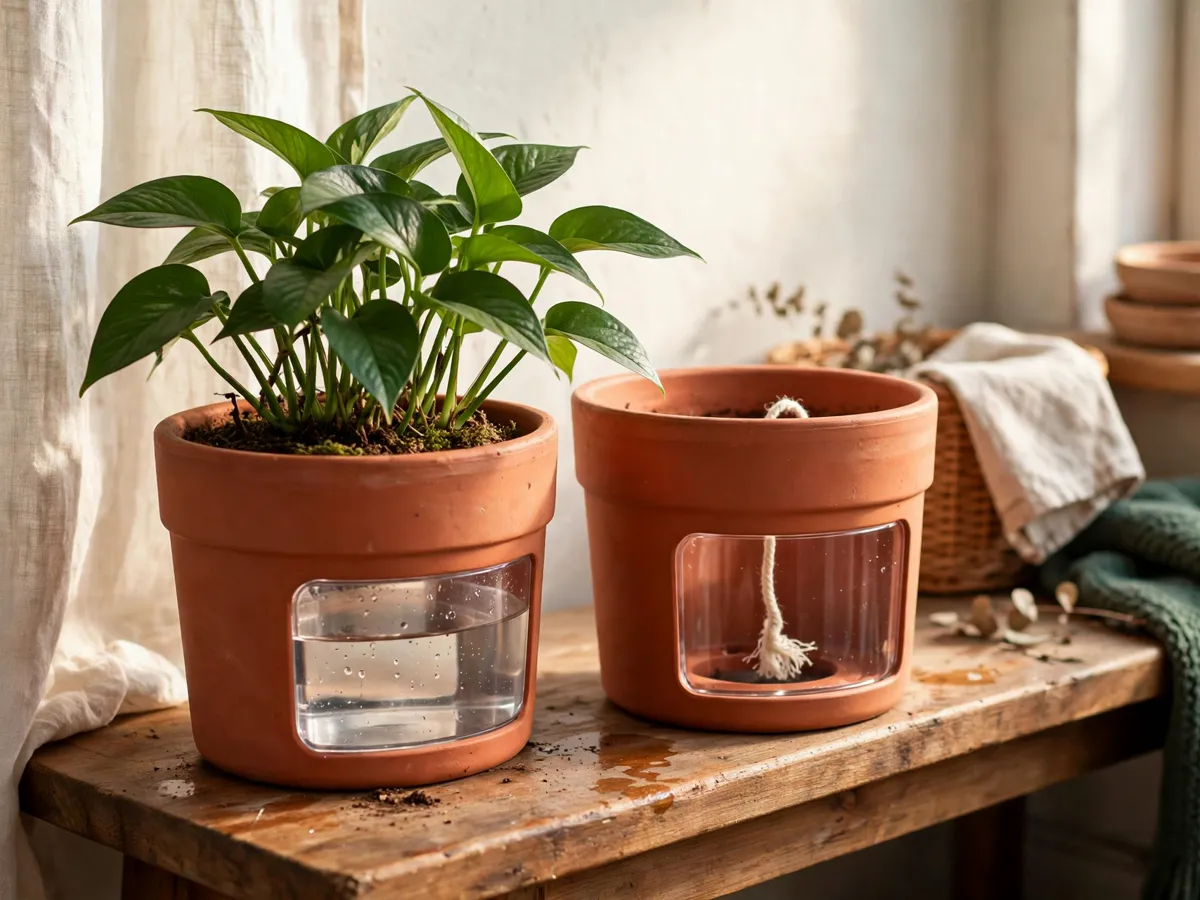
The wick version is the simple one. A cord of cotton or synthetic fibre runs from a water reservoir at the bottom up into the soil ball above it. Water travels along the fibre by capillary action and spreads into the mix wherever the mix is drier than the wick. No parts move, nothing needs power, and the whole mechanism is a string and a bucket.
The reservoir version has no wick at all. The planter holds a water chamber underneath a false bottom, and the pot sits on legs or a raised shelf so only the lowest inch or two of mix touches the water. Moisture rises through the soil column on its own. Cheap fabric grow bags work on exactly this principle, which is why a felt planter with a plastic liner is one of the most common self watering setups people own without realising it.
Both designs share one limit that matters more than the mechanism: they only move water upward or sideways. Neither drains excess water out of the mix. If you fill the reservoir to the top line and leave it there, the soil above it stays wet, the roots stop getting air, and a self watering planter becomes the most reliable way to rot a plant that a normal pot would have survived.
2. When one helps, and when it does not
Buy a self watering planter for one of these four reasons and it will work. Buy it for any other reason and you are decorating with a problem attached.
- You travel or forget. A week or two without watering is the case the hardware was designed for, and it is the reason most people own one.
- The plant likes steady moisture. Ferns, calathea and most thin-leaved tropical houseplants do better in a narrow wet band than in a soak-and-dry cycle.
- The pot is somewhere you cannot reach easily. A tall shelf, a stairwell landing, a corner behind furniture.
- The container is large. Big pots hold more mix and dry out slowly at the top while the bottom is still wet, which makes the finger test unreliable. A reservoir with a water level window tells you the truth.
It does not help a plant that wants to dry out. Anything from a dry climate - and most of the easy shade staples sold to beginners - stores water in thick leaves and expects the soil to go nearly dry between drinks. The short list of those species is in the low light houseplants that need less water guide, and almost every one of them is a poor match for a reservoir.
It also does not fix a light problem. A planter that keeps the mix steady cannot make a north-facing corner bright, and a plant that is losing leaves from darkness will keep losing them in a $35 container.
3. Store-bought versus built from two pots
You can build a working self watering planter in twenty minutes out of two containers that nest, and for most people this is the smarter first move because it costs almost nothing and teaches you the mechanism.
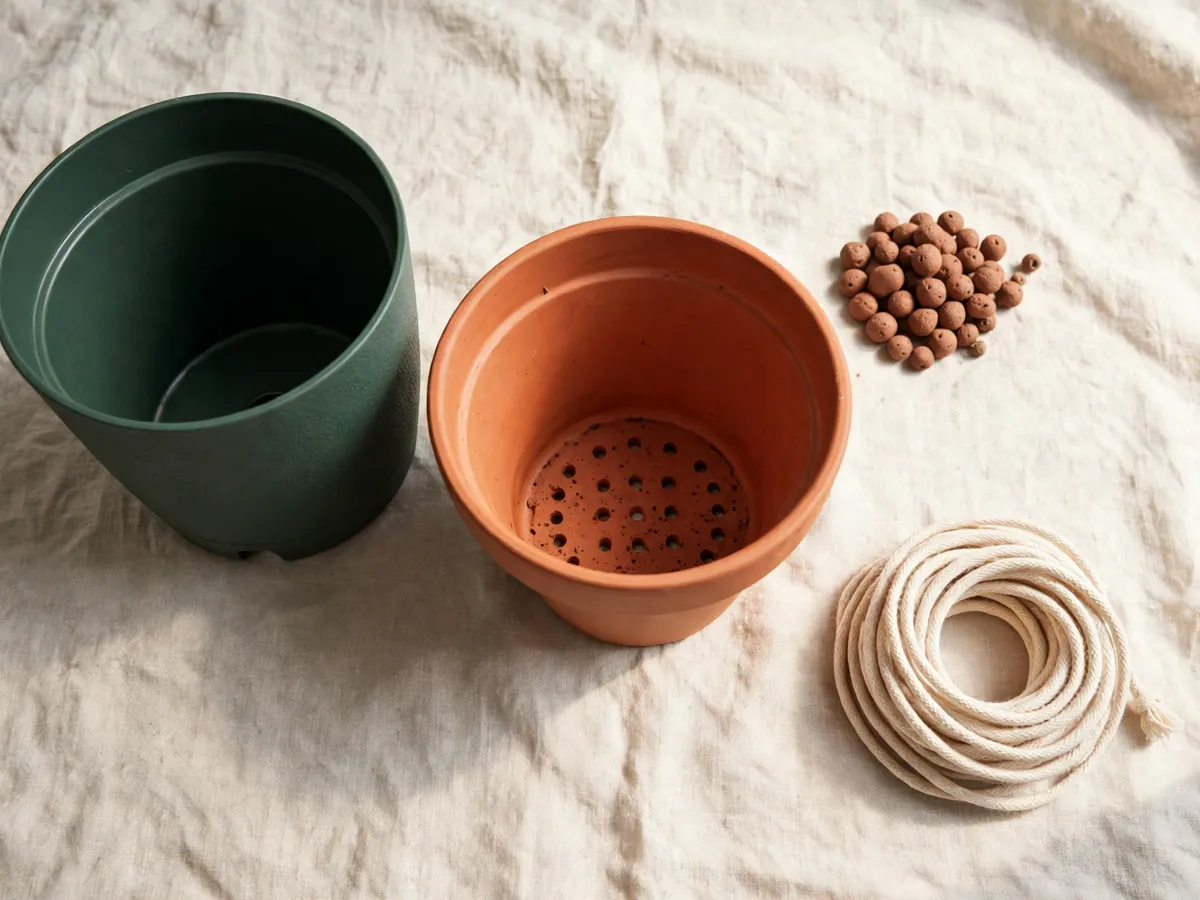
What you need: an outer bucket or cachepot that holds water, an inner pot that fits inside it with a gap at the bottom, two feet of cotton clothesline or a strip of cotton T-shirt, and a bag of pebbles. Drill or punch a few holes in the bottom of the inner pot, thread the wick through so half hangs down, set the inner pot on a layer of pebbles inside the outer container so its drainage holes clear the water line, and fill the reservoir to about an inch below the false bottom.
The store-bought version buys you three things a DIY build does not: a water level indicator, a fitted overflow drain that stops you overfilling, and an air gap that is designed rather than guessed. Those matter most for large planters and for anyone who will not check the level weekly. For a six-inch pot on a desk, the DIY build is genuinely as good.
One thing not to skip in either version: the overflow. If the reservoir has no way to shed excess water, any heavy watering session floods the mix, and the planter holds the water there for days. This is the single most common design flaw in the cheap end of the market.
4. The wick and reservoir setup, in the order that works
- Check the air gap first. The bottom of the soil ball must not touch the water. One to two inches of clearance is the usual target, and it is what keeps the roots in the moist zone instead of the drowned zone.
- Use a light mix, not garden soil. A bag of peat-free houseplant mix with perlite wicks upward reliably. Heavy soil compacts, the wick cannot pull through it, and the top stays dry while the bottom sits in water.
- Wet the mix before the first fill. A dry mix repels water at first, so the wick delivers moisture to a pocket of hydrophobic soil and you get a false reading for a week.
- Start with the reservoir half full, not full. You are learning how fast this plant in this spot empties it. Half full gives you a margin for error on the first cycle.
- Note the empty-down time. Mark the fill line with tape and check it daily for a week. That number is the whole point of the exercise - it converts watering from a memory into a schedule you did not have to invent.
After that first week you stop thinking about it. Refill when the window reads low, not on a calendar, and give the mix a proper top-watering once a month so dissolved salts flush through instead of accumulating at the wick's top end.
5. Filling and watering rules people get wrong
The rules are short and the failures almost all come from breaking the first one.
- Never fill past the overflow line. The reservoir is a buffer, not a source. Past the line, the mix sits in water and the plant is drowning quietly.
- Empty the reservoir before a long trip, then refill. Water that has sat for three weeks goes stale, loses oxygen and starts smelling; a fresh fill on departure day is better.
- Feed weakly into the mix, not the reservoir.Fertiliser salts dumped into the water chamber concentrate at the wick's intake and burn roots. Half strength, into the soil, spring to early autumn.
- Winter means a smaller fill. Growth slows, the plant drinks less, and a reservoir that lasted nine days in July may last forty in January - which is forty days of stagnant water against the roots. Refill to a quarter in the cold months.
- Do not rotate crops of plants through one planter. The wick and the reservoir get colonised by whatever the last plant left behind. Wash and dry the parts between occupants.
If you prefer the manual version, a plain pot with drainage and a consistent finger test does the same job for less money. The self watering planter is a convenience purchase, and it earns its cost only where convenience is genuinely failing. Repotting into one is also a two-part job - the rules for pot size are in the repotting one size up guide, and getting that wrong ruins the planter's whole mechanism.
6. Plants that suit a self watering planter
The species that reward a reservoir share one trait: they come from places where water is always available but never standing. Thin, broad leaves, fast growth, and visible disappointment when the mix goes fully dry.
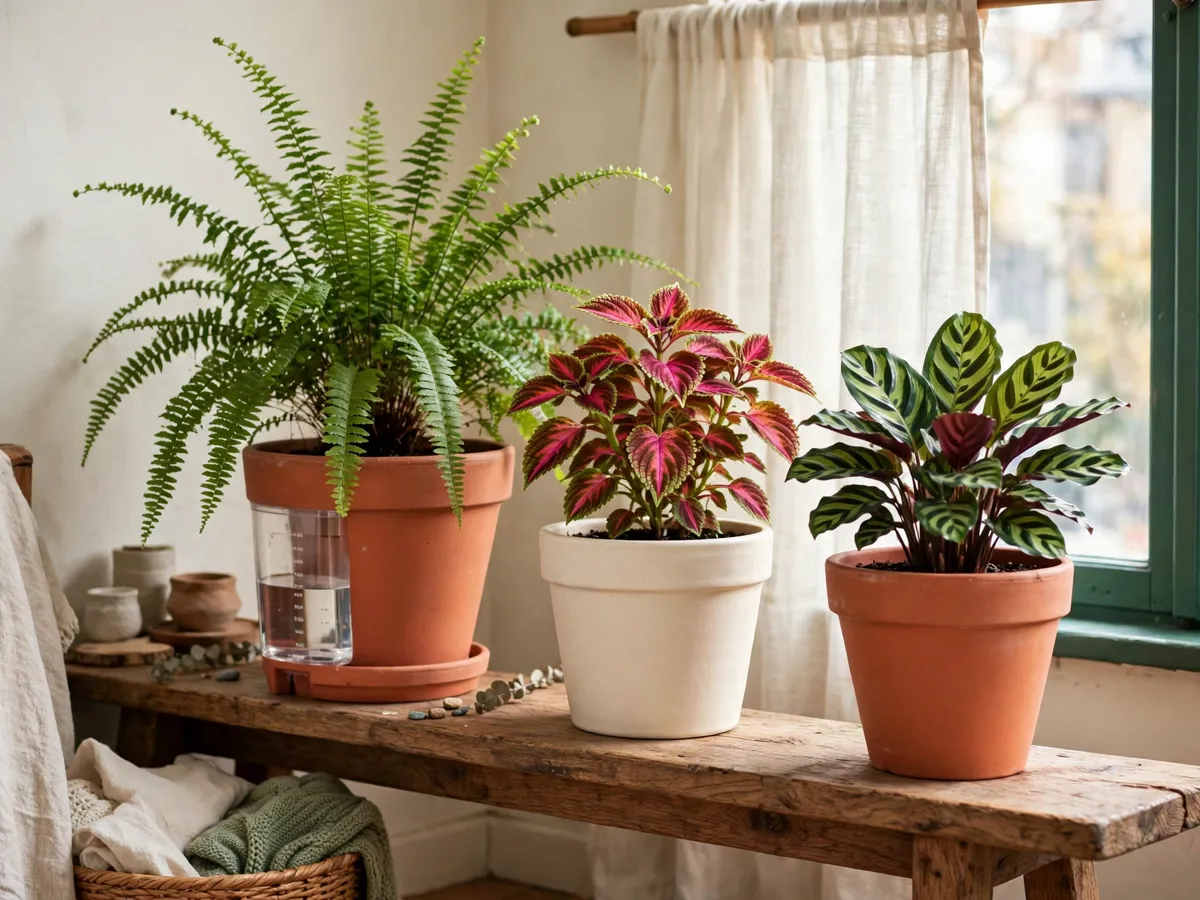
- Ferns. Boston fern and maidenhair are the clearest win. They dry out in days in a normal pot and hold frond quality for weeks on a wick.
- Calathea and the prayer plant family. Steady moisture is exactly what they want, and their crispy-edge problem reduces when the mix stops swinging.
- Peace lily. It dramatises thirst with a total collapse, which a reservoir prevents. Note that it is not safe for chewing pets, so placement still matters.
- Coleus and polka dot plant. Small, fast, colourful and heavy drinkers - the best beginner candidates for a first self watering planter because the effect shows within a fortnight.
- Any edible leaf crop on a windowsill. Salad greens want constant moisture and grow fast enough to empty a reservoir visibly, which makes the setup easy to learn on.
For fruiting plants the picture changes. Tomatoes and peppers in containers are the classic reservoir application outdoors, and indoors they need far more light than most apartments provide. If you are growing edibles in pots at all, the container sizing and mix rules in the growing vegetables in pots guide matter more than the watering mechanism, and a too-small reservoir will not carry a tomato through a sunny day.
7. Plants to keep off a self watering planter
Everything that stores water in its own tissue wants an airy mix and a dry rest period. Put a succulent in a reservoir planter and it will look fine for two months, then go soft at the base and collapse with no warning, because the roots failed before the leaves did.
The list to keep on plain pots with drainage: succulents of every kind, cacti, snake plant, ZZ, jade, string-of-pearls, agave, and most orchids, whose roots are built to dry between drinks and will rot in a wick setup. Spider plant and peperomia sit in the middle - they tolerate a reservoir but do not need one, so use one only if the pot is somewhere you will not reach.
Variegated and silver-leaved forms also belong on the cautious side. They grow slower, drink less, and the constant moisture that suits a green calathea produces pale, leggy growth on a striped one.
8. Mold, algae, gnats and the failures that actually happen
Four problems show up on self watering planters, and three of them are cosmetic.
Algae in the water window. Green film inside a clear reservoir means light is reaching the water. It is harmless to the plant and it is fixed by wrapping the container in opaque paper, buying a planter with a closed chamber, or simply not looking. Opaque reservoirs are the practical answer and one reason fabric and ceramic planters outsell the clear ones.
White mould on the soil surface. A steady moist top layer is a good home for saprophytic mould, which feeds on the mix rather than the plant. Scrape it off, let the top inch dry deliberately for a week, and improve the air flow around the pot. It is a signal that the mix surface stays too wet, which usually means the wick sits too high - lower the intake end.
Fungus gnats. The real nuisance, and the one people blame on the planter. Gnats breed in the moist top layer of organic mix. A half-inch dressing of sand or horticultural grit on top removes their breeding surface and solves most cases without chemicals.
Silent root rot. The dangerous one. A plant in a reservoir that keeps its leaves while the roots brown below looks healthy until it drops everything at once. The tell is smell - lift the inner pot and check. If the mix smells sour or the roots are dark and slippery, stop filling the reservoir, repot into fresh dry-ish mix, and either fix the air gap or give up on the mechanism for that plant.
9. What it costs, honestly
- DIY from two nesting pots: $5–$10 including wick cord and pebbles, plus whatever the outer container costs. Twenty minutes.
- Small store-bought self watering planter, 6–8 inch: $12–$25. The tier where build quality varies most, so check for an overflow before buying.
- Mid-range with a water level window, 10–12 inch: $25–$40. The sweet spot for a living room floor planter.
- Large deck or patio self watering container: $40–$90. Worth it only for a plant you cannot easily reach.
- Replacement wick cord or a fabric liner: $5–$12, and you will need one eventually. Cotton degrades within a season or two.
Compare that against the alternative it is replacing: a $3 watering can you already own and forget to use. The planter is not cheaper than the can. It is cheaper than the plant you kill with the can, which on this list runs $15 to $45.
10. Your first self watering planter, in order
- Pick one plant, not four. Choose a moisture-lover - a fern, a calathea, a coleus - and leave the succulents on their existing pots.
- Build or buy one planter with a visible air gap. If you cannot see where the soil bottom sits relative to the water line, you cannot set it correctly.
- Use a light mix with perlite and pre-wet it. Do not use straight garden soil, and do not let the mix go in dry.
- Fill the reservoir halfway and tape the line. Check it every day for seven days and write down the number of days to empty.
- Top-water once a month so salts flush. Feed at half strength into the soil, never the chamber.
- Lift the inner pot at day thirty and look at the roots. This is the check most people skip and it is the only way to know the setup is not quietly failing.
- Decide from evidence whether a second one is worth it. If the plant grew and you stopped thinking about watering, the mechanism earned its place. If the top layer moulded and the plant stalled, revert to a plain pot with drainage.
Everything here assumes the container is a tool rather than a fix. The wider collection of gardening tips covers the parts a planter cannot solve - light, pot size and what to plant where.
Cost: $12–$40 for one planter and a bag of mix. Time: twenty minutes to set up, one minute a week to check the level.
Common questions
How long does a self watering planter actually go between fills?
Anywhere from five days to five weeks, and the spread is enormous because it depends on plant size, light, temperature and the mix rather than the planter. A fern in a bright room in July empties a 12-ounce chamber in under a week; the same setup in a shaded corner in January may go a month. Measure your own first cycle by marking the fill line, and stop guessing from product claims.
Can I turn any pot into a self watering planter?
Almost any pot that fits inside a slightly larger watertight container. The requirements are a drainage hole in the inner pot, a cotton wick, and one to two inches of air gap between the soil bottom and the water surface. Ceramic and terracotta work; a pot with no drainage at all does not, because there is no way to route the wick into the soil ball.
Do self watering planters cause root rot?
They cause root rot when overfilled, and prevent it when used correctly. The mechanism only raises moisture to where the mix is dry; the failure is humans filling the chamber past the overflow line and leaving it there. If you keep the water below the false bottom and give the mix a monthly flush, the risk is lower than a conventional pot that gets watered on a fixed schedule.
Are self watering planters good for low light houseplants?
Mixed. Low light slows drying, so the reservoir stays full longer and the mix surface stays damp - which invites mould and gnats. The combination works for a moisture-lover like a fern or calathea and is a poor fit for the shade plants that want a dry rest. Check the species list before pairing low light with a reservoir.
What mix should go in a self watering planter?
A light, open houseplant mix with perlite or bark, roughly a third by volume. It needs to wick upward reliably and stay airy around the roots. Dense potting soil compacts, blocks the capillary path and holds water against the false bottom, which is how a reservoir planter ends up with a drowned rootball and a dry top.
Can I use a self watering planter for a vacation?
Yes, and it is the reason most exist. Fill the reservoir the morning you leave, move the pot to a cooler, shadier spot so it drinks slower, and group several pots together to share humidity. A healthy plant in a mid-size planter carries two to three weeks easily. For anything longer, the wick may need a deeper chamber than a desk planter offers.
Save these on Pinterest
Pin the setup order and the plant match list - the two pages that decide whether your first self watering planter holds a healthy rootball or a drowned one. This guide and the rest of the gardening tips live together there.