 Plant As Deco
Organization & Storage
Craft Room Storage Ideas: A Corner That Stays Workable
By Plant As Deco · Updated 22 November 2026
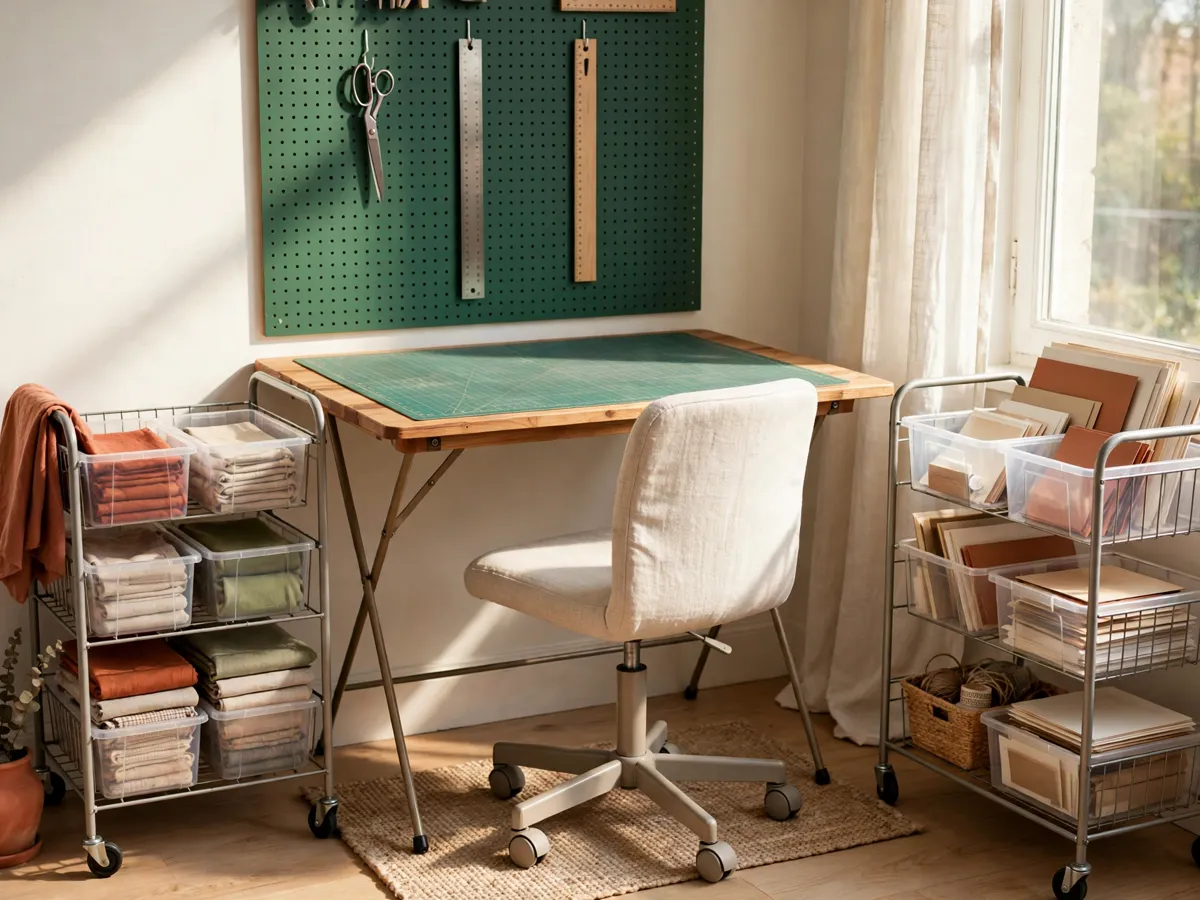
Most craft storage advice assumes a spare room. Most crafters have a corner: one folding table, one wall, maybe a closet shelf. This guide is for that corner. It sorts supplies by how often you actually reach for them, keeps the cutting surface clear enough to start a project in one minute, and ends with a five-minute reset that holds the whole thing together between sessions.
Weekend-ready: $25–$230, one afternoon. Renter-safe, nothing permanent.
1. What a craft corner has to do that a closet does not
A closet is judged on how much it holds. A craft corner is judged on how fast you can start working. Those are different jobs, and storage that wins at the first one usually loses at the second: deep bins and stacked boxes hide exactly the supplies you need in your hand, and hidden supplies get bought twice.
The test that separates a working corner from a storage pile is the clear-surface test. Sit down at the table and count how many things you have to move before you can cut, sew, glue or paint. Zero or one means the surface is ready and the corner is a workshop. Three or more (a mail stack, a laundry pile, last project) means it has become a shelf with a table underneath. Every decision in this guide exists to keep that count at one.
The rest of the corner supports that one rule. Storage lives on the wall, on a cart and on one shelf, arranged so the supplies you use most sit closest to your hands. The table itself carries only the project on it. That division (work happens on the table, storage happens everywhere else) is the whole system, and the sections below build it piece by piece.
Cost: $0. Time: 10 minutes to run the clear-surface test and count what has to move.
2. Start with the supplies you use, not the storage you want
Buying storage before sorting supplies is the mistake that fills a corner with empty organizers. The audit comes first, and it is honest work: pull everything out of the drawers, the boxes and the bag in the closet, and pile it on the table, the bed and the floor. Seeing the full inventory once is what makes every later decision fast.
Sort the pile into three groups by reach frequency, and let the group decide where each thing lives. Daily: the scissors, the cutting tool, the glue, the tape, the pins, the current thread and yarn colors. These get the closest, most visible spots (wall and cart top). Weekly: the rotary cutter, the ruler set, the stash fabric, the paper pads. These get the cart and the open bins. Seasonal: the holiday craft box, the bulk ribbon, the machine attachments you use twice a year. These leave the corner entirely and take the closet shelf or the under-bed bin.
Two honest moves while you are in there. First, let go of the supplies you have been storing out of guilt (the craft kit you never opened, the fabric from a project you abandoned); the keep-or-let-go rule in the room by room declutter checklist applies here exactly as it does anywhere else in the apartment. Second, write the counts on your phone: how many rolls of paper, how many spools, how many half-finished projects. The counts, not the aisle display, decide how many bins and jars you actually need.
Cost: $0. Time: 45–60 minutes for the full pull-out, including the three-group sort. Half-finished projects count as supplies, not failures.
3. The cutting surface: keep it clear
In a corner, the folding table is the room. Size it to the wall, not to ambition: a 4-foot table cuts fabric and paper comfortably and still leaves a walking lane in most apartments, while a 6-foot table only fits where the lane can stay open. Whatever the size, the surface carries one job at a time, and everything that is not the current project lives somewhere that is not the table.
A self-healing cutting mat does more than protect the tabletop. Set on the table, it draws the boundary of the work zone: cuts happen on the mat, the mat stays put in one spot, and the strip of bare table beside it becomes the landing space for the pieces in progress. An 18 by 24 inch mat covers most fabric and paper work; go 24 by 36 inch only if your projects truly need it, because the mat, sized like the table, should leave some surface visible.
Then attach the nothing-lands-here rule to that bare strip. Mail lands on the counter, the laundry basket, the shelf beside the door, anywhere with a lid. The moment the table becomes the flat surface where mail gets put down, the corner starts its slide back into a pile, and one week later you are clearing the table to work. The rule costs nothing and does more for the corner than any bin you can buy.
Cost: $30–$80 for a folding table, $10–$25 for a cutting mat. Time: 20 minutes to set the surface and mark the landing strip.
4. Visible and reachable: pegboard, wall rail, open bins
The wall is the storage a corner always has. Supplies you can see get used; supplies packed into closed boxes get forgotten and rebought. The wall setup is three layers, each carrying a different kind of supply.
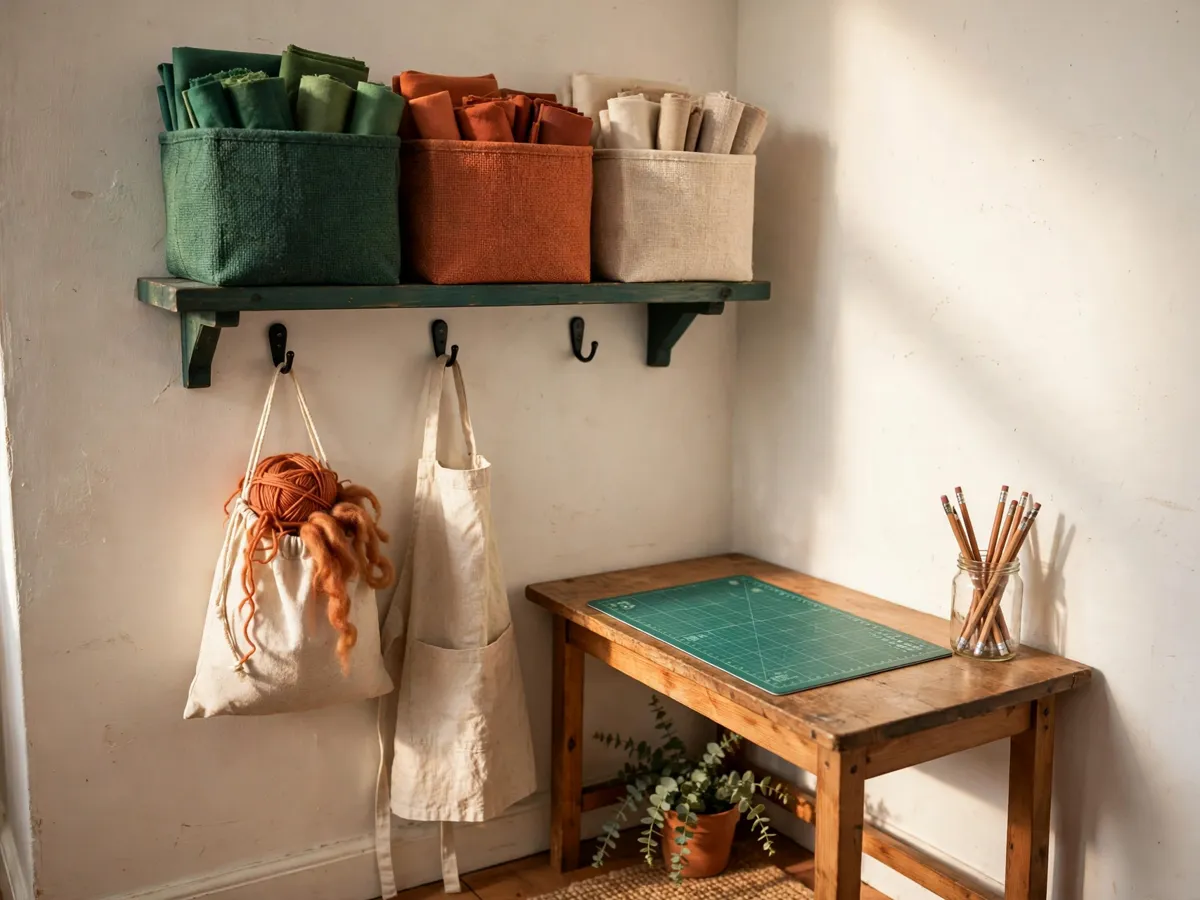
A pegboard takes the tools: scissors, rotary cutter, rulers, brushes, the small items that need a specific hook each. Hang the daily tools at shoulder height so grabbing them takes one motion, and outline each tool with a marker so every item has an obvious home and an obvious gap when it is out. A wall rail with movable hooks and small cups takes the mid-weight supplies: tape, twine, glue bottles, the things that topple over on a shelf. Open bins on a shelf or the table edge take the weekly group: fat quarters, paper pads, the ribbon collection, anything you flip through rather than grab blind.
The split between hang and hide is simple: if you reach for it without looking, it hangs; if you browse it, it sits open; if you use it twice a year, it hides on the closet shelf. In a rental, skip the drilling and run the same layers on adhesive-mounted rails and a freestanding pegboard frame leaning against the wall, or mount nothing at all and give the whole wall job to a tall open shelf pulled up beside the table.
Cost: $15–$45 for a pegboard kit, $10–$30 for a rail, $10–$25 for open bins. Time: 60–90 minutes to lay out and hang, most of it deciding which tool goes where.
5. The cart decision: one rolling cart, three levels
A rolling cart earns its footprint in a corner because it is the only storage piece that moves. Park it beside the table while you work, roll it into the walkway or a closet when guests come, and the corner disappears in ten seconds, which no fixed shelf can do. One cart is enough; two become a junk archive on wheels, so resist the second one until the first is genuinely full.
The levels work as a frequency map, top to bottom. Top level: the active project plus the daily tools, so the most-used things sit at hand height. Middle level: daily and weekly consumables (glue, tape refills, thread, marking pens) sorted into small trays or cups so the level reads at a glance. Bottom level: the heavy and the backup, the sewing machine case, the paper stack, the spare glue bottles, anything you reach for monthly at most.
Hold one rule to keep the cart useful: each level keeps one category family, and an item that no longer fits the level has to move down a level or out of the cart. Carts die by gradual overflow, one borrowed item at a time, until the top drawer jams and the whole piece becomes a mobile guilt pile. Five minutes of re-sorting when it starts drifts saves the cart.
Cost: $25–$70 for a three-tier rolling cart, $10–$15 for small trays. Time: 20 minutes to load by level.
6. Fabric and paper storage: color family or project
Stash fabric sorts two ways, and the right one depends on how you shop your own shelves. By color family works for the quilter and the crafter who pick by look: folded pieces filed into open bins by color, so pulling a palette is one trip to one bin. By project works for the maker who buys with a plan: each project's fabric, pattern and notions live together in one clear bag or box until the project is done. Pick the one that matches how you actually reach for fabric, and the mixed approach (some of each) is fine as long as each piece lives in only one of them.
Fabric breathes. Cotton and linen stash stored airtight for months comes out musty and creased, so open bins, woven baskets or a shelf with the fabric folded upright (file-folded like shirts, spines visible) beat sealed bags for anything you touch more than twice a year. Sealed containers stay reserved for truly long-term storage in a closet or under the bed, and even then a sealed bag with a sheet of acid-free paper inside treats the fabric better than a vacuum bag, which crushes fibers flat.
Paper stores flat and vertical, by size. Pads and cardstock stood on edge in an open bin or a magazine file pull out without unstacking, and the sheets stop curling the way horizontally stacked paper does. Scraps get one bin of their own, sorted by size if you are honest about it (usable pieces on the left, strips and confetti on the right), and the bin gets emptied into real projects or the recycling on the same five-minute reset that clears the table.
Cost: $10–$40 for open bins and a magazine file. Time: 45 minutes to fold the stash upright and file it by color or project.
7. Small parts: buttons, threads, tools
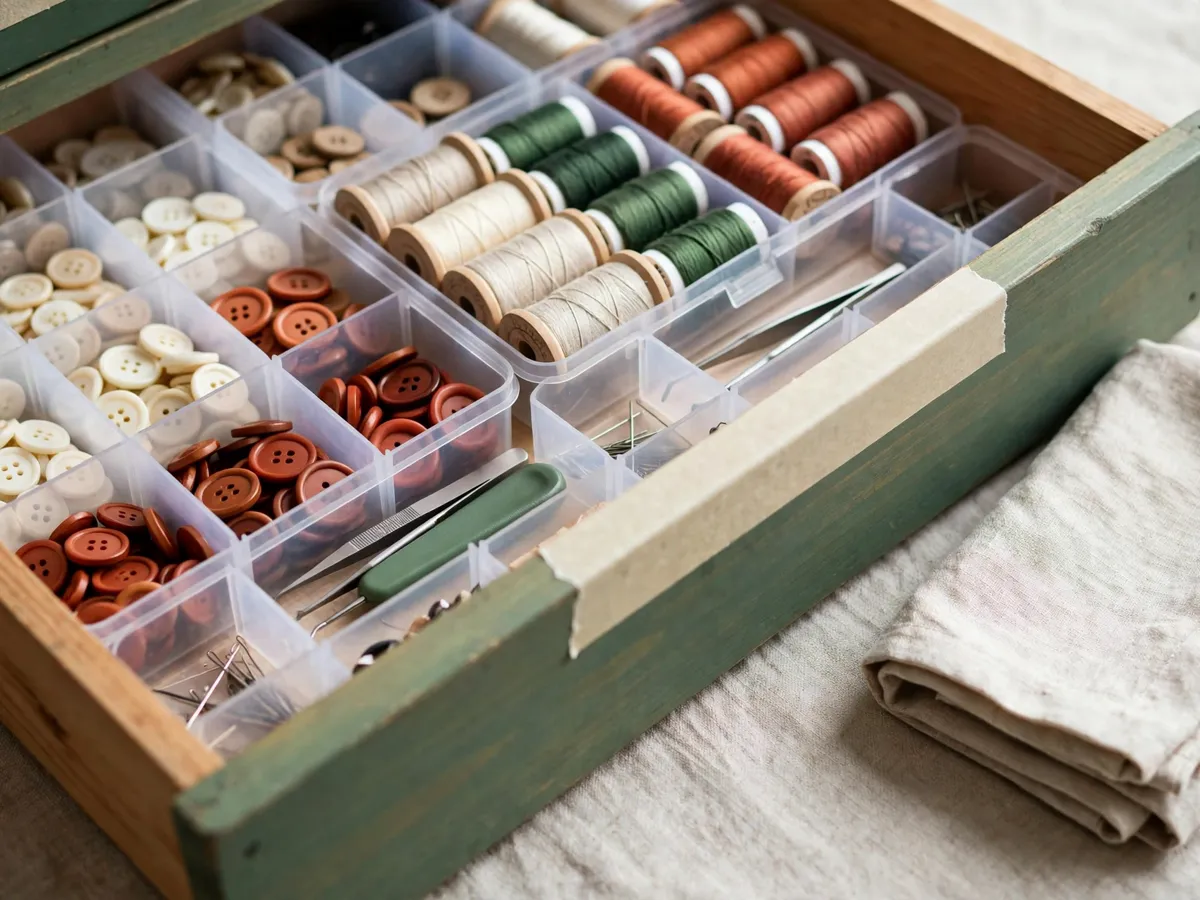
Small supplies organize by family, one container per family, and the container is chosen by how the piece is picked up. Buttons, beads, fasteners and embellishments live in divided bins or small clear jars, one compartment per color or size, because you browse them by look. Thread spools stand upright in a shallow box or a drawer tray, color side up, so the whole collection reads like a paint swatch and the empty slot shows which color is out.
Hand tools (seam ripper, needles, bobbins, small screwdrivers for the machine) gather into one closed case or one drawer with a divider grid, because tools travel: they get carried to the table, used and left, and a visible open tray for them gives the strays a place to land at reset time. The rule that matters here is one family per container. A jar of mixed buttons and bobbins is a jar you have to dig through every single time, and digging is what makes a corner feel chaotic.
Labels are what keep the families intact. A label maker is a purchase, not a requirement: masking tape and a marker hold up fine on jars and bins and cost almost nothing. Label what the container holds, not what it is (a bin that says "elastic and hooks" beats one that says "misc"), and re-label the same day a container changes contents, because an honest label on a wrong bin quietly breaks the whole system.
Cost: $5–$25 for divided bins, jars and tape. Time: 30 minutes to family-sort the small parts and label them.
8. The daily flow: a five-minute reset
A corner stays workable because of one habit, run at the end of every session, and it takes about five minutes. The reset is the part most storage plans skip, which is why most storage plans look great for two weeks and then become the pile they replaced. Run it in the same order every time, because the order is what makes it fast.
The sequence: tools back on the board (every traced outline filled, so the gap shows immediately if something is missing), consumables back in their cart levels, scraps into the one scrap bin, the cutting mat wiped and the landing strip cleared back to bare table. The active project closes into its project box (next section) and the box goes on the cart top or the closet shelf, depending on when you will next touch it. Five minutes, and the corner passes the clear-surface test from section 1 again.
The reset also works as the early-warning system. A tool that did not go back on the board tells you the board layout has a wrong hook. A consumable that keeps missing its cart level tells you the level is overstuffed. Fix those small drifts the day you notice them and the system holds for years; ignore them and the pile rebuilds itself one exception at a time.
Cost: $0–$10 for the scrap bin you may not own yet. Time: 5 minutes at the end of each session.
9. The project box rule: one active project, one box
Half-finished projects are what actually bury a corner. Fabric for one, paper for another, tools left out for both, and soon the table holds three projects worth of parts and none of them can proceed. The fix is one active project, one box: every project in progress lives in a single clear or lidded box, with its fabric, pattern, pieces and tools together, and the box carries a label with the project name and the exact next step ("hem the sleeves").
The label is the part that does the work. Three months later, the note on the lid is the difference between restarting in one minute and re-figuring the whole thing out. Keep one project box out at a time; a second project waits its turn on the closet shelf. If a project has been boxed and untouched for a season, that is a decision point: either schedule a session with it or break it down, and both outcomes clear the corner.
Everything else is archived, and the archive is anywhere the corner is not: a closet shelf, an under-bed bin, a dresser drawer. Supplies waiting for a someday project follow the same rule. The corner holds what you are making now; the archive holds what you might make later; the label on every archived box says which is which.
Cost: $10–$30 for a few clear project boxes. Time: 15 minutes to box and label the current project.
10. Small-space and renter reality
When the corner is barely a corner, the storage moves to spaces that already exist. One closet shelf takes the seasonal group and the project-box archive; the same zoning logic as the small closet reset for beginners applies, with the supplies you touch monthly at eye level and the twice-a-year boxes up top. A lidded bin slid under the bed takes the overflow, and the seasonal swap logic from the off-season clothing storage guide works for craft boxes too: twice a year, swap what sits in the under-bed bin against what sits in the corner.
The back of a door is the last free wall in a rental. An over-door shoe organizer with clear pockets holds ribbons, glue bottles, markers and thread upright, each pocket one family, and it hangs on hooks over the door without a single hole in the wall. A dresser drawer does the same job for small parts if the corner has no wall at all; the divider-grid method in the drawer organization guide splits a deep drawer into thread, tools and notions zones that read at a glance.
Renter-safe applies to every piece in this guide: the table folds and moves, the cart rolls, adhesive rails and leaning pegboard frames come off clean, and nothing in the setup needs a drill or a landlord conversation. That is not a limitation, it is the reason the whole corner can move apartment to apartment with you.
Cost: $15–$60 for over-door pockets, under-bed bins and shelf risers. Time: one afternoon to place everything, most of it deciding what leaves the corner.
11. Cost and time, honestly
The $25 version is real and worth starting with: a table you already own as the cutting surface, a mat, a few open bins, tape and marker labels. It tests the layout before money confirms it, and plenty of corners stop there and work fine.
- $25–$70. The working floor: cutting mat, three bins, an over-door organizer, labels. The surface is a table you own.
- $70–$140. Adds the folding table and the cart, the two pieces that turn a shelf into a corner.
- $140–$230. The full setup: table, cart, pegboard kit, rail, bins, project boxes, small-part containers and labels.
What you do not need: a dedicated craft furniture set, storage sold as a matching collection, or a second cart. Time side: the full setup runs one afternoon of sorting plus an hour of placing, the audit is the longest single step, and the five-minute reset is the only recurring cost. Prices are big-box and secondhand estimates, not quotes.
Cost: $25–$230 all-in. Time: one afternoon to build, five minutes a session to hold.
Common questions
How do you organize craft supplies in a small corner?
Sort everything by reach frequency first: daily supplies get the wall and the cart top, weekly supplies get the cart and open bins, seasonal supplies leave the corner for a closet shelf or an under-bed bin. Then give the table one job (the project on the mat) and run the five-minute reset at the end of every session so the surface starts each project clear.
What can I use as a craft table in a rental?
A folding table sized to the wall, usually 4 feet, works in most apartments and folds away when the corner needs its floor back. Set a self-healing cutting mat on it to define the work zone and leave a strip of bare table beside the mat as the landing space for pieces in progress. A dining table works too; the mat protects it and the nothing-lands-here rule keeps the rest of the surface clear.
Should fabric be stored by color or by project?
By color family if you pick fabric by look, so pulling a palette is one trip to one bin; by project if you buy fabric with a plan, so each project's fabric, pattern and notions live together in one box until it is done. Fold the pieces upright so the edges show, keep them in open bins that breathe rather than sealed bags, and give scraps a bin of their own.
What goes on each level of a craft cart?
Top level: the active project box and the daily tools. Middle level: daily and weekly consumables like glue, tape, thread and markers, sorted into small trays. Bottom level: the heavy and backup items, the machine case, paper stacks and spare supplies you reach for monthly at most. Keep one category family per level, and move anything that outgrows its level down or out.
How do I keep my craft table from piling up?
Give every other surface in the corner a job so the table keeps none of them: tools hang on the board, consumables live in cart levels, scraps go to one bin, and each in-progress project closes into one labeled box at the end of a session. Then run the five-minute reset, which ends with the mat wiped and the landing strip back to bare table. Mail and laundry get their own homes; the moment they get the table, the pile rebuilds.
Save these on Pinterest
Pin the frequency audit and the five-minute reset, the two pages that keep a craft corner working after the weekend is over. This guide and the rest of the organization and storage guides live together there.