 Plant As Deco
Organization & Storage
Smart Home Wiring: Organize the Router Corner
By Plant As Deco · Updated 22 November 2026
Every smart home ends up with the same corner: a modem, a router, a hub, a few smart plugs waiting for a spot, and a nest of cables nobody wants to touch. This guide is for that corner. It covers how to trace what you have, label it, bundle it, coil the slack, and hide the bricks, all renter-safe.
Weekend-ready: $20–$90, one afternoon. Renter-safe, nothing in-wall.
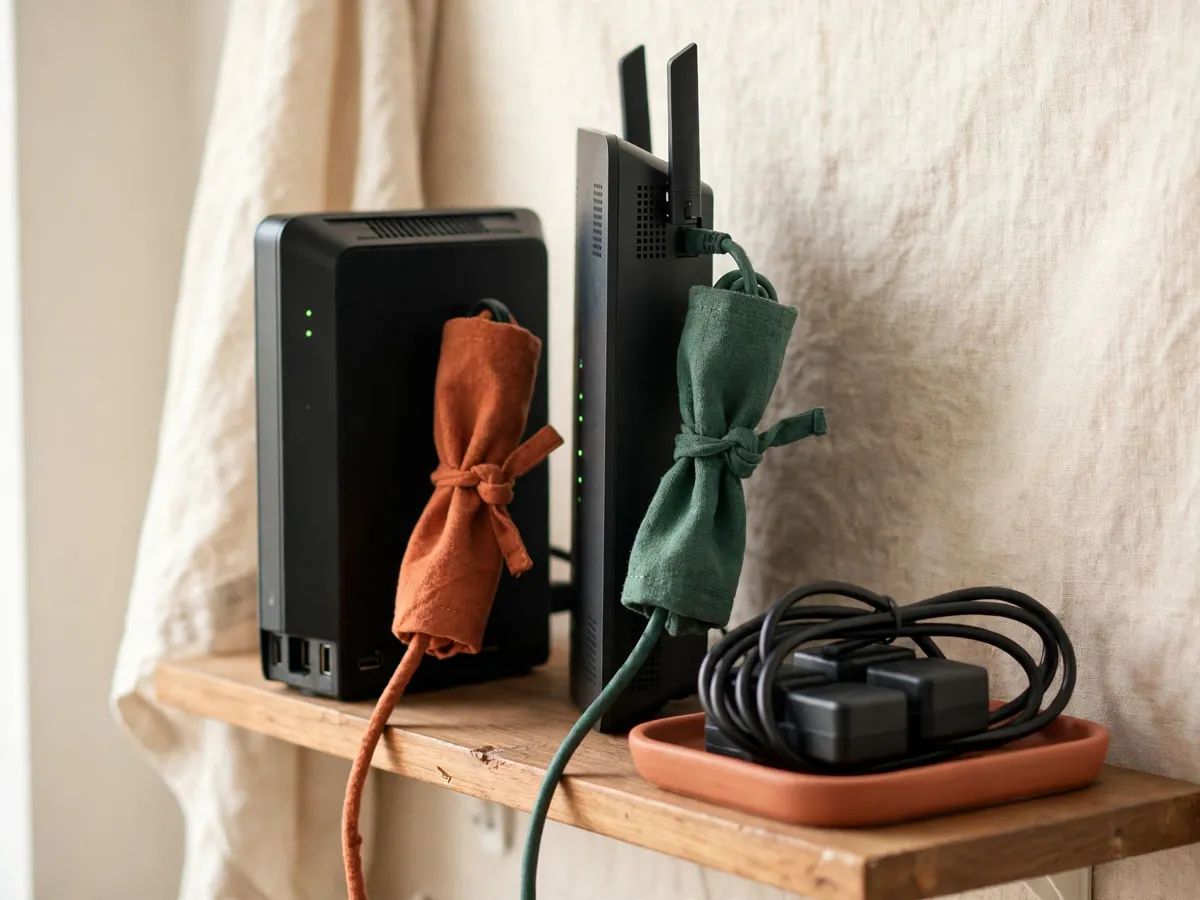
1. What the router corner has to do
A router corner collects hardware by accident. The modem brings the internet in, the router hands it out, the smart hub talks to the lights and sensors, a mesh node carries wifi to the far bedroom, and the line to a porch camera often starts here too. Every box adds a power cord, and most add a signal cable. Two years in, the shelf is a nest.
The corner has two jobs: keep the network running, and survive the reset. Something always drops eventually. The hub loses a sensor, the mesh node goes quiet, the whole internet blinks out. The fix is the same move every time, unplug the right box, count to ten, plug it back in. The real question is whether you can find the right box.
That is the unplug-and-replug test: when something drops, can you pick out the one cable you need in under a minute, without unplugging four other things to reach it? If the answer involves guessing, the corner is assembled rather than organized.
Everything here is low-voltage cable work: cords, ties, trays and covers. Power cords go to an outlet strip, signal cables go between boxes. Nothing in this guide touches the home's electrical wiring, and nothing goes inside a wall.
Cost: $0. Time: 5 minutes during the next outage. Write down which box you guessed wrong; that is the first cable to label.
2. Start with the cables you actually trace
Do not buy anything yet. The audit comes first, and it needs the shelf pulled out from the wall. Take a photo of the back of the shelf before unplugging anything, close enough to read the port labels. That photo is your map back if something does not wake up.
Then unplug one cable at a time and watch what breaks. The cable that kills everything is the line in from the provider. The one that takes out wifi alone runs modem to router. The one that silences a single room feeds the mesh node. This is tracing, and it takes minutes per cable and no tools.
You will find three groups. The live backbone: the line in, the modem to router cable, the run to the hub, the feed to the mesh node. The device runs: the camera line, a cable heading toward the media center. And the dead: the cord from a retired device, the ethernet cable that goes nowhere. Dead cables are often a third of the nest, and they leave in a bag.
The keep-or-let-go rule in the declutter checklist room by room applies to cables exactly as it applies to clothes: if it fed a device you no longer own, it goes. Keep one spare of each type in a labeled drawer, not in the nest.
Cost: $0. Time: 30–45 minutes, photo to finished audit. Label each cable the moment you learn its job.
3. Label first, bundle second
The order matters more than any product in this guide. The moment cables enter a bundle they become identical: same color, same thickness, same length. Label first, while every cord is separate and its job is fresh. The person who bundles first ends up untying the whole thing six months later to find one cable.
The materials cost cents. Masking tape folded over the cable into a small flag, written with a marker, is the classic. Colored tape wraps work as a code once the key is written somewhere it survives, like the inside of the shelf.
Label both ends of every cable, because the end you need is never the end you are looking at. Label by job, not just by room: "line in from provider", "mesh node, bedroom", "camera, porch". A label that names the job survives a move and a router upgrade, because the job stays the same when the box changes.
It is the same habit that keeps keys landing in one bowl: one obvious home, named once. The entryway ideas for renters guide builds that labeled drop spot by the door; the router corner runs on the same principle, one flag per cable.
Cost: $0–$5 for tape and a marker. Time: 15 minutes to flag both ends of every live cable. Relabel the day a cable changes jobs.
4. Bundles and sleeves
With everything labeled, gather the cables into bundles, one bundle per job. The backbone travels together: the line in and the modem to router run. The run toward the bedroom or the media center is a second bundle. Power cords form their own bundle, kept apart from the signal cables.
Choose velcro over zip ties. Zip ties lock, and the only way to change a smart home is to cut them and start over. A velcro wrap reopens in seconds, which matters because the setup is never finished: a smart plug gets added, a camera moves, the hub gains a device.
A fabric sleeve gathers the main run into one soft tube where it travels exposed along a shelf edge or a table leg. Slide it on before connecting the far end; a sleeve does not go on after the fact. One velcro tie at each end holds it shut.
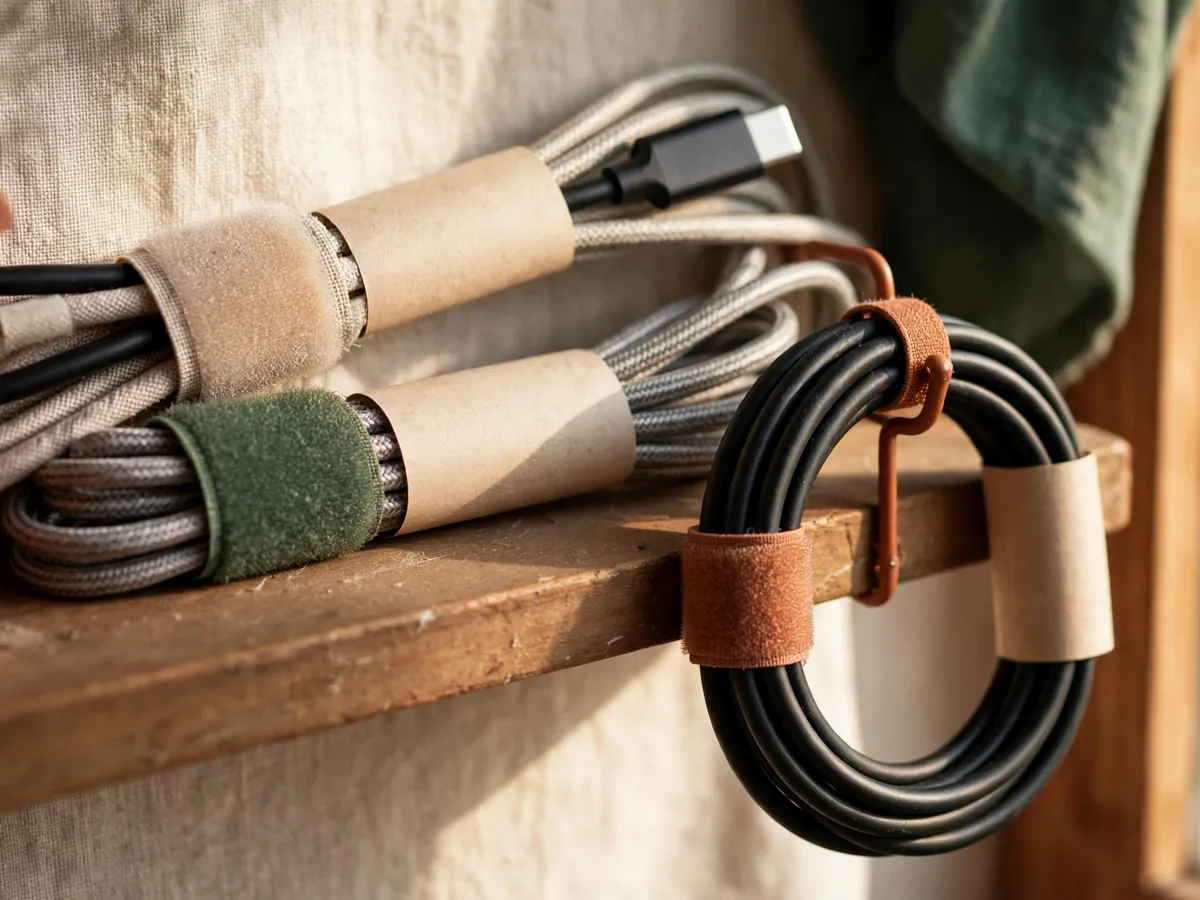
The last piece is the service loop: a loose foot of slack at every connection, so the router can be pulled forward to read its label or press its reset button without unplugging anything. The loop is what turns the next reset into a one-minute job.
Cost: $8–$15 for a velcro roll, $8–$15 for a sleeve. Time: 30 minutes to bundle and tie. Service loops should be loose enough to slide a finger under.
5. Slack management
Every cable arrives longer than the run needs, and extra length is where corners fail. The instinct is to pull everything tight, and tight is wrong: a taut cable strains its plug, tips a light hub or mesh node off the shelf, and works itself halfway out of its port over months.
Slack needs a home, and the home is a coil. For long extra lengths, coil in a figure-eight and hang the coil on a small hook under the shelf: the figure-eight alternates the direction the cable crosses itself, so it does not kink the way a tight round coil can. Shorter lengths wrap into a loose loop with one velcro tie.
Where the coil lives matters less than that it lives somewhere fixed: under the shelf, in the tray behind the bricks, inside the sleeve near the far end. One spot per cable, so the monthly reset always finds it in the same place.
Cost: $3–$8 for adhesive hooks. Time: 20 minutes to coil and hang. A cable with several feet of extra length deserves a shorter cable, not a bigger coil.
6. The power brick sprawl
The bricks are their own problem. The modem, the router, the hub and each camera bring one, and bricks are shaped to block the next socket: wide, heavy, oriented sideways. Plug three into a strip and the fourth does not fit, and the sprawl then migrates to the floor and dangles off the shelf edge.
One tray fixes it. A shallow cable tray or basket sits under the shelf or behind the devices and holds the outlet strip plus every brick. The bricks lie flat with space between them, the cords exit through a side notch, and the whole tray slides forward for a reset.
Plug orientation is the free fix inside the tray. Most bricks rotate so the wide side runs along the strip instead of across it, which frees the neighboring socket; on strips with angled sockets, alternating the bricks' direction lets most of them sit side by side. Warm bricks still need a gap between them, never a stack.
Strip placement is a decision rather than a habit. On the floor, a strip collects dust and gets kicked; set into the tray or mounted under the shelf, it stays clear and reachable. One strip in one place.
Cost: $10–$25 for a tray or basket. Time: 15 minutes to load and orient. Pick a tray with an open side or a notch for the cords to leave.
7. Hiding the mess honestly
Hidden is only half the goal, because the corner has to open. The monthly reset needs hands inside it, so a cabinet that looks perfect but takes ten minutes to unpack is worse than a visible bundle you can reach. Hidden and openable, that is the standard.
In a rental the tools are surface ones. A raceway, an adhesive-backed channel with a snap-on cover, runs the bundle down the wall edge from the shelf to the floor, and the cover can be painted the wall color until it disappears. The home theater organization guide runs the same channel behind a TV; the router corner is the same logic at a smaller scale. A basket under the shelf hides the tray and the bricks while staying open at the front.
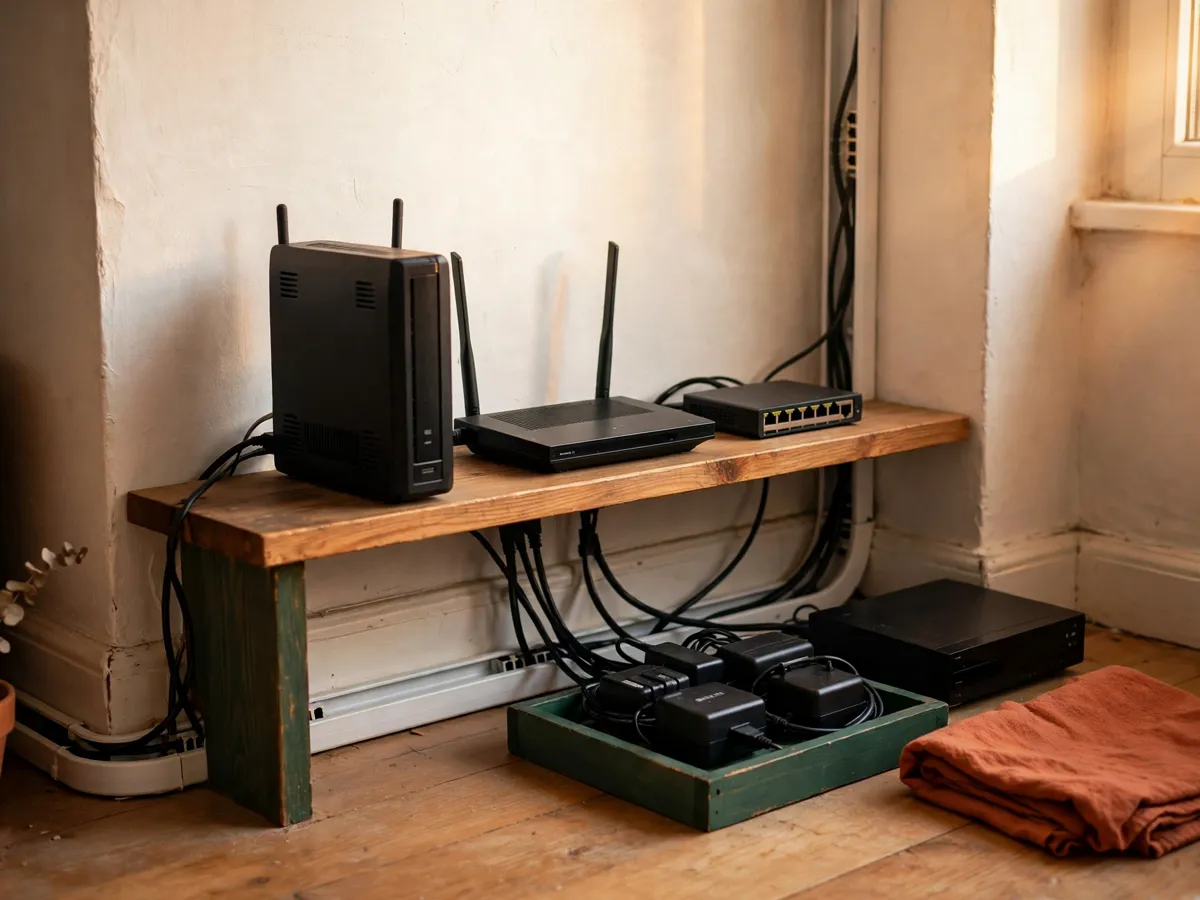
In an owned home there is one more option: a low-voltage drop inside the wall, from the shelf down to a plate near the floor, done with a kit and a couple of holes. It looks the cleanest and it is permanent, which is why it is not the renter path. This guide keeps everything on the surface.
Cost: $12–$35 for a raceway kit, $10–$20 for a basket. Time: 30 minutes to route and cover. Test the adhesive on a hidden patch of wall first.
8. Ventilation and heat
Routers and bricks run warm, and warm boxes stacked together run hot. A modem sitting on top of the router, both wrapped in a bundle, with bricks packed tight beside them, holds heat in. The symptom is the one nobody expects from cable work: random resets. A router that runs too hot reboots itself, and the network blinks out for a minute.
The fix is air, and it is free. Two inches of open space above each box, two inches behind, and nothing stacked on a running device. The router stands on its own surface or its stand, the modem beside it, not under it. Bricks sit spaced in the tray rather than piled.
Dust is the other half of heat. Clogged vents block what little airflow a small box gets, and a shelf corner collects dust faster than an open room. The dust pass lives in the monthly reset below.
Cost: $0. Time: 5 minutes to respread the boxes. If the underside of a box feels hot to the back of your hand, it needs more air, not a tighter bundle.
9. Wall-mounting the router in a rental
The shelf itself is optional. Lifting the router off the surface frees the shelf for the tray and the hub, and puts the antennas up high where the signal travels better. Two routes fit a rental, plus one that skips the wall.
The reliable route is bridge brackets: two small brackets screwed to the wall, carrying the router on its mounting tabs or screws. Two holes, spackled and painted on move-out in ten minutes. This is the mount that holds for years, and two patchable holes are within what most leases tolerate (read yours).
The no-drill route is adhesive, and its limits deserve honesty. Weight-rated adhesive strips hold a light plastic router on a smooth painted wall, for a while. On a textured wall, on wallpaper, near a heat source, or under a heavier mesh node, adhesive lets go slowly and the box lands on whatever is below. If you use it, mount the router low, directly over the tray.
The third route skips the wall entirely: hooks under a floating shelf carry the router on the underside of the shelf, out of sight from the room, with the cables rising straight into the tray. It adds no new holes beyond the shelf's own.
Cost: $8–$15 for brackets, $6–$10 for adhesive strips or hooks. Time: 20 minutes. Adhesive wants a smooth wall and a light box; brackets take everything else.
10. The reset ritual
The corner drifts. Velcro loosens, a coil slips its hook, a new smart plug lands on the shelf for a few days, dust builds in the vents. A fifteen-minute ritual once a month resets all of it, and it is the difference between a corner that stays calm and one that gets redone every year.
- Re-tie the bundles. Walk each bundle, snug the velcro, re-hang the coil that has slipped. Two minutes.
- Dust the vents. Unplug the strip, brush or vacuum the vent slots on the modem, the router and the hub, and wipe the tray. Five minutes.
- Retire the dead. Any cable that arrived since last month gets the audit: it stays only if it feeds something live, and it gets a label on the spot either way. Five minutes.
- Run the test. Pick one live cable at random and name its job in one glance. If you cannot, the label has faded or the layout has drifted; fix it now, not during the next outage.
The monthly pass slots into the cleaning routine for a small apartment as the corner's own entry, next to the under-sink check and the fridge front row. Same shape: one small zone, one pass, once a month.
Cost: $0–$5 for more velcro and tape. Time: 15 minutes once a month. Unplug the strip first and let the boxes cool before dusting.
11. Cost and time, honestly
The full router corner sits between $20 and $90, and the low end is a real setup rather than a compromise: tape labels, a velcro roll, a basket you already own, and an audit done honestly. The high end adds the raceway, the tray and the brackets.
- Velcro tie roll: $5–$10, the highest-impact single purchase.
- Labels: $0–$5, tape and a marker.
- Fabric sleeve: $8–$15 for the main run.
- Raceway kit: $12–$35 for the wall edge run.
- Cable tray or basket: $10–$25 for the bricks and the strip.
- Hooks or brackets: $8–$15 for under-shelf or wall mounting.
The time splits into 45 minutes for the audit and labeling, 30 for bundling, 15 for the tray, 30 for the raceway and 20 for mounting. One afternoon, about three hours, with the audit first because half the result comes from it.
Cost: $20–$90 all-in. Time: one afternoon, about 3 hours. Prices are big-box and hardware-store estimates, not quotes.
Common questions
How do I organize smart home wiring in a rental?
Keep everything on the surface. Audit and label the cables, bundle them with velcro, coil the slack on hooks under the shelf, and run the visible run down the wall edge inside an adhesive raceway with a paintable cover. The bricks and the outlet strip live in a tray under the shelf. The whole corner needs no drill and moves with you.
Should I use zip ties or velcro for cable bundles?
Velcro. Zip ties lock and have to be cut every time the setup changes, and a smart home changes: a plug is added, a camera moves, the hub gains a device. A velcro wrap reopens in seconds, and one roll serves every future change.
How do I keep power bricks from blocking outlets?
Give the bricks a home instead of fighting them at the wall. One tray under the shelf holds the outlet strip and every brick flat, each brick rotated so its wide side runs along the strip, with a gap between the ones that run warm. The strip sits in the tray or mounts under the shelf, not on the floor.
What do I do with extra cable length?
Leave slack in the system on purpose, then give it a home. A small service loop at each box lets you pull a device forward without unplugging it, and longer extra length coils in a figure-eight on a hook under the shelf. Never run a cable taut: taut cables strain their plugs and work loose.
How do I keep the router corner tidy over time?
A fifteen-minute monthly ritual: re-tie the bundles, unplug and dust the vents on the modem, router and hub, retire any cable that no longer feeds anything, and label anything new the day it arrives. The corner returns to a nest only when the monthly pass stops.
Save these on Pinterest
Pin the label-first rule and the monthly reset, the two moves that keep the router corner calm after the weekend is over. This guide and the rest of the organization and storage collection live together there.