 Plant As Deco
Organization & Storage
Home Theater Organization: Tame the Media Wall
By Plant As Deco · Updated 22 November 2026
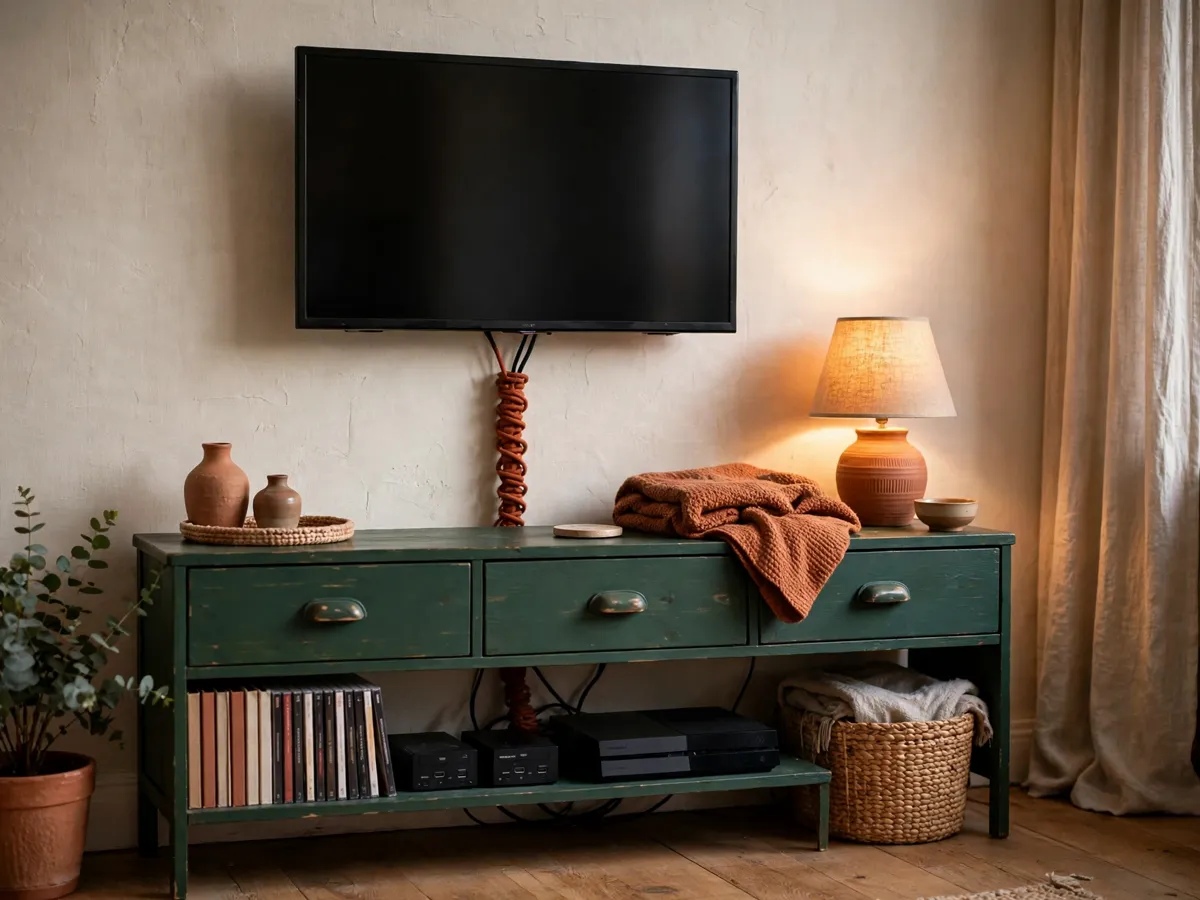
The media wall is where most living rooms lose their calm. A TV, three or four devices, a tangle of cords, a stack of discs, and a pile of remotes turn one wall into visual noise. Home theater organization gives every piece a home: the devices on a shelf, the cords inside a channel, the discs upright, and the remotes in one tray. Done right, the wall reads quiet even while everything is in use.
Weekend-ready: $30–$150, one afternoon. Renter-safe, no drilling into tile or brick.
1. What the media wall has to do
A media wall holds five things: the screen, the devices that feed it, the cords that connect them, the discs and games you still play, and the remotes that run it all. The wall works when each has a fixed place. It fails when any one is loose, because loose items attract more loose items and the pile grows.
The test is simple. Stand across the room and look at the wall. If the first thing you notice is a cord, a stack of cases, or a remote on the floor, the wall is assembled rather than organized. A calm wall draws the eye to the screen and the furniture and leaves the wiring out of view.
Nothing here needs a workshop or custom cabinetry. The work is a set of decisions: where the devices sit, how the cords travel, how the discs are stored, and where the remotes land.
Cost: $0 to run the reset test. Time: five minutes to look honestly. The test only works if you stand back far enough to see the whole wall.
2. Start with the devices you actually use
Before you buy a shelf or a cord cover, pull every device out and lay it on the floor. Sort them into three piles: what streams, what plays discs, and what is dead. Most media walls carry at least one device that has not been turned on in a year, and it is usually the reason the shelf is too full.
The streaming pile runs daily: a streaming stick, a cable box, maybe a small set-top box. The disc pile is the game console and the disc player, used less often but still active. The dead pile is the old player that was replaced and the console nobody uses anymore. Every device on the shelf is a cord on the wall and a vent that collects dust.
Once the dead pile is set aside, count what remains. Most small apartments need room for three to four active devices plus a power strip, and that number drives the shelf decision in the next section. If you are torn on a device, the declutter checklist room by room guide walks through the keep-or-let-go rule.
Cost: $0. Time: 20 minutes to pull and sort. The hard part is the dead pile, and the sorting itself is fast.
3. The console or shelf decision
Every active device needs a surface, and the surface has to do two jobs: hold the device flat, and let air move under it. Devices that run warm, game consoles in particular, need at least two inches of open space above and behind the unit. A shelf that packs devices side by side with no gap shortens their life and makes the wall run hot.
The choice is between closed drawers and open shelves. Closed drawers hide the devices and the cords and look the calmest from across the room, but they trap warm air and can weaken a streaming stick or a console sensor behind a solid front. Open shelves solve both problems and show the hardware to the room. A hybrid works well: open shelves for the warm devices, a closed drawer for the power strip.
Whichever you pick, depth matters more than width. A shelf 14 inches deep holds a game console and its power brick with room to spare. Under 12 inches pushes the brick off the back edge, and that is where most cord messes start.
Cost: $40–$150 for a console or media cabinet. Time: 30 minutes to place and level. Measure the deepest device before you buy.
4. Cord channels: the fix that changes the whole wall
Cords are the thing that makes a media wall look messy, and the thing that is easiest to fix. Get every cord off the floor and into a channel that runs from the devices to the power strip, and from the strip to the outlet. A cord channel is a covered path, a sleeve or a raceway, that bundles the cords against a surface that matches the wall.
In an owned home, the cleanest option is an in-wall channel: a kit that passes the cables behind the drywall, with a recessed outlet plate behind the TV and a low-voltage pass-through behind the console. It looks like the TV floats with no cords at all. It requires drilling, and it should carry low-voltage signal cables only. The power cord from the TV has to reach a proper outlet.
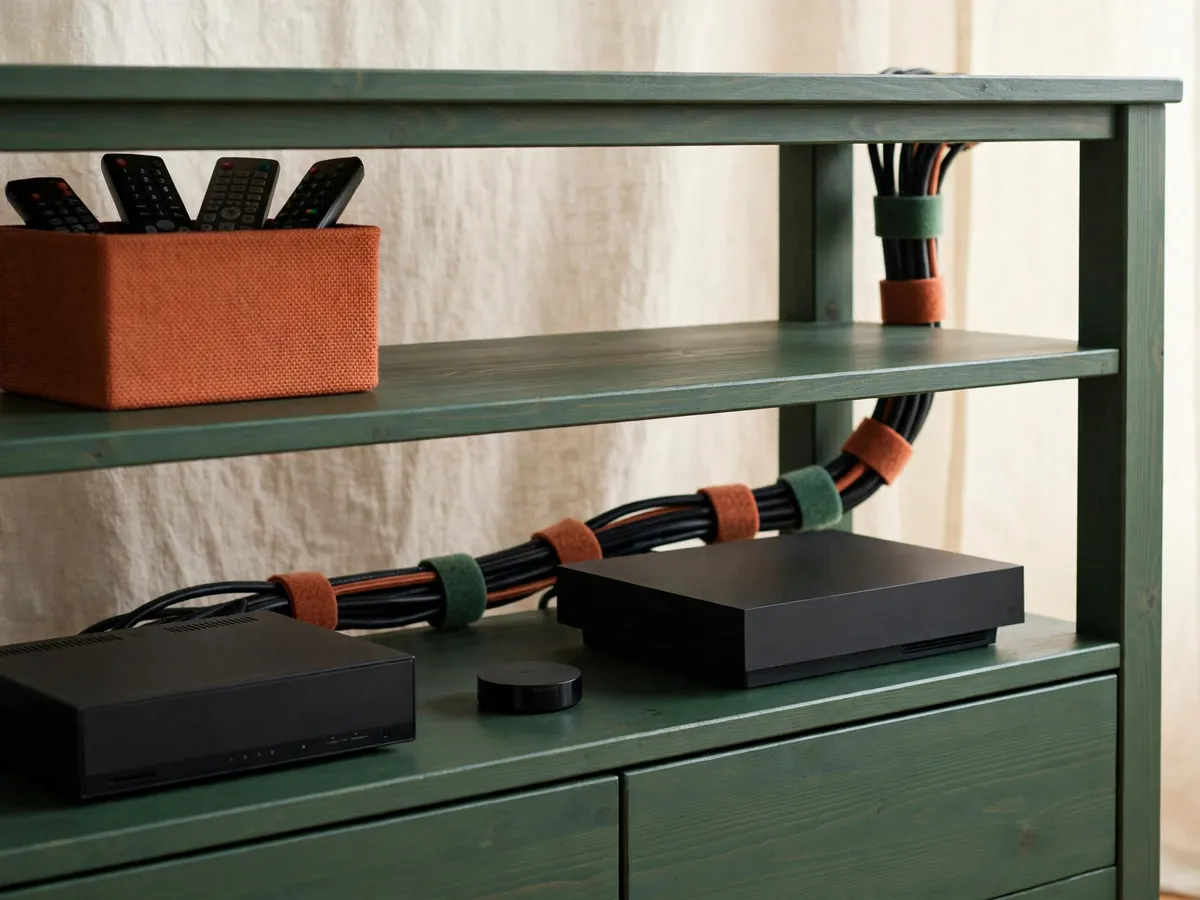
In a rental, the answer is a surface channel that comes off cleanly. A fabric cord sleeve bundles the cords into one soft tube and zip-ties to the console legs. A plastic raceway, a channel with adhesive backing, runs the bundle down the wall behind a snap-on cover you can paint. The raceway is the stronger choice, because it holds the cords flat and disappears on a pale wall.
One rule prevents most cord failures: never run a power cord inside a wall cavity, and never bind it tightly against a signal cable. A tight bundle against a warm power brick is a fire risk before it is ever an organizing choice.
Cost: $12–$35 for a raceway kit, $8–$15 for a fabric sleeve. Time: 30 minutes to route and cover. Test an adhesive strip somewhere hidden before you commit the whole run.
5. Disc and game library
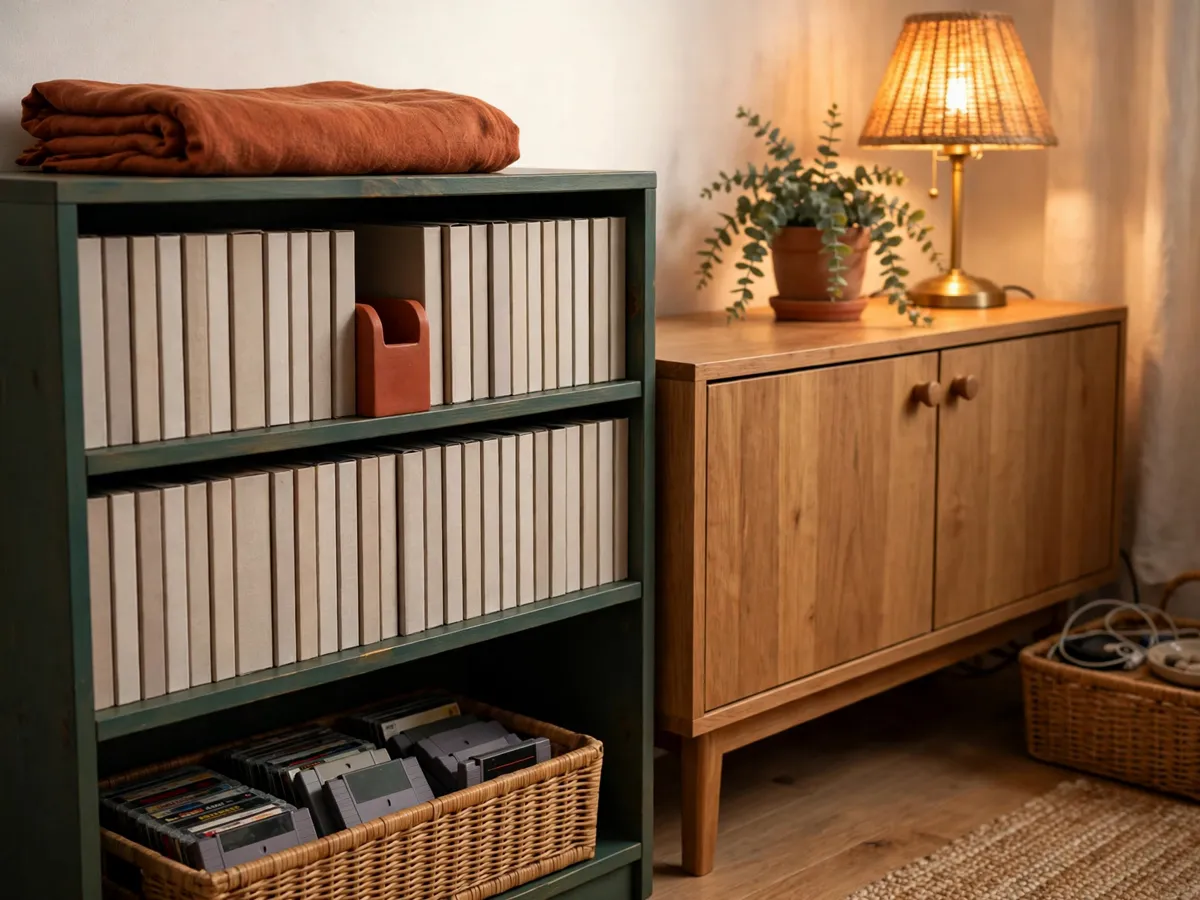
Discs and game cases are the second thing that piles up, after the cords. The cases are usually stacked flat, and a flat stack turns into a leaning tower that spreads across the shelf. The fix is upright storage, the way a bookshelf holds books. A case standing on its edge takes a fraction of the space of one lying flat and reads without lifting the stack.
Before you stand them up, run a purge pass. Pull every disc and every game and sort into keep and let-go. The keep pile is what you have actually played or watched in the last year, plus anything with real sentimental value. The let-go pile is the scratched discs, the movies you streamed instead, and the games you finished and will not replay. Trade-in stores and donation bins take clean cases.
Store what remains upright and grouped by family: movies together, games together, music or data discs together. A shallow media rack, a pair of bookends on the console shelf, or a set of upright file boxes all work, as long as the cases stand on edge with a quarter inch of slack so one slides out without toppling the row.
If small children share the room, the toy storage in a small apartment guide covers the same approach for things pulled and put back daily.
Cost: $0–$25 for bookends or a shallow rack. Time: one hour for the purge and the stand-up. Purging first often removes the need for a new rack.
6. Remote control parking
Remotes are the smallest items on the wall and the ones most likely to end up on the floor. The fix is a single parking spot, obvious enough that everyone in the home uses it without being told. A shallow tray on the console or a small bin on the shelf beside the devices both work.
A low ceramic or wood tray, four to six inches wide, holds three or four remotes at one end of the console. A bin is better when the spot also collects a phone, a charging cable, or loose batteries, because its walls keep the small items from sliding off.
If the home has pre-readers or frequent guests, label the slots. A strip of masking tape and a marker, matched to the remote it points to, turns the spot into a system anyone can follow. The entryway ideas for renters guide uses the same labeled drop spot for keys and bags: one obvious home, labeled once.
Cost: $5–$20 for a tray or bin. Time: five minutes to set the spot. A tray only works if it is the single allowed landing place.
7. The daily flow: a one-minute reset
The setup gets the wall organized, and the reset keeps it that way. A wall that gets used and never reset drifts back to clutter within a week. The reset is a one-minute pass at the end of the day, and it has four moves.
- Remotes to the tray. Every remote goes back to its parking spot. This is the move that fails first, because a remote on the couch is easy to ignore for one more night.
- Discs back to the rack. Anything that came out goes back to its slot, upright, spine facing out. A disc left on the console is a disc that gets scratched.
- Cords into the channel. Any cord pulled loose for a charging cable or a guest device goes back inside the raceway or sleeve. One loose cord overnight becomes two the next day.
- Devices off, vents clear. Confirm the active devices are resting and nothing is stacked in front of a vent. A console that vents through the top cannot breathe under a pile of mail.
It is a return to the home position, and it only works because every item has a home to return to. The cleaning routine for a small apartment guide covers the deeper weekly and monthly passes that sit on top of this daily one-minute flow.
Cost: $0. Time: one minute. The reset only works if it happens every day, before the clutter is visible.
8. The seasonal pass
Twice a year the wall needs a deeper pass than the daily reset: once before the cold months, when devices run longer and the room stays closed up, and once in spring when the dust has settled.
- Dust the vents. Unplug each device and vacuum or brush the vent slots, especially on game consoles and cable boxes that run warm. Dust in a vent is the most common cause of a device running louder than it should.
- Re-tie the cords. Open the raceway or sleeve, pull the bundle, and re-secure it with fresh zip ties or velcro. Cords sag over a season, and a re-tie keeps them flat inside the channel.
- Retire dead devices. Walk the audit again. Anything untouched since the last pass moves to the let-go pile, and its shelf space is better empty than holding something dead.
Cost: $0–$5 for zip ties or velcro. Time: 45 minutes for the full pass. Do it on a day the devices can stay unplugged long enough to cool.
9. Small-space and renter reality
Not every apartment has room for a console, and not every lease allows a wall-mounted TV. The devices still need a surface, the cords still need a channel, and the remotes still need a tray. The hardware changes.
If the TV cannot be mounted, set it on a low stand or a media cabinet and run the cords along the back legs in a fabric sleeve. A stand with a closed back hides the cords from the front and the sides, and a cabinet with doors hides the devices too. The trade is floor space, because a stand pulls the TV into the room.
With no room for a console, a single floating shelf above a small media table holds the streaming stick and the cable box while the game console sits on the table. The channel runs from the shelf down to the table, and the power strip lives on the floor behind the legs. That works in a studio where the wall shares space with a bed or a desk.
A media cabinet under $100 needs no drilling and moves with you. Look for adjustable shelves and a removable back panel. If the back is solid, leave it off: the open back gives devices airflow and gives cords a clean path to the strip.
Cost: $30–$100 for a stand or media cabinet. Time: 20 minutes to place. Skip the wall mount unless the lease allows it and you can patch on exit.
10. Cost and time, honestly
The total to organize a media wall in a small apartment sits between $30 and $150, and the work takes one afternoon. A fabric sleeve and a pair of bookends on an existing shelf lands under $30. A media cabinet, a raceway kit, and a labeled remote tray push toward $150.
- Cord channel: $8–$35 for a sleeve or raceway kit, the highest-impact spend on the wall.
- Console or media cabinet: $40–$100 for a flat-pack unit, more for solid wood.
- Disc storage: $0–$25 for bookends or a shallow rack.
- Remote tray: $5–$20, or $0 for a shallow bowl you already own.
- Labels: $0–$5 for tape and a marker.
The time splits into 20 minutes to audit the devices, 30 to place the console, 30 to route the cords, an hour to purge and stand up the discs, and five to set the tray.
Cost: $30–$150 total. Time: one afternoon, about three hours. The cheapest path still works if the audit and the purge come first.
11. What usually goes wrong
Most failed makeovers share the same handful of mistakes, and each is cheaper to skip than to undo.
- Buying organizers first. A console and a raceway chosen before the device audit end up the wrong depth and the wrong size. Audit, then buy.
- Cords behind hot devices. Bundling a power cord against a console exhaust vent, or sealing it in a raceway with no airflow, is a heat problem dressed up as cable management.
- Discs in flat piles. A stack of cases looks tidy for a week, then leans, then falls. Upright storage from the start prevents the pile.
- No airflow. A cabinet with a solid back and devices packed edge to edge traps heat. Leave gaps, remove the back panel, or keep warm devices on open shelves.
- Two remote parking spots. A tray on the console and a bin on the side table means remotes in both places. Pick one and remove the other.
Cost: $0 to avoid. Time: five minutes to read before you start. Each item here is a purchase or a redo you can skip.
Common questions
How do I hide TV cords without drilling?
Use a surface raceway, an adhesive-backed channel that runs the cords down the wall behind a snap-on cover you can paint to match. A fabric cord sleeve bundles them into one soft tube and zip-ties to the console legs. Both come off cleanly and suit a rental where drilling is not allowed.
What is the best way to store discs and game cases?
Store them upright, on their edge like books, grouped by family. Run a purge pass first to cut the library, then use bookends on the console shelf or a shallow media rack. Leave a quarter inch of slack so one case slides out without toppling the row.
Can I put a game console in a closed cabinet?
Only if the cabinet has airflow. A closed drawer traps warm air and shortens the life of a device that runs hot. Use open shelves for warm devices, or remove the back panel and leave at least two inches of open space above and behind the unit.
How deep should a media console be?
At least 14 inches, to hold a game console and its power brick with room to spare. Under 12 inches pushes the brick off the back edge, and that is where most cord messes start. Measure the deepest device before you buy the console.
How do I keep the media wall organized over time?
Run a one-minute daily reset: remotes to the tray, discs back to the rack, cords tucked into the channel, vents clear. Twice a year, run a seasonal pass to dust the vents, re-tie the cords, and retire any device untouched for six months.
Save these on Pinterest
Pin the cord channel and the one-minute reset, the two moves that keep a media wall calm. This guide and the rest of the organization and storage collection live together there.