 Plant As Deco
Home Organization & Storage
Pantry Organization for Wire Shelving: Fix the Shelf, Not the Bins
By Plant As Deco · Updated 17 November 2026
If your rental pantry has white wire shelves, you already know the failure: the spice jar tips sideways between the wires, the olive oil bottle rocks on the round bars, and the back row might as well be a storage unit you lost the key to. Pantry organization for wire shelving starts with the shelf itself, not the bins — name how the shelf fails, give it a working surface, do the vertical math, and set a depth rule. One afternoon, no drilling.
Weekend-ready: $0–$45, one afternoon. Renter-safe, no drilling.
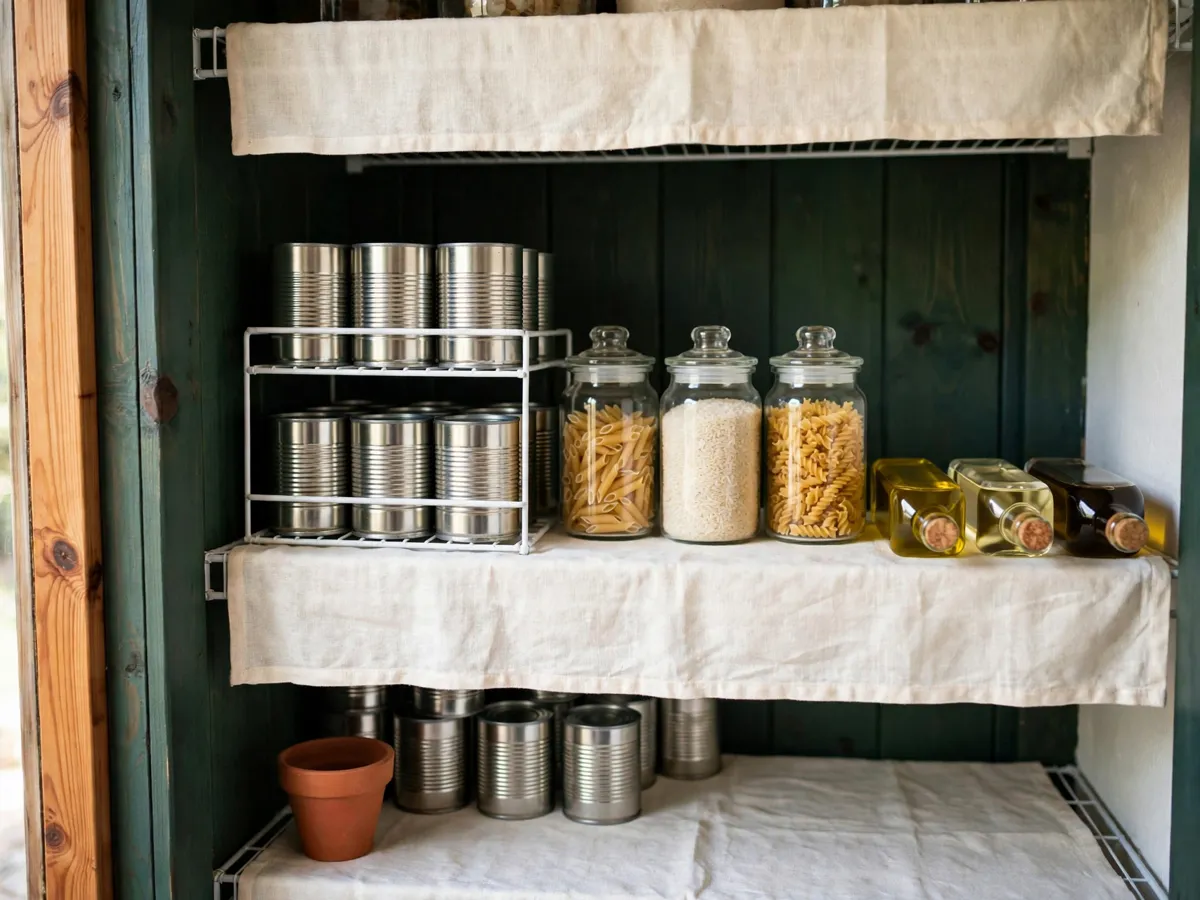
1. Name the four ways a wire shelf fails
Every wire-shelf complaint is one of four failures, and each one has a fix that costs less than the bin you were about to buy for it. Diagnose first, buy second — a shelf that fails two ways needs two fixes, and a shelf that fails none needs nothing but the depth rule in section 5.
Small items tip through the gaps. A spice jar or a soup can has a foot smaller than the wire spacing, so every third reach tips something sideways into the shelf below. The fix is a surface, not a container: cardboard from a shipping box ($0), or one of the three bought options compared in section 2 ($3–$15).
Bottles wobble on the bars. Wire is round, so a bottle rests on a line, not a surface — oil and vinegar rock every time the shelf is brushed. The fix is grip under the contact line: a strip of non-slip rug pad under the bottle row ($3–$8) stops the walk without hiding the shelf.
Tall boxes dead-space the vertical gap. One cereal box standing tall fills the clearance and blocks anything stacking near it, so a shelf with 12 inches of height holds one sparse row. The fix is vertical: a shelf riser ($5–$15) or an under-shelf rack ($5–$12), whichever the math in sections 3 and 4 calls for.
The back row disappears with depth. On a 12-inch-deep shelf you cannot see the back from standing height, so duplicates hide and money quietly re-buys them. The fix costs nothing: the front-row and back-row rule in section 5, plus the one honest advantage wire has over a solid shelf — you can see the back row from below.
Cost: $0 to diagnose. Time: 10 minutes in front of the open pantry. Name the failure out loud before buying anything — a fix for the wrong failure is still clutter.
2. Give the shelf a working surface
The first two failures — tipping and wobbling — share one fix: a surface layer between the food and the wire. You have four realistic options, and they are not interchangeable, because each trades grip against cleaning against airflow. Glass jars ring and slide on bare wire; any of the four quiets them. Pick one per shelf by what that shelf holds, not one for the whole pantry.
| Option | Cost | Grip | Wipe-clean | Airflow & crumbs |
|---|---|---|---|---|
| Vinyl shelf liner | $5–$12 a roll | Good — a flat surface under every foot | Yes — wipes with a damp cloth | Seals the deck; crumbs sit on top until wiped |
| Cut cardboard, saved box | $0 | Good while it stays dry | No — replace it when it sags or stains | Seals the deck; crumbs collect at the edges |
| Thin melamine board, cut to fit | $8–$15 | Best — a true solid surface under everything | Yes — the easiest wipe-down of the four | Seals it completely; nothing falls through at all |
| Non-slip rug pad, cut in strips | $3–$8 | Best grip — bottles stop walking | No — rinse it in the sink and dry it | Mostly open — air and crumbs still pass through |
The choice gets simple once you name the shelf. The oil-and-vinegar shelf wants wipe-clean, so vinyl liner or the melamine board. The spice-and-snack shelf wants grip, so rug-pad strips. The start-today-and-broke version is cardboard, replaced the day it sags — it is a real answer, not a placeholder. One decision per shelf, then stop; the table exists so you buy once.
Cost: $0–$15 per shelf. Time: 20 minutes to measure, cut and lay. Measure the shelf with a tape before cutting — a liner cut to a guessed size wrinkles and lifts at the edges.
3. Do the vertical-space math on one shelf
A typical rental pantry shelf runs about 12 inches deep, 16 inches wide, with 12 inches of clearance to the shelf above — 192 square inches of surface and a cube of air above it that flat shelving wastes. Here is the arithmetic, in standard soup cans (about 3 inches across, 4½ inches tall), so you can run it on your own shelf with your own numbers.
Flat, one layer: 16 ÷ 3 gives 5 cans across, 12 ÷ 3 gives 4 rows deep, so 20 cans — using 4½ of the 12 inches of clearance and leaving 7½ inches of air above every can doing nothing. Stacked two-high on the bare wire the count reads 40, but the top layer balances on round wire: it rolls, it walks, and pulling the wrong can drops it. The math works; the shelf does not.
One 6-inch riser: it splits the 12-inch clearance into two 6-inch levels, and a 4½-inch can fits under 6 inches with room to lift it out. Each level holds one flat layer of 20, so the same shelf holds 40 cans — the count stacking promised, except every can now sits on a surface instead of balancing on wire. About an inch and a half remains at the top, enough for the flat packets that never stand up anyway. That reclaimed second layer is the vertical storage a wire shelf was wasting — this is the fix for the tall-box dead space in section 1.
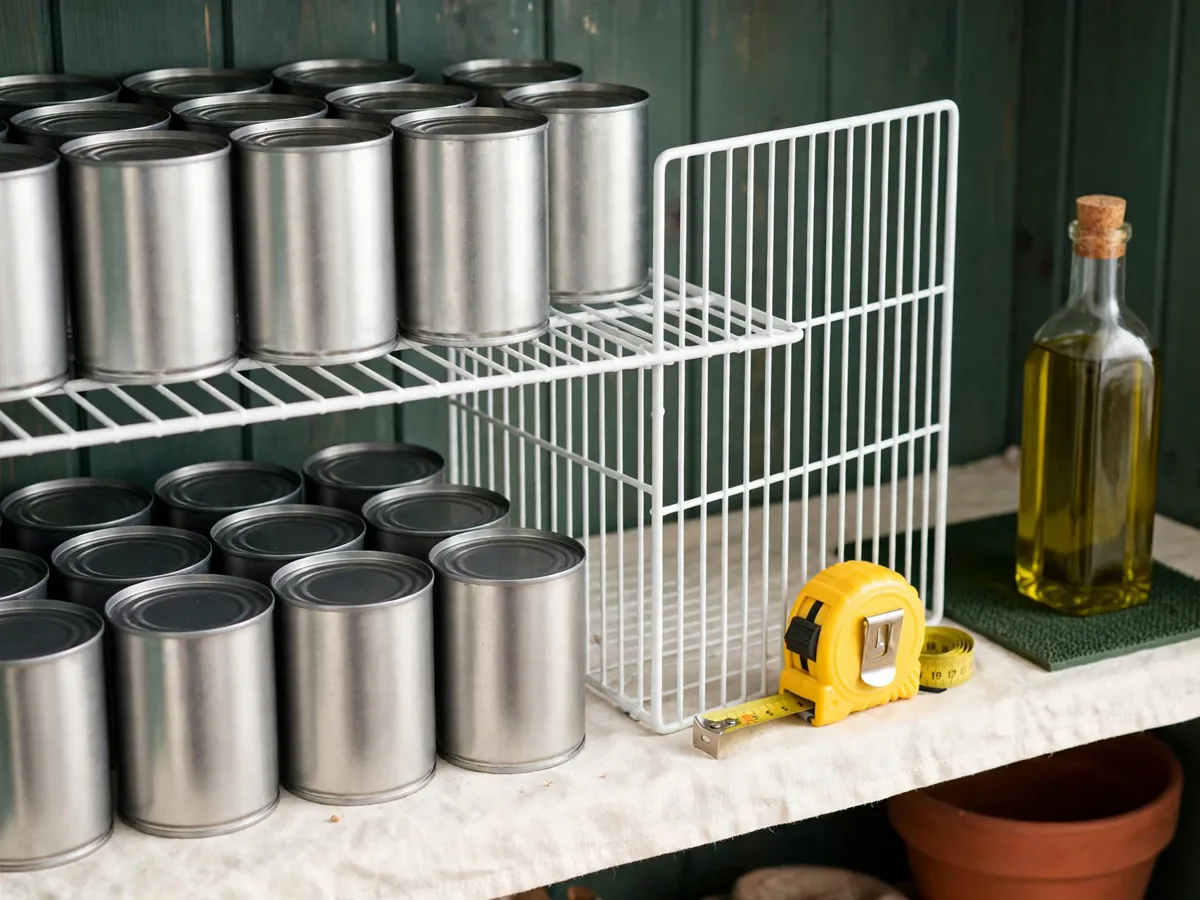
Cost: $5–$15 per riser. Time: 15 minutes to measure and place. Measure the clearance first — the riser and what sits on it both have to fit under the shelf above.
4. Hang the under-shelf rack in the air you are not using
The riser has a sibling for shelves that hold light, flat things: an under-shelf rack clips onto the shelf above and hangs down into this shelf's clearance, turning dead air into a working layer — the under-shelf storage a wire pantry is missing. It is the right fix where the shelf holds wraps, foil boxes, snack bags and the flat packets that lean on everything else.
The math, on the same 12-inch clearance: a rack about 4 inches tall hangs into the top of the space and leaves 8 inches below it. A 4½-inch can still fits under 8 inches with room to lift it out, so the shelf keeps its full layer of 20 cans and gains a hanging row of wraps and bags that used to lean on the cans. The rack layer is measured in the light stuff it holds — it is not a second can layer, and it does not replace the riser on a shelf of heavy goods. Choose per shelf: riser where the stock is cans and jars, rack where the stock is flat and light.
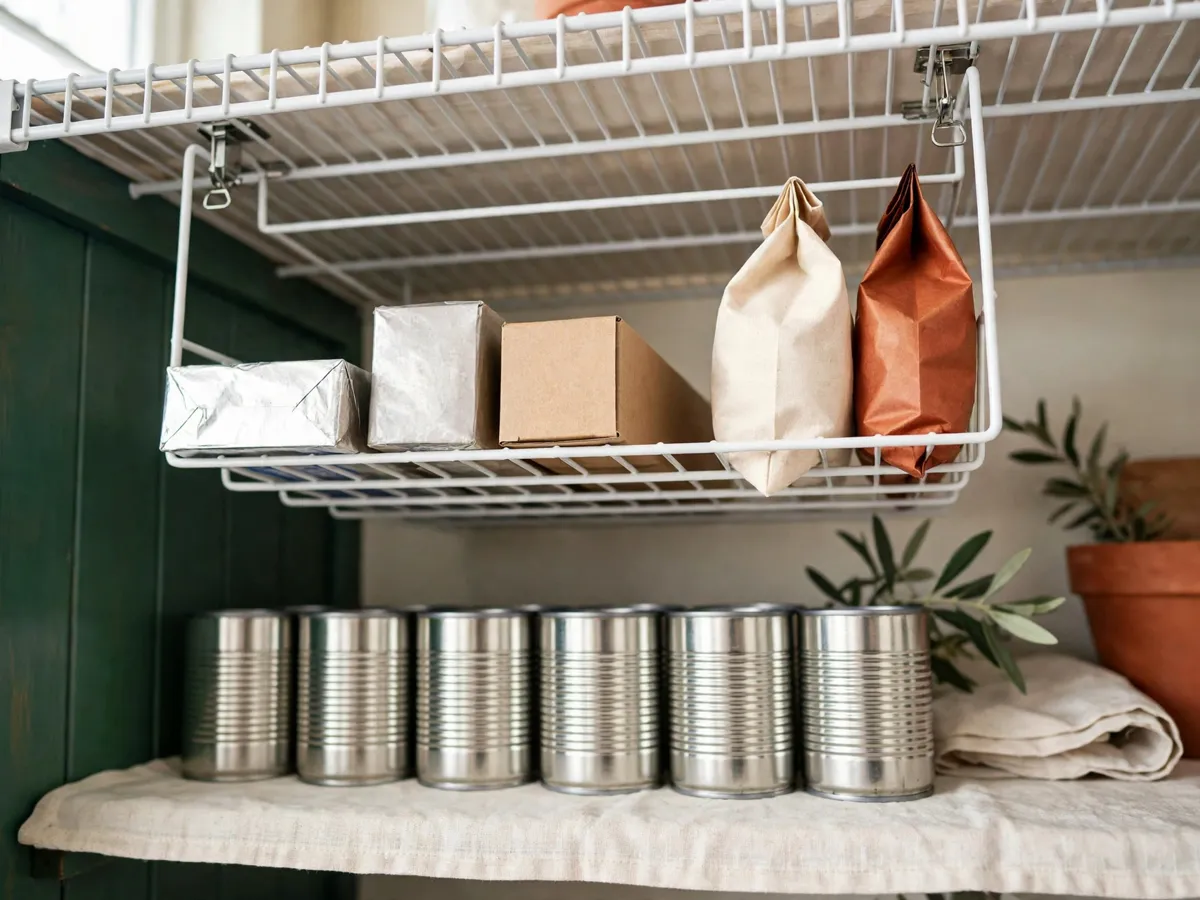
Cost: $5–$12 per rack. Time: 10 minutes to clip on and load. The clamp takes about an inch of the shelf above, so hang racks under shelves that hold light, forgiving stuff.
5. Set the depth rule: front row, back row, heavy low
Depth is where wire shelves lose people, so fix it with a rule instead of a product. Front row: weekly items, the things you reach for without looking. Back row: backup stock only — the second bag of rice, the spare cans, the unopened oil. Restock one-in-one-out: new groceries go to the back, and the front row refills from the back first, so the oldest can gets used without anyone thinking about rotation.
Weight runs the other axis: heaviest low. Oil, vinegar and glass jars live on the lowest shelf, because a glass jar that tips through a wire gap on the top shelf falls three shelves and the floor, and from the bottom shelf it falls none. Daily items sit at eye level, backup on the top shelf only if it is light — paper goods and spare snack bags, never glass.
Here is the part wire gets right: a solid shelf hides the back row completely at eye level, but wire has no solid deck, so the back row stays visible from below. Crouch once, look up through the wires, and you can see whether the backup row holds cans or empty air. Use that — check the back row from below before you shop, and the depth rule runs itself without pulling the front row forward.
Cost: $0. Time: 10 minutes to assign rows per shelf. The rule only holds if the back row stays backup — the first snack bag that migrates forward quietly ends the system.
6. The rebuild: one shelf at a time, in this order
You need: a tape measure, scissors, the surface you chose for that shelf, and the riser or rack if the math called for one. One shelf at a time — the full empty-everything reset is the zone-by-zone pantry reset, and this page is the shelf work underneath it.
- Empty one shelf onto the counter — not the whole pantry. One shelf keeps the afternoon survivable.
- Measure and write down three numbers: depth, width, and the clearance to the shelf above. Every cut and every riser decision comes from these.
- Brush or vacuum the wires. Crumbs fall through an open deck and gather underneath, so the floor under a wire pantry tells you how it has been going.
- Cut and lay the surface for this shelf — the table in section 2, matched to what this shelf holds.
- Add the riser or the rack where the math in sections 3 and 4 says this shelf needs vertical room.
- Load by the depth rule: back row backup, front row weekly, heaviest low, daily at eye level.
- Stop after one shelf if the afternoon is gone. The second shelf goes about twice as fast now that the decisions are made.
Cost: $0–$45 all-in — one surface ($0–$15), one riser ($5–$15) and one rack ($5–$12) at the top of their ranges still lands under $45, and $0 if cardboard and the depth rule carry the week. Time: 30–45 minutes for the first shelf, 15 for each after. Measure before you cut — every wasted strip of liner is a measurement you skipped.
Copy this checklist before you start
- Three numbers written down per shelf: depth, width, clearance
- The failure named for each shelf, out loud, before buying
- One surface chosen per shelf from the table — not one for all
- Riser or rack placed only where the shelf math called for it
- Back row assigned to backup stock, front row to weekly items
- Heaviest items — oil, vinegar, glass jars — on the lowest shelf
- Daily items at eye level; nothing glass on the top shelf
- One-in-one-out restock rule agreed with everyone who unloads
What we would skip
- Matching bin sets to hide the wire — bins on an unlined shelf still tip, and the bin money buys nothing until the surface and the vertical math are done. What containers are worth buying is the $0-to-$60 pantry plan's job, not this page's.
- Re-drilling the shelf heights in a rental — the brackets and the holes belong to the landlord, and moving them risks the deposit for a fix the riser solves for $15.
- Heavy glass jars on the top shelf — heaviest low is the whole rule; a jar that tips through a gap falls farthest from the top.
- Lining every shelf with the same material on day one — the oil shelf wants wipe-clean, the snack shelf wants grip, and only the worst shelf knows which it needs until you live with it a week.
- A rack on every shelf — each one spends an inch of the shelf above and a slice of headroom below; hang them only where the stock is flat and light.
Cost: $0 to skip, and it is the cheapest section on the page. Time: 2 minutes to read.
Common questions
How do I stop things falling through wire shelves?
Give the shelf a surface: cardboard from a shipping box costs nothing today, and the table in section 2 ranks the bought options — vinyl liner, melamine board, rug-pad strips — by grip, cleaning and what each does to airflow. Pick one per shelf by what that shelf holds.
Are shelf risers worth it on wire shelving?
On a 12-by-16-inch shelf with 12 inches of clearance, the math says yes: one 6-inch riser takes a shelf from 20 stable cans to 40, because it gives the second layer a flat surface instead of round wire. Measure the clearance first — the riser and the cans on it both have to fit.
What should go on the top shelf of a wire pantry?
Light backup only — paper goods, spare snack bags, the unopened extras you touch monthly. Never glass jars or oil: heaviest low is the rule, because a jar that tips through a wire gap falls farthest from the top shelf.
Why are there always crumbs under my wire pantry?
Because the deck is open — crumbs fall through the gaps and gather on the floor. That is the trade for the airflow that keeps the closet fresh. A wipe-clean surface layer catches them at the shelf instead, which is one more reason the oil shelf wants vinyl or melamine.
How do I organize a deep wire shelf I can't see the back of?
The depth rule: front row weekly, back row backup, restock one-in-one-out so the oldest gets used first. Then use wire's one honest advantage — the open deck lets you check the back row from below, so crouch, look up through the wires, and shop from what you actually see.
Save these on Pinterest
Pin the shelf math — the 20-cans-to-40 arithmetic is the part people want in front of them at the store. This guide lives in the Organization & Storage collection with the rest of the checklists.