 Plant As Deco
Organization & Storage
Under Stairs Closet Storage Ideas: A Renter-Safe Weekend Plan
By Plant As Deco · Updated 19 November 2026
The space under the stairs is the most wasted corner in a small home — too short at one end, too tall at the other, shaped like a triangle that fights every shelf you try to put in it. This page turns that triangle into a working closet you can organize in a weekend without a drill, a stud finder, or your landlord's permission. You will measure the slope, zone the space into three bands, pick shelves and bins that fit the angled walls, organize what stays into labeled bins, and end with a routine that holds.
Weekend-ready: $25–$120, one weekend. Renter-safe: everything here is drill-free — tension rods, freestanding shelves, and bins that sit on the floor. Landlord-safe throughout.
1. What Under-Stairs Storage Really Is
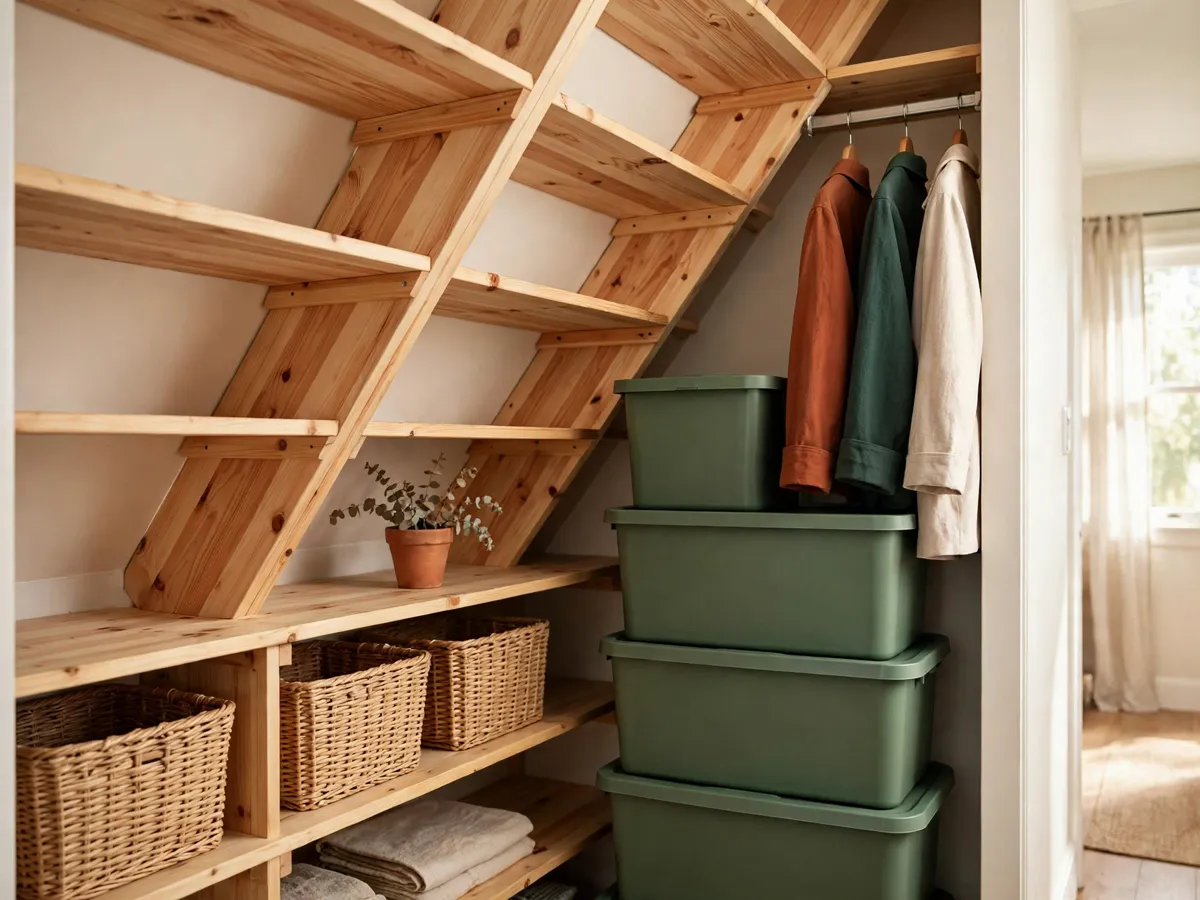
Under-stairs storage is the area beneath the stairs that most homes use as a dust trap or a broom corner. In a small apartment or a rental house, that triangle of floor is some of the most valuable storage you have — it is enclosed, out of sight, and does not compete with living space. The problem is the shape. The steps rise from one side to the other, so the ceiling under them slopes from full height at the tall end down to a few inches at the low end. That angled ceiling is what makes the space hard to use and what makes most store-bought storage fail in it.
A standard closet is a box — same height, same depth, same width from wall to wall. You put a shelf across the back, a rod below it, and everything lines up. Under the stairs you do not have a box. You have a wedge. The tall end might be seven feet high and the low end might clear your ankle. A flat shelf across the back wastes the tall end because the shelf sits at the height of the low end, and everything above it is empty air. A rod across the full width hangs coats at the tall end and drags them on the floor at the short end.
The fix is to stop treating it like a regular closet and start treating it like three separate zones stacked along the slope. The tall end is for hanging. The middle is for shelves and bins. The low end is for flat storage — boxes, bags, things you reach once a season. Once you see the triangle as three heights instead of one space, every storage decision gets easier and the space stays organized longer. If you have tried a small closet organization before and run into the same wall, that guide covers the box-shaped version. This page covers the triangle.
2. Read the Space Before You Buy
Every under-stairs project fails the same way: you buy a shelf unit or a set of bins that looks right online, bring it home, and discover it does not fit the slope. The angled ceiling means a shelf that fits at the front hits the underside of the stairs six inches back. Spend ten minutes reading the space first.
Start by clearing everything out. Pull the vacuum, the boots, the broken umbrella, the holiday boxes. Stand back and look at the shape. Where does the slope start? How far back does full height extend before the ceiling drops? Is the back wall plumb or does it angle inward? Is there a baseboard, a radiator pipe, or an outlet that will interfere? These decide what you can build.
Then check the floor. Under-stairs floors are often uneven — the steps were built first and the closet framed around them, so the floor may slope or step down at the low end. A freestanding shelf needs a level surface, and a bin that rolls needs a flat floor. If the floor steps, note where and how high.
Cost: $0. Time: 10 minutes. Take photos of the empty space from three angles — you will want them when you are standing in a store aisle trying to remember how the slope runs.
3. The Three Zones Under the Stairs
The triangle under the stairs divides into three natural zones, each defined by ceiling height. The tall zone is the end where the ceiling is full height — usually closest to the bottom step, where you can stand without hitting your head. This is where hanging storage lives: a rod for coats, hooks for bags, a shelf at head height for hats and scarves. The tall zone is the only part that works like a regular closet.
The mid zone is where the ceiling starts to slope. You cannot hang clothes here — the rod would be too low — but you can stack shelves that step down with the slope. This is the zone for folded clothes, bins of seasonal items, baskets of linens, and boxes of things you reach monthly. The key is using shelves that follow the angle instead of fighting it.
The low zone is the end where the ceiling drops below knee height. Most people give up on this section, but it is perfect for flat storage: shoe boxes, wrapping paper, luggage, sleeping bags, anything flat that does not need to be reached often. Slide a low bin or a flat box in and it disappears. The low zone is not wasted space — it is deep storage that happens to be close to the floor.
Cost: $0. Time: 5 minutes to mark the three zones on the wall with painter's tape so you can see the boundaries before you build.
4. Measuring the Slope and Clearance
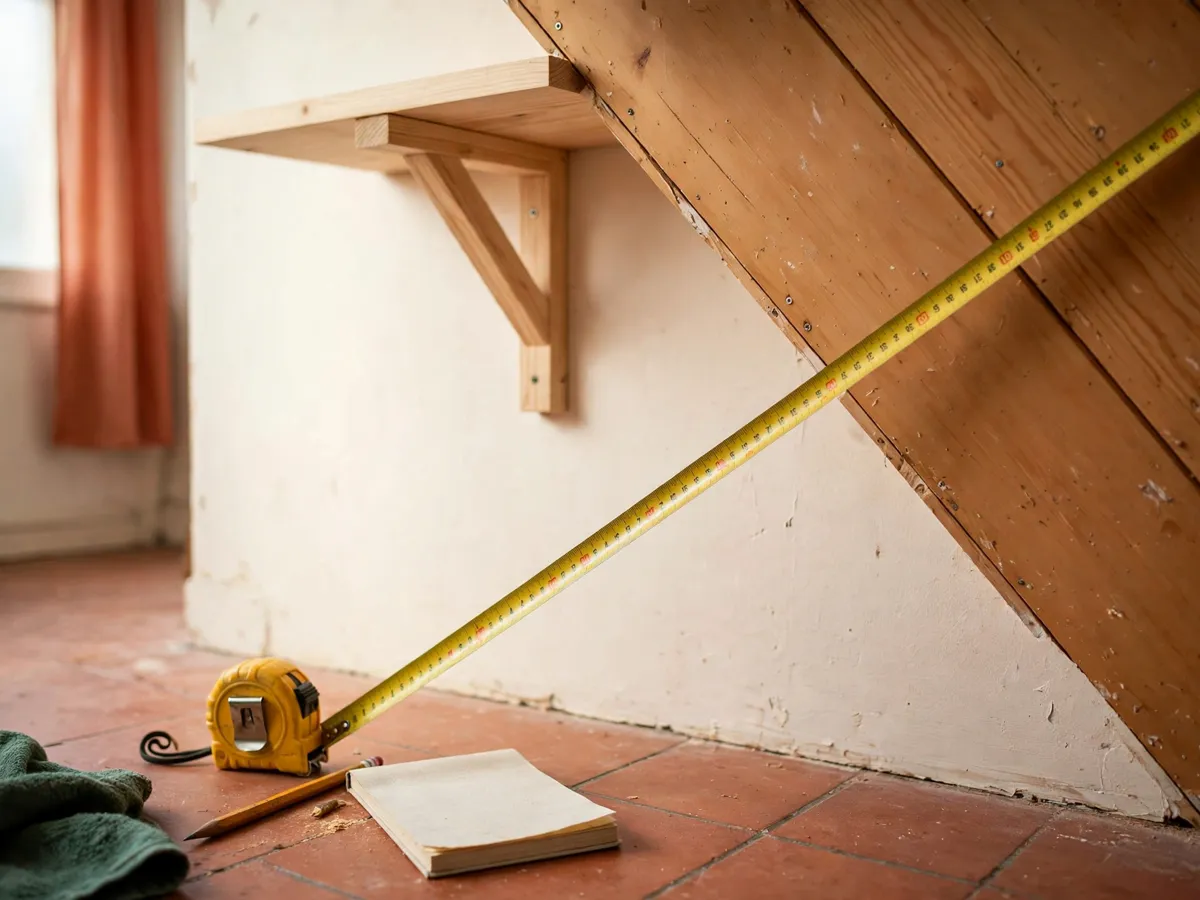
Measuring the slope is the one step that decides whether your shelves fit or fight the ceiling. You need three numbers at three points along the depth of the closet. First, measure the ceiling height at the front edge of the opening. Second, measure one foot back. Third, measure two feet back. The difference between the first and the third tells you how steeply the ceiling drops, and that rate is what every shelf and bin has to clear.
Most runs of stairs drop about one inch of ceiling height for every three to four inches of depth. A shelf placed 12 inches back from the opening loses three to four inches of clearance. A bin that is 14 inches tall and fits at the front edge will hit the slope six inches back. This is why flat shelves fail in an under-stairs closet — the shelf sits level, but the ceiling does not, so the back has less room than the front and tall items only fit at the front edge.
Also measure the width at the front and the width at the back. The closet may narrow as it goes deeper, especially if the steps turn. A shelf that fits the front opening may be too wide for the back wall. And measure the floor-to-lowest-tread gap at the low end — this is the clearance for your lowest bins. If that gap is less than six inches, the low zone is for flat items only, not bins.
Keep a tape measure in the closet — measure before every new bin or shelf, because package numbers mean nothing if the slope eats the clearance.
Cost: $0. Time: 10 minutes with a tape measure and a phone note. Measure twice — the slope is the one number people get wrong.
5. Shelf Systems That Fit the Triangle
The shelves you put under the stairs have to step down with the slope, not sit flat across the back. A flat shelf wastes the tall end because it sits at the height of the low end, and everything above it is dead air. A stepped shelf — one that drops as it goes deeper — uses the full height at every point. You can build stepped shelves two ways, both renter-safe.
The first option is a set of freestanding cube shelves of decreasing height. Put the tallest unit at the front of the mid zone, a shorter one behind it, and the shortest at the back. Each cube sits below the slope at its position, so the top clears the ceiling by an inch or two. Cube shelves run $25 to $45 per unit, and you typically need two or three. Look for units 11 to 13 inches deep — deeper than 14 and the back hits the slope.
The second option is adjustable wire shelving on freestanding legs. The legs sit on the floor and the brackets clip at any height, so each shelf sits just below the slope at that depth. A four-tier wire unit runs $35 to $60 and lets you fine-tune every shelf to the ceiling angle. The trade-off: wire lets small items tip through, so use bins or shelf liners on the top tiers. Both options leave zero damage at move-out.
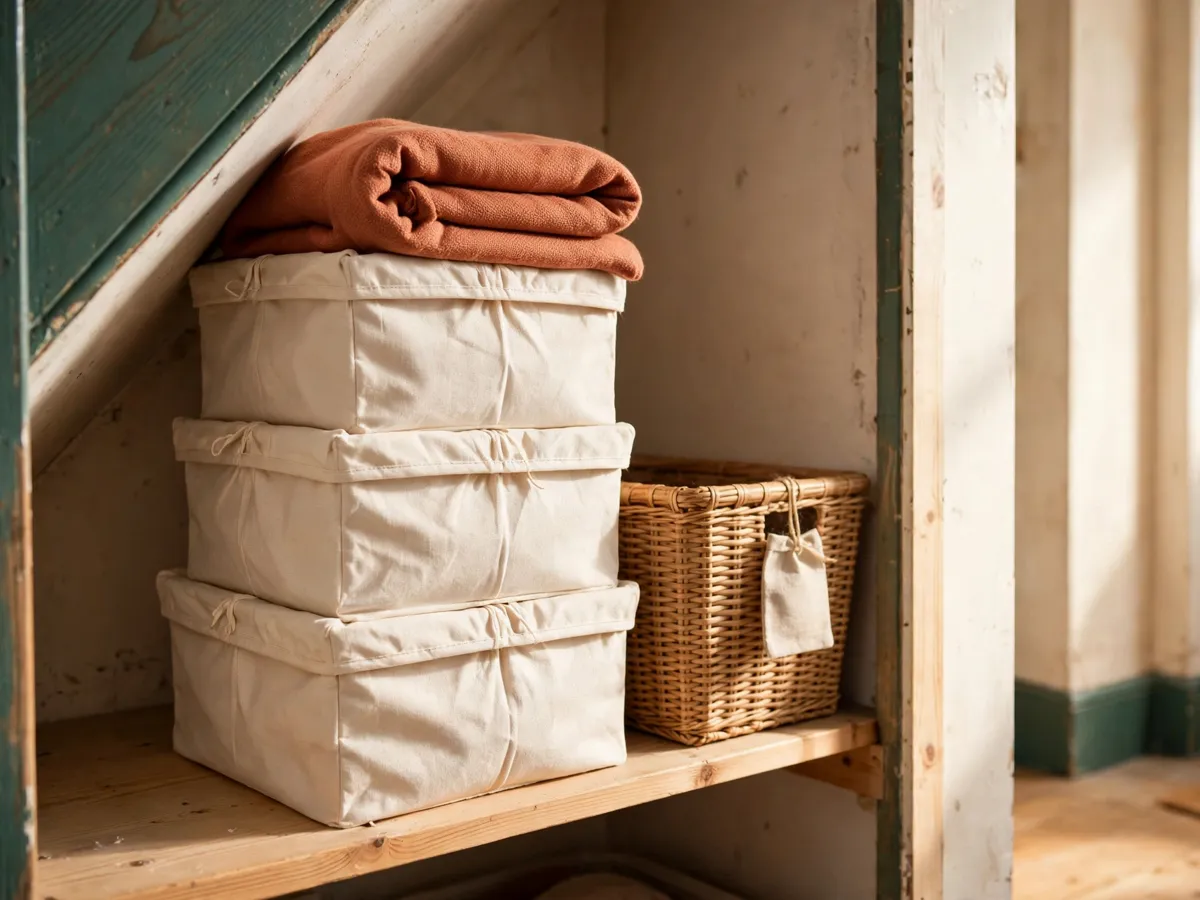
Cost: $25–$60 per shelf unit, $50–$120 for a full mid-zone setup. Time: 30 minutes to assemble and place.
6. Rod and Hanging Storage
The tall zone is the only part of the under-stairs closet where you can hang clothes, and a tension rod makes it renter-safe. A tension rod spans the opening at the tall end, held by spring pressure against the side walls. No screws — it goes up in two minutes and comes down clean. A standard rod runs $8 to $15 and holds 15 to 20 pounds, enough for eight to twelve coats.
Place the rod at the height where the ceiling is tallest — usually the front edge of the opening. Hang it high enough that coats clear the floor but low enough that you can reach the hangers without a step stool. For most people that is 60 to 66 inches. If the tall zone is narrow — less than 24 inches — use a single rod. If it is wider, run two rods front to back, with the second lower to clear the slope.
Hooks are the other hanging option for the tall zone. Over-the-door hooks or adhesive wall hooks hold bags, scarves, and caps — light items that do not need a rod. Save the rod for coats and jackets, which are the heaviest and need the full height. The entryway ideas guide covers the same hook-and-rod setup for a front hall; the under-stairs version is the same idea in a hidden space.
Cost: $8–$15 for a tension rod, $6–$12 for a set of over-door hooks. Time: 5 minutes to install. Renter-safe — zero wall damage.
7. Bins, Baskets and Drawers
Bins and baskets are what make the mid and low zones work. Shelves alone turn into piles; bins keep categories separate and let you pull one out without disturbing the rest. Organizing the under-stairs bins follows the same rule as any small closet: one bin per category, labeled from the front, nothing stacked more than two high. The difference is that the bins have to clear the slope, so depth matters more than height.
Use shallow bins in the mid zone — 10 to 12 inches deep, 8 to 10 inches tall. A bin 14 inches deep will hit the slope before it slides all the way onto the shelf. Fabric bins with open tops work best for categories you reach often, because you can see in without pulling the bin out. Woven baskets work for linens and towels — they breathe, look good, and hold their shape. For the low zone, use flat bins or under-bed storage boxes that slide along the floor. These run $10 to $20 each and hold seasonal items you reach twice a year.
Label every bin from the front. A strip of painter's tape and a marker is enough — the label is not decoration, it is what makes the bin returnable. When someone else puts things away, the label tells them where it goes. Without labels, the bins become a jumble within a month. A label maker runs $20 and prints sticky labels that last longer than tape and keep the system organized.
Cost: $6–$15 per bin, $30–$60 for a full set. Time: 20 minutes to sort, fill, and label.
8. The Door or Curtain Decision
Most under-stairs closets have a door already — a small panel door or a bifold. If yours has a door, keep it. A door keeps dust out, hides the contents, and costs nothing. The only thing to check is the swing: a door that opens inward eats floor space inside the closet, and one that opens outward needs clearance in the room. If the door swings inward and blocks your shelves, consider removing it and hanging a curtain instead.
A curtain is the renter-safe alternative when the door is missing, broken, or in the way. A tension rod across the opening holds a curtain panel that slides open and closed. Pick a fabric that matches the room — linen, cotton, or canvas all work. The curtain costs $12 to $30 and installs in five minutes with no tools. The trade-off: a curtain does not seal as tightly as a door, so more dust gets in. If dust is a concern, choose a heavier fabric and let it pool slightly at the floor.
If the closet has no door and no curtain, the contents are visible from the room, which means the organization has to look good, not just work. Use matching bins, keep the color palette tight, and treat the closet as a visible shelf. For a deeper look at the same principle, the linen closet organization guide covers visible-shelf styling for a closet that guests can see.
Cost: $0 to keep the existing door, $12–$30 for a curtain and rod. Time: 5 minutes to hang a curtain.
9. Lighting a Dark Closet
Under-stairs closets are dark by design — they have no window, and the door or curtain blocks whatever room light reaches them. A dark closet is a closet that does not get used, because you cannot find anything without pulling everything out. The fix is a battery-powered LED light, and it is the single best $15 you spend on the whole project.
A motion-sensor LED bar is the easiest option. Mount it with adhesive strips on the underside of the tallest stair tread — the one above the tall zone — so it lights down into the closet. It turns on when you open the door and off after 20 seconds, so you never fumble for a switch. It runs on three AAA batteries that last three to six months. Cost: $12 to $18. No wiring, no drill.
If the closet is deep — more than four feet from front to back — a single light at the front does not reach the low zone. Add a second LED bar at the mid-point, mounted on the slope or the side wall. The goal is even light, not a spotlight.
Cost: $12–$18 per light, $25–$35 for two. Time: 5 minutes to stick up. Battery life: 3–6 months per set.
10. Keeping It Dry and Ventilated
Under-stairs closets are prone to two problems: damp and stale air. The space is enclosed, it shares a wall with the outside in many homes, and it sits below the stairs, where moisture can collect. If the walls feel cold and damp, fix that before storing clothes or linens — one damp season ruins them.
The first fix is a vent gap. If the closet has a door, leave it cracked an inch at the bottom, or cut a small vent grille into the lower panel — but only if you own. For renters, a curtain instead of a door lets air circulate naturally. If you must keep the door closed, place a moisture absorber inside: a disposable dehumidifier box runs $5 to $8 and lasts two to three months.
The second fix is what you store. Do not put leather, suede, or anything that molds easily in an under-stairs closet unless you know it is dry. Coats are fine if ventilated; leather bags are not. Linens and towels breathe and are safe. If the closet is damp and you cannot fix it, use it for non-fabric storage — tools, cleaning supplies, luggage, holiday decor — and keep the clothes in a bedroom closet instead. The small closet reset guide has the full system for keeping clothes in the bedroom when the under-stairs space is better suited to dry goods.
Cost: $5–$8 for a moisture absorber, $0 to leave the door cracked. Time: 2 minutes to place. Check the absorber monthly.
11. What to Store and What Not To
The under-stairs closet is a mixed-use space, but not everything belongs in it. The tall zone is for coats, jackets, and bags — things you grab on the way out. The mid zone is for seasonal clothing in bins, linens, cleaning supplies, and hobby materials. The low zone is for flat, rarely used items: luggage, wrapping paper, sleeping bags, and holiday boxes. This mix works because each zone has a different access pattern — daily, monthly, and twice-a-year — and the height matches how often you reach it.
What does not belong: food. The under-stairs closet is not a pantry — it is not temperature controlled, it may be damp, and it shares a wall with the outdoors. Storing dry goods here invites pests and spoilage. Electronics and candles also do poorly — temperature swings under the steps can warp candles and shorten battery life. And avoid storing anything that smells strongly — paint, solvents, cleaning chemicals — alongside clothes, because fabrics absorb the odor.
For shoes, the under-stairs closet is a good home for off-season pairs in bins — winter boots in summer, sandals in winter. Daily shoes belong at the entry. The shoe storage guide covers the entry setup; the under-stairs closet handles the overflow that does not fit at the door.
Cost: $0. Time: 10 minutes to sort what stays and what relocates.
12. First Weekend Checklist
- Empty the closet fully and photograph the shape from three angles.
- Measure the slope at three points — front, one foot back, two feet back — and write the numbers down.
- Mark the three zones with painter's tape: tall, mid, low.
- Install a tension rod in the tall zone at 60–66 inches for coats.
- Place freestanding cube or wire shelves in the mid zone, stepping down with the slope.
- Fill shelves with labeled bins — one category per bin, shallow enough to clear the slope.
- Slide flat bins into the low zone for seasonal and rarely used items.
- Stick a motion-sensor LED bar under the tallest tread for light.
- Add a moisture absorber if the space feels damp, and leave the door cracked or swap to a curtain.
- Sort what stays and what relocates — food, electronics, and chemicals belong elsewhere.
Cost: $25–$120 total. Time: one weekend afternoon. Everything here is renter-safe — drill-free, with zero wall damage.
Common questions
Can I hang clothes under the stairs without drilling?
Yes. A tension rod spans the opening at the tall end and holds itself in place with spring pressure against the side walls. No screws, and no wall damage. It holds 15 to 20 pounds, enough for eight to twelve coats. Place it at 60 to 66 inches from the floor in the zone where the ceiling is full height.
What shelves work best in an under-stairs closet?
Freestanding cube shelves of decreasing height, or adjustable wire shelving on legs. Both step down with the slope instead of sitting flat, which means you use the full height at every point along the triangle. Avoid flat wall-mounted shelves — they waste the tall end and need a drill. Look for shelves 11 to 13 inches deep so the back clears the slope.
How do I keep an under-stairs closet from getting damp?
Leave the door cracked an inch at the bottom, or swap to a curtain that lets air circulate. If the door must stay closed, place a disposable moisture absorber inside — it runs $5 to $8 and lasts two to three months. Do not store leather, suede, or electronics if the space feels damp. Use it for dry goods, linens, and tools instead.
Is under-stairs storage renter-safe?
Yes, if you use tension rods, freestanding shelves, adhesive LED lights, and bins that sit on the floor. None of these need a drill, a screw, or a wall anchor. Everything comes down clean at move-out. The only thing that is not renter-safe is cutting a vent into the door — save that for owners, and use a curtain or a moisture absorber instead.
What should I not store under the stairs?
Food, electronics, candles, and chemicals near clothes. The space is not temperature controlled and may be damp, so dry goods spoil and candles warp. Use the space for coats, linens, seasonal bins, luggage, and dry household goods instead.
Save these on Pinterest
Pin the slope-measurement numbers and the three-zone diagram — the two pieces you will forget when you are standing in a store aisle with a shelf unit that is two inches too deep. This guide and the rest of the organization and storage collection live together there.