 Plant As Deco
Organization & Storage
Shoe Storage for a Small Entryway: Zones That Fit the Pairs You Own
By Plant As Deco · Updated 19 November 2026
The entryway shoe pile is the first thing you see when you walk in and the last thing you trip over on the way out. A small entry does not have room for full shoe storage, but it has more vertical space than most people use. This page plans shoe storage on the measurements first — the entry width, the door swing, the wall that is free — and then picks the rack, bin and zone that fits the pairs you actually own and keeps wet shoes off the floor.
Weekend-ready: $20–$120, one afternoon. Renter-safe: everything here is drill-free except one wall rack, and there is a door-mounted alternative for that.
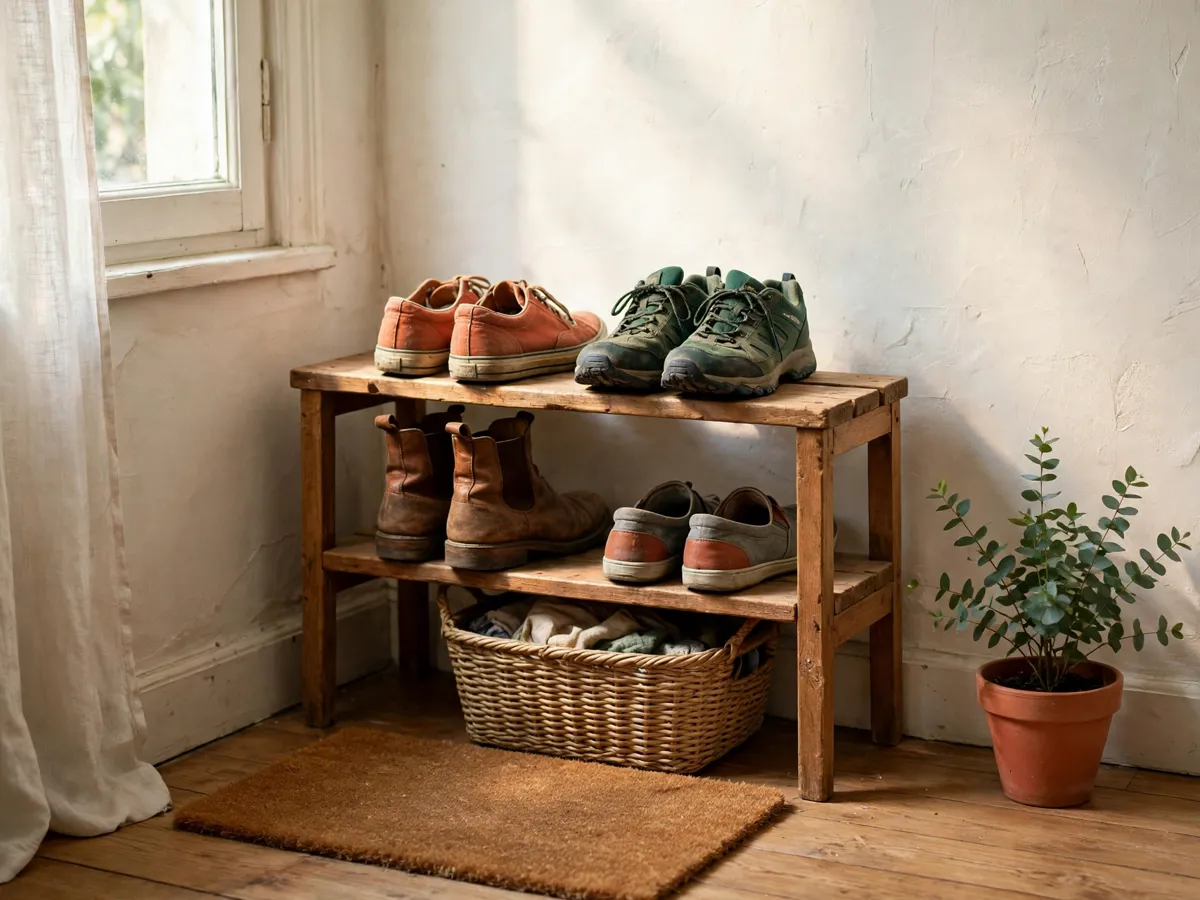
1. Measure the entry before you buy anything
An entryway is not a room — it is a corridor with a door at one end and a mat on the floor. Before any rack or bin shows up, three numbers decide what fits: the width of the walkway, the depth from the wall to the door swing, and the length of free wall that has nothing hanging on it. Write each one down. The smallest of the three sets the ceiling on what the entry can hold.
Start with depth. A standard interior door swings inward 30 to 36 inches, and that arc eats the floor space directly in front of the hinge. Measure from the wall behind the door to the far edge of that swing arc, because anything taller than the gap between the open door and the wall gets pinned every time someone comes through. A shoe rack deeper than 15 inches is almost always wrong here — the average entry gives 12 to 14 inches of usable depth before the door hits it.
Then measure the free wall. The entryway wall that does not carry a coat hook, a mirror, a light switch or a vent is the wall a rack can stand against. It is usually 24 to 36 inches wide in an apartment, sometimes less. The third number is ceiling height: most entries run 8 feet, and vertical storage uses every inch of it without touching the walkway.
A mat belongs at the door — a coir or rubber mat that catches grit before it reaches the floor. Put the mat down first, measure around it, and the rest of the shoe zones fall into the space that is left. The entryway ideas guide covers the broader entry setup; this page focuses only on the shoes.
Cost: $0, or about $15 for a mat. Time: 20 minutes with a tape measure.
2. Count the pairs you own
Every shoe storage plan fails for the same reason: the rack was bought for six pairs and the household owns eighteen. Pull every pair out of the entryway storage, from under the seat, from the back of the door, and line them on the floor. Sort into four bands and the storage zones write themselves:
- Everyday shoes — four to six pairs per person. Sneakers, flats, the boots worn to work, the slip-ons by the door. These are the pairs that live at the entry because they are on your feet three or more days a week.
- Seasonal shoes — two to four pairs. Winter boots in November, sandals in June. Rotate them in and out; only one season belongs at the entry at a time.
- Dress shoes — one to three pairs. Heels, leather oxfords, the pair worn twice a year. These do not need to be at the entry — a closet shelf or a labeled bin in the bedroom serves them better.
- Specialty — one or two pairs. Gym shoes, hiking boots, rain boots. Keep them if the soles still grip; otherwise they are wardrobe fodder.
A two-person household typically owns 14 to 22 pairs total, and only 8 to 12 of those need to be at the entry on any given day. The rest belong in a bedroom closet or a hallway linen closet — the linen closet organization guide lays out a system that handles overflow without crowding the entry.
Count the soles on the floor. That number — not a guess, not a round number — is the target the rack, bins and zones have to hold.
Cost: $0. Time: 15 minutes. Skip nothing: the pair you forget is the pair that ends up on the floor in a week.
3. Pick a rack that fits the space and the shoes
A shoe rack is the backbone of entryway shoe storage, and it is the one piece where a wrong size wastes the whole wall. Match the rack width to the free wall, the rack depth to the entry depth, and the tier count to the number of pairs that live here. The math is simple: a 24-inch-wide rack with two tiers holds about eight to ten pairs of everyday shoes, and a three-tier version holds twelve to fifteen.
Depth is the dimension that catches people. A rack deeper than 15 inches steals walkway space; one shallower than 10 inches lets heels overhang and scrape the wall. Look for 12 to 14 inches — that range fits a standard entry and holds a men's size 12 sole flat without overhang. If the entry is narrower than 12 inches, skip the floor rack and go straight to the vertical wall zone.
Two tiers is enough for a single person; three is the right number for a couple. Each tier should sit 7 to 8 inches apart so a boot shaft fits without crushing the pair above. Open racks let shoes air; closed-front racks hide the pile but trap moisture. Metal tube racks run $20 to $40; wooden slat racks run $45 to $90 and look better against a painted wall.
Stackable racks sound clever, but the joints loosen under weight within a season. One solid rack outlasts three clip-together units. If the entry has a radiator or a baseboard on the free wall, measure the clearance above it before buying — a rack that sits on top of a baseboard is a rack that tips.
Cost: $20–$90. Time: 30 minutes to assemble and place.
4. Use the vertical wall zone
The entry wall has eight feet of height and most of it is empty. Vertical shoe storage is the move that saves floor space without giving up capacity — a hanging organizer or a wall-mounted rack goes up instead of out, and the walkway stays clear. This is the zone where renters and owners diverge: the wall rack drills, the hanging organizer does not.
A canvas hanging shoe organizer is the cheapest vertical win. It hangs from a single hook over the door or from a tension rod in a narrow alcove, runs 24 pockets in a column, and holds one pair per pocket. Sneakers, flats and low shoes fit; boots do not. The pockets are 5 inches deep, so a pair of heels sits without crushing, and the whole unit folds flat when the season changes. Cost: $12 to $25.
A wall-mounted shoe rack is the drilled version — two or three brackets screwed into studs, a pine or metal shelf on top, and the shoes sit on the shelf with the soles facing out. This is the one drilling piece in the guide, and renters should skip it in favor of the over-door option. For owners, the advantage is load: a bracket-mounted rack holds 20 pounds without sagging, and it frees the floor entirely.
Boot hooks are the third vertical option — individual hooks screwed into the wall at 8-inch spacing, each one holding a boot pair upside down by the heel. This keeps tall boots upright and aired, and it uses wall space that a rack cannot reach. Four hooks hold four pairs of boots in 32 inches of wall, the footprint of a single shelf.
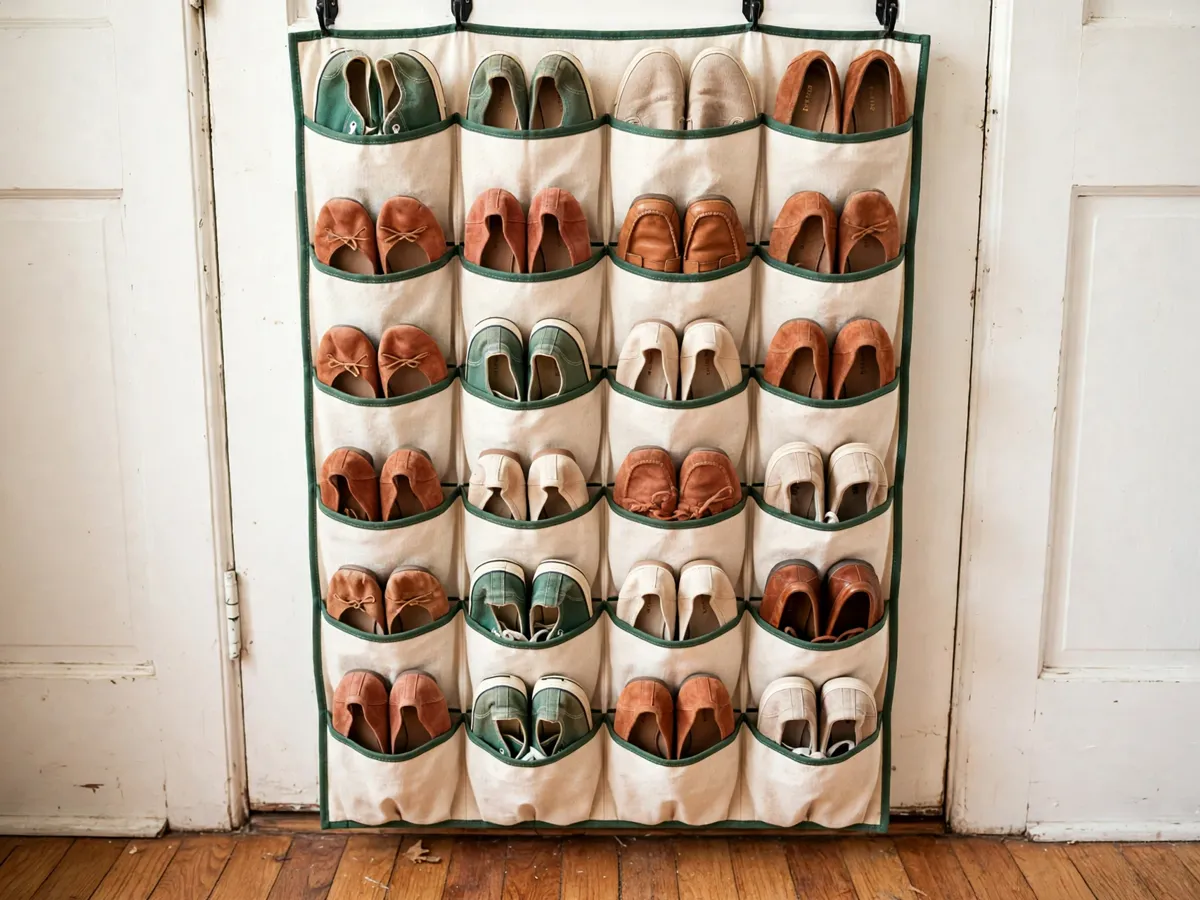
Cost: $12–$40. Time: 10 minutes for the hanging organizer, 30 minutes for a wall rack with a stud finder and a drill.
5. The door zone: over-door storage
The back of the entry door is the most underused surface in a small apartment. An over-the-door shoe organizer drops over the top edge, hangs flat against the door, and adds 24 pockets of storage without a single drill hole. It is the renter's best move — no hardware, no wall damage, and it comes down in 10 seconds when the lease ends.
The standard organizer is 24 pockets in a 4-by-6 grid, each pocket about 5 by 7 inches. That holds 24 pairs of flats, sneakers and low shoes. Boots and tall shoes do not fit — the pocket depth is too shallow for a boot shaft. Heels fit if the heel hooks over the pocket edge; slip them in sole-first.
Two things to check before buying: the door clearance and the hook width. The door needs 2 inches of clearance above the frame for the over-door hooks to seat — some apartment doors sit flush and the hooks will not drop over. Measure the top edge first; if it is flush, a tension-rod version that mounts inside the door frame is the alternative, and it runs about $5 more.
The door zone is not for wet shoes. Canvas pockets absorb moisture and hold it against the door, which warps a hollow-core door over a winter. Keep the wet shoe zone on the floor with a tray.
Cost: $12–$25. Time: 5 minutes to hang.
6. The bench zone: sit and store
A bench in the entryway does two jobs: a seat to pull boots off, and storage underneath for the shoes that do not belong on a rack. Three styles work in a small entry. An open-shelf bench has two or three cubbies below the seat, each about 14 inches wide, where shoes sit in pairs. A cubby seat has divided compartments — one per pair — and looks the most intentional. A bin version has an open cavity that holds one or two large bins, catching the shoes that do not stack neatly:
- Open-shelf bench — $45 to $80, holds 6 to 8 pairs.
- Cubby bench — $60 to $120, holds 6 to 10 pairs in divided slots.
- Bin bench — $40 plus $10 per bin, holds seasonal overflow.
Seat depth should match the rack — 12 to 15 inches — so the entry walkway stays consistent. A seat deeper than 16 inches starts to feel like furniture in a corridor, and the door swing will hit it. The entryway bench plans guide walks through a build with a cut list and a material budget if a store-bought bench does not fit the wall.
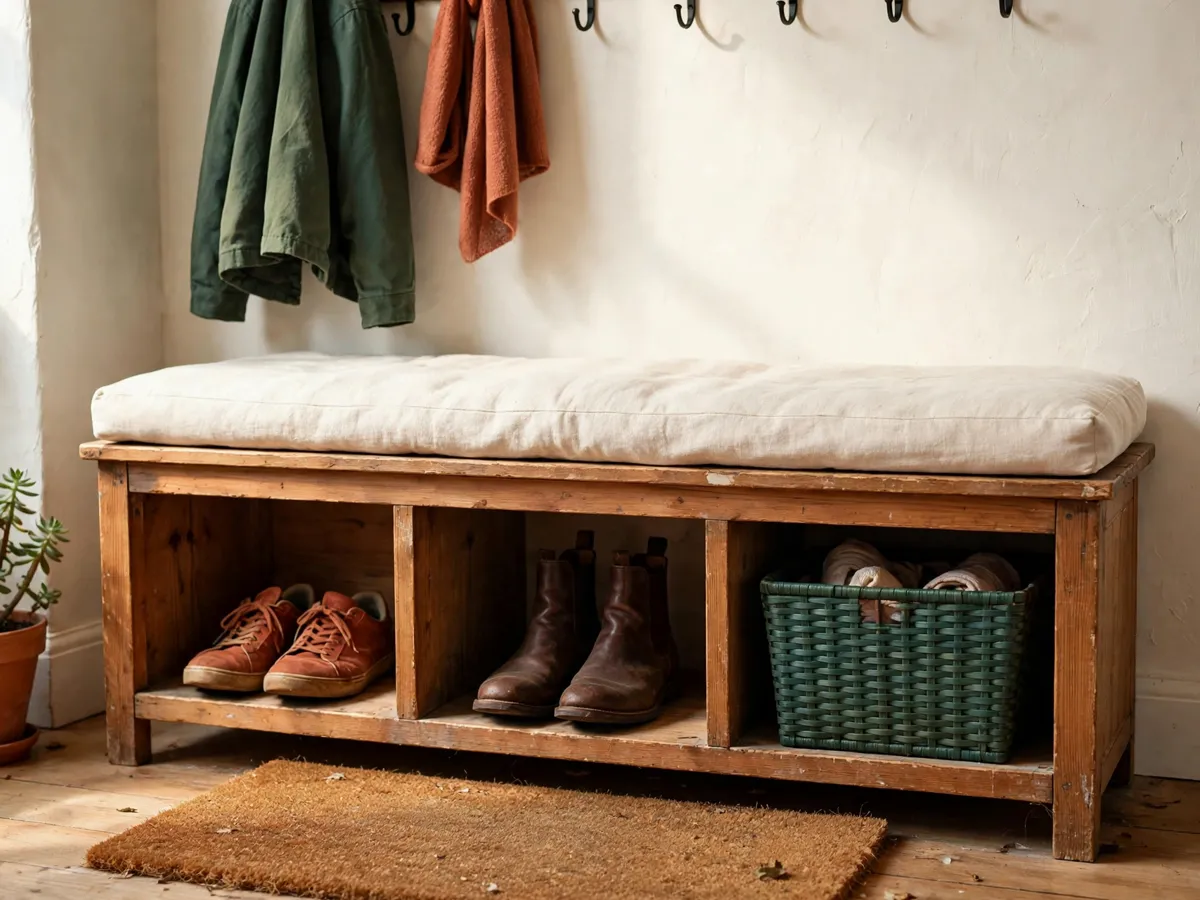
Cost: $40–$120. Time: 20 minutes to assemble and place.
7. Bins, labels and the off-season layer
The entry holds the shoes you wear this month, not the whole collection. Off-season pairs — winter boots in July, sandals in January — go into bins, and the bins go on a closet shelf, under the bed, or in the top of a hallway cabinet. The entry stays clear because the bins carry the overflow.
Use one size of bin, not a mix. A clear plastic bin with a locking lid, 15 by 11 by 6 inches, holds four to six pairs of flats or three to four pairs of boots. Clear bins let you see what is inside without opening every lid; if the bins go on a high shelf, label the end that faces the room. A label on two sides — front and one end — means the bin reads correctly no matter how it sits.
Stack the bins two high, never three. The third bin crushes the shoes in the bottom one, and a stack of three tips when you pull the middle one out. If the closet shelf is deep enough for two rows, put the current season in front and the off-season behind — rotate them twice a year when the weather turns.
Label the bins with what is inside and the season: "Winter boots — 4 pairs" or "Sandals — summer." A strip of painter's tape and a marker works; a printed label looks cleaner. The point is that you never open three bins to find one pair.
Cost: $8–$15 per bin, $1 for tape. Time: 20 minutes to sort and label.
8. Wet shoe season: tray and mat
From November through March, wet shoes are the entryway's real problem. Rain, snow and road salt track in on every pair. The fix is a tray — a shallow, waterproof boot tray that sits on the floor under the rack or beside the seat, and catches the water that drips off wet soles.
A boot tray runs 15 by 30 inches, about 2 inches deep, and holds three to four pairs of wet boots or shoes. Plastic trays cost $8 to $15; metal ones with a powder-coat finish run $20 to $35 and look better against wood flooring. Put a coir mat on top of the tray — the coir scrapes mud off the soles, and the tray catches what falls through. Position the tray at the door, not against the wall.
Empty the tray after every storm. Tilt it toward the floor drain or the outside threshold, wipe it dry, and put it back. Salt builds up on the tray edges; rinse it in the sink once a month. Wet shoes that sit on a tray overnight air out; wet shoes that sit on the floor warp the boards.
Cost: $8–$35 for the tray, $10–$20 for a coir mat. Time: 5 minutes to place, 2 minutes to empty after a storm.
9. Rotate and cull
A shoe storage system only works if it matches what you wear. Rotate the seasonal pairs in and out twice a year — boots to the entry in October, sandals in April — and cull the pairs that no longer fit or have not been worn in a year. The entry is not a wardrobe; it is a staging area for the shoes on rotation.
The rotation is simple: when the season changes, pull the off-season bin off the shelf, take the current-season shoes out, and swap them into the entry. The outgoing pairs go into the bin, the bin goes back on the shelf, and the entry holds only what the weather calls for. A two-bin system — one for summer, one for winter — handles most households.
Culling is harder. The rule: if a pair has not been worn in 12 months, the sole is gone. Worn-out soles, heels that have lost their lift, boots with cracked leather — donate or recycle them. The entry wardrobe is not a museum. Every pair that stays but is never worn is a pair that takes a slot on the rack and forces a daily pair onto the floor.
The declutter checklist runs the same keep-or-cull decision across every room; the entry section is the same filter applied to shoes.
Cost: $0. Time: 30 minutes, twice a year.
What we would skip
- A shoe cupboard deeper than 16 inches. In a small entry, a cupboard that deep steals the walkway and the door hits it every time. Cabinets belong in a hallway or a bedroom, not a 36-inch entry.
- Hanging shoe bags with fabric pockets that sag. Canvas organizers hold their shape; thin fabric bags stretch within a month and the shoes pile on the floor underneath.
- Stackable clip-together racks. The joints loosen, the tiers tip, and a tipped rack dumps six pairs of shoes across the entry at 2 a.m. One solid rack costs the same and stays put.
- A mirror placed where the shoe rack needs to go. The entry wall has one job — hold the shoes. Hang the looking glass on the adjacent wall or skip it.
- An outerwear rack on the same wall as the shoe rack. Coats and shoes compete for the same 24 inches of wall; put the hooks on the opposite wall or use the door for shoes instead.
Cost: $0 to skip. Time: two minutes of reading that saves a return trip to the store.
10. What it costs, honestly
Three routes, three bills, at big-box prices for a mid-size US market; treat these as the shape of the spend rather than a quote. Every route handles the same 8 to 12 daily pairs — the difference is material, finish and how much of the wall gets drilled.
- Budget route — $20 to $40. One over-the-door canvas organizer ($15) plus a boot tray ($10) and a coir mat ($10). Holds 24 pairs in the door pockets and catches wet shoes on the tray. No drilling, no assembly, renter-safe. The trade-off: no seat, no closed storage, and the door pockets show.
- Mid route — $50 to $90. A two or three-tier wooden slat shoe rack ($45–$70) plus a boot tray ($12) and bins for off-season storage ($8 each, two bins). Holds 10 to 15 pairs on the rack, plus overflow in bins on a closet shelf. The rack sits on the floor — no drilling needed.
- Full route — $100 to $120. A cubby seat ($80) with labeled bins ($10 each), plus an over-door organizer ($15) for overflow. The seat holds 8 to 10 pairs in divided cubbies and gives a place to sit. This is the route that makes the entry feel finished.
- Add-ons that apply to any route. A wall-mounted boot hook set ($12 for four hooks) if you own tall boots. A second coir mat ($10) for a back-door entry. Labels and tape ($2).
The organization and storage collection includes the broader entry and storage systems these pieces fit into.
Realistic all-in for a mid-route setup plus two bins: $70–$100. Time: one afternoon.
The before-you-buy checklist
- Entry depth measured from wall to door swing — the smallest number, not the largest, sets the rack depth ceiling.
- Free wall length measured — the rack or bench width matches this, not the pair count you wish you had.
- Pairs counted and sorted into everyday, seasonal, dress and specialty bands — only the everyday and current-season pairs stay at the entry.
- Door clearance checked — 2 inches above the frame for over-door hooks, or a tension-rod version if the door sits flush.
- Wet shoe zone planned — a tray at the door, a mat on top, and the rack far enough back that wet soles do not drip on dry pairs.
- Off-season bins labeled and shelved — the entry holds this season, the shelf holds the rest.
- One solid rack or seat chosen over two stackable units — stability matters more than adjustability in a narrow entry.
Cost: $0 to check. Time: 10 minutes before the store run.
Common questions
How many shoes should I keep at the entry?
The entry holds the pairs you wear this week — four to six per person for everyday shoes, plus two or three seasonal pairs in rotation. A two-person household should aim for 8 to 12 pairs at the entry total. Anything beyond that belongs in a bedroom closet or a labeled bin on a shelf. The entry is a staging area, not permanent shoe storage.
What is the best shoe storage for a rental apartment?
An over-the-door canvas organizer plus a floor rack — neither drills into the wall. The organizer hangs from the top of the door and holds 24 pairs; a wooden slat rack sits on the floor and holds 10 to 15. Together they cost $35 to $55 and leave zero damage. If the door sits flush and over-door hooks will not fit, use a tension-rod organizer inside the door frame instead.
Can I put shoes in a closet instead of the entry?
Yes, and you should for everything except the daily pairs. A hallway linen shelf or a bedroom closet shelf holds the off-season and dress shoes in labeled bins. The entry keeps only what you put on walking out the door — the rest lives where you get dressed. This keeps the entry clear and the shoe count manageable.
How do I handle wet boots in a small entry?
A boot tray at the door. Set a 15-by-30-inch plastic or metal tray where you step in, put a coir mat on top, and pull wet boots off onto the tray. The tray catches the water, the mat scrapes the mud, and the floor stays dry. Empty the tray after every storm and rinse it monthly to clear salt buildup. Never put wet boots on a rack — the water runs onto the pair below.
Should I buy a shoe cupboard or a shoe rack?
In a small entry, a rack. A cupboard is deeper — usually 18 inches or more — and that depth steals the walkway in a 36-inch entry. A rack runs 12 to 14 inches deep, holds the same pairs, and costs half as much. Save the cupboard for a hallway or a bedroom where depth is not a constraint. If you need closed storage, use a cubby seat instead — it is shallow enough for the entry and hides the shoes behind divided fronts.
Save these on Pinterest
Pin the before-you-buy checklist and the pair-counting bands — the two pieces you will otherwise forget standing in the store aisle, holding a rack that is four inches too deep. This guide and the rest of the organization and storage collection live together there.