 Plant As Deco
DIY Home Projects
DIY Kitchen Bench With Storage: Plans, Cut List and Cost
By Plant As Deco · Updated 20 November 2026
A kitchen bench does two jobs out of one footprint: it seats three at a small dining table for less floor than four seats, and it hides the pots and linens that live on the counter. This build is 48 inches wide, 15 deep and 18 tall, with a lid that folds up on a hinge over an empty box. Every dimension comes off your table first.
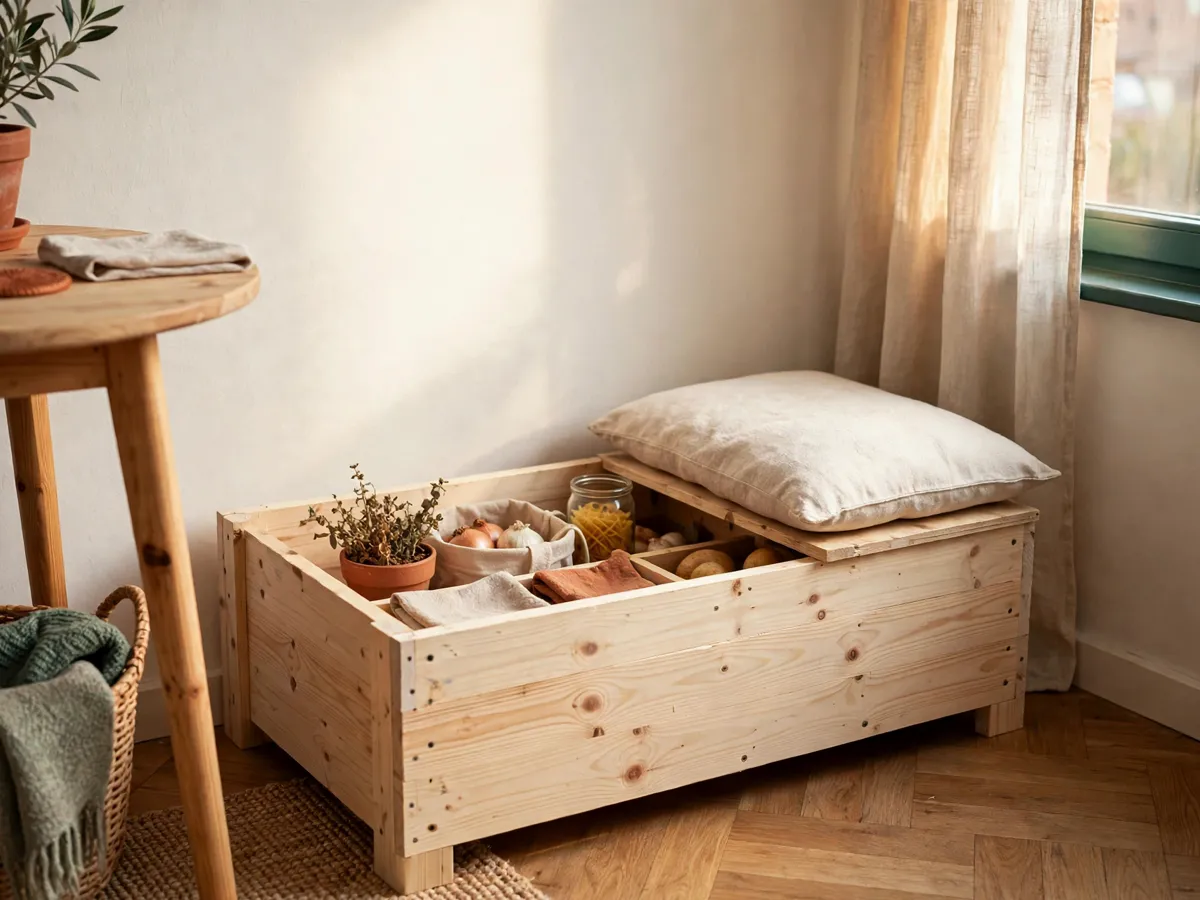
Why a bench earns its footprint
A bench is a seat plus storage plus a place to park a stack of mail, and in a kitchen eight feet wide that difference is the whole argument. Push it under the table when dinner is done and the floor is clear; four separate seats sit out until someone stacks them.
The storage is the part people underestimate. Under a lift-top lid you get roughly 9 cubic feet of dry, closed space: the baking sheet that never fits the cupboard, the slow cooker you use twice a winter, a bin of loose rubber bands. Because the lid is also the seat, nothing has to be cleared before somebody sits.
It also fixes the seating at a breakfast nook. Two seats on one side of a small table is a squeeze; one bench seats two adults and a child with room to shift, and slides clear of the door when dinner ends. A banquette with a back does the same job but is built to the wall and never moves; this bench moves, which is what a rental wants. A third nook seat is rarely the answer in a kitchen this small.
Weekend-ready: $90–$250, one weekend. Renter-safe: freestanding, anchors optional, no wall drilling required. The bare box and lid land near $110 in new stock; struts, a real cushion and a sealed finish push the same frame toward $240.
Measure the spot before you cut anything
Five measurements decide this build, and four come off the table rather than the wall. Measure with the same tape, write it down in inches, and check each at two or three points, because table aprons are rarely level. A bench built to a guessed width is firewood.
Knee clearance: apron height minus 1 inch. Measure from the floor to the underside of the table apron. Dining tables run 29 to 30 inches and the apron sits around 25 to 26. This bench, cushion included, comes to 19 1/2 inches, so a 25-inch apron clears it.
Seat height: 17 to 19 inches. Ten to twelve inches of gap lets an adult sit without the apron digging into their thighs. This plan builds 18 inches bare: a 17 1/4-inch side panel plus the 3/4-inch lid, and a 1 1/2-inch pad brings it to 19.
Depth: 14 to 16 inches. Fifteen is the compromise. Under 14 the seat stops feeling like a seat and the storage will not take a cutting board on edge. Past 16 the front edge pushes a sitter forward.
Width: table length minus 4 to 6 inches. A 54-inch table takes a 48-inch bench; a 42-inch one takes a 36-inch bench. Leave the bench shorter than the table so the ends do not show past the top.
The two clearances people forget. Open the nearest kitchen door full width: a bench inside that arc gets kicked on every plate run, so it goes past the swing or onto the wall side. If an outlet is in the run, leave 3 inches of gap.
Lift-top or open cubbies: choose one
The same carcass supports two bottoms, and the choice changes the hardware, the cost and the build time. Pick before you buy stock.
| Version | What you get | Cost |
|---|---|---|
| Lift-top lid | One sealed box, dust-free, takes tall items, hides everything | $130–$250 |
| Open cubbies | Two or three bays, bins and baskets slide in, no hardware to wear out | $90–$180 |
Choose the lid if the bench is the main storage for anything you do not want to see. Linens, spare gadgets, a bin of placemats and the holiday cutters all vanish under a lid, and the closed box keeps crumbs out. From the outside you see a seat and a rail. This is the build the rest of the guide covers.
Choose cubbies if you reach the items daily. A bay with a woven basket beats a lid you lift with both hands while holding a plate. Two dividers make three bays, and nothing wears out. The trade is dust. For the rest of the small-kitchen plan, the kitchen storage ideas for small spaces guide covers the bins, the baskets and the counter side.
What the bench has to hold
Two numbers set every thickness in the cut list: who sits on it and what goes inside. This bench is designed for three adults across 48 inches, with flat, light storage under the lid. That is the design case.
The lid is the structural part. A 3/4-inch plywood panel spanning 48 inches flexes in the middle if nothing runs under it. The fix is not thicker sheet goods; it is the two lid cleats glued and screwed to the underside, which turn a flat panel into a shallow box beam. That carries three adults with no middle sag, and the cleats are on the cut list rather than optional.
The sides carry the sitting, the struts carry the lid. Once someone is seated, that weight goes down through the side panels into the bottom and the floor. A 3/4-inch plywood side at 15 inches wide and 17 1/4 tall is ample, provided the screws land in the bottom panel and the rails rather than only in glue.
What goes inside sets the depth. Flat things only: a stack of plates, a folded tablecloth, a bin of placemats, the small appliance that comes out on Sundays. Interior clear height is 15 1/2 inches and interior depth about 13 1/2. A stockpot will not stand up inside; a 13-inch skillet will.
Where the honest limits are. The bench is a seat, not a step, and standing on the middle of the lid puts the pressure where nothing supports it. No rating applies to a home build, so the answer is the structure: two screws in every joint, glue in every corner, and a lid that does not move when you press it.
The cut list
This is the whole cut list for the 48-inch lift-top version. Two assumptions matter. Lumber is sold by nominal size, so a 1x4 measures 3/4 by 3 1/2 inches. And 3/4-inch plywood is really 23/32, which is why the bottom panel is 46 1/2 inches wide. Every size below is a finished size: cut to the tape, not to the label.
| Part | Material | Finished size | Qty |
|---|---|---|---|
| Lid panel | 3/4 in plywood | 48 x 15 in | 1 |
| Side panels | 3/4 in plywood | 15 x 17 1/4 in | 2 |
| Bottom panel | 3/4 in plywood | 46 1/2 x 13 1/2 in | 1 |
| Back rail | 1x4 pine | 46 1/2 x 3 1/2 in | 1 |
| Front rail | 1x6 pine | 46 1/2 x 5 1/2 in | 1 |
| Lid cleats | 1x3 pine | 46 in long | 2 |
| Strut blocks | 1x3 pine offcut | 3 in long | 2 |
| Corner stiles | 1x3 pine | 17 1/4 in long | 2 |
| Cushion base | 1/2 in plywood | 47 x 14 in | 1 |
The sheet goods add up. The lid, both sides and the bottom come to about 2,000 square inches of plywood, and a 4x4 project panel carries roughly 2,300. It covers the list only if you lay the parts out in pencil before the saw starts. A 4x8 sheet costs more and leaves scrap for a shelf elsewhere.
All the pine comes off three boards. One 8-foot 1x4, one 8-foot 1x6 and one 8-foot 1x3 cover the rails, both cleats, both strut blocks and both stiles, with offcuts left for shims. Buy the pine straight-grained and knot-free on the face that will show. The front rail is the board the whole kitchen looks at.
Every horizontal part shortens with the bench. Build the 36-inch version and the lid becomes 36 inches, the bottom 34 1/2, both rails 34 1/2 and both cleats 34. The sides and stiles stay as listed, which is why this cut list is safe to resize.
Materials and hardware
The stock is boring and available: two sheet goods, three pine boards, one hinge, two struts and a box of screws.
| Item | What it does | Price |
|---|---|---|
| 3/4 in plywood, 4x4 panel | Lid, both sides and the bottom of the box | $30–$70 |
| 1x4 pine, 8 ft | Back rail and the hinge mounting surface | $5–$9 |
| 1x6 pine, 8 ft | Front rail, the visible face of the bench | $6–$11 |
| 1x3 pine, 8 ft | Lid cleats, strut blocks and corner stiles | $4–$7 |
| 48 in piano hinge, or two 3 in butt hinges | Lets the lid fold up along the back edge | $12–$24 |
| Two gas struts, 30 lb each | Hold the open lid up and keep it off your head | $14–$28 |
| Strut brackets, four pieces | Mount each strut end on a block, not bare plywood | $6–$12 |
| 1 1/4 and 1 1/2 in wood screws, plus glue | Every joint in the box and every bracket | $10–$16 |
| Satin sealer, felt or rubber bumpers | Wipeable finish and a lid that stops knocking | $14–$26 |
Plywood over MDF, and here is why. A kitchen bench lives next to a sink, and MDF drinks moisture at every raw edge and swells. Cabinet-grade birch plywood holds screws at the edge and tolerates a damp cloth. If that is the only panel your store carries, seal all six faces before assembly.
Struts are sized, not guessed. Two 30-lb struts carry a lid this size with the cushion on it. Buy them slightly under-powered: an over-strong strut fights you on the way down. Mount them on the blocks so each bracket screw bites into solid board.
Screws: wood screws, never drywall screws. Drywall screws are hard and brittle and snap under the sideways stress a seat takes. Use 1 1/4-inch screws for the box joints and 1 1/2-inch ones where a bracket reaches deep, always into a pilot hole so no plywood edge splits.
Tools you actually need
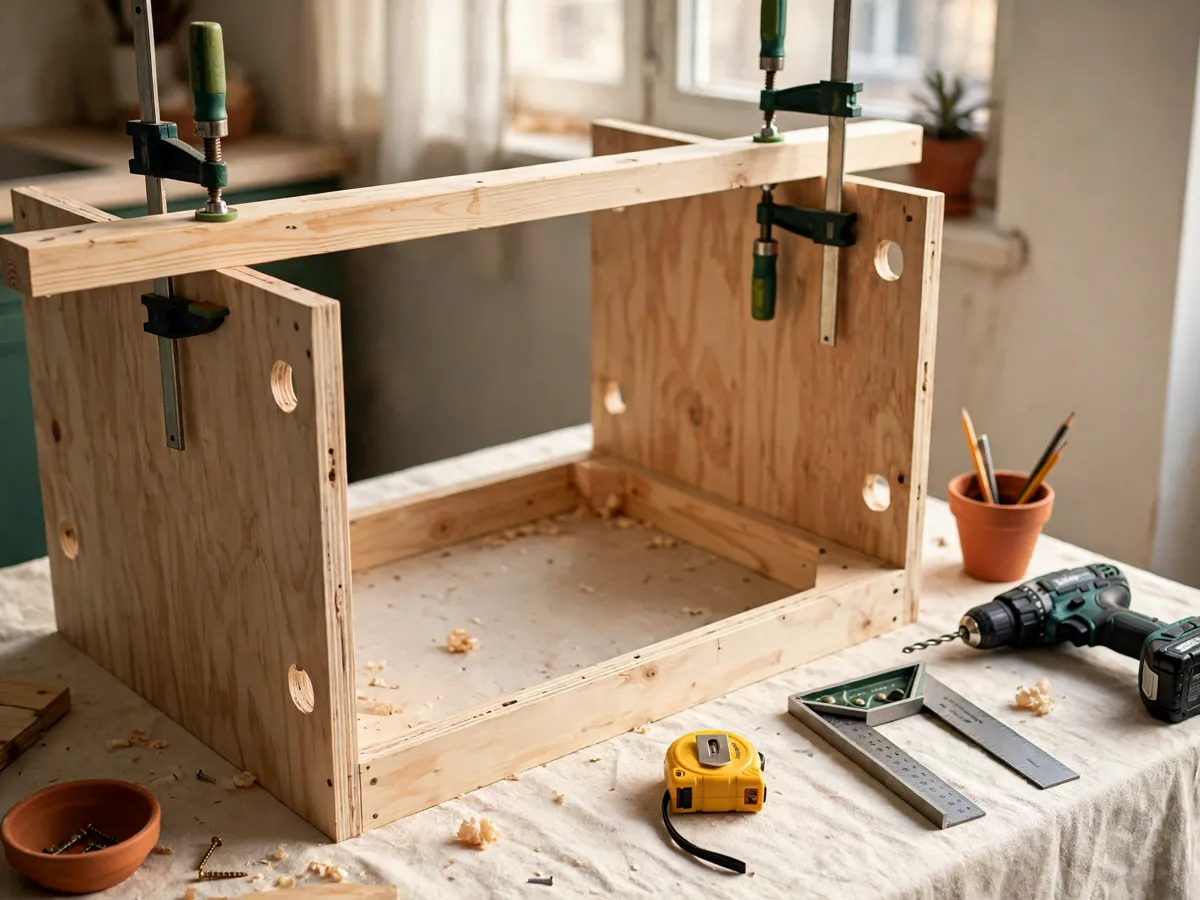
The tool list is short and every item earns its place. A drill or impact driver does all the screw work. A saw that cuts straight: a circular saw with a clamped straightedge, or a hand saw with patience. A speed square, a 24-inch level, a tape, two clamps and a sanding block. That is the full kit.
What you do not need. A table saw is faster, but this cut list has no rip longer than 15 inches, so a straightedge and a clamp do the same job. A pocket-hole jig is optional: the joints are butt joints held with glue and countersunk screws, plenty strong for a seat.
The one tool beginners skip and regret. Clamps. Two of them hold the panels flush while the glue sets, and without them every screw pulls the joint slightly out of line. You can build without a jig or a sander, but not without clamps.
Drill settings, because this matters. Pilot holes at 1/8 inch, countersink the head so it sits below the surface, and drive with the clutch on medium so the screw stops when it seats. A screw driven too deep in 3/4-inch plywood blows out the back and holds nothing. Use a bit that fits the head.
Sanding is a tool, not an afterthought. Sand every panel to 120 grit before assembly and to 220 on the visible faces after. A block with a flat face keeps the surface even and stops you rounding the edges. Rough edges collect kitchen grime; a smooth one wipes clean.
Building the box
The carcass goes together square or it never gets square later. The order is bottom panel first, sides second, rails third, clamped and checked before the glue sets. Every joint is a butt joint with glue and countersunk screws.
Step one: the bottom and the sides. Lay the bottom panel flat, stand a side panel on each long edge, and clamp it flush. Drill a pilot hole every 6 inches, countersink, and drive a 1 1/4-inch screw up through the bottom into the side. Check the diagonals before the glue tacks: both ways should match within 1/8 inch. If not, push the long diagonal in with a clamp.
Step two: the rails. The back rail is the hinge surface, so it sits flush with the top of the sides. The front rail is the visible face, so it overhangs by 1/4 inch to hide the plywood edge. Glue, clamp, pilot, countersink, and drive screws through each rail into the sides.
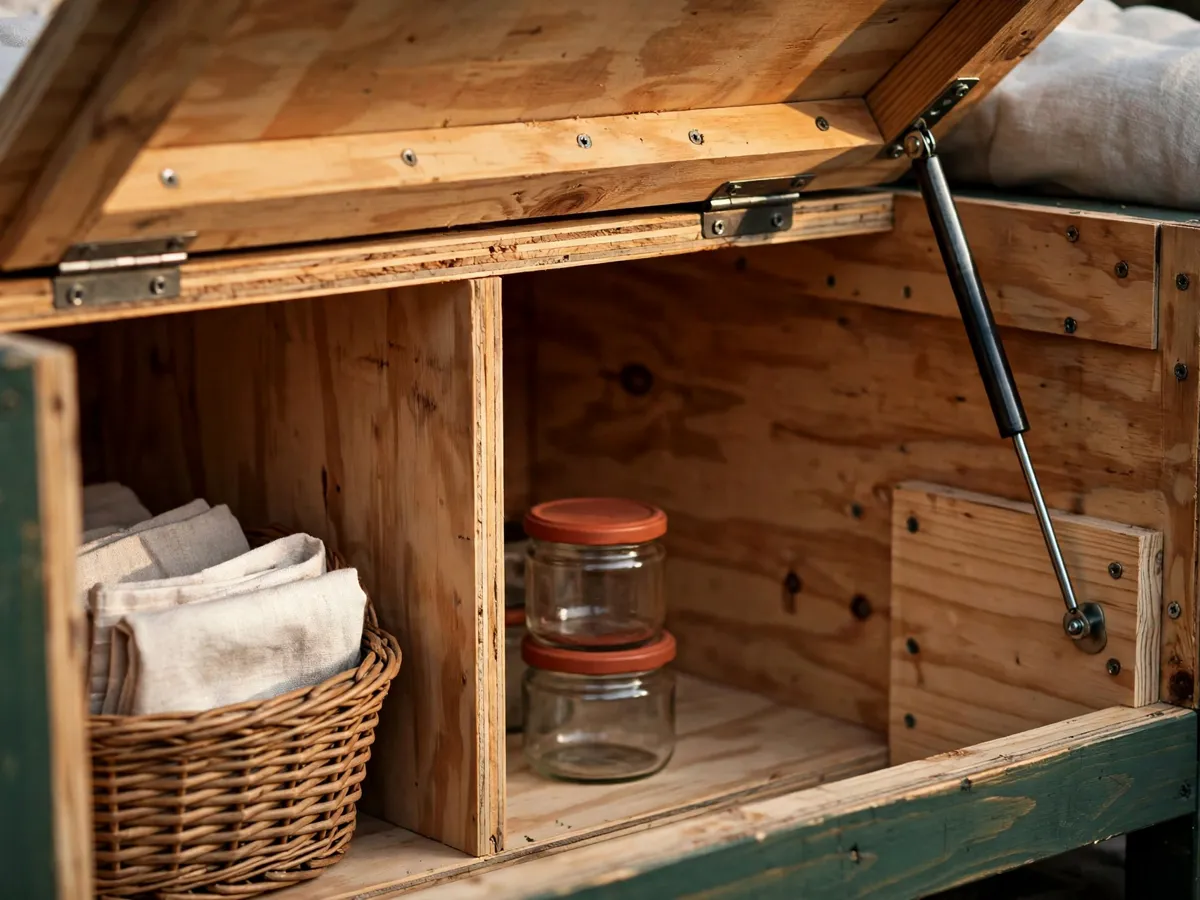
Step three: the stiles and cleats. Two short 1x3 stiles run up the inside front corners, screwed to each side and to the front rail. They brace the corners against racking and give the strut bracket a solid surface. The two lid cleats run across the underside of the lid, 3 inches in from each end, and the strut brackets bolt to them.
Check the box before the lid goes on. Set the carcass on a level floor and press each corner. If one rocks, shim the short leg with a thin offcut glued to the bottom — a bench that rocks feels broken from the first sit. The floor does not have to be level; the bench does.
The lift-top and its hardware
The lid is the one moving part, and it has to work every time or the storage is useless. Three pieces make it work: the hinge, the two struts, and the bumpers.
The hinge: piano or butt. A 48-inch piano hinge along the back rail keeps the seam straight across the width and stops the lid racking when it folds up one-handed. Two 3-inch butt hinges are cheaper, but each carries half the lid on four screws and the gap between them can flex. Butt hinges suit a bench you strip down for moving.
Mounting it flush. Screw one leaf to the rail and the other to the underside of the lid, close it, and sight along the front edge. If it rides high at the back, plane the rail down by the hinge thickness. A lid 1/16 inch off looks fine; one 1/8 inch off collects crumbs.
The struts: two, one each side. Gas struts hold the lid open at roughly 80 degrees, so you do not hold it up while rummaging. Mount the body end on a strut block fixed to the side panel and the rod end to a lid cleat. The block exists because a strut in bare plywood pulls out under tension.
Soft-close versus standard. Standard struts let the lid drop when you pull down, which suits a small child badly. The soft-close pair eases it down over the last few inches for about $8 more and one more part that can wear. If the household has little kids, the pair is worth it.
Bumpers. Two rubber or felt bumpers on the top edge of the front rail stop the lid knocking every time someone sits. Set them 6 inches in from each end.
The seat and cushion
The lid is the seat, and the cushion is what makes it worth sitting on for an hour. A bare plywood lid holds a person for a few minutes; a cushioned one through dinner. The cushion here is a 1 1/2-inch pad on a 1/2-inch plywood base, in a washable cover.
The base. Cut the 1/2-inch plywood to 47 by 14 inches, a half inch smaller than the lid on every side, so the cover does not bind when the lid lifts. Glue the pad to the base with spray adhesive, hold it an hour, and trim it flush with a bread knife and a straightedge.
The cover. A canvas or heavy cotton cover wraps the pad and base, pulled tight and stapled to the underside, so the cushion lifts off as one piece and the cover goes in the wash. A darker cover hides kitchen marks better than linen; a lighter one reads as a nook.
Attaching the cushion. The base sits loose on the lid, held by four small hook-and-loop pads at the corners. Do not screw it down: a removable cushion comes off for washing and for moving. The lid still opens with the cushion on it, because the struts are sized for the extra few pounds.
The cubby version skips the pad. On the open-cubby bench the seat is a thin board with a loose topper, so you see into the bins without lifting anything. A flat woven mat or a folded blanket does the job.
What it costs and how long it takes
The budget below is early-2026 US prices for new stock, and it assumes the drill and the saw are already in the house. The bare box is the carcass with a hinged lid; the full bench adds struts, a cushion and a sealed finish; the cubby version swaps lid hardware for dividers and bins.
| Tier | Lumber and sheet goods | Hardware and extras | Total |
|---|---|---|---|
| Bare box and hinged lid | plywood $30–$70, pine boards $14–$26 | hinge $12–$24, screws and glue $10–$16, sealer $14–$26 | $90–$160 |
| Full bench with struts and cushion | the same sheet and boards, plus base $5–$8 | struts $14–$28, brackets $6–$12, pad and cover $22–$45, bumpers $3–$5 | $160–$250 |
| Open-cubby version | the same sheet, plus divider plywood $6–$10 | screws and glue $10–$16, two bins $16–$30, sealer $14–$26 | $90–$180 |
Where the budget moves. Lumber is the stable line. The hinge and struts are where the cost varies most — a piano hinge runs $12 to $24, struts $14 to $28 a pair. The cushion is the other variable: a budget pad and cover near $22, a denser one toward $45.
Tools, if you own none. This belongs in the budget: a drill $60–$120, a saw $50–$120, a level $15–$30, two clamps $20–$40, a square and sanding block $16–$27. That is $161–$337 once, and every later build in the DIY Home Projects collection reuses it. The same tools build the entryway bench plans and the simpler cuts in the free woodworking plans for beginners.
Time, honestly. Cutting takes an hour, the box two, the hinge and struts 90 minutes, the cushion an hour. The finish takes two hours of work and most of a day of drying. That is one weekend, and the drying cannot be hurried.
Common questions
How wide should a kitchen bench be?
Measure the table length, subtract 4 to 6 inches, and build to that. A 54-inch table takes a 48-inch bench; a 42-inch table takes a 36-inch one. Only the horizontal parts change; every height stays as listed, which is why the cut list is safe to resize.
Can I build this without drilling into walls?
Yes. This bench is freestanding and needs no anchors; it moves when you move. To stop it sliding on a smooth floor, put rubber feet under the bottom. That keeps it a renter-safe build.
Do I need gas struts, or are hinges enough?
Hinges hold the lid closed; they do not hold it open. A lid this size falls on your head when you reach inside, so struts are worth the cost. Skip them and you need a prop or a friction stay that locks at the open angle.
Plywood or solid pine for the lid?
Plywood, with the cleats underneath. A solid pine board that wide cups across the grain within a year, and a cupped lid does not sit flat. Use pine for the rails and cleats, where the part is narrow enough to stay flat.
How do I finish a bench that sits next to the kitchen?
Seal it with a wipeable finish. A water-based satin sealer goes over a primer, dries in 2 to 4 hours, and takes a second coat the same afternoon. Two coats on the lid and front rail, one inside the box, and a light 220-grit sand between. Cure it a full day before anything heavy sits on it.
Can I build this in an apartment?
Yes, with one change. Have the store cut the sheet goods, because a circular saw indoors throws sawdust everywhere. The rest is drill work and clamps, clean enough for a kitchen floor with a drop cloth. The joint conventions are in the beginner woodworking plans guide.
Save this bench plan on Pinterest
Pin the cut list first: the 18-inch seat height, the 15-inch depth and the 48-inch width decide whether a kitchen bench works at your table. For the storage side of the same corner, the kitchen storage ideas for small spaces guide covers the bins and the counter plan. The bench built for shoes and coats is in the entryway bench plans, and the free woodworking plans for beginners guide has the smaller cuts.