 Plant As Deco
Gardening & Planting Tips
Care of Houseplants: A Beginner Routine for Water, Light and More
By Plant As Deco · Updated 19 November 2026
Most houseplants die from one of two things: too much attention or not enough light. The care routine that keeps a plant alive for years is shorter than most people think, and it has almost nothing to do with the species you bought. Water, light, soil, a pot with a hole, and a feeding schedule that runs half the year - those five inputs decide whether a plant thrives or slowly declines. Everything else is troubleshooting.
Weekend-ready: $15–$60 for your first two plants, two pots with drainage, and one bag of mix. One afternoon to set up, ten minutes a week to maintain.
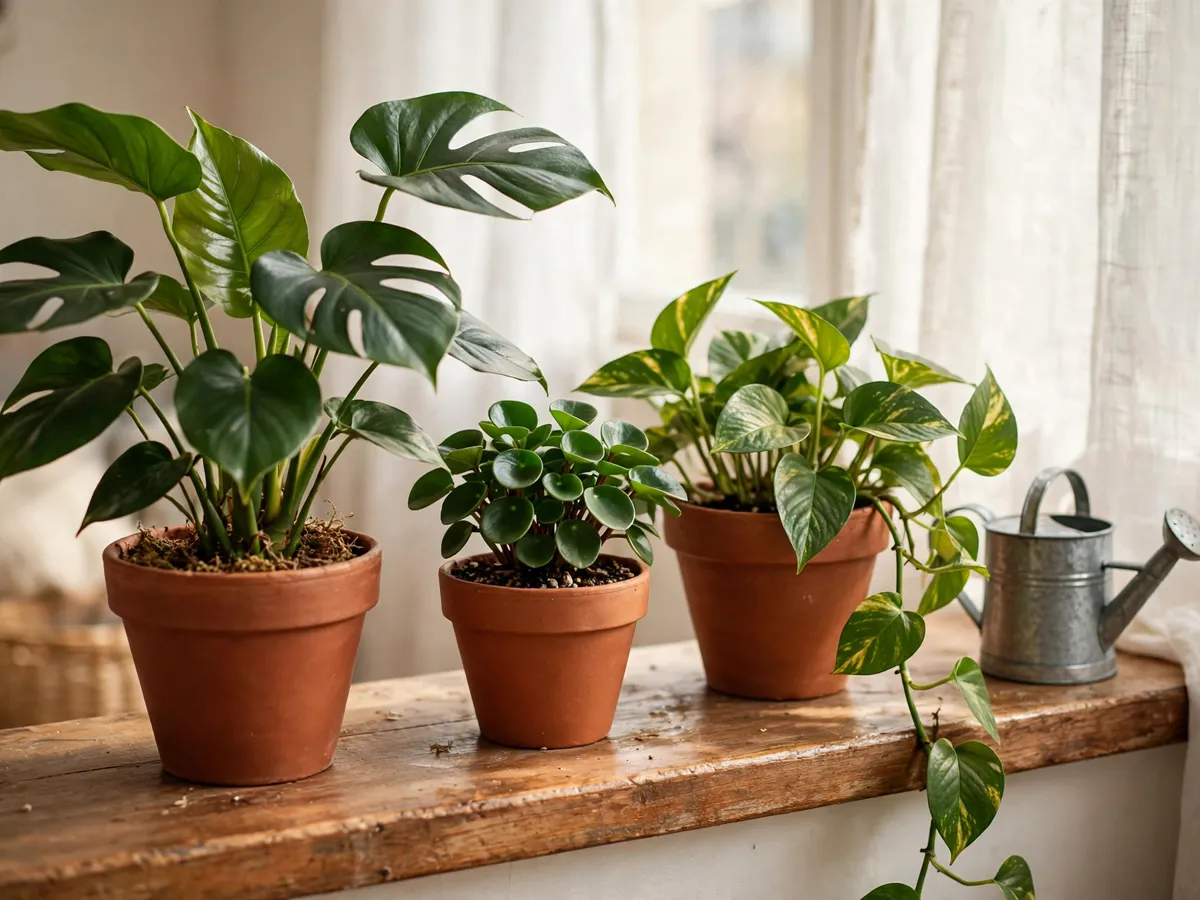
1. What houseplant care really means
Caring for houseplants is not a daily task. It is a weekly check that takes ten minutes, plus a monthly adjustment for the season. The plants that survive decades in homes are not the ones receiving elaborate attention - they are the ones sitting in the right spot, in the right pot, watered on a cycle that matches how fast the soil dries.
A houseplant is a plant growing in a container indoors, cut off from the ground it evolved for. Everything it needs - water, nutrients, oxygen at the roots - has to come through a small volume of potting mix that you control. It cannot reach deeper when the top dries, and it cannot shed excess when the bottom is saturated. Your job is to keep that small volume workable and to put the pot where the light suits the species.
Beginners often assume care means doing something every day. It does not. The most common killing move is watering on a fixed schedule whether the soil needs it or not. The second is a corner that looks good but receives almost no usable light. Get those two right and you have solved most of houseplant care.
2. The five inputs, ranked by how much they matter
Not all inputs are equal. A plant in the wrong light fails no matter how carefully you water, and a plant in the wrong soil rots no matter how good the window is. Here is the honest ranking.
- Light. The single most important input. Without enough of it a plant cannot photosynthesise its way to growth, and no amount of water or feeding fixes that. Every species has a minimum, and most beginners underestimate how dark their rooms are.
- Watering. Second, and the one most people get wrong by doing it too often. Saturate thoroughly, then let the top inch or two dry before adding more.
- Soil and pot drainage. A pot with no hole is a sealed container that suffocates roots. Old, dense mix compacts and stops draining. Both kill slowly and silently.
- Feeding. Fresh mix carries a plant for two or three months. After that it needs dilute feed during growth. It matters, but less than the three above.
- Humidity and grooming. Most foliage plants tolerate average home air. Dusting leaves and watching for pests rounds out the routine; neither saves a plant in the wrong light or the wrong soil.
3. Watering house plants: the finger test and the dry-down
Watering house plants is the skill that takes the longest to learn and the shortest to get wrong. The core idea is that roots need both water and air in the soil, and a constantly wet mix drowns them. The goal is a cycle: saturate the mix thoroughly, let it dry to the right point, then saturate again.
The finger test is how you tell when the mix has dried enough. Push your index finger into the soil to the first knuckle, about an inch deep. If the soil feels damp and cool, wait. If it feels dry and warm, water. For larger pots, push a chopstick or a wooden skewer to the bottom and pull it out - damp soil clings to the wood, and dry soil falls off.
When you water, do it properly. Pour slowly around the entire surface until water runs freely from the drainage hole underneath. Empty the saucer ten minutes later so the pot is not sitting in a puddle. A plant that sits in standing water reabsorbs it through the drainage hole, and the bottom of the rootball stays saturated. That is how root rot starts, and it is the most common way beginners kill houseplants.
How often you end up watering depends on the season, the pot size, the soil mix, and the plant. In a warm room with bright light, a six-inch pot might dry in five days. In a dim, cool room, the same pot might take two weeks. Do not set a calendar reminder for every Monday. Check the soil, and let the soil tell you. The low light houseplants that need less water guide covers the species that dry slowest, and the self watering planters guide explains the one situation where hardware replaces the finger test - a tall shelf or a two-week trip.
Two myths worth ignoring. Ice cubes are not a watering method - cold water shocks tropical roots, and three cubes barely moisten the surface while the bottom stays dry. Coffee grounds sprinkled on the soil do not feed the plant meaningfully and can attract fungus gnats. Use room temperature tap water, and pour it into the pot, not onto the leaves.
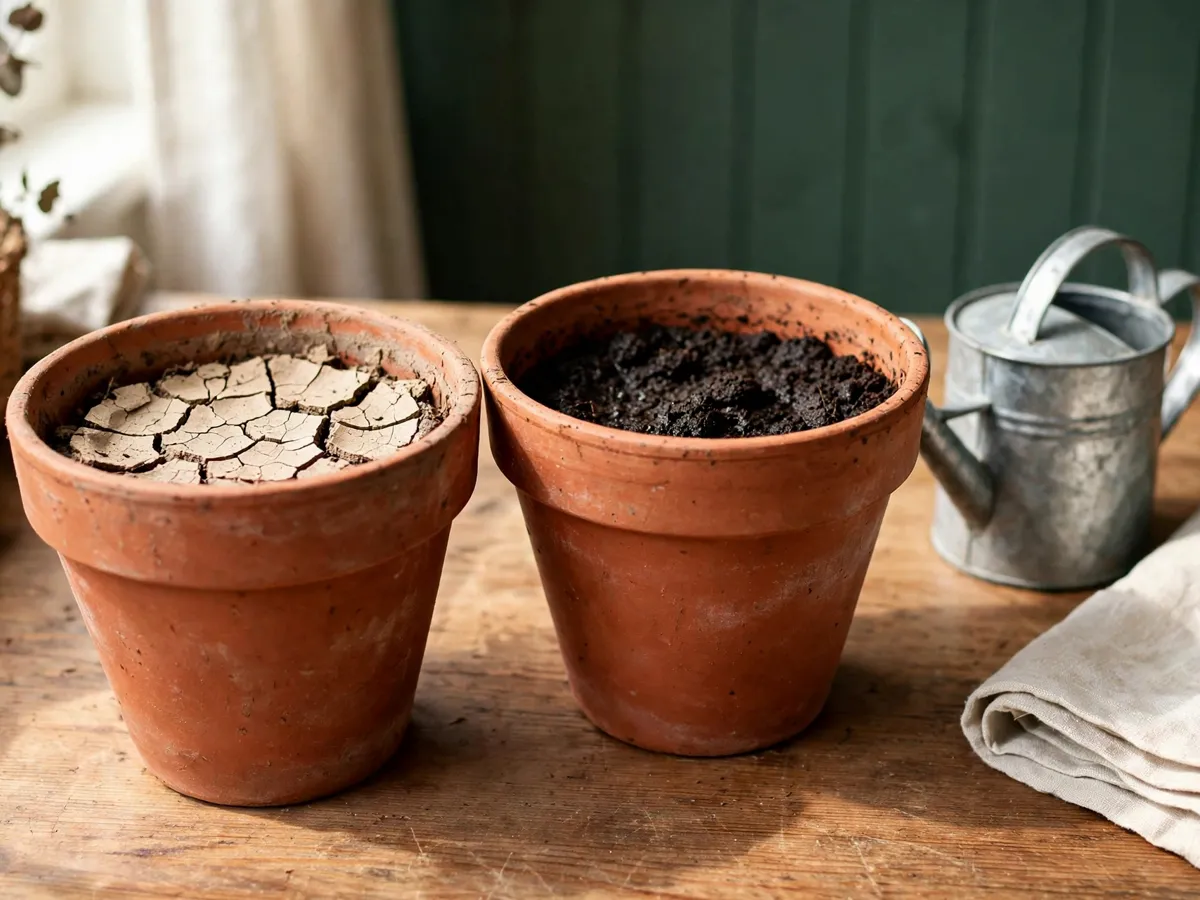
Cost: $0 for the finger test. Time: two minutes per plant to check and water.
4. Light without guessing
Light is the input beginners guess at most often, and guess wrong. The label on a nursery pot might say low light or medium light, but those terms mean nothing without a reference point. Here is a practical one: stand in the spot at midday and face the window. If you can read a book without squinting, the spot is bright indirect light. If you need a lamp, it is low light, and only a few species will hold there. This is the part of houseplant care you cannot compensate for later.
A south-facing window gives the brightest, most consistent light through the day. East and west windows give direct sun for part of the day and indirect light the rest. A north-facing window is the dimmest of the four orientations. Distance matters as much as direction - intensity drops sharply every foot you move a pot away from the glass, and a plant three feet back from a south window often gets less usable light than one sitting in a north window.
Sheer curtains diffuse direct sun and turn a harsh south window into a bright indirect spot that suits most species; without one, the same window scorches thin leaves in summer. Watch the plant for a week after any move. Leaves reaching toward the glass and long gaps between them mean the light is too low. That is leggy growth, and it calls for a better spot, not a change to the watering care routine.
A grow light helps when the only wall available is north-facing or the room has no windows. A basic full-spectrum LED bulb in a desk lamp, run eight to ten hours a day, is enough for most foliage plants. The aim is to supplement weak window light, not replace the sun.
5. Pots, soil and drainage
The pot and the soil work as one system, and the drainage hole is the most important feature of both. A pot without a hole is a decorative cover, not a planter. The plant lives in a nursery pot or a ceramic vessel with at least one hole, and the cover sits outside to catch drips. This single rule prevents more failures than any other piece of houseplant care.
Houseplant soil should be light and open, not heavy garden soil. A general-purpose mix contains peat or coco coir for moisture, perlite or pumice for drainage and airflow, and sometimes bark. It should feel springy when squeezed, not like wet clay. Dense soil that holds water too long is the hidden cause behind most root rot, because roots cannot get oxygen from a compacted, saturated mix.
Soil breaks down. After a year or two the organic matter compresses, the perlite settles, and the mix stays wet longer than it did when fresh. That is when a plant needs new soil and a pot one size larger. The repotting a houseplant one size up guide covers that process, including how to tell a rootbound plant from one that is simply hungry.
The container itself need not be expensive. A terracotta pot with a hole costs under five dollars and breathes through its walls, so the soil dries evenly. Plastic nursery pots are free with the plant and drain well. Glazed ceramic looks better but holds moisture longer, which stretches the watering interval. Match the material to the species: terracotta for plants that like a dry rest, glaze or plastic for moisture lovers.
6. Feeding: half strength, during growth only
Feeding is the input most beginners overthink. Fresh potting mix holds enough nutrients for two to three months. After that, the plant needs supplemental feed during its growing season - roughly April through September for most houseplants in a temperate US home.
Use a balanced liquid fertilizer diluted to half the label rate, applied every third or fourth watering during the growing months. The label on most synthetic feeds says to use a full dose every two weeks. Half strength every third watering is gentler and produces steady growth without the risk of burning roots with concentrated salts. Pour the diluted feed onto already-damp soil, never onto dry roots.
Stop feeding entirely from late autumn through early spring. A plant in reduced light grows slowly or not at all, and feeding a dormant plant forces salts to accumulate in the soil without being absorbed. That buildup shows up as brown leaf tips and edges - the classic sign of fertilizer burn. Resume feeding when you see new growth in spring, not on a calendar date.
The seasonal winter houseplant care guide covers the full cold-season adjustment - reduced watering, paused feeding, humidity management and the heating-season problems that dry out foliage. The short version: feed half-strength during growth, stop when growth stops, and never feed a plant that is stressed or shedding.
7. Humidity, dust and wiping leaves
Most houseplants come from tropical climates where humidity runs sixty percent or higher. The average heated US home sits between thirty and forty percent in the cold months. The gap does not kill most foliage plants, but it crisps the edges of thin-leaved species like calathea, ferns and some philodendron.
A humidifier near the plants raises local humidity far better than misting. A spray bottle wets the leaves for about thirty seconds and does almost nothing for the air around the pot. A small ultrasonic unit running beside the shelf holds the fifties in a normal room, which is enough for all but the most demanding species.
Dust matters more than people expect. A layer of household dust blocks light from the leaf surface, which reduces photosynthesis in a plant that may already sit in marginal light. Wipe large, smooth leaves with a damp cloth every few weeks: support the leaf from underneath and stroke from stem to tip. Fuzzy-leaved plants should never be wiped - brush them instead. This is the smallest, most overlooked part of houseplant care.
Grouping pots raises local humidity slightly, because each plant transpires moisture from soil and leaves. Three or four pots within a foot of each other make a damper pocket than one pot alone, and it costs nothing to arrange.
8. The ten-minute weekly routine
Houseplant care works best as a weekly cadence, not a daily one. Pick a day - Saturday morning, Sunday afternoon, whatever fits - and spend ten minutes walking through the plants. The routine is the same every week, and it takes less time than folding a load of laundry.
- Check each pot with the finger test. Push a finger an inch into the mix. Water the ones that are dry; skip the ones that are still damp. This takes about thirty seconds per plant.
- Look at the newest growth. Are the newest leaves smaller than the older ones? Is the stem stretching? Both signal low light. Note which plants might need a brighter spot.
- Check for pests. Look at the undersides of leaves and the stems where they meet the soil. See the pest section below for what to look for.
- Rotate the pot a quarter turn. Plants lean toward the light source. Turning the pot every week keeps growth even and prevents the one-sided shape that develops when a pot stays in the same orientation.
- Empty the saucers. If any saucer has standing water from the last watering, empty it. Roots should never sit in a puddle for more than ten minutes.
- Feed during the growing season only. From April through September, add half-strength liquid feed to every third watering. Skip this step entirely from October through March.
This routine works for every foliage houseplant a beginner is likely to own. Flowering species have extra requirements, but the backbone - check soil, observe growth, check pests, rotate, drain, feed seasonally - covers most of what a plant needs from you.
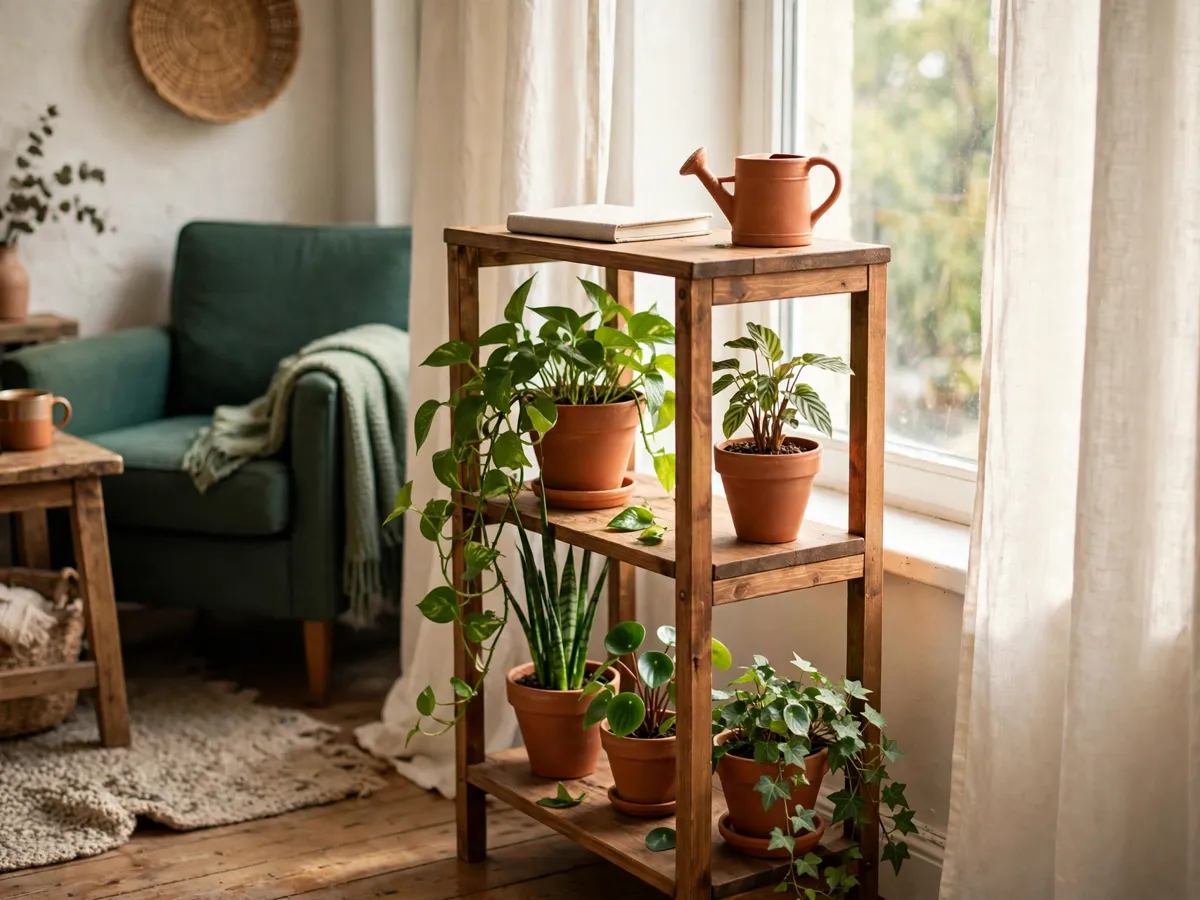
9. The seasonal shift
Care is not static through the year. The inputs shift with the seasons, and the transitions are when most adjustments happen.
- Spring. Days lengthen, light intensifies, and plants push new growth. Resume feeding, check whether roots have crowded the pot, and move anything that sulked through the cold months. This is the best window to repot, because the plant recovers fastest now.
- Summer. Heat dries a pot in three days where spring took ten. Check soil more often, water deeply, and pull plants back from the glass if leaves start scorching.
- Autumn. Light drops fast and heating comes on. Stretch the watering interval, stop feeding by late October, and move pots away from radiators and vents that blow dry air on foliage.
- Winter. Growth slows or stops, watering drops to every two or three weeks, and feeding pauses. The threats are dry heated air, cold drafts, and overwatering by someone who has not adjusted the routine. The full cold-season version lives in the winter houseplant care guide.
10. What each symptom means
Houseplants communicate through their leaves, and most problems appear there first. Here is how to read the common signals.
- Yellow leaves, especially lower ones. Usually overwatering. The oldest leaves yellow and drop first when roots sit in wet soil. Check the drainage hole and stretch the interval.
- Brown, crisp edges. Low humidity or salt buildup. If the room is heated and the whole plant has dry edges, raise humidity. If there is a white crust on the soil, flush the pot with clean water.
- Droopy leaves that do not recover after watering. Root rot. The roots are damaged and cannot take up water even in wet soil. Unpot, trim the dark mushy roots, and repot into fresh dry mix.
- Leggy stems with wide gaps between leaves. Not enough light. Move the pot closer or add a lamp.
- Curling leaves. Thirst or heat stress. The plant is losing water faster than it can absorb it. Check soil first, then whether the pot sits near a vent.
- Brown spots mid-leaf. Often fungal, from water sitting on foliage. Water the soil, not the leaves, and add airflow.
One yellow leaf on an otherwise healthy plant is normal - plants shed their oldest leaves as new ones appear. The concern is a pattern: several leaves in the same week, or new growth that looks different from old. That pattern means something in the care routine has to change.
11. Pests: the two-minute sweep
Pests are what most beginners stop checking for until the plant is already declining. Two minutes during the weekly care routine is enough if you know what to look for.
- Spider mites: fine webbing where leaves meet stems, then pale stippling before yellowing. They thrive in dry, warm air. Wipe the stems and leaf undersides weekly and raise the humidity if they return.
- Fungus gnats: small black flies hovering over the soil. Adults are harmless; the larvae in the mix damage young roots. Let the top two inches dry between waterings and the larvae cannot survive.
- Mealybugs: white cottony clumps in leaf joints and along stems. Dab each one with a cotton swab dipped in rubbing alcohol, then recheck a week later - they hide in crevices, and one pass rarely clears them.
- Scale: small brown bumps on stems and leaf undersides that do not move once settled. Scrape gently with a fingernail and wipe the area with diluted alcohol. Both scale and mealybugs travel between plants, so isolate an infected pot until it is clear.
12. Your first week, in order
Do these in sequence and you will know within a month whether your home suits plants, without betting forty dollars on one that was never going to work there.
- Pick the window first, not the plant. Identify which windows face south, east, west and north. The brightest spot in most homes is a south or east window with no obstructions outside.
- Buy one forgiving plant. A snake plant, a pothos or a philodendron in a six-inch pot costs $10 to $20 and tolerates beginner mistakes. Do not start with a fiddle leaf fig or a calathea.
- Repot it into a container with a drainage hole, using a bagged houseplant mix. If the nursery pot already has holes, slide it into a decorative cover pot and leave the plant in the inner pot.
- Place the pot near the window you identified, not in a dark corner. Rotate it a quarter turn every few days for the first week so the plant adjusts evenly to the new light direction.
- Water thoroughly on day one, until water runs from the drainage hole. Then do not water again until the top inch is dry. Check every few days with the finger test rather than on a fixed schedule.
- Start the weekly routine on your first weekend. Ten minutes of checking, rotating and observing is enough. Do not feed for the first two months - the fresh mix has nutrients.
- Photograph the plant on day one and again after a month. The photo is the only honest record of whether the plant is growing or standing still. Houseplant growth is slow enough that day-to-day changes are invisible.
A new houseplant in the right window, in the right pot, watered on a soil-based routine, will outlive most expectations. Everything in the gardening tips collection builds on this foundation - seasonal adjustments, species selection, propagation and the specific routines for specialised plants.
Common questions
How often should I water my houseplants?
There is no fixed schedule. Water when the top inch of soil feels dry to the touch, which might be every five days in a bright, warm room or every two weeks in a dim, cool one. The finger test is more reliable than any calendar reminder, because the soil dries at different rates depending on the season, the pot size and the plant.
Do houseplants need direct sunlight?
Most foliage houseplants prefer bright, indirect light rather than direct sun. A spot near a window where the sun does not hit the leaves directly is ideal for the majority of common species. A few, like succulents and cacti, want direct sun. The rest scorch in direct light and stretch in low light.
Is tap water safe for houseplants?
Yes, for most species. Let it sit in an open container overnight so chlorine dissipates and the water reaches room temperature. If your tap water is very hard, the salts will build up in the soil over months and cause brown leaf tips. Flush the pot with clean water every few months to wash excess salts through the drainage hole.
When should I repot my houseplant?
Repot when roots are circling the pot and growing out of the drainage hole, or when the plant has stopped growing despite adequate light and watering. Most houseplants need a larger pot every one to two years. Go up one pot size at a time - a plant in a six-inch pot moves to an eight-inch, not a twelve-inch. Too much soil around a small rootball stays wet too long and causes rot.
Why are the tips of my houseplant leaves turning brown?
Brown tips have three common causes: low humidity in a heated room, salt buildup from overfeeding or hard water, and underwatering. Check the soil moisture first - if the mix is dry and pulling away from the pot edge, the plant is thirsty. If the soil is damp and the room is heated, raise the humidity. If there is a white crust on the soil surface, flush the pot with clean water.
Can I keep a houseplant in a room with no windows?
Only with a grow light. No houseplant survives long-term in a windowless room without supplemental lighting. A full-spectrum LED bulb in a desk lamp, run eight to ten hours a day, is enough for most foliage species. Without it the plant declines over weeks regardless of how well you water or feed.
Save these on Pinterest
Pin the weekly routine and the symptom decoder - the two pages that decide whether your houseplants survive the first year. This guide and the rest of the gardening tips live together there.