 Plant As Deco
Organization & Storage
Walk-In Closet Organization: Zone the Walls First
By Plant As Deco · Updated 20 November 2026
A walk-in closet is a room, and a room takes a different plan from the reach-in you re-shuffled last spring. Step inside and you have three walls to work with, a ceiling most people leave empty, and a middle stretch nobody claims until it turns into the junk zone. This guide zones it wall by wall: what has to hang, what folds, what sits low, the rod heights that fit real clothes, the shoe wall, the lighting a windowless room needs, and the honest cost of the whole job. Work the sections in order — the measuring earns every decision after it.
Weekend-ready: $120–$900, one weekend. Renter-safe: freestanding units, door-mounted racks and tension rods need no wall drilling.
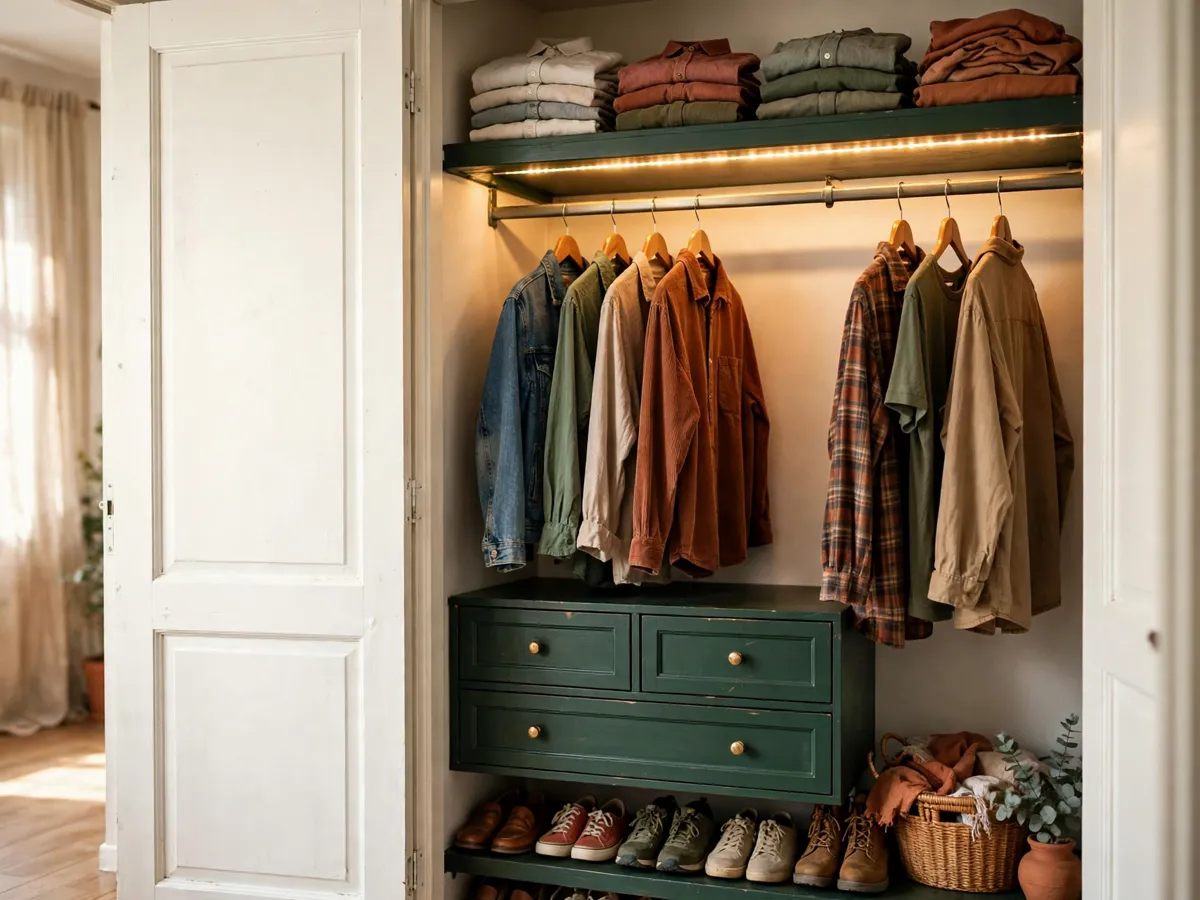
1. What a Walk-In Closet Actually Has to Do
A reach-in hands you one rod and one shelf. A walk-in hands you a room: three or four walls, a ceiling you can reach, and a stretch of open ground nobody planned for. Left alone for a season, the centre turns into the dump zone.
So the first job is deciding what each wall is for. Walk in with everything still on the bed and answer one question per item: does this hang, does this fold, or does this live low. Three piles, one per answer, and the room stops being a black box.
One boundary protects the plan. A walk-in is a bedroom fixture, not a storage room for the household: holiday boxes, a vacuum and a toy crate are shelf inches you will not have for clothes. If a thing does not hang, fold or get worn, it belongs outside this room. If your own project is the narrow reach-in by the front door, the coat closet guide covers that one-rod job. And if the room you are converting is the cavity beneath the stairs — low ceiling, sloped walls, one usable rod — the under-stair storage guide maps it.
Cost: $0. Time: 30 minutes to build the three piles and walk back out.
2. Measure the Walls Before You Buy Anything
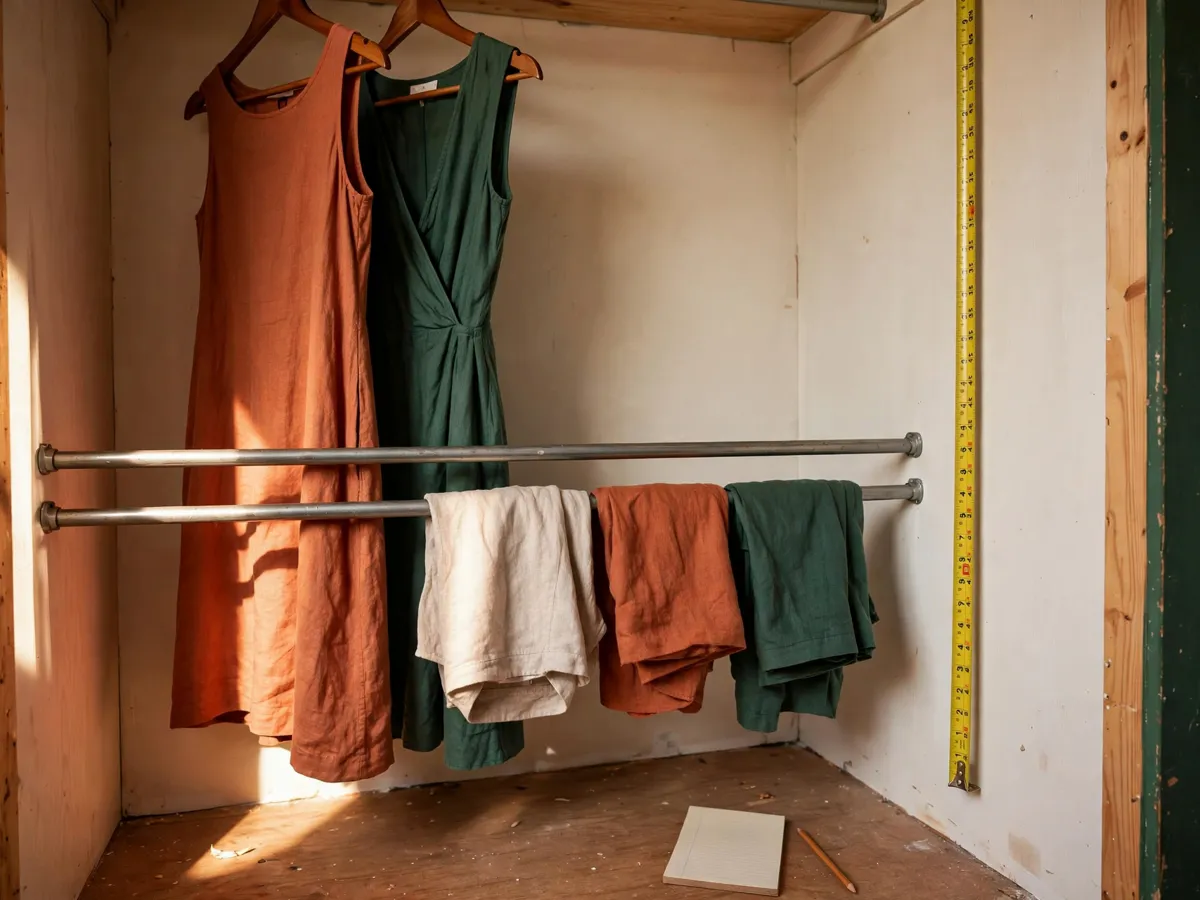
Almost every costly closet mistake is bought in a store aisle. You pick shelving that looks right, haul it home, and it stands two inches proud of the wall so the door will not close. Ten minutes with a tape measure prevents all of it. You need six numbers, taken from inside the room and written down before you leave the house.
First, the width of every wall, measured at the top, the middle and the base. Older framing is rarely square, so a 60 inch reading up high can be 57 inches down low, and the smaller number is the one that decides what fits. Second, the depth of the room from the back wall to the opposite wall, which tells you whether two rows of hanging can work back to front. Third, the ceiling height, because that is the budget for the upper zone.
Fourth, the swing of the door: mark the arc it sweeps with tape so nothing gets built inside it. Fifth, the position of every vent, switch and outlet, since a tall unit over a vent blocks air to the room. Sixth, the measurement people skip: the distance from the doorway to the first wall, which is the walkway you owe yourself. Thirty-six inches of clear walking space is the number to protect; below 30 you will be turning sideways with a laundry basket in your arms.
Cost: $0 if you own a tape. Time: 10 minutes, plus one photograph from the doorway.
3. The Three Zones: Hang, Fold and Down Low
Every walk-in organizes into the same four bands, and the trick is assigning them wall by wall. The hang zone runs from about 38 inches to 78 inches up the wall. The fold zone is the reachable band between 24 and 48 inches, where shelves and drawers sit at torso height and a stack stays a stack. The low zone is everything under 24 inches: shoes, bags, flat boxes. The upper zone, from roughly 80 inches to the ceiling, stores what the room uses twice a year.
Zoning this way beats zoning by person, which is how most walk-ins fail. A person-based layout gives each side a mix of hang, fold and low, so every wall is half empty and every rod is the wrong height for half of what hangs on it. A zone-based layout puts one function per wall: one rod height per wall, one shelf depth per wall, one shopping list per wall.
Draw it before you buy. Sketch the room from above in your notes app, label the four walls, and write one word on each: hang, fold, low, upper. Give the biggest wall to the messiest category, because that is the one that will drift.
Cost: $0. Time: 15 minutes for the sketch, and it changes every purchase you make after it.
4. Hang Heights That Fit Real Clothes
Standard builder height is 66 to 68 inches for a single rod, and in a walk-in it is wrong about half the time: it wastes the wall above it and stops short of what most people need below. Measure the longest thing you hang — a dress, a robe, a long cardigan — from the shoulder seam to the hem, add two inches, and set the rod at that number. A knee-length dress drops about 46 inches, so a rod at 54 keeps the hem clear and leaves 20-odd inches above for shelving.
Short items want their own rod, low and close. Shirts, blouses and trousers folded over the bar need about 24 inches of drop, so a second rod at 38 to 40 inches doubles the hang on the same wall. Leave 12 inches between the two; less and the upper row rests on the lower garments, which is how a shirt collar ends up crushed. Match the hangers to the row, too — slim velvet ones at 1½ inches each let a 60 inch wall hold forty shirts on the lower rod, while bulky wooden ones cut that to twenty-five.
Depth matters as much as height. A rod needs 24 inches of clear depth so garments hang flat without pressing a wall or a door. On a shallow wall, a 16 inch rod works for shirts and jackets only, and anything wider folds instead of hangs. Mount the rod so its centre sits at least 4 inches off the back wall; hangers ride the bar at the shoulder hook rather than flush. Slim hangers on a velvet bar also stay put when you pull one shirt out. If you cannot drill, a freestanding garment rack at 62 inches does the same job on any wall.
Cost: $18–$60 per rod and bracket set, or $45–$140 for a freestanding rack. Time: 45 minutes per wall.
5. Shelves, Drawers and the Upper Zone
Shelving carries the fold zone, and depth decides whether a stack stays a stack. A 12 inch shelf holds tees and jeans in one layer you can see the top of; a 16 inch shelf invites two deep, and the back layer caves every time someone pulls the front shirt. Space the shelves 12 to 14 inches apart for folded clothes, 10 inches for knitwear, and 15 if the plan is upright boxes. Anything taller than the gap is a bin job rather than a shelf job.
Drawers sit beneath the shelving, at 24 to 36 inches up the wall, where a pulled drawer clears your knees. Three shallow drawers beat two deep ones for socks, underwear, belts and ties, because you see every compartment at once; save the deep ones for jeans. A drawer tower on casters is the renter answer to a built-in: it rolls out, it leaves at the end of a lease, and the wall stays unpunched. Fixed units need solid backing or a mechanical anchor into framing.
The upper zone runs from roughly 80 inches to the ceiling, and it stores one thing: the seasonal layer. Spare bedding, the cotton garment bags, the pairs you are not wearing now. Reach it with a 24 inch step stool rather than a chair. If your household keeps sheets and towel stock in a cabinet out in the hall, that is a separate job, and the linen closet guide covers the folded-stack math for it.
Cost: $60–$220 for shelving and a drawer tower, $25–$45 for a stool. Time: 2 to 3 hours per wall.
6. The Shoe Wall
Shoes are the mess that grows. Count them before you build: a walk-in typically holds 20 to 35 pairs, and every pair needs about 13 inches of width and 10 inches of depth. That is why the shoe wall is a wall, not a rack in the corner. One 60 inch wall on a tilt-front rack carries 24 pairs in three rows.
Sort by how often you reach for them. Everyday pairs go at ankle height, 6 to 18 inches up, where you can slip a foot in without bending far. Weekly pairs sit on the next row. Boots stand on their own soles at the base, and everything worn twice a year climbs to the upper zone. Keep sneakers side by side toe-to-heel rather than stacked, or the uppers crease where the weight sits. A clear tilt rack costs $35–$90; an open shelf of the same width costs about the same and shows more.
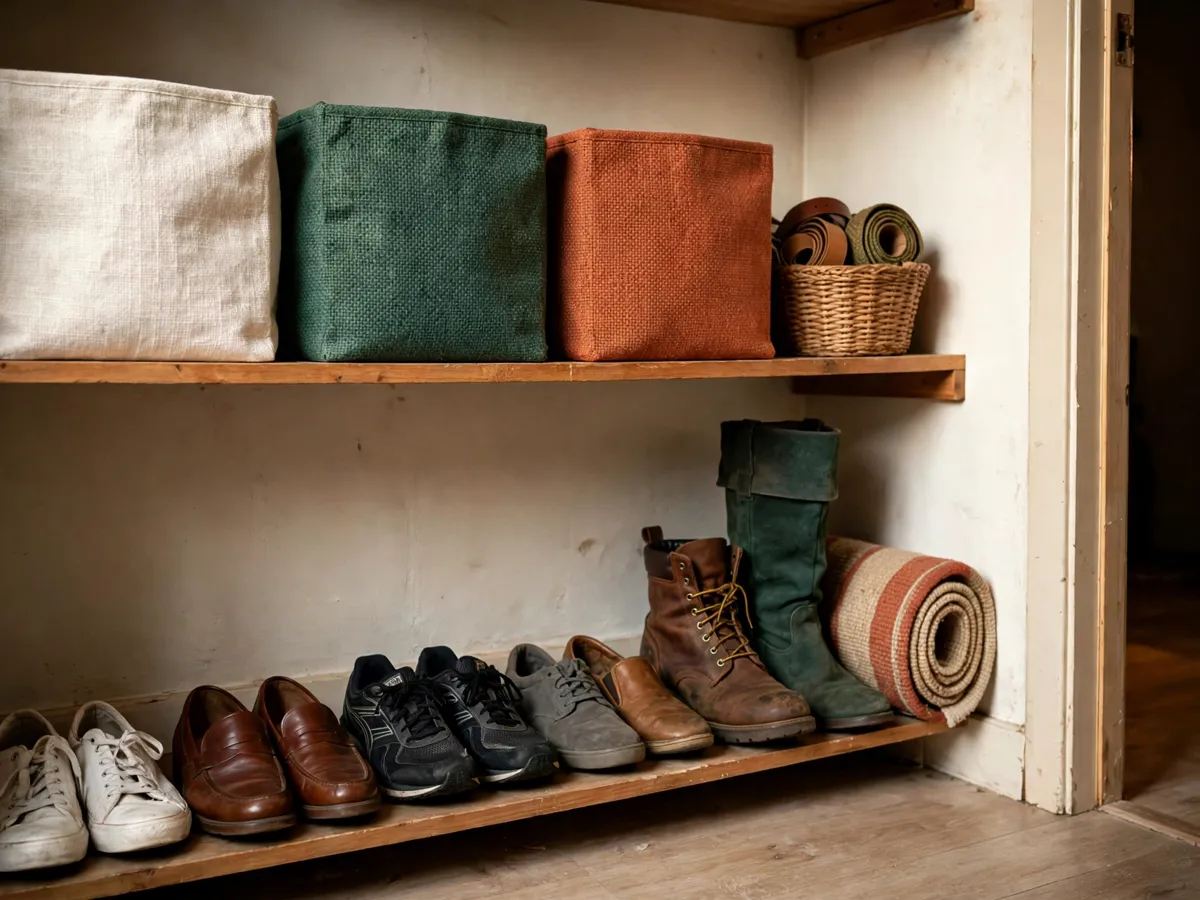
Two habits keep the wall readable. First, nothing goes in a box unless the box is clear or the front carries a label you can read from the doorway. Second, one pair in and one pair out, which is the only rule that stops a shoe wall from creeping into the walkway. If the overflow spills out of the room, that is a second project with a different set of measurements, and it belongs outside this closet.
Cost: $35–$90 for a rack, $0 for the swap rule. Time: 45 minutes to sort and line every pair up.
7. Lighting a Windowless Room
Most walk-ins have no window and one ceiling fixture that throws your own shadow across the wall you are reading. That is the real reason a closet feels disorganized even when it is tidy: the back of the rod is dark, the top shelf is dark, and the shoes are dark. Light the shelves, not the ceiling. A strip under each shelf front, aimed down and forward, puts the beam on the clothes instead of on your hands.
Pick 2700 to 3000 Kelvin for a warm room and 4000 if you match colours in here; anything cooler reads hospital. Look for 300 lumens per foot or more and a colour rating of 90 or above, so a navy does not turn grey on you. Battery strips with a motion sensor run $18–$40 and stick to the shelf underside, which makes them the renter-safe route. Hardwired under-shelf light costs $60–$180 installed and switches with the room, so it never dies mid-weekend.
Fix the strip at the front edge of each shelf rather than the middle, or the shelving above casts a shadow on the row below. Two lit shelves and one over the hang rail is enough for most rooms; four is a lot of light and a lot of wire. If the only switch sits outside the door, put a small lamp with its own switch inside so you are never fumbling in the dark with an armful of folded clothes.
Cost: $18–$40 per battery strip, $60–$180 hardwired. Time: 20 minutes sticky-mounted, 2 to 3 hours wired.
8. The Island or Cart Call
An island is the most wanted and least needed piece in a walk-in. It works on one condition: the room is at least 8 feet wide, so the island leaves 36 inches of walkway on every side. Below that width, an island eats the walking space you were just protecting in section 2 and turns the room into a squeeze. Measure the walkway before you measure the cabinet.
A real island gives you a flat top for folding, deep drawers for the small things and a low shelf for bags. New, it runs $400–$1,600; a dresser pulled from the bedroom does the same job for $0 and rolls into place on furniture sliders. A DIY build with a cut list sits in between and fills a weekend. Secure anything someone might climb, and reserve the surface for one task at a time.
If the room is narrow, a cart wins. A slim rolling cart at 15 to 18 inches wide slides into the gap beside a rod, holds folded jeans on three tiers, and parks under a shelf when you want the walking space back. It costs $40–$120, needs no assembly beyond four wheels, and it moves out to the laundry room on wash day. That flexibility is the whole argument for a cart in a small walk-in, and the reason most rooms under 8 feet should skip the island for a year and see what the cart cannot do.
Cost: $0 for a repurposed dresser, $40–$120 for a cart, $400–$1,600 for an island. Time: 1 hour to 2 weekends.
9. Doors vs Open and Curtain Options
A walk-in usually keeps its door, and the only decision is whether to replace it. Keep the swing door if the room sits off a bedroom people walk through daily; it hides the room at 7 a.m. and costs nothing. A pocket door needs 30 inches of clear wall beside the opening to disappear into, which most closet entrances do not have. A bypass pair steals 3 inches of opening width and traps half the doorway behind a panel.
The drape option is worth taking seriously in a rental. A tension rod across the doorway plus a canvas panel costs $30–$70, installs in 20 minutes, and leaves the frame untouched. Medium-weight fabric softens the room and hides the state of the shelves at 11 p.m. The trade is airflow and light: shut the drape and a windowless closet gets darker and stuffier, so hang it open most days.
For the walls themselves, open shelving beats closed cabinets. Open fronts mean you see the stack, reach the shirt and put it back in one motion; closed fronts add a swing to every wall and a half-second of friction that quietly becomes a pile on the island top. Glass earns its place in the upper zone, where dust is the enemy.
Cost: $0 to keep the door, $30–$70 for the drape route, $150–$400 for a new pre-hung pair. Time: 20 minutes to 3 hours.
10. Mirrors, Ventilation and What Happens Down Low
One full-height mirror on the back of the door is the cheap route at $25–$60, and it uses a surface you were never going to shelve. Mounted on the end wall instead, it catches the light from the doorway and throws it back, which helps a windowless closet feel twice as bright. Keep it inside the room; a reflective panel opposite the hang wall doubles the visual clutter along with the light.
Ventilation is the part nobody plans and everybody pays for. A sealed room with a shut door holds damp in wool and closed drawers, and the musty smell that follows is hard to reverse. Leave an inch of air behind every stack, crack the door for an hour on dry days, and skip airtight tubs for anything wool or down. A small vent grille at the base of a tall unit keeps air moving behind it.
Down low, protect what the base of the room is for: walking. A rug adds warmth underfoot but eats clearance, so keep it thin — under half an inch — and inside the walkway lines you taped in section 2. Nothing sleeps down there overnight except the shoe wall and the step stool. That single rule is what keeps the room looking organized a month later.
Cost: $25–$60 for the door panel, $20–$80 for a thin rug. Time: 15 minutes to hang, 5 minutes a week to keep the base clear.
11. What It Costs and How Long It Takes
Here is the honest budget for a 6 by 8 foot walk-in, priced the way the storage aisle actually sells it. Pick the lines that match your room; most homes need three or four of them rather than all six.
- Two rods with brackets for the hang wall: $36–$120, 1 to 2 hours.
- Shelving kit, four to six shelves at 12 to 16 inches deep: $60–$220, 2 to 3 hours.
- Drawer tower on casters, three shallow drawers: $80–$180, 30 minutes.
- Shoe rack or tilt-front unit for one wall: $35–$90, 30 minutes.
- Battery LED strips under two shelves: $36–$80, 20 minutes.
- Freestanding garment rack for a rental: $45–$140, 15 minutes.
The full list adds up to $292–$830, and almost nobody buys all of it. The realistic spend for one weekend is $120 to $340: two rods, a shelving kit, a shoe rack and two LED strips. Add the drawer tower if the small things are the problem, or the freestanding rack instead of the rods if you are renting. The $900 end of the range is the room with a tower, a bigger shoe unit, a drape and hardwired light.
Time breaks down like this: 30 minutes to sort the piles, 10 to measure, an hour to draw the wall plan, 2 hours to hang and level two rods, 3 for the shelving, 1 for the shoe wall and 2 to re-hang everything in its new zone. That is a solid Saturday plus a Sunday morning — call it 10 to 12 hours, one weekend.
Cost: $120–$340 for the weekend, $292–$830 for the full list. Time: 10 to 12 hours across one weekend.
Common questions
How big does a room need to be to count as a walk-in?
About 24 square feet is the smallest workable version: a 4 by 6 foot room gives you 36 inches of walkway in front of one 24 inch deep hang wall. At 6 by 8 feet, two walls carry hanging and a third takes shelving and drawers, which is the layout most of this guide assumes. Below 24 square feet you are organizing a large reach-in, and the small closet guide for beginners is the better plan for that one.
What height should the rods be in a walk-in?
Set the long-hang rod at 54 inches if knee-length dresses are the longest thing in the room, or 66 to 68 inches for full-length gowns. The short-hang row goes at 38 to 40 inches with at least 12 inches of air between the two rods. Count what you own before you drill: a 60 inch wall carries about forty slim hangers and twenty-five bulky ones.
Can I organize a walk-in in a rental?
Yes. Freestanding garment racks, a drawer tower on casters, a leaning shelving unit, a tension rod across the doorway and battery LED strips all do the job without a single hole in the wall, and the setup comes apart in under an hour at move-out. Check the lease before adhesive strips go on painted surfaces.
Is an island worth it in a small walk-in?
Only in a room 8 feet wide or wider, because an island owes you 36 inches of walkway on all four sides. Under that width, a slim cart at 15 to 18 inches gives you the same flat top and three tiers of storage for a fraction of the cost. Try the cart for a season before you commit to cabinetry.
How do you light a closet with no window?
Light the shelves, not the ceiling. Stick a warm LED strip under the front edge of the two shelves you read most, aimed down and forward, and add one over the hang rail. Pick 2700 to 3000 Kelvin with a colour rating of 90 or above. Battery strips cover a rental; hardwired strips switch with the room.
What should stay out of the room entirely?
The household overflow, mostly. Holiday boxes, cleaning tools, the printer that eats paper and a spare chair each take shelf inches you will not have for clothes. Two fixed swaps a year — late autumn when the heavy layer comes in, early spring when it goes back up — keep the zones honest.
Save these on Pinterest
Pin the wall plan and the rod heights — 54 inches for knee-length, 38 to 40 for the short row, and 36 inches of walkway before any island. Those are the numbers you will forget standing in the aisle with a shelf box in your hands. This guide and the rest of the organization and storage collection live together there.