 Plant As Deco
Organization & Storage
Under Sink Storage Ideas: A Pipe-First Plan for Kitchen and Bath
By Plant As Deco · Updated 16 November 2026
The cabinet under the sink is the hardest-working box in a small home and the least organized one: bottles balancing on the cabinet floor, a drain pipe squatting in the middle, and a shutoff valve nobody has looked at since move-in day. This plan is for renters and owners with one small under-sink cabinet in a kitchen, a bathroom or both. It maps the plumbing first, splits the space into three zones by how often you reach, stacks trays up both sides of the trap, turns the cabinet door into a fourth shelf, and ends with the monthly leak check that protects everything you just organized.
Weekend-ready: $10–$60, one afternoon. No drilling and no screwed-in shelves — renter-safe throughout.
1. Map the pipes before you buy anything
Under-sink storage fails for one reason: it is bought for instead of measured. The drain pipe and its trap sit in the middle of the cabinet floor, and every tray, bin and shelf you buy has to live around that shape. So before anything goes into a shopping cart, spend twenty minutes making a pipe map — four numbers and two photos that turn a guessing game into arithmetic. The kit is already in your home, and the towel is not for spills: a damp cabinet floor is a finding, not a chore, and it belongs to the leak check at the end of this section.
- A tape measure
- A flashlight
- Your phone camera
- Pencil and paper, or a note on the phone
- One dry towel
- Empty the cabinet completely, onto the counter. Expired bottles and dried-up tubes leave for the bin now, while you can still see them.
- Measure the width of each side pocket — the clear space left of the pipes and right of them — at the narrowest point, usually where the trap curve comes closest to a side wall.
- Measure the height of each side pocket from the cabinet floor to the underside of the basin. The basin slopes, so the front edge is taller than the back; record the smaller number, because a tray has to fit at the tight spot, not the roomy one.
- Find the shutoff valves and measure the clearance in front of them. A hand has to reach in and turn each valve a full turn, and nothing you buy later may stand in that space.
- Write the numbers on a strip of painter's tape, stick the strip inside the cabinet wall, and photograph the open cabinet with the tape visible. That photo is the pipe map you take shopping — check it against the dimensions on every listing, and treat a listing with no dimensions as a guess.
While the cabinet is empty, do the leak pass, and then repeat it once a month. Look at every joint — where the trap meets the wall pipe, where each supply line meets its valve — run a finger along the underside of the trap, and press the towel flat against the cabinet floor. Under the sink is where a slow leak hides longest in a home: it is the one cabinet nobody opens on purpose, and a drip travels along the outside of a pipe before it ever pools where you would notice it. Once the cabinet is set up with trays, the monthly pass takes about sixty seconds, because everything lifts out in two pieces.
Cost: $0. Time: 20 minutes. Measure at the narrowest point, not the roomiest — trays have to clear the tight gap.
2. Three zones, nothing floating
With the pipes mapped, sort everything that came out of the cabinet into three piles, using one question only: how often do you reach for it? Daily things — the dish soap, the hand soap refill, the sponge and the dish brush in a kitchen; the face wash and the toothpaste tube in a bathroom — earn the front of a side pocket at hand height, standing upright with labels facing out so one glance beats a rummage. Cleaning supplies — the weekly spray, the scrub brush, the spare sponges, the bowl cleaner — sit behind the daily zone or on the lowest level of the stack, where they are reachable but not in the way. Rarely things — the backup stock, the box of refills, the seasonal bottle — do not go back in at all. That is the rarely pile rule from the bathroom reset guide: if you do not reach for it at least weekly, it does not live under the sink. Where those boxes actually go — the shelf, the closet, or out of the home — is the room-by-room declutter checklist's job.
The second rule is shorter: nothing floats. Every zone gets exactly one tray — one for daily, one for cleaning — and nothing stands loose on the cabinet floor. The tray is what keeps the monthly leak check honest: a drip lands on an empty floor where you can see it, instead of pooling unseen under a crowd of bottles, and lifting a whole zone out to wipe the cabinet down takes one motion instead of eleven. If the zone thinking clicks for you, it is the same one-job-per-shelf method that runs a pantry — the pantry zone guide applies it shelf by shelf.
Cost: $0–$20 for two or three trays. Time: 45 minutes. Group by how often you reach, not by what the product is.
3. Stack up both sides
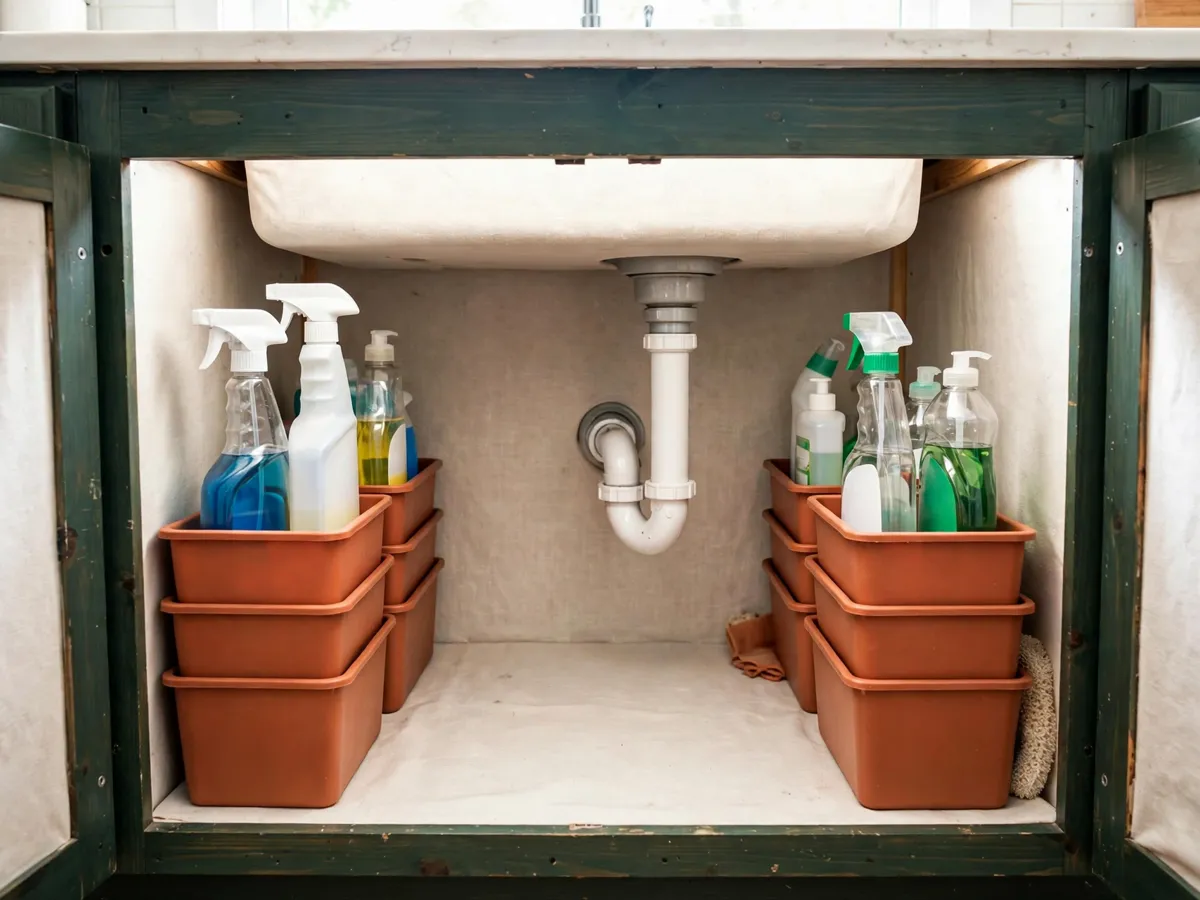
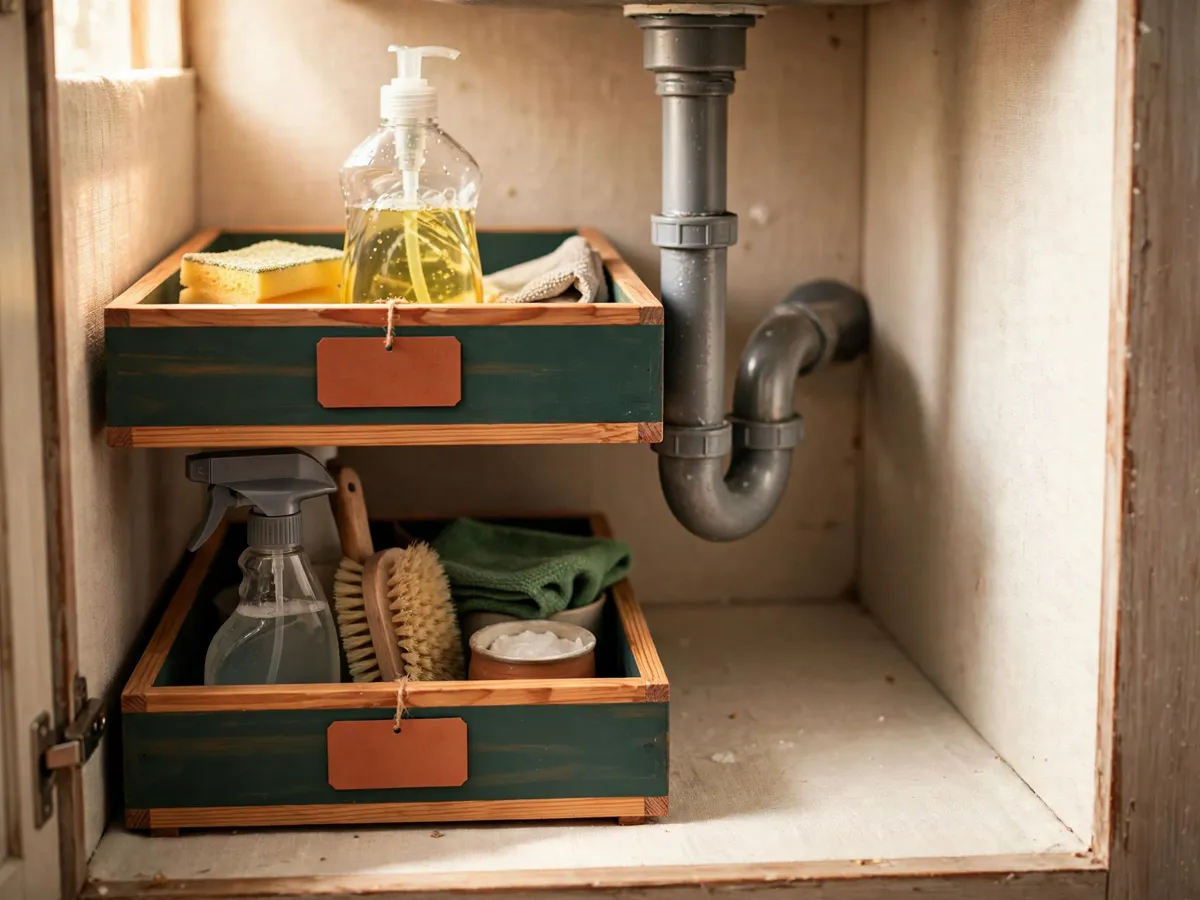
The trap steals the middle of the cabinet, which makes the two side pockets the whole storage story, and the way to multiply them is height. Stackable trays turn one pocket into two or three levels: the lower level takes the tall bottles — cleaners, the dish soap refill, the spray bottles that will not lie down — and the upper levels take the small things, sponges, dish tablets, microfiber cloths. One freestanding shelf does the same job for less money when a pocket only needs two levels; it rests on the cabinet floor under its own weight and leaves with you at the end of a lease. Kitchens and bathrooms stack differently, and the pipe map already told you which one you have. In a kitchen, one side often disappears entirely into a garbage disposal unit, which is the cabinet telling you the other side carries everything. In a bathroom, the trap usually sits lower and centered, leaving two shallow pockets: surface bottles on one side, the tall bowl cleaner on the other.
Three ways this fails, all avoidable with the map in hand. A tray that fills its pocket wall-to-wall cannot be pulled past the pipe at all, so leave an inch of slide room between the tray and the trap before you buy. A stack that stands in front of the shutoff valves turns a five-second valve turn into a five-minute excavation — the valve clearance from step four of the map is a purchase rule, not a suggestion. And trays that overhang the pocket edge push against the door every time it closes, until the day the door stops closing; if the door feels stiff, pull the trays back an inch before you blame the hinges. The wider small-kitchen plan this sits inside — shelves by height, the fridge front row, the nightly ten -minute tidy — is in the kitchen storage checklist.
Cost: $15–$50 for stackable trays and one freestanding shelf. Time: 30 minutes. The tallest bottle decides the spacing between levels, not the average one.
4. The cabinet door is a fourth shelf
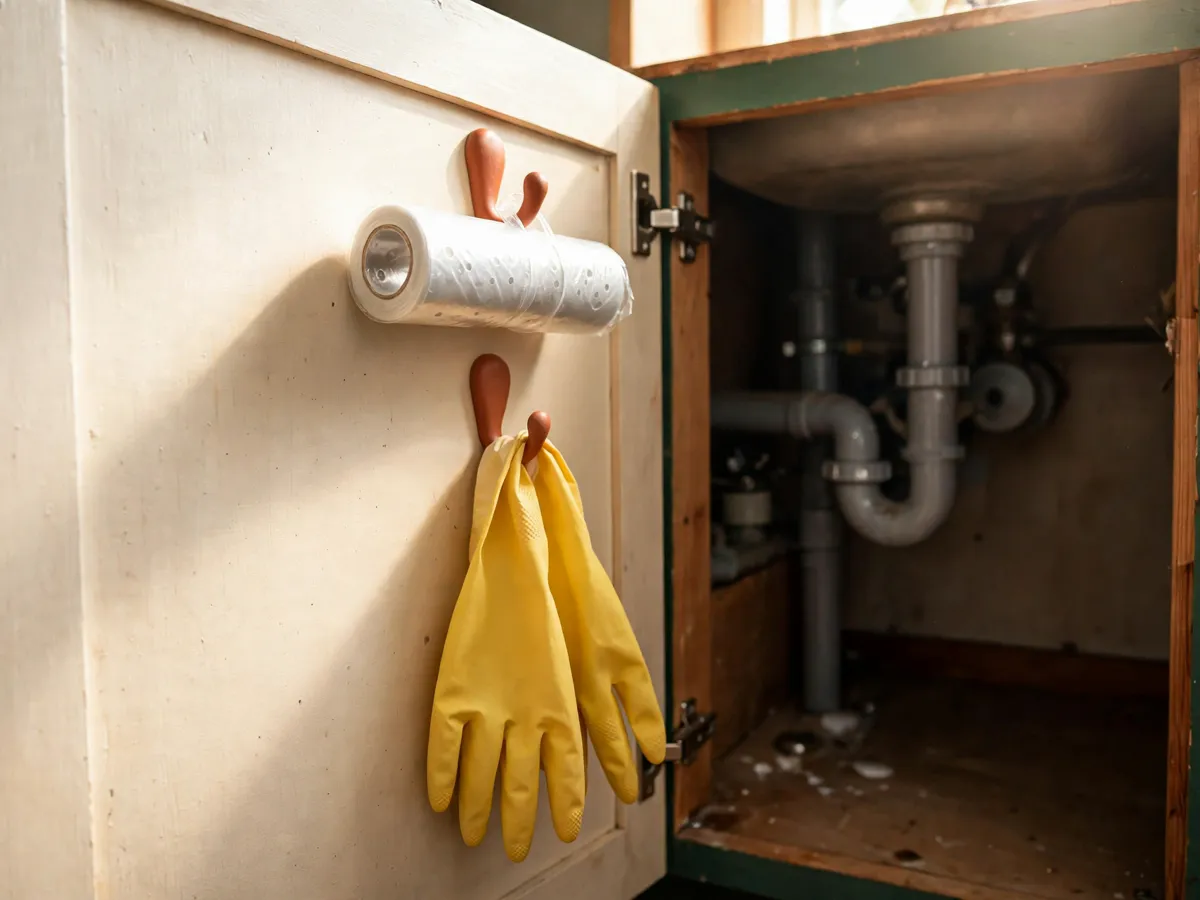
The inside face of the cabinet door is the one surface in the cabinet that never has to clear the plumbing, and in most homes it holds nothing at all. Treat it as the fourth shelf. Two fittings do all the work, and both peel off clean. Adhesive hooks — the weight-rated strip kind — carry the light dry things: rubber gloves hung by the cuffs, a microfiber cloth, the scissors. A stick-on rod, or two hooks and a short rail, carries the roll of small trash bags, or holds one bag hung open as the simplest bin in the house — pull the drawstring, lift it off, done.
Measure the inside width of the door before anything sticks, and keep two clearances in mind as you place. The depth of what hangs must sit inside the frame edge, or the door will not close; and nothing may hang at the height where the stacked trays push out, because hooks and trays share the same swing — place hooks high, trays low. Hang nothing liquid on the door: a bottle that drips runs straight down the door face and onto the front edge of the cabinet floor, and a leaking door is harder to notice than a leaking floor. Gloves, cloths, bags, brushes — dry goods only. Before you load anything, run the close-open test once with the empty hooks in place; hook placement is the whole game, and moving an empty strip is easier than moving a loaded bin.
Cost: $8–$25 for adhesive hooks and one stick-on rod. Time: 20 minutes. Adhesive ratings assume a smooth, sealed surface — hang only light things on bare particleboard.
5. The no-drill renter version
Nothing in this plan needs a hole anywhere, which is the point: the under-sink cabinet is usually a rental's cabinet, and the deposit matters more than any rack. The full no-drill kit is short. Stackable trays and one freestanding shelf rest on the cabinet floor under their own weight. Adhesive hooks and a stick-on rod carry the door. And a short tension rod spanned across the cabinet — wall to wall, above the trap — hangs spray bottles by their trigger handles, which takes every spray bottle off the floor and stops the dominoes that start when one bottle leans. When the lease ends, everything peels: warm each adhesive strip with a hairdryer for a few seconds and pull it slowly, straight down along the door face. Skip the screw-in door racks and the drilled shelf pins, even in a cabinet nobody sees — holes are holes, and the two hooks they replace cost less than the paint that covers them.
The monthly leak check from the first section belongs to renters most of all. A leak caught in week one is a paper towel and a tightened joint; a leak your landlord finds at inspection is a swollen cabinet floor and a deduction. Sixty seconds — eyes on the joints, finger under the trap, palm flat on the cabinet floor — and because everything sits in trays, all three moves happen without unpacking anything.
Cost: $10–$40. Time: 30 minutes. Measure the tension rod span twice — a rod a quarter inch short drops the first time the door slams.
What we would skip
Skip the one-piece U-shaped organizer — the plastic shell with the notch molded out for a pipe. It was cast around somebody else's trap, and traps sit at different heights and depths in every cabinet; without your pipe map it is a lottery ticket. Skip the pull-out drawer on rails: the rails need flat, clear floor for the full slide, and in most under-sink cabinets the trap or the valve occupies exactly that lane — the drawer either stops short of opening or parks in front of the shutoff. Skip deep bins for the daily zone; a deep bin buries the thing you reach for every morning, and daily things live in shallow trays you can see into at a glance. Skip lidded boxes under the sink entirely — nobody wrestles a lid one-handed while holding a sponge, and a sealed box hides a leak as effectively as it hides clutter. The one spend worth making: two good stackable trays with high sides per pocket, because the high side is what lets you slide a whole zone out past the pipe.
Cost: $0 to skip. Time: the decisions that keep the cabinet working every day.
Before you buy: copy this
- Pipe map on your phone: width and height of each side pocket, measured at the narrowest point
- Shutoff clearance kept — a hand can still reach and turn both valves with the trays in place
- Tray levels spaced for the tallest bottle, not the average one
- Door measured inside width, hooks placed high, close-open test done empty
- One tray per zone, nothing loose on the cabinet floor
- Monthly leak check on the calendar: joints looked at, trap felt, floor pressed
Cost: $0 to check. Time: 10 minutes, before the order goes through.
Questions renters ask
How do I measure an under-sink cabinet before buying organizers?
Empty it fully, then take the width of each side pocket at the narrowest point, the height from the cabinet floor to the underside of the basin on both sides of the trap, and the clearance in front of the shutoff valves. Write the numbers on painter's tape inside the cabinet and photograph it — that photo is what you check every listing against.
What belongs in each under-sink zone?
Daily items go in the front of a side pocket at hand height, cleaning supplies behind them or on the lowest level, and rarely used backup stock leaves the cabinet for a pantry or closet shelf. Nothing stands loose on the cabinet floor — each zone sits in one tray.
Can I hang storage inside the cabinet door?
Yes, with adhesive hooks and a stick-on rod, both of which peel off clean. Keep what hangs light and dry — gloves, cloths, the trash-bag roll — place the hooks high so the trays clear them, and run the close-open test once before loading anything.
How often should I check under the sink for leaks?
Once a month. Look at the joints where the trap meets the wall pipe and where the supply lines meet the valves, run a finger along the underside of the trap, and press a palm flat on the cabinet floor. With everything in trays it takes about sixty seconds.
Save these on Pinterest
Pin the pipe map — the two side-pocket measurements and the valve clearance — because that one habit is what makes every tray fit the first time. The pantry, bathroom, declutter and kitchen plans this page borrows from are collected with the rest of our small-home plans in the organization and storage guides.