 Plant As Deco
DIY Home Projects
DIY Kitchen Cart Plans: The 18 by 24 Inch Rolling Cart
By Plant As Deco · Updated 18 November 2026
A rolling kitchen cart earns its floor space by being moved. It is extra counter at 36 inches when guests arrive, a shelf run for pots on a weekday, and a surface you roll to the stove. This build is pine and plywood: 24 inches wide, 18 inches deep, three shelves, a butcher block top and four plate casters, the front two locking. Every number starts from your aisle rather than from the lumber, because a cart that blocks the walkway is a pile of nice wood in the garage.
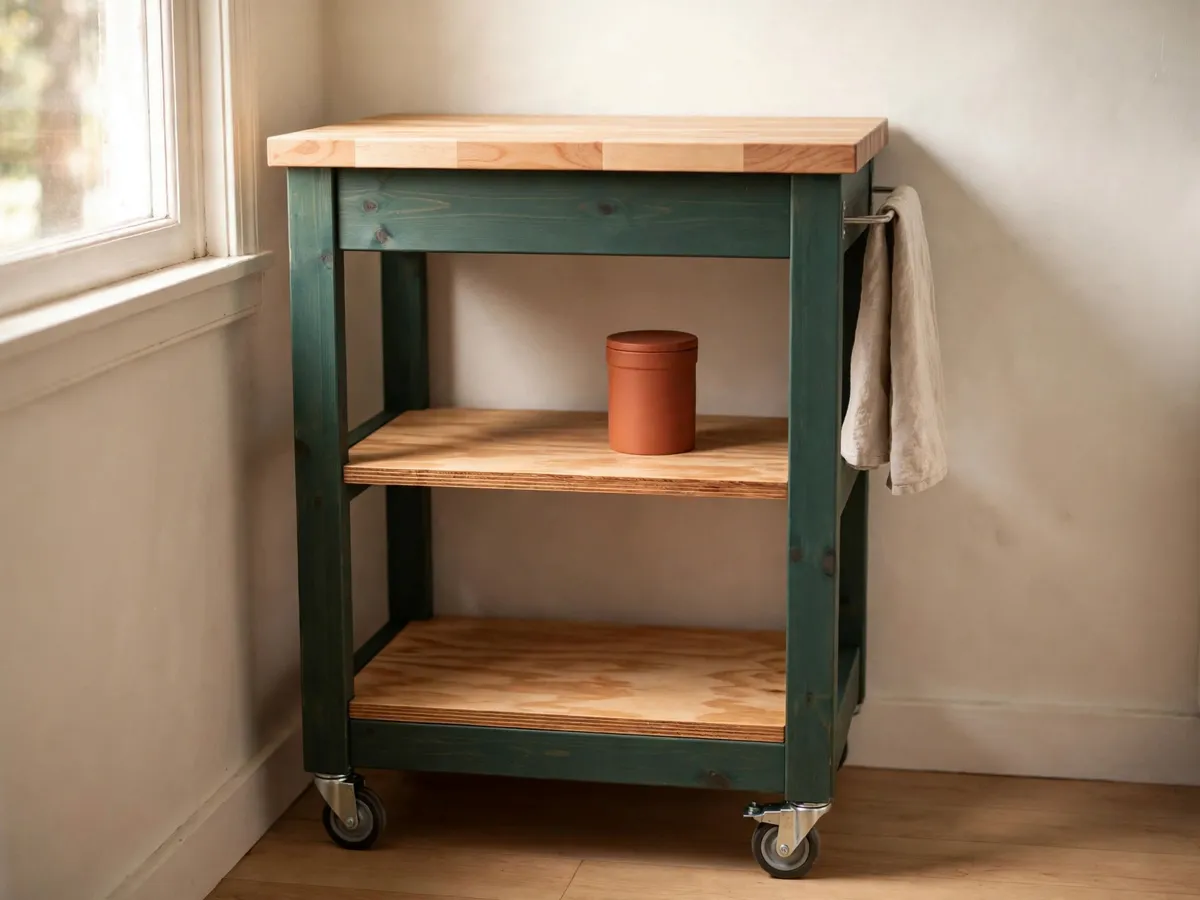
The build at a glance
This is a plan, not a shopping list: two plywood sides, four 1x4 rails, three shelf panels, a 1/2-in plywood gusset at each corner and four plate casters. The finished footprint is 24 by 18 inches, the top surface sits at 36 inches, and the same cut list scales to a 32-inch height for a low kitchen counter run by shortening the two sides alone. Depth stays at 18 inches either way, because 18 is what a dinner plate and a stockpot need. It asks for a drill, a circular saw or a store cut, and one weekend.
It suits a first or second kitchen build. The joints are butt joints driven with screws and glue, so what decides whether the cart feels solid is the caster plate and the square of the frame. A cart that racks sideways never rolls straight: check the diagonals before glue sets.
Weekend-ready: $55–$160, one weekend. A bare three-shelf pine cart lands near $60–$75 in new stock; the butcher block top and two locking casters push the same frame to $120–$160.
Measure the aisle before the lumber
Four measurements decide this build, and all four come off the kitchen rather than off the drawing. Write them on the cut list before the store run.
Clear passage: 36 inches, or 42 where two people cook. A cart parked in a walkway adds its 18-inch depth to the path somebody must still cross. Measure the gap between the counter run and the opposite appliance, then subtract 18. Under 36 inches the cart lives against a wall and comes out on demand, which is a fine answer if you decide it before Saturday.
The door swings are the ones people forget. Open the fridge flat against the cart spot and mark where the handle lands. Do the same with the oven door, which swings down into the same floor. The cart plus the arc its casters trace has to clear both marks.
Top height: 36 inches, and where 32 wins. Counter height is 36, so a cart at 36 works as a serving surface beside the run. If your kitchen counters are the older 34 inches, or the cart has to slide under a window sill, build it at 32 and cut the sides 4 inches shorter. The arithmetic, floor to top surface: 3 inches of caster, 27 1/4 of leg, 3 1/2 of apron, 3/4 of deck, 1 1/2 of butcher block. That is 36 exactly.
Depth against the wall: leave 1 inch. The deck is 18 inches deep and the cart carries no back panel, so it can stand with its rear edge an inch off the wall. Check that the top clears any backsplash trim or outlet box. A cart touches no wall, one reason it beats a second cabinet in a rental kitchen.
Cost: $0. Time: 15 minutes with a tape, a pencil and the fridge door open. Caveat: measure the passage at its narrowest point, because a baseboard or a protruding stove steals 2 inches from a straight run.
Cart, ready-made island or shelf unit: pick one
Three ways to add work surface to a small kitchen, ranked by how much of the result you control.
Option 1: the rolling cart in this plan. You pick the height, the depth, the shelf openings and the top surface, and you get a towel bar handle instead of a molded plastic grip. The constraint is two hours of sanding, or a store cut if you own no circular saw. It costs $60–$160 and rolls through a 30-inch doorway on 3-in casters, which a fixed island cannot do.
Option 2: a ready-made island from the box aisle. A stamped-metal or particleboard cart runs $45–$130 and assembles in an hour with an Allen key. Buy it when the kitchen is a rental you cannot modify, or when you want the surface this weekend. Two limits: the top cannot be raised to a height you choose, and a particleboard shelf swells at the edge once a wet lid rests on it.
Option 3: a fixed shelf unit or a wall shelf. If the cart spot sits inside the 36-inch passage, the floor is not available and the answer is vertical. A narrow unit in a 12-inch gap keeps the walkway clear, and a board over the counter adds surface with no footprint. The DIY Home Projects collection lists both, and the shelf plan is the faster one.
Cost: cart $60–$160, ready-made $45–$130, wall shelf $35–$90. Time: cart one weekend, ready-made one hour, wall shelf an afternoon. Caveat: pick by the passage measurement, not by which one looks better on a screen.
The cut list for the 18 by 24 cart
This is the whole cut list for the 36-inch version, sized for the 24 by 18 footprint. Lumber is sold by nominal size, so a 1x4 measures 3/4 inch by 3 1/2 inches and 3/4-inch plywood is really 23/32 inch. Every figure below is a finished size. The nominal-versus-real explanation, and how to read a cut list line by line, is in the beginner woodworking plans guide.
| Part | Size | Qty |
|---|---|---|
| Sides, 3/4-in ply | 18 x 27 1/4 in | 2 |
| Apron front and back, 1x4 | 22 1/2 x 3 1/2 in | 2 |
| Apron ends, 1x4 | 16 1/2 x 3 1/2 in | 2 |
| Deck, 3/4-in ply | 24 x 18 in | 1 |
| Butcher block cap | 24 x 18 x 1 1/2 in | 1 |
| Middle and bottom shelves | 22 1/2 x 18 in | 2 |
| Cleats, 1x2 | 18 in | 4 |
| Lips, 1x2 | 22 1/2 in | 2 |
| Gussets and bar block, 1/2-in ply | 4 x 4 in, 3 x 3 in | 5 |
The 3/4-inch plywood adds up to 2,205 square inches. A 4x4 project panel carries 2,304, so one panel covers this cut list only if you lay every part out in pencil first: the two sides set the width, the deck runs beside them, and the shelves nest in the offcut. The gussets and the towel bar block come off a 1/2-inch scrap. One 8-foot 1x4 covers the apron; the cleats and lips need 117 inches of 1x2.
Only one line changes for the 32-inch cart. The two sides become 23 1/4 inches tall and everything else stays as written, shelf sizes and deck included. Cut the sides first and the horizontals last, because the sides carry the height decision. Depth is 18 inches either way, so the kitchen aisle does not change with the lower version.
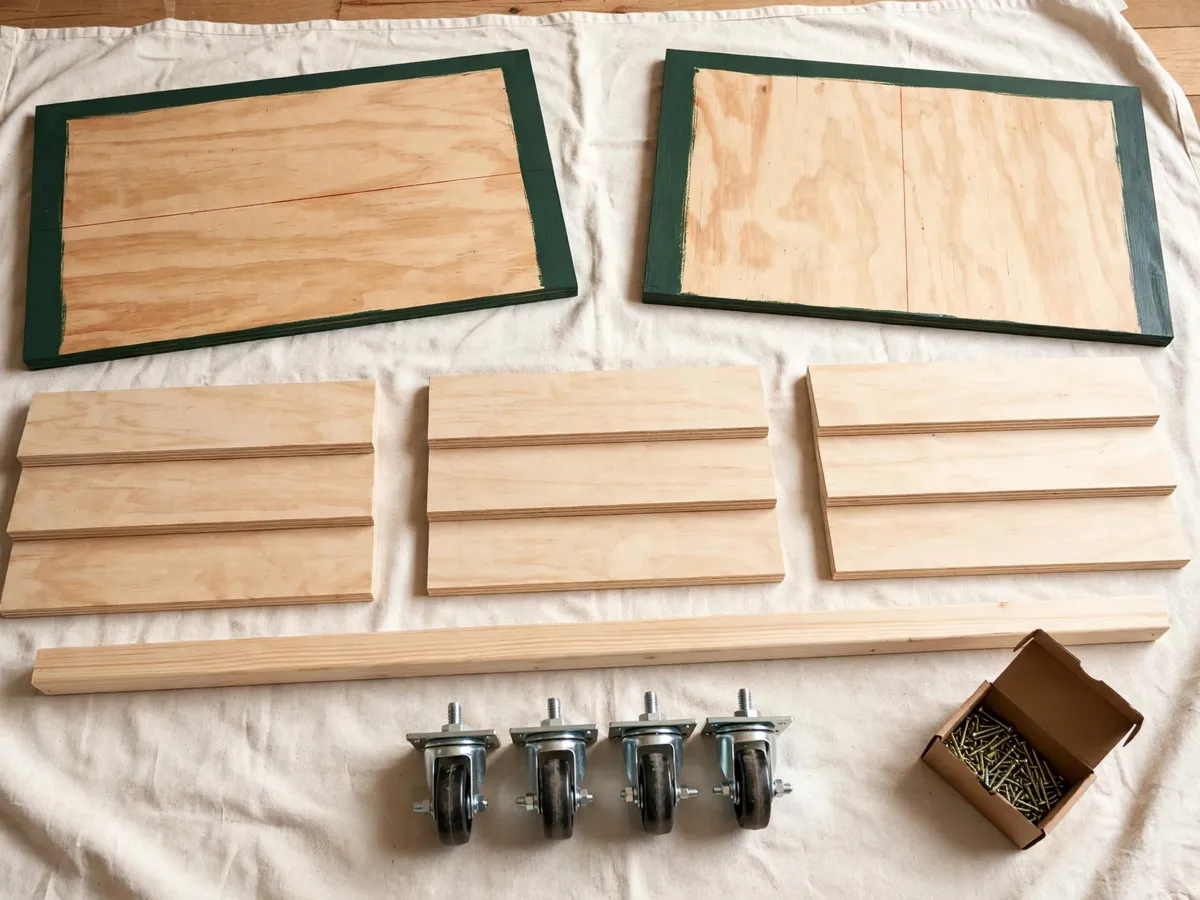
Cost: project panel $24–$34, 1x4 board $6–$8, two 1x2 boards $10–$14, 1/2-inch scrap $6–$10. Time: 45 minutes at the saw once the layout is pencilled. Caveat: have the store cut the panel to this cut list if you own no saw, and pencil the finished size on each board.
Tools, and the joints that hold a cart together
The tool list is short and none of it lives in a shop: a drill or driver, a circular saw or the store cut above, a sander or 120 and 220 paper on a block, a tape, a speed square, and four one-handed clamps. Add a 7/64-in pilot bit and a countersink bit. A table saw is not in this plan.
Joint one: the shelf cleat to the side panel. Four #8 x 1-1/4-in screws per cleat, driven through the 1x2 into the panel's face grain, with a bead of glue first. Screws bite face grain in plywood, which is why the cleats sit on the inside faces rather than the edges. Pilot every hole: 3/4-inch plywood splits along the veneer line, and a split cleat lets the shelf droop at one corner.
Joint two: the apron to the top of the sides. The four 1x4 rails go on edge, so the apron stands 3 1/2 inches tall and the deck lands on top of it. Two screws per rail end into each side, plus glue, plus the deck's 24-inch span tying the corners. Check square before the glue sets: the diagonals should match within 1/8 inch. A frame 1/4 inch out of square never rolls straight.
Joint three: the deck to the butcher block cap. Eight screws from under the deck into the cap through pre-drilled holes, or bread-board fasteners if you want the cap removable. Glue plus screws is permanent, and a permanent cap means a scratched top is a rebuilt top.
Built-in electrical is out of scope: a power strip clipped under the apron is the answer, because cable inside furniture is an electrician's job rather than a weekend one.
Cost: $0 if the drill is already home; a speed square $10–$15, four one-handed clamps $24–$48, an orbital sander $40–$70. Time: 30 minutes to gather and set up. Caveat: assemble with no pilot holes and you have two split shelf corners by the time the finish dries.
The caster plate decides whether the cart wobbles
A cart is a frame on four moving points. Every other part can be a half inch off and still work; the casters cannot.
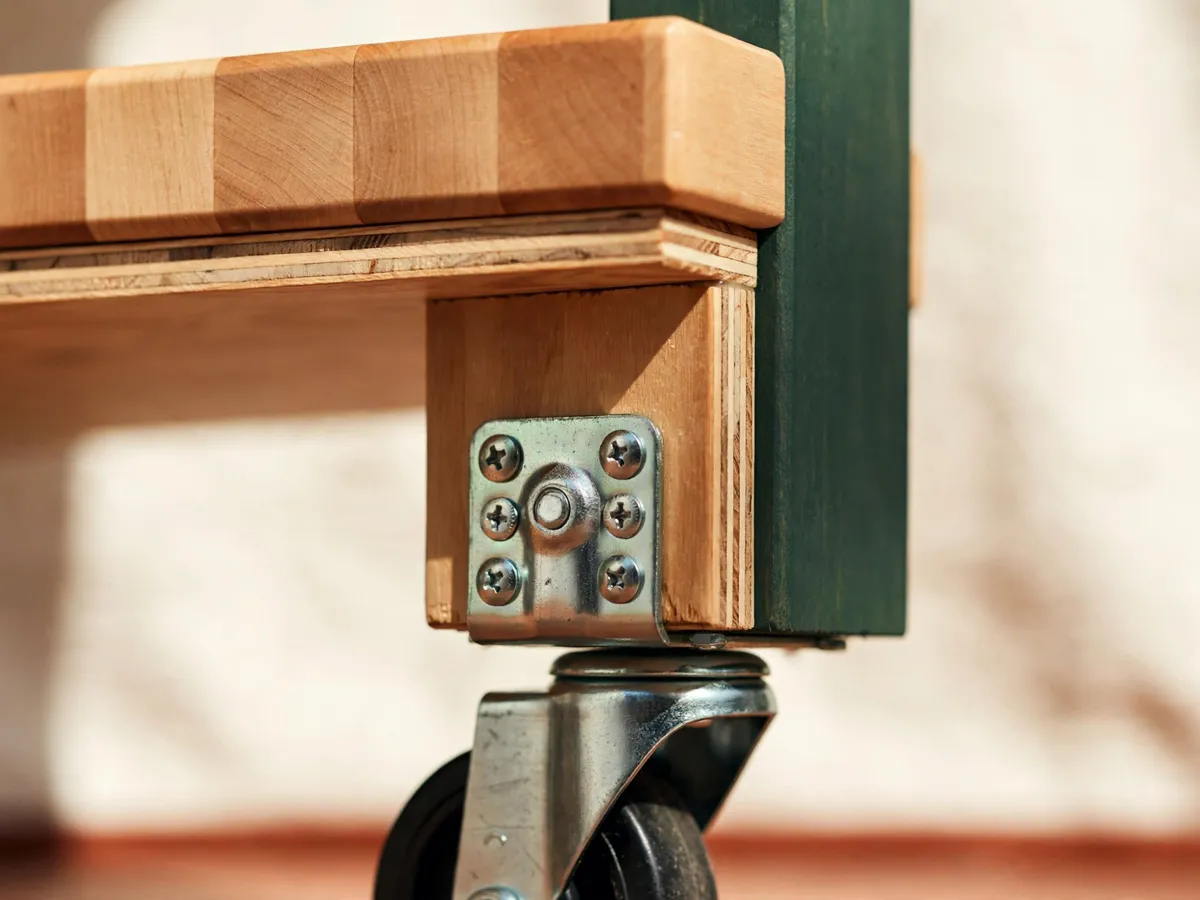
Four 3-in plate casters, the front two locking. A plate caster bolts flat, spreading the load over the whole plate instead of one bolt shank, and a 3-in wheel rolls over a threshold rather than catching on it. Lock the front pair only: the cart holds while you lean on it, yet pivots on the rear pair when you push it into the run.
The classic mistake is a swivel-and-rigid pair. Two swivel casters up front and two fixed at the back is the hardware-aisle default. On a 24-inch cart it steers away from you: push forward and the front end wanders. Four swivel plates roll straight and pivot on the spot, which is what a 36-inch passage needs. Buy four, two with a brake.
Four #8 x 1-in screws per plate, into a gusset. The plate screws into the bottom of a 3/4-inch plywood side panel, where a screw is only as good as the veneer it travels between. So each corner gets a 1/2-in plywood gusset, 4 by 4 inches, glued and clamped over the panel bottom before the caster goes on. It confines the core, stops the split, and spreads the load across 16 square inches of glued plywood. Never bolt a plate to a shelf edge alone: that puts every wheel load through one plywood edge.
Then check the plane, not the height. Press one front corner, then one rear. Rock means a caster sits short; the fix is a 1/16-in shim under its plate. With all four plates touching the arithmetic closes: 3 inches of caster plus 27 1/4 of leg puts the frame at 30 1/4, the apron adds 3 1/2, the deck 3/4 and the cap 1 1/2. The top surface is 36 inches.
Cost: four 3-in swivel plate casters $24–$46, with two locking front plates inside that range. Time: 20 minutes, once the frame is square. Caveat: read the load rating before the plate leaves the shelf; it is the one spec you cannot sand later.
Three shelves, a lip, and a towel bar that is also a handle
Shelf height is set from the floor: the bottom surface at 6 inches, the middle at 18, the top at 36. Mark the cleat lines 2 1/2 and 14 1/2 inches up from the bottom edge of each side panel, which is where those surfaces land once the panels sit on their cleats. The clear openings are then 11 1/4 inches between the bottom and middle shelf, and 12 1/4 between the middle shelf and the apron overhead.
Variant A: open shelves. Two plain plywood panels, nothing at the front edge. Fastest, and right for bowls and folded towels, with one weakness: a cartful of cans rolls off the front the first time you turn a corner at pace.
Variant B: a 1x2 lip on the front edge. One 22 1/2-inch length of 1x2 screwed and glued along each shelf's front, 1 1/2 inches tall. The load numbers below assume this version, because the lip turns each shelf into a shallow tray and keeps a jar out of the aisle. It also gives the edge a finished face on a cart standing in the open kitchen.
Variant C: a rail-and-post top. Skip the lip on the middle shelf and run a 1x3 rail across its front on two 1/4-in dowels, 2 inches above the panel. Bottles stand behind the rail and a cutting board leans on it. Build it if the cart is storage, not serving.
The towel bar does two jobs, so build it once. A 12-in flanged towel bar across one end of the deck is the push handle and the towel hook at once. Screw its flanges through the deck into a 3 by 3-inch plywood block glued underneath, so the threads bite 1 1/4 inches of cross-grain ply rather than stopping at the back of the panel. On the butcher block version the cap adds 1 1/2 inches, so use 2 1/2-in screws. The alternative needs no aisle hardware: a 1x3 rail on two 1/4-in dowels glued into 1 1/2-inch holes.
Cost: a 12-in towel bar $8–$18, the block offcut about $1, two 1x2 lips $5. Time: 40 minutes for all three shelves and the handle. Caveat: fit the towel bar before the finish cures, because a drilled flange hole in a cured poly coat chips at the rim.
Finish for food splatter, and what each shelf carries
A kitchen cart gets sauce on it, so the finish is chosen for wiping rather than for grain. A wood top gets mineral oil: flood the surface, soak 15 minutes, wipe dry, repeat twice more over one afternoon. It repairs with a rag and a bottle, and wants a fresh coat every couple of months. A painted top gets two coats of water-based polyurethane over primer, 2 hours between, with a light 220-grit sand in between; it wipes clean and hides a burn mark better.
Seal the underside of every shelf and the inside faces of both sides before assembly. Nobody sees those faces, and they are the ones that drink a spilled glass of water. Oil the end grain of the butcher block cap twice: an end that dries faster than the field is where a top checks.
Food-contact honesty, once and plainly. The butcher block top is a prep surface for dry and low-risk work: fruit, vegetables, bread, a mixing bowl. It is not a raw-meat board. A laminated softwood top over a plywood deck is not built to be scrubbed to a sanitizing standard, and a real board for raw protein costs $25.
What a shelf carries, honestly. A 3/4-inch plywood shelf on two 1x2 cleats, with a lip at the front, holds about 25 pounds spread across the panel: a dozen cans, a stack of bowls, a small appliance. The top carries more, because a 1 1/2-inch laminated cap over a full deck is stiff enough for a stand mixer with the bowl turning. No laboratory rated this cart, so that figure is our own rule of thumb.
The deflection check takes ten seconds. Press your palm hard on the middle of a loaded shelf and sight across it. A visible bow of about 1/8 inch means the span wants a middle support: a 1x2 post from the shelf below, or a cleat under the panel. Run it once a year, since a shelf loaded all summer has relaxed screws.
Cost: mineral oil $8–$14, or primer plus two coats of poly $18–$30. Time: 2 hours on Sunday, last coat curing overnight. Caveat: load and oil the same afternoon and the top keeps the print of every can.
What the three versions cost
The ranges below are late-2026 US big-box prices for new stock, rounded to the nearest dollar, assuming a drill and a saw are already home.
| Version | Lumber | Hardware and finish | Total |
|---|---|---|---|
| Bare pine cart | $40–$56 | plain casters, screws, glue, finish | $60–$75 |
| Butcher block, locking front | $60–$88 | casters, gusset ply, towel bar, oil | $120–$160 |
| Thrift-frame flip | $16–$28 | casters, gusset ply, paper, finish | about $35 |
Tools, if you own none. This line belongs in the budget: a drill or driver $60–$120, a circular saw $50–$120, four clamps $24–$48, a speed square $10–$15, an orbital sander $40–$70. Ask the store to cut the panel to the cut list and the saw line disappears, and 120 plus 220 paper on a block replaces the sander for $6.
Where the money goes. On the middle kitchen cart the caster set and the cap are two thirds of the spend, and both are worth it: the wheels decide whether it rolls, the top whether it reads as furniture. The shelf lips, the towel bar and the gusset ply cost under $25 and are the three lines most builders cut. Do not cut those three.
Cost: as tabled, tools excluded. Time: one weekend for any version. Caveat: lumber moves with the season, so treat the ranges as a budget line rather than a quote, and price the panel before committing to the cap.
What we skip on this build
- The rolling bench base. A wheeled work surface is a different frame, height and set of cross-braces, taught in full in the workbench plans for beginners. This cart borrows nothing from it beyond the caster rule.
- Cabinet heights and the under-sink zone. Where the cart's 36-inch top sits relative to your run is a kitchen layout question, answered in the small-space kitchen storage guide. Read it before picking 36 or 32.
- What goes on the shelves. The cart carries one or two zones at most, and the zone map, container sizes and label rule live in the pantry zones guide. Do not re-decide container shape at the saw.
- Wall-mounted shelves instead of a cart. If the 36-inch passage fails, the answer is a board on brackets, and the stud spacing, bracket types and load limits are in the floating shelf cut list.
Cost: $0 to skip. Time: the ten minutes of deciding that keeps a weekend honest.
The weekend plan, hour by hour
- Saturday, hour one. Measure the passage, the depth against the wall and both door swings. Write the real numbers on the cut list, pencil every part onto the panel, then cut the sides first and the horizontals last. Sand all cut edges to 120 grit.
- Saturday, hours two and three. Mark the cleat lines at 2 1/2 and 14 1/2 inches up each side. Drill and countersink every hole while the panels lie flat. Glue and screw the cleats, then the lips, then set the shelves to check the 11 1/4 and 12 1/4 openings.
- Saturday, hour four. Glue and clamp the gussets to the panel bottoms, stand the frame on them, screw on the caster plates. Press each corner and fix the rock with a shim before the apron goes up.
- Saturday evening. Screw the apron on edge to the tops of the sides, check both diagonals within 1/8 inch, set the deck, then prime or first-oil the cart and leave it flat overnight.
- Sunday morning, 2 hours. Fasten the butcher block cap or sand and recoat the painted deck. Mount the towel bar into its block. Second coat, then the dry time on the can.
- Sunday afternoon. Roll it to the marked spot, load the bottom shelf first, run the palm-press check on both lower shelves, and wipe the oil off the top before the first bowl lands.
Cost: $0 to follow. Time: 3 to 4 hours Saturday, 2 hours Sunday, or four evenings if the weekend is spoken for. Drying time cannot be hurried.
Questions this cart raises
How tall should a kitchen cart be?
Thirty-six inches, because that is counter height and it lets the top work as a serving surface beside the run. Build 32 if your kitchen counters are the older 34, if the cart must slide under a window sill, or if the tallest cook is under 5-foot-3. Only the side panel length changes: 27 1/4 inches tall, 23 1/4 short.
Can a DIY cart hold a stand mixer?
On the top, yes, and on a shelf only about 25 pounds. A mixer with the bowl turning puts a shaking load in the middle of the panel rather than a still one, so put it on the butcher block cap over the full deck. If it must live on a shelf, add the middle support and re-run the palm-press check after a month.
Do all four casters need a lock?
Two is the right number, and they go on the front. The brakes hold the cart still while you lean on the towel bar handle, and the unlocked rear pair lets it pivot in a 36-inch passage instead of needing a shove to turn. Four brakes make it a block of wood you drag, and zero brakes mean it follows you while you hold a hot pan.
Plywood top or butcher block?
Painted plywood costs less, wipes with anything, hides a burn mark, and suits a rental kitchen. Butcher block costs about $30 more in stock, can be sanded and re-oiled twice, and is the only top that reads as furniture next to a real counter. A scratched block top is a repair; a scratched poly deck is a repaint.
Will 3-in casters roll over a rug?
Over a low-pile kitchen mat, yes, and over a thick rug the wheel sinks in and the cart wanders. A 3-in wheel clears a threshold strip up to about 1/4 inch, the common metal divider. If the cart must cross a rug, put a hard plastic mat under the path.
Save this cart plan on Pinterest
Pin the cut list first. The three numbers that decide whether it fits are the 18-inch depth, the 36-inch top height and the 27 1/4-inch leg, and the caster plate is the part to read twice before the store run. The builds below use the same plywood and a weekend of the same size.