 Plant As Deco
DIY Home Projects
DIY TV Stand Plan: Cord Routing and Console Airflow
By Plant As Deco · Updated 22 November 2026
A homemade TV stand fails in a rental for one of three reasons. It is sized for a showroom instead of the actual TV. It traps the console against a wall until the fan spins loud and the console throttles. Or it dumps a tangle of power and HDMI cables across the floor where a foot finds them first. This plan fixes all three: a 50 inch freestanding pine stand, open at the back for air, with a cord channel out the back and a cut list with the arithmetic shown. No wall anchors required.
Weekend-ready: $42–$125, one weekend. Renter-safe, freestanding, no wall anchors needed.
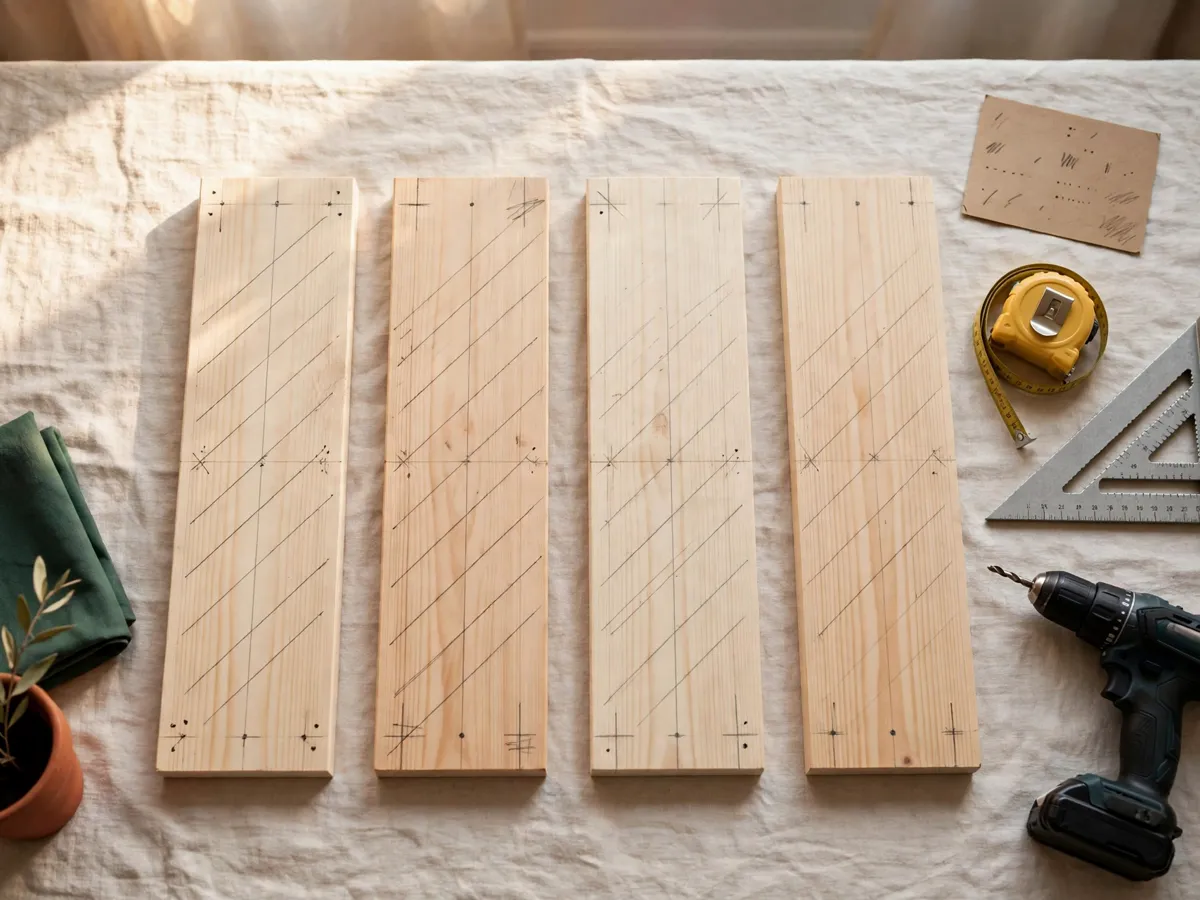
1. What a TV stand actually has to do
A TV stand looks like a low shelf, but it does four jobs at once, and each job pulls a dimension in a different direction. Hold the TV: a 50 inch screen on its factory base puts 30 to 45 pounds on a small footprint, and the top has to stay flat under that load without sagging forward. Hide the box: the console, streaming box, router and power strip live underneath, with cables running through a channel instead of draped across the room.
Breathe: a console sheds real power as heat, and boxed in on three sides with a solid back it pulls its own exhaust, climbs above room temperature, and throttles itself to protect the chip. Survive a bump: the stand sits in a walked-through room, so it has to resist a side push without racking, and it has to do that without a wall holding it upright.
Cost: $0. Time: 10 minutes to walk the room with a tape and a note. One caveat: the console that runs hottest is the one you already own, so measure it before sizing the shelf.
2. Size it to your TV, not the showroom
Three numbers set the stand, and none of them come from a plan. Width: the top should run 2 to 4 inches wider than the TV on each side, so a bumped edge cannot send the screen off the side. A 46 inch TV wants a 50 to 54 inch top, and this plan defaults to 50, which carries a 42 to 46 inch TV with the right overhang.
Depth: measure the console box front to back. Most consoles run 10 to 12 inches of box with the cables sticking straight out the back, so an 11-1/4 inch deep shelf (a nominal 1x12) carries the box with the plugs dropping off the open back, provided the stand sits 2 inches off the wall. A receiver runs 14 to 17 inches and needs a deeper top.
Height: sit on the couch in your normal slouch, look straight ahead, and mark the wall at eye line. The center of the screen sits at that line, so the stand top goes at eye line minus half the screen height (a 46 inch TV is about 23 inches tall, so its center is 11-1/2 inches above the stand top). This plan builds at 24 inches for a low seat, and the end-panel height adjusts up to 30 for a standard couch without changing any other part.
Cost: $0. Time: 10 minutes with a tape and a helper. One caveat: the stand looks right at any height, but your neck knows the difference after a two-hour movie, so measure eye level before cutting.
3. Tools you own versus tools you will buy
Every cut here is a square crosscut on a board under 50 inches, and the joinery is screws and glue, not dadoes or mortises. That is why the plan works in an apartment with no workshop. The owned list: a tape measure and a sharp pencil, a speed square, a drill with a 1/8 inch bit for pilots and a 1-1/2 inch spade bit for the cord hole, a circular saw with a fresh crosscut blade (or a fine-tooth hand saw), sandpaper at 120 and 180 grit, and yellow wood glue.
The two you may need to buy: two clamps ($10 to $22 the pair) to hold a panel while the glue grabs, and a straightedge guide for the saw ($8 to $14, or a straight scrap 1x4). A square cut off a straightedge is the difference between a stand that sits flat and one that rocks on a corner. If you would rather not saw at all, most US lumber desks cut to a marked list for a small fee, and this list is six straight cuts on three boards; check every piece at the counter, because a store cut a quarter inch short only shows up at home. For which tools earn their shelf first, the beginner woodworking plans guide sorts a realistic first project from one that assumes a full shop.
Cost: $0 if the drill and saw are home, $18–$36 for clamps and a straightedge. Time: 20 minutes to gather everything and sight down the boards at the yard. One caveat: buy pine, not oak, for a stand that carries 45 pounds.
4. Material and cut list
The list is short on purpose: pine 1x12 boards for the panels and top, one 1x2 for the stretcher, screws, glue, sandpaper, and an optional quarter-inch plywood back. Pine is soft, light and cheap, which is what a freestanding stand wants, because the whole load sits on the floor. Every part is sized for the 50 by 24 inch stand, carrying a TV up to about 46 inches.
| Part | Finished size | Qty | Cut from |
|---|---|---|---|
| Top | 50 x 11-1/4 x 3/4 in | 1 | 8 ft 1x12 |
| End panels | 24 x 11-1/4 x 3/4 in | 2 | 8 ft 1x12 |
| Bottom shelf | 48-1/2 x 11-1/4 x 3/4 in | 1 | 8 ft 1x12 |
| Middle shelf | 48-1/2 x 11-1/4 x 3/4 in | 1 | 8 ft 1x12 |
| Front stretcher | 47 x 1-1/2 x 3/4 in | 1 | 8 ft 1x2 |
| Back panel (optional) | 47 x 20-3/4 x 1/4 in | 1 | 1/4 in plywood, 2x4 ft sheet |
Where the numbers come from. A nominal 1x12 measures 11-1/4 wide on the tape, which sets the depth. The shelves fit between the end panels, so their length is the top width minus the two panel thicknesses: 50 minus 2 times 3/4 equals 48-1/2 inches. That is the one subtraction that decides whether a shelf drops in or binds.
The shelf spacing. The end panels are 24 inches tall and the top sits on them at full 3/4 thickness, so the space from the bottom shelf top face to the underside of the top is 22-1/2 inches (24 minus the 3/4 top, minus the 3/4 bottom shelf). A middle shelf splits it into two bays of 10-7/8 each after its own thickness, so a console 8 to 9 inches tall fits with the 2 inch air gap it needs, and the second bay holds the router and the power strip. Keep the console bay open at the back so the warm air has a way out.
The board count. The list needs 50 inches for the top, 2 times 24 equals 48 for the end panels, and 2 times 48-1/2 equals 97 for the shelves: 50 + 48 + 97 is 195 inches of cut length, plus about an inch of saw kerf across seven cuts. So 196 inches against the 96 inches an 8 foot board offers: 196 divided by 96 is 2.04, which rounds up to three 8 foot 1x12 boards ($27 to $48). The surplus covers the one panel a first attempt will ruin. The stretcher fits one 8 foot 1x2 ($3.50 to $6.50). The optional back panel, 47 by 20-3/4 inches, cuts from a 2 by 4 foot sheet of 1/4 inch plywood ($8 to $14). Consumables: 28 screws of 1-1/4 inch, so a 100 count box ($4 to $7); glue ($3 to $5); sandpaper ($4 to $6). Finish is priced in section 9.
Cost: $39–$73 for boards, screws, glue and paper ($47–$87 with the plywood back). Time: 90 minutes of marking and cutting. One caveat: sight down every 1x12 before it goes in the cart, because a warped panel twists the whole stand.
5. The build, step by step
The stand is a box: a top on two end panels, two shelves between them, a stretcher across the front. The order that keeps a first build square is the order that fixes mistakes at the cheapest moment: cut everything, dry-fit, check against the TV, then drive screws.
- Cut all six pieces from the table in section 4 and label the back faces: top (T), end panels (E1, E2), bottom shelf (B), middle shelf (M), stretcher (S).
- Lay the top face down. Stand the end panels on their long edge, flush with the top corners, and clamp. Measure both diagonals: they must read the same, and this is the last moment a correction costs nothing.
- Drive two 1-1/4 inch screws through the top into each end panel (four total), pre-drilling each with the 1/8 inch bit so the pine does not split near the end.
- Mark the middle shelf line on the inside of both end panels at 11-5/8 inches up from the bottom of the panel (that is the bottom face of the shelf; the line sits at 22-1/2 divided by 2, or 11-1/4, up from the bottom shelf top face). Check both marks sit level with each other.
- Dry-fit both shelves between the panels and check the diagonals again. A shelf that binds is a sixteenth too long, and the fix is a pass with the sanding block, not a new cut.
- Drive four 1-1/4 inch screws through each end panel into each shelf edge, two near the front and two near the back, pre-drilling every one.
- Flip the box face down and mount the stretcher across the bottom, about 2 inches up from the floor, one screw into each end panel, flush with the front face.
- Set the stand upright on a flat floor. It must sit on all four corners without rocking; a rock is sanded off the offending corner, not shimmed with cardboard.
- Set the TV on top, centered. A visible bow of more than a sixteenth means the top needs a stiffener: a fifth board screwed under it, not a rebuild.
- Sand everything to 180 grit with the grain and break every sharp edge, especially inside the cord channel, where a splinter scratches a cable jacket.
Cost: $0 beyond the material list. Time: 4 to 5 hours of assembly, split by one glue pause of about an hour. One caveat: screw the shelves before the stretcher, because a stretcher set at an angle twists the box.
6. Cord routing the honest way
The honest approach is a channel: one exit behind the console, one path down the back, one sleeve to the outlet. Cut the exit with the 1-1/2 inch spade bit; it clears a power cable, two HDMI leads and an antenna wire. Without the plywood back, the hole goes through the top of the middle shelf bay about 2 inches back from the front edge, so cables drop straight from the TV. With the back, cut it through the panel instead, a few inches above the middle shelf, and line the two up by marking both from the same shelf edge.
Run the TV cables down through the hole to the console. Bundle them with a velcro strap, not a zip tie, so a cable can be added or removed without cutting anything, and leave a 6 inch service loop so the TV can slide forward on the top. The power cables drop down the back of the stand to a power strip on the bottom shelf. The last leg is a cord cover stuck to the baseboard ($6 to $12) taking the bundled run to the outlet; in a rental it reads as an upgrade, not damage, and it removes the one trip hazard a freestanding stand cannot solve alone. For cables a cord cover cannot reach, the pegboard wall organization guide covers a higher run up a wall.
Cost: $6–$12 for a cord cover. Time: 20 minutes during the build, 30 after the TV is up. One caveat: measure the fattest plug before drilling, because the hole has to fit the plug, not the cable.
7. Airflow for consoles
A console or a receiver is a small space heater with a fan. Box it in with a solid back and the intake pulls its own exhaust, the air inside climbs above room temperature, and the console throttles its clock speed to protect the chip. The symptom is a fan spinning loud and a frame rate dropping after 20 minutes, and the cause is the stand, not the console.
Two rules fix it. First, leave the back open: this plan skips the plywood back by default, and the gap behind the console bay is the exhaust path. If you want a back for dust or a child barrier, cut a 4 by 8 inch vent above and below the console, not behind it, so air moves up and out instead of bouncing off a panel. Second, leave 2 inches of clearance above the console: the bay clears about 10 inches of console height with the gap it needs. The honest test is a hand held above the console after an hour of play; warmer than the room means a higher shelf, not a new fan.
This is also why the console does not live on the bottom shelf: the floor is the dustiest surface in the room, the intake sits near it, and a year of carpet dust kills fan bearings early. Keep the console in the middle bay and the power strip, router and streaming boxes on the bottom, where the strip is still reachable but the dust no longer reaches the console intake.
Cost: $0. Time: 5 minutes to check the gap after the build. One caveat: a ventilated back panel is a compromise, not a replacement for an open back.
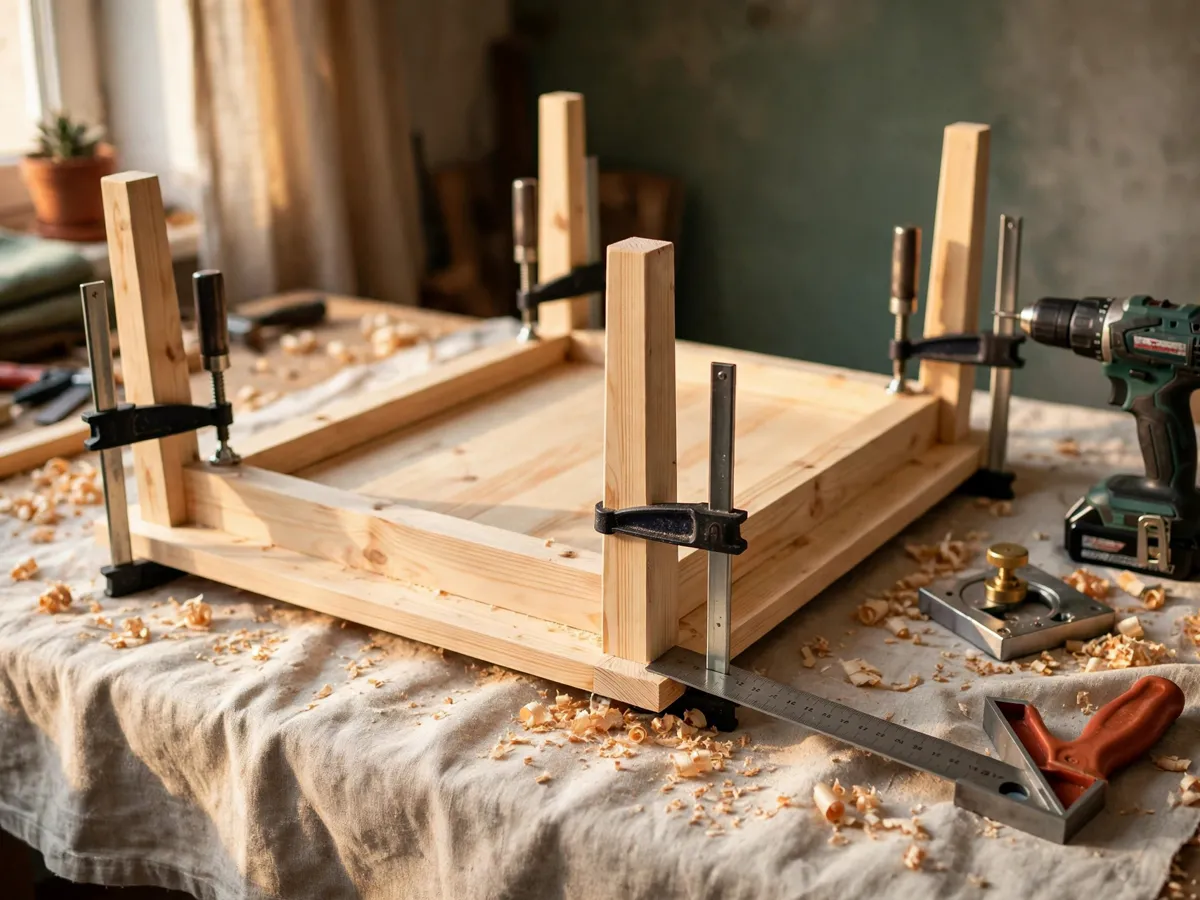
8. Joinery made simple
The load sits straight down through the end panels to the floor, and screws work in shear, the direction they hold best, so screws and glue are enough for a TV. The default is the butt joint: each shelf butts against the end panel and takes four screws through the panel into the shelf edge, with glue adding a bond stronger than the pine itself. The only failure mode is a screw too close to the edge splitting the shelf, and a pilot hole 3/4 inch back from the edge solves it.
The upgrade is pocket screws: a jig ($20 to $40, learning curve about four holes) drives angled screws that hide the heads inside the joint and pull it slightly stiffer. For a builder planning a second project it earns its cost by the end of this stand, and the mortise and tenon joint guide covers the step after that, a joint that holds without metal. Either way, what holds the weight day to day is the stretcher: without it the box racks into a trapezoid under a side push, and the wobble slowly works the screws loose.
Cost: $0 for butt joints, $20–$40 for a pocket-hole jig. Time: 30 minutes for the joints either way. One caveat: screws hold in shear, not pull-out, so never hang the stand from its top or load it sideways.
9. Finishing choices
Pine takes finish unevenly, so the choice matters more on a first stand than the next one.
| Finish | Cost | Time, two coats | Best for |
|---|---|---|---|
| Danish or tung oil | $9–$18 | 30 min plus 8 h dry | Warm tone, easiest to repair |
| Water-based poly, satin | $14–$26 | 40 min plus 6 h dry | Most spill resistance per dollar |
| Stain then clear topcoat | $18–$38 | 90 min plus 24 h dry | A walnut tone over cheap pine |
| Latex or acrylic paint | $12–$22 | 60 min plus 8 h dry | Hides knots, matches a room |
Oil is the forgiving choice: a missed spot sands out and re-oils without a visible patch. Water-based poly is the tougher one for a room with drinks or pets. Paint is the honest rescue for a board with a visible knot, which looks deliberate under an opaque coat and careless under a clear one. Whichever route, use a water-based finish: an oil-based poly off-gasses solvent for days in a small apartment. If you stain, pine needs pre-stain conditioner (about $6), the difference between an even amber tone and blotchy patchiness.
Cost: $9–$38 depending on the route. Time: 30 to 90 minutes of work, spread over a day of drying. One caveat: do not set the TV on a wet top, because a damp finish grabs the rubber feet and leaves a ring you cannot buff out.
10. Anchoring and safety in a rental
The stand is freestanding, the renter-friendly default: it sits on four panel edges, the TV sits on top, and the weight of the TV pins the stand to the floor. That is stable for a TV up to about 45 pounds on the 50 inch top, which covers every 42 to 50 inch LED on the market. Past that, the honest fixes scale up: a doubler under the top (a second 1x12 screwed to the underside, about $9) roughly doubles the capacity, and past 60 pounds a 3/4 inch plywood top on a 1x2 frame is the better choice.
The anti-tip strap is the one safety addition, optional only in a home without children or pets. A $6 to $10 strap runs from the back of the stand to a wall stud and stops a tip if a child pulls on the TV; it takes two screws into a stud, two quarter-inch holes to patch at move-out, and it is the same strap used on a bookshelf for the same reason. Where the lease forbids any wall hole, skip the strap and shape the stand instead: this plan builds wide (50 inches) and low (24 inches), which is the geometry that resists a tip without a strap, with the TV pushed back rather than centered.
Cost: $0 freestanding, $6–$10 for an anti-tip strap. Time: 10 minutes to add a strap, 0 to skip it. One caveat: a strap into drywall without a stud holds nothing, so if the wall is unknown, skip the strap and widen the stand.
11. Variations by skill
The core plan scales by changing two numbers, the end panel height and the top width. Most of the questions the workbench plans guide answers about bigger builds come back to the same two numbers.
The mid-century legs swap. Replace the flat end panels with four tapered legs cut from a 2x2, angled 8 degrees on two faces, mounted with angled plates. The top and shelves stay, the stand gets the "diy mid century tv stand" look, and the build adds about 90 minutes of leg tapering plus $12 to $20 for stock and plates. The legs eat the bottom compartment, so storage drops.
The two-tier variant. Add a second shelf above the first, on four 1x2 posts (a 48-1/2 by 6 inch shelf on 4 inch posts), to hold a soundbar at ear level. The posts add a second cord run, an hour of build time, and one more 1x2 board.
The mobile stand with casters. This is the "treadmill tv stand diy" setup: a TV you roll in front of a treadmill or rower and roll away after. Three changes: the end panels drop to 20 inches (casters add 2-1/2, keeping the top near 22-1/2, a good eye line from a treadmill), the top widens to 54 inches for a wider overhang on a moving TV, and four 2 inch locking casters ($5 to $8 each) bolt through a plywood base plate. Lock them before you step on: a rolling stand is stable locked and tippy not.
The one-sheet build. Cut the whole stand from one 4 by 8 foot sheet of 3/4 inch plywood ($35 to $55): top, panels, shelves, stretcher and back. It adds a few plywood rips and a heavier, stiffer stand for one trip to the yard.
Cost: $0 within pine, $12–$32 for legs or casters, $35–$55 for the plywood one-sheet. Time: 1 to 2 hours added. One caveat: the mobile stand is the only variant that changes the stability math, so build it low and lock the casters before loading the TV.
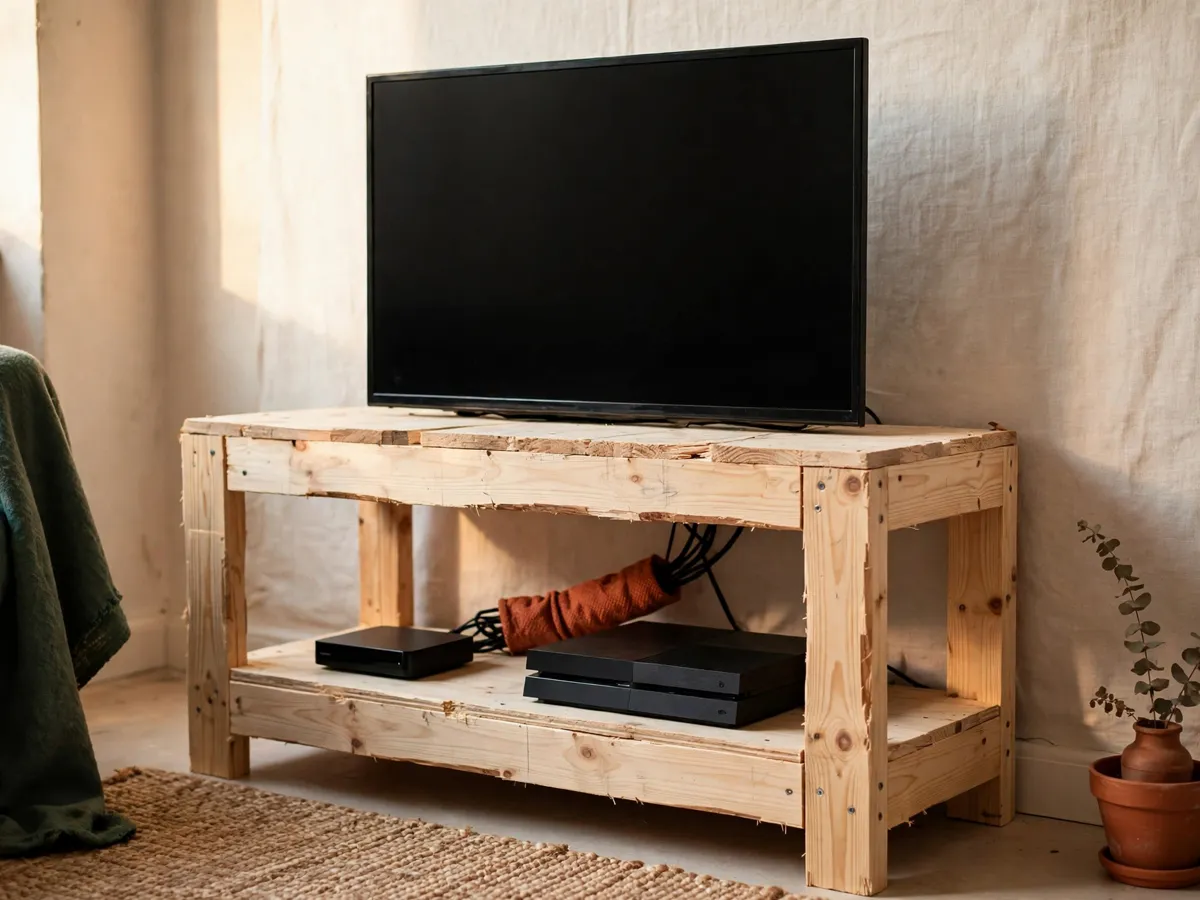
12. Common failure modes and fixes
The failure modes, in the order they show up
- Rack, or wobble. A missing or loose front stretcher. Fix: one 1x2 across the front, screwed into both end panels at the bottom.
- Sagging shelf. A 3/4 inch board spanning 48-1/2 inches under console weight. Fix: a 1x2 cleat under the front and back edges, or a center stiffener.
- Misaligned cord holes. Two holes drilled from two different measurements. Fix: mark both from the same datum edge before any drilling.
- Split panels. A screw driven without a pilot hole near a board end. Fix: a 1/8 inch pilot for every screw, 3/4 inch back from the edge.
- Wobble on carpet. Panel edges sink unevenly into a thick pile. Fix: four furniture levelers ($8 to $12) screwed into the bottom of the end panels.
What to skip: the drawer (a $4 dish on the bottom shelf holds the remotes; a drawer adds a full day of joinery), the glass top (doubles the weight, chips on the first dropped remote), and the built-in light strip (a USB strip behind the TV does the same job for $10 and no wiring).
Cost: $0–$12 for the fixes. Time: none on the day, one to two hours saved on the plan. One caveat: every failure mode here is cheap to avoid during the build and expensive to fix after the TV is loaded.
13. Cost and time, honestly
The headline number, $42 to $125, is lumber plus fasteners plus an optional back and finish, assuming the drill and saw are already in the house. Line by line, so the budget can be trimmed on purpose instead of by accident at the checkout.
| Line | Low | High | What moves it |
|---|---|---|---|
| Three 8 ft 1x12 pine boards | $27 | $48 | Grade, yard, spare board |
| One 8 ft 1x2 pine board | $3.50 | $6.50 | Grade and yard |
| 1/4 in plywood back | $0 | $14 | Optional, skipped for airflow |
| 100 ct box 1-1/4 in screws | $4 | $7 | Brand, interior vs exterior |
| Yellow glue and sandpaper | $7 | $11 | Whether the house has some |
| Finish | $9 | $38 | Route chosen in section 9 |
| Two clamps, if bought | $10 | $22 | Bar vs spring, length |
| Anti-tip strap, if used | $0 | $10 | Freestanding vs strap |
Time: 90 minutes marking and cutting, 4 to 5 hours assembly with one glue pause, 20 minutes of cord routing during the build and 30 after the TV is up, and 30 to 90 minutes of finishing spread over a day of drying. About 6 to 7 hours active, about 24 hours elapsed across a weekend.
Cost: $42–$125 all in. Time: 6 to 7 hours active, one weekend elapsed. One caveat: the spare board is the cheapest insurance in the list, and skipping it to save $9 is how one ruined panel buys a second trip to the yard.
14. Common questions
How wide should a DIY TV stand be?
The top should run 2 to 4 inches wider than the TV on each side: a 46 inch TV wants a 50 to 54 inch top. The width comes from your TV, not the plan, so a 55 inch TV moves the top to 59 inches and the shelf length moves with it.
How tall should a TV stand be?
Set by eye level from the couch: mark the wall at eye line from your normal seat, and the stand top goes at eye line minus half the screen height. This plan builds at 24 inches for a low seat and adjusts up to 30 for a standard couch without changing any other part.
Does a console need airflow in a TV stand?
Yes. Boxed in with a solid back, a console pulls its own exhaust, climbs above room temperature, and throttles. Leave the back open or cut vent gaps above and below the console, and give it 2 inches of clearance, the rule in section 7.
How do I run cables in a DIY TV stand?
Cut a 1-1/2 inch exit hole at the back of the middle shelf compartment, drop the TV cables to the console, then run the power cables down the back to a strip on the bottom shelf. A baseboard cord cover takes the bundled run to the outlet and removes the one trip hazard a freestanding stand cannot solve.
Can a freestanding TV stand hold a TV without a wall anchor?
Yes, up to about 45 pounds on this 50 inch pine top, which covers every 42 to 50 inch LED. A wide, low stand resists a tip without a strap; the anti-tip strap in section 10 is optional only in a home without children or pets, and where the lease forbids wall holes, build wide and low instead.
Save these on Pinterest
Pin the cut list, the cord routing layout, or the console airflow rules and come back to them on a free weekend. For a wider set of DIY projects to plan around this one, the full index links to shelf plans, workbench plans, and kitchen builds that share the same tool list.