 Plant As Deco
DIY Home Projects
DIY Console Table Plan: A Slim Hallway Build
By Plant As Deco · Updated 22 November 2026
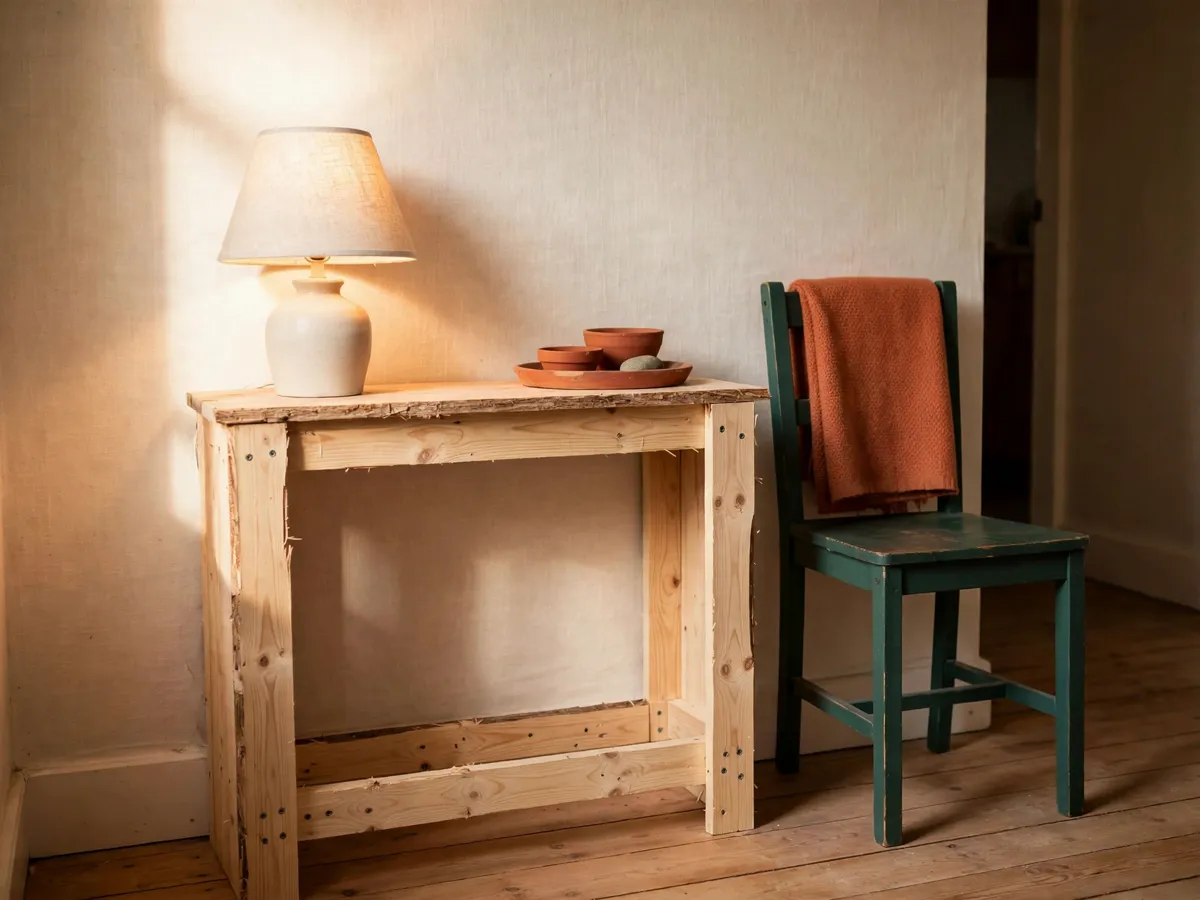
A console table is the slim table every hallway wants and the rare build a beginner can finish without a single wall hole. It stands against the wall and carries a lamp, a tray, a stack of books and a key bowl, four jobs in a 12 inch footprint. This plan builds a 38 by 12 by 32 inch pine version from five boards and one weekend, with a cut list whose math adds up, a wobble fix that actually stops racking, and a freestanding safety plan for a rental. Read it as a plan you can build this weekend.
Weekend-ready: $48–$78 in lumber, fasteners and finish, one weekend split across two afternoons. Renter-safe, freestanding, wobble fix included.
That range assumes a drill and a saw are already in the closet. The two things most first builders add are a pair of clamps and a pocket-hole jig, and only the clamps are required. Both appear in the tool list below.
1. What a console table has to do
Before sizing the lumber, settle the four jobs a hallway console actually has to do, because a table that misses one of them ends up as clutter. First, hold a lamp and a tray. The top has to carry the weight of a small lamp and a tapered wood tray without bowing, and that is a 10 to 14 inch deep, 30 to 40 inch long surface. Second, fit the hallway depth. The table sits against the wall and the path past it has to stay clear for a body and a swung door, so the depth has to come from the room, not the catalog. Third, not wobble. A freestanding console that racks under a tall lamp is the failure mode this plan builds against, and a single stretcher is what stops it. Fourth, look slim. A pine console is a hallway piece, not a workbench, so the proportions matter more than the grain. The honest build is: one wide board on four thin legs, braced tight underneath.
Those four jobs are the brief. A console plan that starts with a pretty photograph and works backward to dimensions usually misses the third job, the wobble, because a photograph hides racking. A plan that starts with the four jobs tends to land a table that stays in the hallway for years rather than the first month.
Cost: $0. Time: 10 minutes with a tape and a look at the hallway. One caveat: a console sized to fill the wall usually steals the walkway, so the first job is the hallway, not the table.
2. Size it to your hallway, not the catalog
Three measurements decide the table, and they come from the room. The depth comes first, because a console deeper than the hallway allows is the build that ends up in the donation pile. Measure the clear hallway width, wall to the opposite wall or the door swing, and reserve at least 30 inches for the walkway. Whatever is left, up to 14 inches, is the depth ceiling. This plan uses a 1x12 pine board whose finished width is 11-1/4 inches, which lands inside the 10 to 14 inch band most hallways allow and reads slim against a wall. If the hall is tight, a 1x10 at 9-1/4 inches is the smaller alternative, listed in the variations section.
The height comes second, and 30 to 36 inches is the working band. The top of a console should sit near a dining table height, low enough that a lamp on it casts light down onto the hall and high enough that a tray clears the knees of someone walking past. This plan uses 32 inches, the middle of the band, which suits a lamp without crowding a coat hook above it. The leg cuts are all the same length, so as long as the four legs match, the table sits level.
The length comes last, and it is set by the wall and the couch. A console in a hallway runs along the wall up to the door frame, and a console behind a couch runs the length of the couch back. A 36 to 42 inch length covers most single-lamp hallway placements and most sofa backs. This plan uses 38 inches, sized to a 1x12 board and a hallway with one lamp and one tray. The floating shelf cut list guide covers the same depth question for a wall-mounted piece, and the sizing logic is the same: keep the walkway clear first, then size to what fits.
One check before the lumber run. Open the door that swings through the hallway, widest swing, and lay a tape flat against the wall on the arc of the door's corner. The table has to fit behind that line. A console that the front door smacks on its way open is the build that gets moved by week two, no matter how good the joinery is.
Cost: $0. Time: 10 to 15 minutes with a tape. One caveat: the wall is rarely plumb, so measure against the wall, not a square assumed off the floor.
3. The one-sheet decision
The question that comes up on every first build: can the whole table come from one 4x8 foot sheet of plywood or from three pine boards? The honest answer for this 38 by 12 by 32 inch console is no, not from a single sheet, and the reason is the legs. A wooden table leg built from edge-glued plywood is heavy, needs a router for a clean edge, and tends to delaminate along its plies at the floor. Solid pine legs from a 2x4 are cheaper per leg, easier to cut and the material every beginner console plan in this collection relies on. So the one-sheet assumption dies at the legs, and the honest build is a four-board mix.
Counting boards, honestly. The top is one 1x12, because a single board avoids the glue-up that a plywood top wants. The four legs come from 2x4 pine, two boards at 32 inches each so the count is one board per two legs. The aprons and stretcher come from 1x4 pine, and the cut-list arithmetic in section 5 lands at one board of 1x4 for everything except the diagonal brace, where a second board covers the brace and the spare. So the lumber list is one 1x12, two 2x4s, and two 1x4s: five boards, plus a finish and a fastener box. That is the full material story for the primary build, and the math is shown line by line in section 5.
Where a single sheet could work. A 4x8 sheet of 3/4 inch plywood holds a top, four aprons and a stretcher with no problem, but only if the legs come from solid pine too, which means buying the sheet and the pine. The sheet is $45 to $60 alone, the legs another $10 to $16, and suddenly the five-board build is cheaper and the tools list gets shorter, because a saw that crosscuts a 1x4 also rips a 2x4 and does not need a straight edge guide for a 4 foot rip. A beginner build that costs more and needs an extra tool is the wrong starting point, and the beginner woodworking plans guide sorts the same question across a shelf, a crate and a bench.
Cost: $0 to do the count. Time: 15 minutes with the cut list and a calculator. One caveat: the one-sheet plan looks cheap until the legs force a second material, and the four-board plan stays the shorter tool list.
4. Tools you own versus tools you will buy
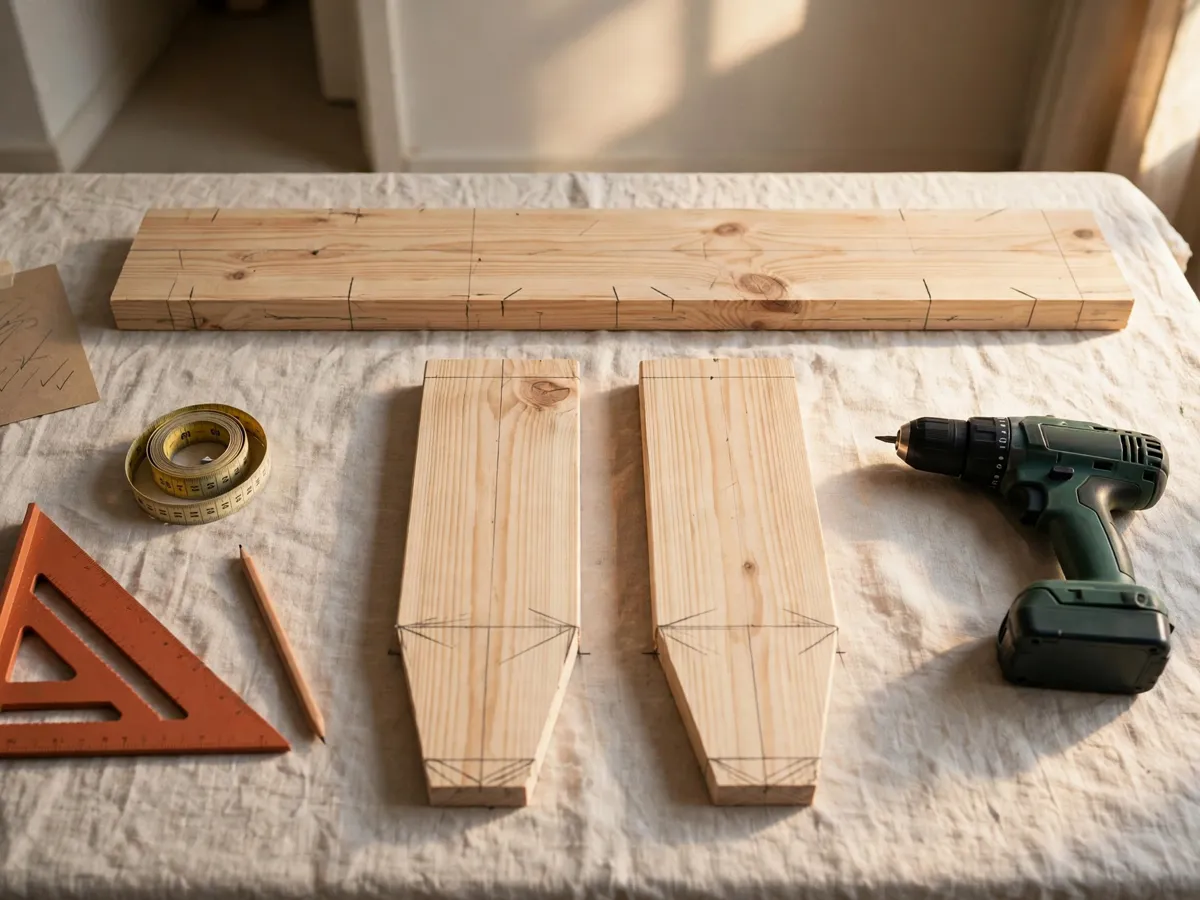
Every cut in this build is a square crosscut, no rip cuts, no dados, no router work. The longest cut is the 38 inch top, which a circular saw handles with a straight edge as a guide, and a miter saw handles in a single chop. Pine is soft, so a fine-tooth hand saw clears a 2x4 leg in about twelve strokes and a 1x4 apron in about six. That is why this plan works without a workshop.
- Tape measure and a sharp pencil. A mechanical pencil marks a thinner line than a carpenter's pencil, and on pine that thin line matters when the tolerance is a half inch.
- Speed square or combination square. Used to square every cut line and to check the assembled frame for square before the last screws go in.
- Drill or driver, with a 1/8 inch bit for pilot holes and a number 2 bit for the screwdriver. Pilot holes stop pine from splitting at the end of every board, and on this build every screw ends in pine.
- Circular saw or miter saw. A circular saw with a fresh crosscut blade and a straight edge handles the 38 inch top. A miter saw handles every other cut in one chop. A fine-tooth hand saw works if neither powered saw is available, and it is slower on the top only.
- Two 12 inch bar clamps or heavy spring clamps, $10 to $22 for the pair. They hold an apron tight to its leg while the screw grabs. Heavy books work in a pinch on a hard floor, but clamps make the build repeatable.
- One sheet each of 120 and 180 grit sandpaper plus a sanding block or a scrap of 2x4 wrapped in the paper.
- A small bottle of yellow PVA wood glue and a rag for squeeze-out. Glue does most of the holding on a console, and the screws hold the joint tight while the glue dries.
The one optional tool, and it is optional. A pocket-hole jig, $25 to $40, makes the apron-to-leg joints clean and fast, with the screws driven at an angle into the leg. The same joints can be made with straight-through screws driven from the outside of the leg into the end of the apron, pre-drilled, and a few of those screw heads show on the outside of the table. The through-screw version is the one this plan writes for, because it works with the drill a beginner already owns.
What this build does not require, and the plans that call for them are usually upsells: a router, a brad nailer, a table saw, a planer, or a biscuit joiner. None of them change the strength of the finished table at this scale. The DIY tool kit checklist guide sorts the same tool decision across ten builds, and the order it suggests for filling a kit still puts the clamp pair first.
Cost: $0 if the drill and saw are home, $10–$22 for clamps, $25–$40 for an optional pocket-hole jig. Time: 15 minutes to gather everything. One caveat: a dull saw blade is the most common reason a first build ends with a wobbly cut, so check the blade before the first board.
5. Material and cut list
The shopping list is five pine boards, one box of screws, one bottle of glue, sandpaper and an optional finish. Every part below is sized for the 38 inch wide by 11-1/4 inch deep by 32 inch tall console from sections 2 and 3. The dimensions are stated as rough-sawn pine, so a 1x12 measures 11-1/4 by 3/4 inches finished, a 2x4 measures 3-1/2 by 1-1/2 inches finished, and a 1x4 measures 3-1/2 by 3/4 inches finished. Those are the numbers the cut math uses.
| Part | Finished size, inches | Qty | Cut from |
|---|---|---|---|
| Top panel | 38 x 11-1/4 x 3/4 | 1 | 8 ft 1x12 |
| Legs | 32 x 3-1/2 x 1-1/2 | 4 | 8 ft 2x4 |
| Front and back aprons | 35 x 3-1/2 x 3/4 | 2 | 8 ft 1x4 |
| End aprons | 8-1/4 x 3-1/2 x 3/4 | 2 | 8 ft 1x4 |
| Lower stretcher (anti-rack brace) | 8-1/4 x 3-1/2 x 3/4 | 1 | 8 ft 1x4 |
| Diagonal brace (back panel) | ~37 x 3-1/2 x 3/4, 45 deg ends | 1 | 8 ft 1x4 |
Where the numbers come from, one part at a time. The top is the 38 by 11-1/4 inch board straight from the 1x12, cut to length only. The legs are 32 inches, the height from section 2, and a 2x4 leg measures 3-1/2 by 1-1/2 finished, which is wide enough to take two screws per apron without splitting. The front and back aprons run between the two legs on each long side, so their length is the table length minus two leg thicknesses: 38 minus 2 x 1-1/2 = 35 inches. The end aprons run between the legs on each short side, so their length is the table depth minus two leg thicknesses: 11-1/4 minus 2 x 1-1/2 = 11-1/4 minus 3 = 8-1/4 inches. The lower stretcher runs crosswise between the front and back legs, same 8-1/4 inches, and it is the part that stops the table from racking side to side.
The diagonal brace on the back panel is the second half of the wobble fix. It runs from the top of one back leg down to the bottom of the other, cut with 45 degree ends, and its length is close to the diagonal of the back opening. The back opening, between the two back legs, is 32 inches tall and 35 inches wide once the apron is in place, and the diagonal of a 35 by 24 inch rectangle (the clear opening once the aprons take 3-1/2 inches at the top and the stretcher takes 3-1/2 at the bottom) is the square root of (35 squared plus 24 squared), or the square root of 1225 plus 576 = the square root of 1801, about 42-1/2 inches. That is the theoretical diagonal, and a 45 degree cut trims to fit at about 37 inches because the brace sits inside the opening rather than corner to corner. Section 7 walks through the actual cutting and fitting. The brace can be one piece or two opposing pieces for an X, and the second 1x4 board in the shopping list covers it plus a spare.
The board count, and this is the arithmetic that decides whether the weekend holds. The top is 38 inches cut from a 96 inch 1x12, one board. The four legs at 32 inches are 128 inches of cut length, and one 96 inch 2x4 holds two legs at 32 with a 32 inch spare, so two 2x4 boards cover the four legs with about 32 inches of spare for the spare leg or the diagonal brace offcut. The 1x4 list is two front and back aprons at 35 inches each (70), plus two end aprons and a stretcher at 8-1/4 inches each (24-3/4), plus one diagonal brace at roughly 37, for a total of about 131-3/4 inches of cut length. The saw eats about 1/8 inch per cut across six cuts, another 3/4, so 132-1/2 inches against the 96 inches an 8 foot 1x4 offers. That is two 8 foot 1x4 boards, with the second one mostly spare for the brace and one corrected mistake. So the lumber list is one 1x12, two 2x4 and two 1x4: five boards, and the total cut-length math is 38 plus 128 plus 132-1/2 = 298-1/2 inches of cut length from about 480 inches of board on the cart, which is the right answer for a beginner build with one spare of every thickness.
Add the consumables. Every apron gets two screws per end, four aprons is 16 screws, plus four for the stretcher and four for the diagonal brace, plus four to fasten the top to the aprons through pilot holes. That is 28 screws of 1-1/4 inch, so a 50 count box at $4 to $7 covers the build. Yellow glue, a 4 ounce bottle, $3 to $5. Sandpaper at 120 and 180 grit, $4 to $6 if the house has none. A finish is optional and priced in section 9. Spare boards on the 1x4 run, especially the diagonal brace, are the cheapest insurance in the whole list.
Cost: $32–$52 for boards, screws, glue and paper. Time: 90 minutes of marking and cutting. One caveat: sight down every 2x4 before it goes in the cart, because a twisted leg pulls the whole table out of square no matter how careful the cuts are.
6. The build, step by step
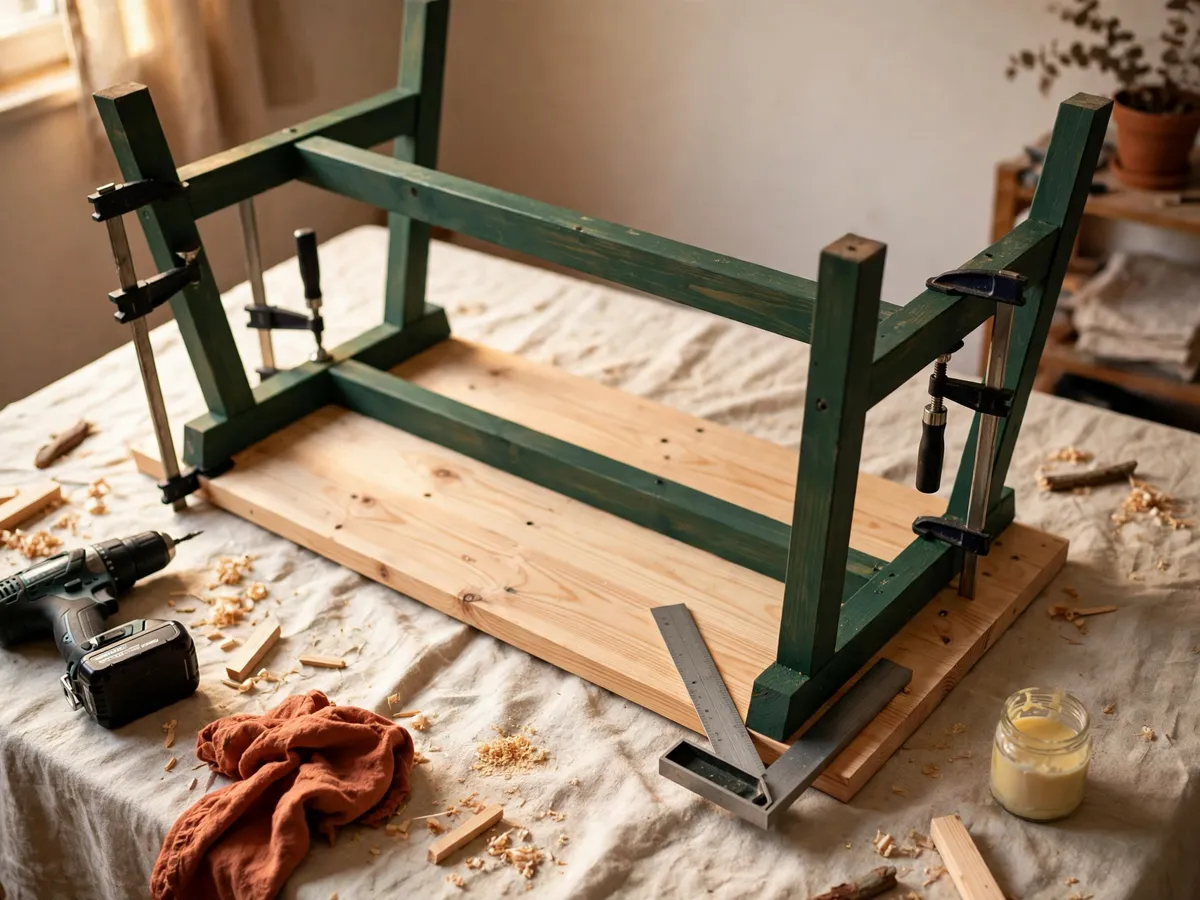
The order that keeps a first build square is: cut everything, build the two leg frames, check each frame for square, then join the frames with the stretcher and lower braces, then drop the top on and fasten it through the aprons. Building both leg frames before any check is how a 1/8 inch drift on the first one becomes a 1/2 inch gap by the time the top goes on.
- Cut all ten pieces from the table in section 5 and label them on a face that will not show. Legs L1 to L4, front apron FA, back apron BA, end aprons EA1 and EA2, stretcher ST, diagonal brace DB. The diagonal brace is cut to a 45 degree test fit, and its final length is set in step 8 against the leg frame.
- Stand L1 and L2 on the floor, 35 inches apart, inside face to inside face. Lay the front apron across the top of both legs, set back 1/4 inch from the front face of the legs so the apron sits just behind the front edge of the top. Clamp one end, square the apron to the leg with the speed square, and drive two 1-1/4 inch screws through the apron into the end of the leg, pre-drilled with the 1/8 inch bit. Repeat at the other end. This is one leg frame half.
- Repeat with L3 and L4 and the back apron. You now have two leg frame halves, each one pair of legs joined by a long apron. Set the halves face down on a flat floor and measure both diagonals of each frame. If the diagonals read different, shift the apron a sixteenth and re-check. This is the last moment a correction costs nothing.
- Join the two halves at the ends with the two end aprons. Lay L1 and L3 face down and 8-1/4 inches apart between the floors, and fasten one end apron into the top of L1 and L3 with two screws each. The end apron sits flush with the front and back aprons, inset 1/4 inch. Repeat at the other end of the table. The four aprons now form a frame that holds the four legs.
- Drop the stretcher across the bottom of the frame, 6 inches up from the floor, between the front and back legs on one long side. Pre-drill and drive one screw through each leg into the end of the stretcher. The stretcher is the part that stops the table racking side to side, and a tight fit at this step is the difference between a console that holds a lampstand and one that walks the floor when the door closes.
- Square the whole frame one more time. Lay the frame on the floor and measure both diagonals, corner to corner across the top. Equal diagonals mean the frame is square. A 1/8 inch difference is fine. A 1/2 inch difference means one leg frame drifted, and the fix is to loosen one end apron screw, nudge the leg, and re-tighten. Do this before the top goes on, because the top will not pull a twisted frame square.
- Lay the top panel face down on a blanket on the floor. Set the assembled frame on it, aprons down, so the legs are flush with the corners of the top and the aprons sit inset 1/4 inch from the front, back, and ends. Drive one screw per apron through a pilot hole from underneath, four screws total, into the underside of the top. The screws pull the top flush to the frame and they hold it against the legs.
- Fit the diagonal brace on the back of the table. Lay it across the back opening between the two back legs, mark the 45 degree cut lines against the legs, and trim the brace to fit tight. Screw one screw through each end of the brace into a leg, four screws total. This is the second half of the wobble fix, and it stops the table racking front to back. Wipe every glue squeeze-out with a damp rag before it skins over.
- Sand everything to 180 grit with the grain, and break every sharp edge with a few passes. The legs and aprons see hands as often as the top, and a soft edge reads as a finished table where a sharp one reads as a stack of boards.
Cost: $0 beyond the material list. Time: 4 to 5 hours of assembly, split by one glue pause of about an hour. One caveat: tighten the stretcher before the top goes on, because the stretcher is what holds the frame square while the top is fastened.
7. The wobble fix
A freestanding console table wobbles for one of four reasons, and each of them has a fix that costs nothing and adds about ten minutes to the build. The first is a missing stretcher. A freestanding table with no brace between the legs racks side to side the first time a lamp is bumped, and the fix is the lower stretcher from the cut list, screwed tight between the front and back legs about 6 inches up from the floor. A single 1x4 stretcher on one long side is enough at this depth, because the table is narrow and the side-to-side force is small.
The second is a missing diagonal on the back. Even with a side stretcher, the frame can rack front to back along the long axis, and the fix is the diagonal brace on the back panel. The brace runs from one back-leg top to the opposite back-leg bottom, cut with 45 degree ends to fit inside the back opening. A second opposing brace makes an X, and that is the version the variations section writes for a farmhouse style build. One brace is enough at the 38 inch length of this plan.
The third is an uneven floor. A freestanding table on carpet or an uneven wood floor wobbles on one corner, and the fix is a level foot or a shim. The simplest level foot is a 3/8 inch nut and bolt tapped into the bottom of the leg, $2 to $4 for a set of four, and they let the table sit dead level on carpet. The simpler shim is a folded piece of cardboard slid under the short leg, and it is the renter answer that costs nothing and comes off at move out. Either way, level the table once, set, and the wobble does not come back until the table is moved.
The fourth is a loose top. A top that is not screwed to the aprons can shift on the frame, and a shifted top reads as a wobble even when the legs are tight. The fix is the four through-screws from underneath the top, one per apron, pre-drilled so the pine does not split. Tighten them snug but not death-tight, because the top wants to move a hair with the seasons and a slightly loose screw lets it.
Cost: $0 to $4 for level feet. Time: 20 minutes of checks and shims, fine if needed. One caveat: a wobble that survives all four fixes usually means one leg is cut a sixteenth short, and the fix is a shim, not a recut.
8. Joinery made simple
The joinery on this console table has one job: hold the weight of a lamp, a tray and a stack of books, which is a moderate load carried almost entirely by the four legs and the aprons that lock them. Three joinery options do that job, one is required and two are optional upgrades.
The required joint is the through-screw. The aprons are fastened to the legs with two 1-1/4 inch screws driven through the apron into the end grain of the leg, pre-drilled with a 1/8 inch bit. This is a perfectly good joint for a console table at this load, it takes about four screws per leg, and a few screw heads show on the outside of the legs. For a first build, the through-screw is the version this plan writes for, because it works with the drill a beginner owns and it holds the lamp.
The first optional upgrade is pocket screws. A pocket-hole jig drives the screws at an angle into the face of the leg, so the screw head hides on the inside of the apron and the outside of the table stays clean. The jig is $25 to $40, and it is the upgrade most hobby woodworkers buy first because it cleans up every joint at this scale. A pocket-screw build looks built rather than screwed together, and the joint is just as strong as the through-screw at this load.
The second optional upgrade is the mortise and tenon. A mortise cut into the leg meets a tenon cut on the end of the apron, and the joint is glued and clamped, no screws. It is the strongest of the three, it is the one real furniture is built with, and it is also the one that needs a chisel and about two hours of practice per joint. The mortise and tenon joint guide walks through a practice piece with the math shown, and a console table is the right second project once a beginner has one mortise under the chisel. For a first console build, the through-screw is the honest starting point, and the mortise and tenon is the version the second console inherits.
One detail that decides whether any of the three hold: glue. Whether a through-screw, a pocket screw, or a mortise and tenon is used, every joint gets a thin film of yellow glue on the mating faces before the screw or clamp goes on. Glue does most of the holding on a console table, and the screws do most of the holding while the glue dries. A joint with no glue is a table that loosens by year two, and a joint with glue and screws is a table that holds the lamp for the length of the rental.
Cost: $0 for through-screws, $25–$40 for a pocket jig, $13–$95 for a chisel and practice stock for the mortise route. Time: 30 to 60 minutes for the through-screw or pocket build, about 2 hours per joint for the first mortise. One caveat: do not skip the glue on any of the three, because the screw alone does not hold the joint against a tall lamp swinging.
9. Finishing choices
Pine is the reason this build is cheap, and pine is also the reason it needs a decision here rather than at the end. Soft pine takes stain unevenly, it dents when a tray is slid across it, and its resin can yellow a finish over a winter. The finish is not decoration on this table, it is protection for the top and the years it has to hold a lamp.
The order that works on pine, whichever topcoat you pick. Sand to 180 grit with the grain, vacuum the dust off every surface, then apply a pre-stain wood conditioner if the chosen finish is stain. Conditioner is the difference between an even amber tone and the blotchy patchiness that makes a first pine project look like a garage sale, and it runs about $6.
| Finish | Cost | Time, two coats | Best for |
|---|---|---|---|
| Danish or tung oil | $9–$18 | 30 min plus 8 h dry | Warm tone, feels like wood, easiest to repair |
| Water-based poly, satin | $14–$26 | 40 min plus 6 h dry | Most dent and spill resistance per dollar |
| Stain then clear topcoat | $18–$38 | 90 min plus 24 h dry | Walnut or espresso tone over cheap pine |
| Latex or acrylic paint | $12–$22 | 60 min plus 8 h dry | Hides a bad joint and matches a room |
For a first build, oil is the forgiving choice: it cannot be applied too thick, it cannot leave brush marks, and a missed spot sands out and re-oils without a visible patch. Water-based poly is the tougher choice and the better one if the table lives in a hallway where someone will set a wet umbrella on it. Paint is the honest rescue option, because a frame with two crooked joints looks deliberate under an opaque coat and looks careless under a clear one. The water-based version is the one to pick if the hallway is somewhere a person sleeps, because solvent-based poly off-gasses for days and water-based is cured by the next morning.
Whatever the choice, keep the underside of the top unfinished or at least sanded smooth after the coat. A film-building topcoat on the underside can grip the top of the aprons, and a stuck joint is the one failure that is hard to undo without re-cutting the top.
Cost: $9–$38 depending on the route. Time: 30 to 90 minutes of work, spread over a day of drying. One caveat: do not load a lamp onto a wet table, because a damp finish will stick to the lamp base and set a ring.
10. Anchoring and safety in a rental
A freestanding console table is one of the few pieces of furniture a renter can build without ever touching the wall, and that is the honest starting point. The table stands on its four legs, the stretcher and diagonal brace stop it racking, and the weight of the top plus whatever sits on it holds the table against the wall. The whole anchoring question is, for most hallways, no question at all.
The two cases that change the answer. First, the household has a toddler or a large dog, either of which will lean on the table or pull the lamp cord and tip the whole table forward. The fix is an anti-tip strap, a $6 nylon furniture strap, screwed into the back of the table and into a stud in the wall. Two screws into the table, two into a stud, and the table tips only as far as the strap allows. The strap is the renter choice because two stud holes are the only wall damage, and they patch with a dab of spackle at move out.
Second, the lease forbids holes altogether. In that case the freestanding table is the answer, and the honest weight limit is about 30 pounds on the top, which is a lamp, a tray, a stack of books and a key bowl, not a stack of hardcovers. A freestanding console tips when the load on the top exceeds the table's own weight, and a 25 pound pine console with a 30 pound load on its leading edge will tip forward. The fix is to keep the heavy items toward the wall side of the top and the light items toward the front, which is also how the lamp looks best.
One detail that decides whether any of this works: the door swing clearance. Open the door that swings through the hall, widest swing, and confirm the table sits behind the line the door's corner traces. A table the door catches on its way open is the build that gets moved or shortened inside week two, no matter how good the joinery is. The clearance check is the same as the sizing check from section 2, and it is worth doing twice, once before the build and once after the table lands.
Cost: $0 freestanding, $6 for an anti-tip strap. Time: 10 minutes to check the door swing and 20 minutes to fit a strap. One caveat: a freestanding table that tips forward at empty is too top-heavy, and the honest fix is two more screws into the back legs rather than a heavier base.
11. Variations by skill
The core plan scales up and down, and the beginner DIY projects index carries the wider set. The depth stays at 11-1/4 inches across every variation, because that depth is set by the 1x12 and by the hallway, so what changes is the length, the legs and the back panel.
The farmhouse style with X-brace legs, for a second build. Replace the single diagonal brace on the back with two opposing braces that cross at the middle of the back opening, an X. Cut two diagonal braces instead of one, notch them where they cross, and screw the braces into both back legs. The X is the look most farmhouse consoles carry, it is also the strongest back panel at this scale, and it adds about an hour and one more 1x4 to the build. That is the version that reads built rather than assembled.
The waterfall end, for a third build. Drop the end apron on one side and let the top run past the legs to the floor, with the top's grain continuing down the leg. The clean version requires the top to overhang the end legs by 8 inches or so, and the leg on that end is cut taller to land flush with the top of the board rather than under it. The waterfall is a striking look and it is the build that asks for a miter saw and a glued miter joint at the corner, which is the upgrade that earns a third project.
The behind-couch sofa table, for the same build in a different room. Use the exact same frame, and set the length to the couch back rather than the hallway wall. A 60 to 72 inch top, two more legs, and two more floor-to-table stretchers across the long span, and the table sits behind the couch at the same 32 inch height. The behind-couch version usually skips the wall and the strap, because the couch itself keeps the table from tipping forward. The TV stand plan covers the same span question for a media piece, and the air flow and cable rules there carry over to a behind-couch console with a lamp.
The upcycled-door top, for the build that starts with a find. A hollow-core door panel cut to depth and laid on the same pine frame becomes a console top in one afternoon, with the door's hollow core rabbeted into the aprons for stiffness. The look is the door's, and the build is the same pine under it. The curtain rod plan covers the same upcycling question for a wall piece, and the safe finish questions there carry over to a door top.
The pedestal base, for a fifth build. Replace the four legs with a single trestle base, two heavy legs joined by a wide bottom rail, and the top runs cantilevered over the trestle ends. The pedestal reads more furniture than workshop, and it is the version that asks for the strongest glue-up in the list, because a trestle relies on a wide glued joint rather than four screws. The kitchen cart plan uses the same trestle idea at a smaller scale, and the caster plate that stops the cart wobble is the same anti-rack brace that stops a trestle console from racking.
Cost: $0 to vary the plan at the same depth, $4–$12 for an extra board on the X-brace version. Time: about 1 extra hour for the X-brace, 4 extra hours for the waterfall. One caveat: depth stays at 11-1/4 inches across every version, because the hallway sets the depth and the 1x12 sets the board.
12. Common failure modes
Five ways this build fails, in the order they show up
- Racking and wobble. The single most common console failure, and the fix is section 7: a tight stretcher and a diagonal brace. A console with no stretcher racks the first time a lamp is bumped, and the fix is two screws and ten minutes.
- Top too narrow for the lamp base. A 1x10 at 9-1/4 inches can hold a small lamp but not a wide tray, and the lamp base overhangs the back. The fix is the 1x12 at 11-1/4 inches, sized in section 2 before the first cut.
- Legs splayed. A 2x4 leg set with no square check ends up kicked out at the bottom, and the table reads as a drunk workbench. The fix is the diagonal check in step 6, measured before the top goes on, because the top will not pull the legs back.
- Split pine at the screw exits. A 1x4 apron is 3/4 inch thick and a 1-1/4 inch screw driven without a pilot hole will split the pine every time at the end. The fix is the 1/8 inch bit before every screw, no exceptions.
- Finish blotchy. Pine takes stain unevenly, and the blotch shows on the top first. The fix is the pre-stain conditioner in section 9, $6 and ten minutes, applied before the first coat of stain.
And do not leave the finish to the last hour. Stain and oil are the steps a first builder pushes back, and by then the lamp is already on the table, so the underside of the top stays raw. Finish before the lamp goes on, and the table reads built rather than attempted.
Cost: skipping the fixes above removes nothing from the build, it adds the failures back. Time: 30 minutes of checks across the build that prevent all five. One caveat: every failure mode here is cheap to avoid during the build and expensive to fix afterwards.
13. Cost and time, honestly
The headline number, $48 to $78, is lumber plus fasteners plus a finish. It assumes the drill and the saw are already in the house and the table is built from pine rather than hardwood. Here is where that range comes from, line by line, so the budget can be trimmed or expanded on purpose instead of by accident at the checkout.
| Line | Low | High | What moves it |
|---|---|---|---|
| One 8 ft 1x12 pine board | $14 | $24 | Grade, yard, and whether you buy an extra foot |
| Two 8 ft 2x4 pine boards | $10 | $16 | Stud grade vs select, and the spare leg |
| Two 8 ft 1x4 pine boards | $8 | $12 | The diagonal brace and the spare strip |
| 50 ct box 1-1/4 in screws | $4 | $7 | Brand, interior vs exterior |
| Yellow glue, 4 oz | $3 | $5 | Brand only |
| Sandpaper, 120 and 180 grit | $4 | $6 | Whether the house already has some |
| Finish, oil to stain plus poly | $9 | $26 | Route chosen in section 9 |
| Anti-tip strap, if needed | $0 | $6 | Free standing vs toddler in the house |
Time, in the same honest shape. Marking and cutting is 90 minutes. Assembling the two leg half-frames and joining them is 4 to 5 hours, with one glue pause of about an hour that is not work but is on the clock. Finishing is 30 to 90 minutes of work spread over a day of drying. The anti-tip strap, if used, is 20 minutes. Total active time, about 5-1/2 to 7 hours, and total elapsed time across a weekend, about 24 hours because of the drying.
Cost: $48–$78 all in. Time: 5-1/2 to 7 hours active, one weekend elapsed. One caveat: the spare 1x4 is the cheapest insurance in the list, and skipping it to save $4 is how a single ruined diagonal brace buys a second trip to the yard.
14. Common questions
How deep should a DIY console table be?
Between 10 and 14 inches. The depth comes from the hallway, not the catalog: measure the clear hallway width, reserve at least 30 inches for the walkway, and the leftover up to 14 inches is the depth ceiling. This plan uses an 11-1/4 inch 1x12 pine top, which lands inside the band and reads slim against the wall.
How do I stop a freestanding console from wobbling?
A stretcher across the bottom of the legs, plus a diagonal brace on the back panel. The stretcher stops the table racking side to side, the brace stops it racking front to back, and together they hold the four legs square to the top. A freestanding table with both is steady on a flat floor, and a level foot or a folded shim under the short leg fixes the one wobble that survives both.
Can I build this console table as a renter with no wall holes?
Yes. The table stands free on its four legs, and the stretcher and diagonal brace hold it square without any wall anchoring. An anti-tip strap screwed into a stud is the only addition if the household has a toddler or a large dog, and it leaves two small holes that patch with a dab of spackle at move out.
How many pine boards does the build take?
Five, at the 38 by 12 by 32 inch size: one 8 foot 1x12 for the top, two 8 foot 2x4s for the four legs, and two 8 foot 1x4s for the aprons, stretcher and diagonal brace. The cut list in section 5 shows the math, line by line, and the two 1x4 boards cover the brace plus one spare for a corrected cut.
What is the difference between a console table and a sofa table?
The two are the same shape, used in different rooms. A console table sits against a hallway wall, and a sofa table sits behind a couch. The depth and height are the same, the length is set by the wall or the couch back, and the same pine plan builds both. The variations section covers the behind-couch version.
Save these on Pinterest
Pin the cut list, the wobble fix, or the renter-safe freestanding plan and come back to it on a free weekend. If you want a wider set of DIY projects to plan around this one, the full index links to shelf plans, workbench plans, and kitchen builds that share the same tool list.