 Plant As Deco
DIY Home Projects
DIY Wine Rack Plans: A 12-Bottle Lattice Build for Apartments
By Plant As Deco · Updated 22 November 2026
A homemade wine rack fails in an apartment for one of two reasons. It is sized for a collection nobody actually keeps, or its openings are cut for a bottle shape the owner does not own. This plan fixes both by starting with a count and a measurement instead of a drawing. What follows is a 12-bottle lattice rack, four bottles across and three rows high, built from pine 1x2 boards, with the cut list arithmetic shown strip by strip, the lattice spacing worked out from a bottle already in the house, and the wall options laid out for a lease that forbids holes.
Weekend-ready: $35–$75 in lumber, fasteners and finish, one weekend split across two afternoons. Renter-safe, no structural work.
That range assumes a drill and a hand saw are already in the closet. The two things most first builders buy are a circular saw guide or a fresh fine-tooth blade and a pair of clamps, and both appear in the tool list below.
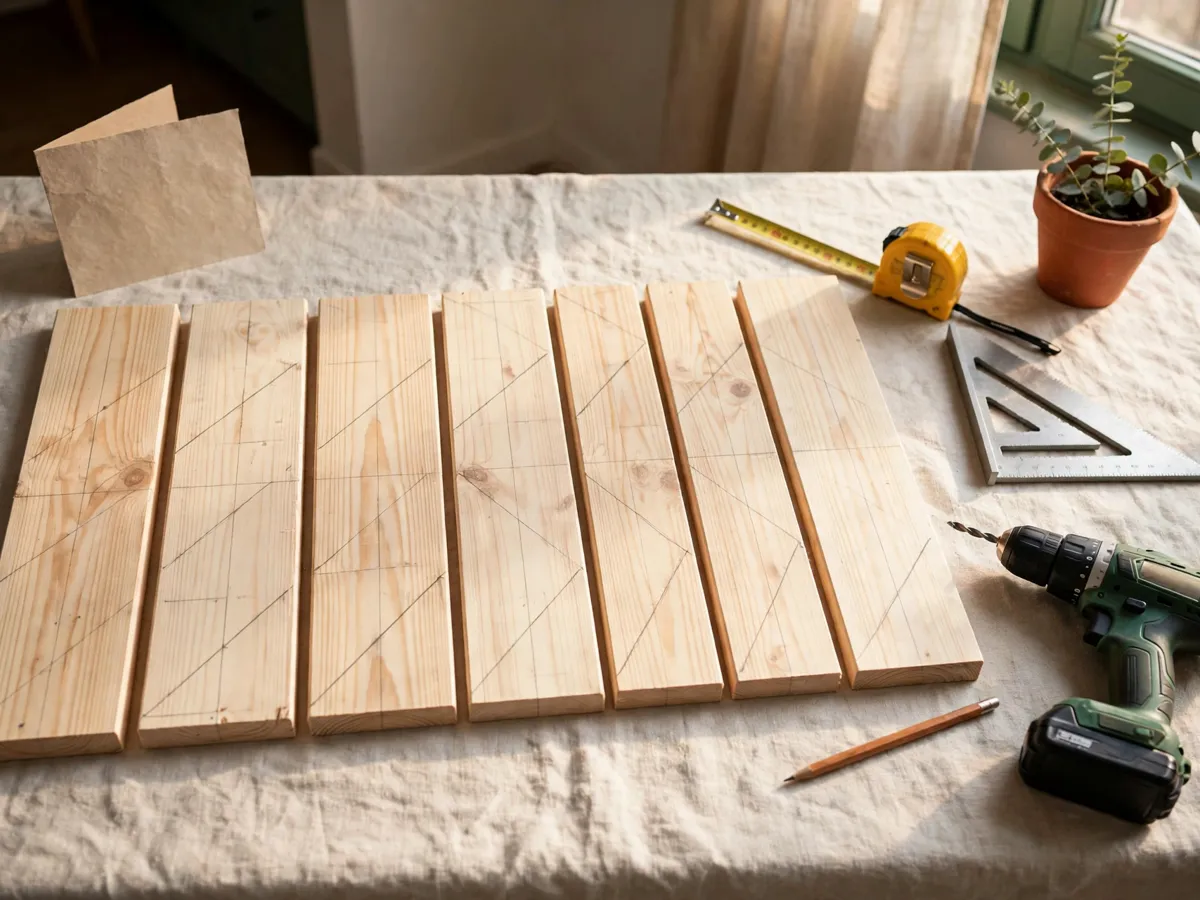
1. Count the bottles you actually keep
Gather every bottle you own, full and empty, and stand them in a row on the floor. Count them. That number, and not the number printed on a plan, decides the rack. A 12-bottle rack built by someone who keeps six bottles ends its first year as a dusty grid with two bottles swimming in it, and the honest fix is two rows instead of three.
Then count what is coming. Gift bottles, a case bought on sale, one every payday. Add that to the number on the floor and round up to the next multiple of four, because this plan builds in rows of four. Twelve is a comfortable size for a household that opens a bottle or two a week and buys by the case now and then.
The count sets three dimensions, in that order. Four bottles across means four openings, and each opening repeats every 5-1/2 inches, so the face is 23-1/2 inches wide including its outer uprights. Every four bottles after that adds a tier, and every tier adds 5-1/2 inches of height. Eight bottles is two tiers, 23-1/2 by 12-1/2 inches. Twelve is three tiers, 23-1/2 by 18. Sixteen is four tiers, 23-1/2 by 23-1/2. Depth is set by the bottle rather than the count, and the third measurement below decides it.
Next comes the measurement that matters more than the count. Stand your fattest bottle on a sheet of paper, mark both sides of its body with a pencil, and measure between the marks. Bordeaux and most Cabernet bottles come in around 3 inches. Burgundy and Pinot Noir run closer to 3-1/4. A Champagne bottle reaches 3-1/2 or more. The opening has to clear the widest bottle you intend to park in it, and section 5 turns that diameter into the spacing number.
One more check before the shopping list. Lay a tape along your longest bottle, from the heel to the top of the neck. A standard 750 ml bottle runs 11 to 12 inches, and a Champagne bottle can reach 13. In this design the bottle points into the wall and rests on a rail at the front grid and a rail at the back grid, so the two grids sit 12 inches apart and a standard bottle disappears inside the rack. That is the point of the depth: nothing protrudes into a hallway. A 13 inch Champagne bottle stands about 1 inch proud at the front, which is the number to check against a cabinet door or a closet rail.
Cost: $0. Time: 10 minutes with a tape and the bottles on the floor. One caveat: a rack sized for the collection you hope to have is the most common reason a wine rack plan gets rebuilt inside a year.
2. Tools you already own, and the two you may need to buy
Every cut in this build is a square crosscut, and none of them is longer than 25-1/2 inches. That is the whole reason the plan works without a workshop. There are no rip cuts, no dadoes, no table saw, and nothing that has to be repeated to a sixteenth of an inch. A 1x2 pine strip is only 3/4 inch thick, so a fine-tooth hand saw clears one in about eight strokes.
- Tape measure and a sharp pencil. A mechanical pencil marks a thinner line than a carpenter's, and thin lines matter when the tolerance is a half inch.
- Speed square or combination square. Used for the same job on every strip: squaring the cut line and checking the assembled grid.
- Drill or driver, with a 1/8 inch bit for pilot holes and a number 2 bit for the screwdriver.
- Fine-tooth hand saw, 15 to 20 teeth per inch, or a circular saw with a fresh crosscut blade.
- One sheet each of 120 and 180 grit sandpaper, plus a sanding block or a scrap of 2x4 wrapped in the paper.
- A small bottle of yellow PVA wood glue and a rag for squeeze-out.
The two you may need to buy. First, two clamps, either 12 inch bar clamps or heavy spring clamps, $10 to $22 for the pair. They hold a strip against its neighbor while the glue grabs, and a stack of heavy books works in a pinch on a hard floor. Second, a 6 inch scrap of 1x2 for the spacing block, which is free, but if the pine rack at the store only sells 8 foot lengths you may spend $4 to $8 on an offcut board purely to get the spacer and the wall cleats.
If you would rather not saw at all, most US lumber desks cut to a marked list for a small fee per cut, and this list is twelve lines of square crosscuts. Bring the table from section 3, write the length next to each part name, and ask. Check every piece at the counter before you leave, because a store cut that came out 1/4 inch short is only discoverable at home.
What this build does not require, and the tool lists that claim otherwise are usually selling something: a pocket-hole jig, a router, a brad nailer, a miter saw, or more than two clamps. A $16 box of 18 gauge brads and a hammer will pin the grid crossings if you would rather not pre-drill, though screws hold longer. For the wider question of which tools earn their shelf first, the beginner woodworking plans guide sorts a realistic first project from one that assumes a full shop.
Cost: $0 if the drill and saw are home, $14–$30 for clamps and an offcut. Time: 20 minutes to gather everything and read the boards at the rack. One caveat: buy pine rather than a pre-finished board, and do not let a salesperson talk you into oak for something that hangs on drywall.
3. The material and cut list, with the math shown
The shopping list is deliberately boring: pine 1x2 boards, a box of screws, glue, sandpaper, and finish if you want it. Pine is soft, light and cheap, which is exactly what a wall rack wants, because a pocket carries one bottle at most and the whole thing hangs on drywall. Every part below is sized for the 23-1/2 by 18 inch twelve-bottle rack from section 1.
| Part | Finished size | Qty | Cut from |
|---|---|---|---|
| Grid uprights, per face | 18 x 1-1/2 x 3/4 in | 5 | 8 ft 1x2 |
| Grid rails, per face | 20-1/2 x 1-1/2 x 3/4 in | 4 | 8 ft 1x2 |
| Depth spacers (4 corners, 2 mid-edge) | 12 x 1-1/2 x 3/4 in | 6 | 8 ft 1x2 |
| Cell spacer block | 4 x 1-1/2 x 3/4 in | 1 | offcut from above |
| Wall cleat (hanging rail) | 23-1/2 x 1-1/2 x 3/4 in | 1 | 8 ft 1x2 |
Where the numbers come from, one part at a time. A cell pitch is 5-1/2 inches: a 1-1/2 inch strip plus a 4 inch clear opening. Four cells across needs 5 uprights, and the face is 23-1/2 inches wide (5 x 1-1/2 + 4 x 4 = 7-1/2 + 16 = 23-1/2). Three cells high needs 4 rails, and the face is 18 inches tall (4 x 1-1/2 + 3 x 4 = 6 + 12 = 18). The rails run between the outer uprights, so a rail is 23-1/2 minus two uprights, 20-1/2. The depth spacers set the bay, and 12 inches matches the bottle length measured in section 1.
The board count, and this is the arithmetic that decides whether the weekend holds. The list doubles for the uprights and rails because the rack is two identical grids: 10 uprights at 18 = 180 inches, 8 rails at 20-1/2 = 164 inches, 6 spacers at 12 = 72 inches, the wall cleat at 23-1/2, and the 4 inch cell block. That is 443-1/2 inches of cut length, and the saw eats about 1/8 inch per cut across 25 cuts, another 3 inches. So 446-1/2 inches against the 96 inches an 8 foot board offers: 446-1/2 / 96 = 4.65 boards, which rounds to five 8 foot 1x2s. The fifth board comes home mostly intact, and that surplus is the right answer, because it covers the one strip a first attempt will ruin. At $3.50 to $6.50 a board, lumber is $18 to $33.
Add the consumables. Every crossing gets glue, and every crossing gets a screw: 5 uprights meeting 4 rails is 20 crossings per grid, 40 across the two, plus 12 for the spacers at one screw per end of each of the 6, plus 3 for the wall cleat. That is 55 screws of 1-1/4 inch, so a 100 count box at $4 to $7 covers the build and leaves a drawerful for the next project. Yellow glue, a small bottle, $3 to $5. Sandpaper at 120 and 180 grit, $4 to $6 if the house has none. Finish is optional and priced in section 6.
Cost: $29–$51 for boards, screws, glue and paper. Time: 90 minutes of marking and cutting. One caveat: sight down every board before it goes in the cart, because a twisted 1x2 pulls a cell out of square no matter how careful the marking is.
4. The build, step by step
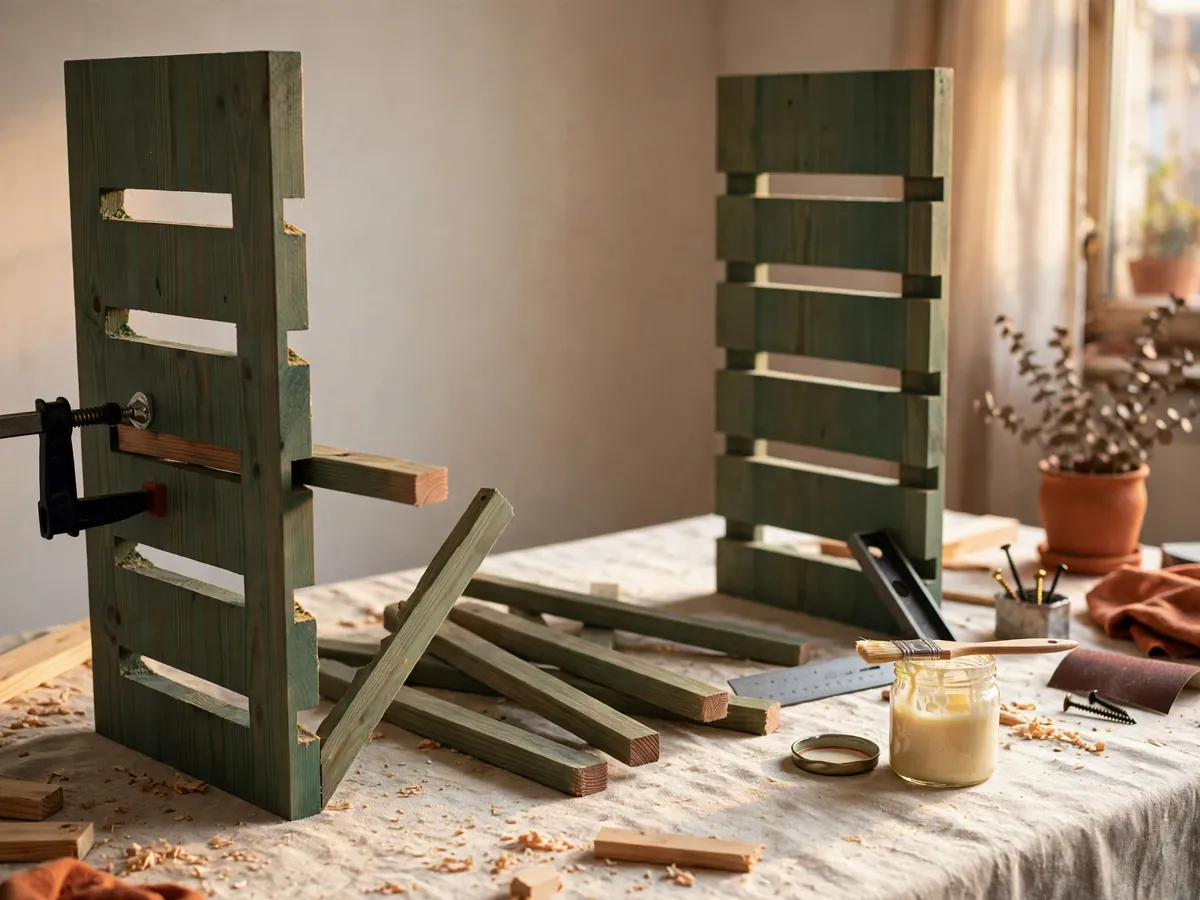
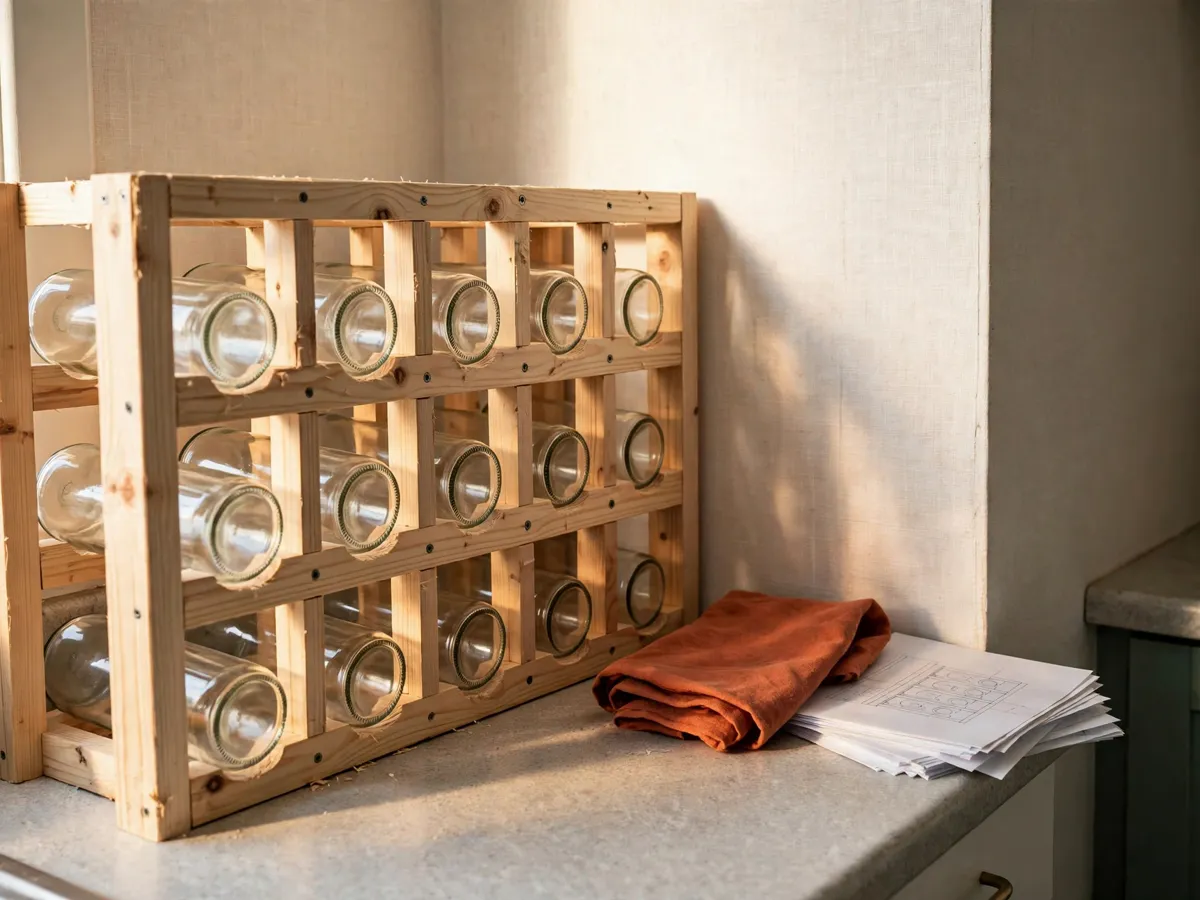
The rack is two flat grids held 12 inches apart by six spacers, and a bottle points into the bay and rests on a rail of the front grid and a rail of the back grid, its body passing through matching cells in each face. The order that keeps a first build square: cut everything, assemble one grid flat, check it against a bottle, then build the second. Making both grids before any check is how a 1/8 inch drift becomes a 1/2 inch lean by the time the two are joined.
- Cut all 25 pieces from the table in section 3 and label them on their back faces: uprights U1 to U10, rails R1 to R8, spacers S1 to S6. The two grids are identical, so mark them A and B and keep each group in its own pile.
- Cut the cell spacer block, a 4 inch scrap. Every cell in the rack is checked with this one block, and it earns its cut because it is exactly the clear opening.
- Lay grid A face down on the floor or a table. Set the five uprights parallel, edges touching the spacer block on each side, so their centers land 5-1/2 inches apart. Mark the rail lines on the uprights at 0, 5-1/2, 11 and 16-1/2 inches from the bottom. The last rail's top edge, 16-1/2 plus its own 1-1/2, is the 18 inch face height from section 3.
- Glue the four rails of grid A onto the marks, one drop of glue per crossing, and square the assembly by measuring both diagonals. They must read the same. If they do not, shift a rail a sixteenth and measure again, because this is the last moment a correction costs nothing.
- Clamp the grid and leave it an hour. While it sets, drive the crossing screws, 20 per grid (five uprights meeting four rails), pre-drilling each one with the 1/8 inch bit so the pine does not split near an end.
- Drop the fattest bottle in the house into a corner cell of grid A. It should clear both uprights with daylight on both sides and no rocking. If it touches, the pitch is wrong, and fixing it now is far cheaper than fixing it after two grids are joined.
- Build grid B the same way, using grid A as the template for the rail marks. Two identical grids is the whole requirement, and a template removes the arithmetic from the second one.
- Join them. Stand grid B upright, lay a spacer at each corner and each mid-edge, glue and screw one end of each spacer into grid B. That is 6 spacers and 6 screws, and it sets the 12 inch bay without a single measurement.
- Lower grid A onto the free ends of the spacers, square it by the diagonals one last time, and drive the remaining 6 screws. Wipe every glue squeeze-out with a damp rag before it skins over.
- Load twelve bottles, one per cell, nose first through a front cell into the matching back cell. Set the rack on a flat floor overnight, then check that no bottle is touching a strip it should not touch, and that the rack sits flat without rocking on one corner. A rock is sanded out of the offending spacer, not shimmed with cardboard.
- Sand everything to 180 grit with the grain and break every sharp edge with a few passes. Cells see hands as often as bottles, and a splinter inside a pocket is the kind of surprise that ends with a red shirt.
Cost: $0 beyond the material list. Time: 4 to 5 hours of assembly, split by two glue pauses of about an hour. One caveat: screw the spacers before the grids, because a spacer set at an angle will twist the two faces out of parallel and the cells stop holding bottles level.
5. Lattice geometry: the pitch and the opening, from your bottle
Two numbers run this section: the pitch between strips and the clear opening inside a cell. They are not the same number, and mixing them up is where most lattice wine rack plans go wrong. Pitch is measured center to center, and it is 5-1/2 inches here. Clear opening is the inside width of the cell, and it is pitch minus the strip width: 5-1/2 minus 1-1/2 leaves 4 inches.
The clear opening has to pass two tests. First, the bottle diameter you measured in section 1 must fit through it, and a Bordeaux at 3 inches clears 4 with half an inch to share on each side. Second, the opening must be small enough that a bottle cannot fall through it sideways, and a 4 inch square will swallow a bottle standing neck down. So the cells only work because the bottle slides in nose first and rests on the rails above and below, rather than dropping through the grid. That is the structural idea of a lattice rack, and it is why the pitch is tied to the bottle diameter plus about an inch rather than a round number that looks clean on the drawing.
How the two faces meet. The two grids sit one behind the other, 12 inches apart, and a bottle slides through a cell in grid A and a cell in grid B that line up. If the cells do not line up, the bottle binds, and a bound bottle is how a lattice rack takes the paint off a label. So grid B is built from grid A as a template, never from the tape a second time, and the spacers go on at the corners and the mid-edge: six points at a fixed length hold the faces parallel along the whole rack.
The geometry question that usually gets drawn as diamonds. A diamond lattice comes from rotating a single grid 45 degrees, and it looks better in a photo because it hides the squared look. It also demands a 45 degree cut on every strip end and a notch on every crossing. That is why this plan holds the line at a square grid: the cell is the same, the cuts are all square, and the tool list stays two boards short. A diagonal slat nailed over the face recovers most of the look, if the photograph is the goal.
One tolerance to accept and stop worrying about. A 1/8 inch error in one cell is invisible and holds a bottle. The same 1/8 inch error repeated across every cell becomes a 1-1/2 inch error across the face, and the outermost bottles will not seat. Measure every strip from one datum edge, never from the last strip, and the drift cannot build up.
Cost: $0. Time: 15 minutes with the bottle, a pencil and a scrap of paper. One caveat: use the widest bottle you will actually store, not the one you serve guests from.
6. Finishing: oil, poly, paint, or nothing
Pine is the reason this build is cheap, and pine is also the reason it needs a decision here rather than at the end. Soft pine takes stain unevenly, it dents when a bottle is slid in hard, and its resin can yellow a label over a winter. Finishing is not decoration on this rack, it is protection for the bottles.
The order that works on pine, whichever topcoat you pick. Sand to 180 grit with the grain, vacuum the dust out of every cell, then apply a pre-stain wood conditioner if you are going to stain. Conditioner is the difference between an even amber tone and the blotchy patchiness that makes most first pine projects look like a garage sale, and it costs about $6.
| Finish | Cost | Time, two coats | Best for |
|---|---|---|---|
| Danish or tung oil | $9–$18 | 30 min plus 8 h dry | Warm tone, feels like wood, easiest to repair |
| Water-based poly, satin | $14–$26 | 40 min plus 6 h dry | Most dent and spill resistance per dollar |
| Stain then clear topcoat | $18–$38 | 90 min plus 24 h dry | Walnut or espresso tone over cheap pine |
| Latex or acrylic paint | $12–$22 | 60 min plus 8 h dry | Hides a bad grid and matches a room |
For a first build, oil is the forgiving choice: it cannot be applied too thick, it cannot leave brush marks, and a missed spot sands out and re-oils without a visible patch. Poly is the tougher choice and the better one if the rack lives in a kitchen where someone will wipe it down. Paint is the honest rescue option, because a grid with two crooked cells looks deliberate under an opaque coat and looks careless under a clear one.
Whatever you choose, keep the inside of each cell unfinished or at least sanded smooth after the coat. A film-building topcoat on a cell wall grips a paper label and can tear it when a bottle is pulled, and a torn label is the one damage a wine rack does that you cannot fix with sandpaper.
Cost: $9–$38 depending on the route. Time: 30 to 90 minutes of work, spread over a day of drying. One caveat: do not load bottles into a wet rack, because a damp finish on a cell wall will stick to the glass and set a ring.
7. Mounting it on a wall you are not allowed to drill
A loaded 12-bottle rack weighs about 40 to 50 pounds, roughly 5 pounds of pine and screws against 35 to 45 pounds of wine. That is moderate for furniture and far past any adhesive hook, and the gap between those two facts is where most apartment installs go wrong. The honest options, in the order worth trying them, are: stand it free, mount it on a stud with two screws, or mount it on drywall anchors rated well above the load.
Free standing is the option a renter should not skip. Set the rack on a shelf, a dresser top, or the floor behind a couch, and the wall stops being part of the project. The plan as written stands on its own bottom rail, because the footprint is a 23-1/2 by 12 inch rectangle and a loaded rack keeps its center of gravity low. Add a $6 furniture strap to a nearby bookcase if the house has a dog or a toddler, and that is the whole stability question.
Stud mounting is the permanent answer and it needs lag screws, not cabinet screws. Find the stud with a $12 to $25 finder or by knocking, mark its center, and drive two 5/16 inch lag screws through the wall cleat into the stud. Two lags into one stud hold several hundred pounds in shear, so the rack fails long before the wall does, and the holes are two quarter inch plugs to patch at move-out. This is the choice for a rack in a hallway, and it is the choice most leases technically forbid, so read the clause before reaching for the drill.
Drywall anchors are the compromise, and the rating is the only number that matters. A snap-toggle rated 40 to 80 pounds per anchor in half inch drywall covers the load with two anchors, and three anchors across the cleat is the plan when the wall is unknown. Self-drilling anchors top out near 50 pounds and are the weaker choice here. Adhesive strips are not the plan. Their published ceilings are for a smooth painted surface loaded in shear, and a textured apartment wall with 40 pounds swinging on it is not that test.
One detail decides whether any of this works: the rack hangs by its cleat, the 23-1/2 inch piece from the cut list, screwed across the back at the top. Hang a rack by its cleat and the load sits on the wall squarely. Hang it by a lattice strip and that strip takes the shear alone, which is how a pine 1x2 snaps at a crossing. For the wider question of what a wall will and will not carry, the floating shelf cut list guide covers the same anchor ratings at shelf loads.
Cost: $0 free standing, $6–$14 for three toggles or a strap, $12–$25 for a stud finder plus $4 for two lag screws. Time: 20 to 40 minutes. One caveat: a rack hung on a wall that is not plumb looks crooked even when the rack is square, so check the wall before blaming the build.
8. What to skip, and the four ways this build fails
The failure modes, in the order they show up
- Cells cut for a Bordeaux, bottles bought Burgundy. A 3-1/4 inch bottle in a 3 inch opening jams, and the jam is discovered one bottle at a time. The fix is section 1, before the first cut.
- Drift. A 1/8 inch error repeated across four cells becomes a 1/2 inch error at the far edge, and the outer bottles stop seating. The fix is one datum edge and one spacer block.
- Split pine near an end. A 1x2 is 3/4 inch thick and a 1-1/4 inch screw will split it every time without a pilot hole. The fix is the 1/8 inch bit before every screw, no exceptions.
- A rack that leans, because the wall is out of plumb or because the spacers went on at an angle. The fix is six spacers at the corners and mid-edges, checked by diagonals before the last screws.
What to skip, because a first build is already long enough. Skip the diamond lattice and its 45 degree cuts, since the cell is identical and the tool list doubles. Skip the drawer under the rack for corks and foil cutters, since a $4 dish holds them. Skip the overhead stem rack, since it turns a 4 hour build into an 8 hour one and adds a ceiling anchor to a rental wall. Skip oak, since a wall rack carries about 45 pounds and oak triples the lumber line for no structural gain.
And do not leave the finish to the last hour. Stain and oil are the steps a first timer pushes back, and by then the cells are already loaded, so the inside of every cell stays raw. Finish before the bottles go in and the rack looks built rather than attempted.
Cost: skipping the list above removes $15–$40 from the build. Time: none saved on the day, one to two hours saved on the plan. One caveat: every failure mode here is cheap to avoid during the build and expensive to avoid afterwards.
9. Four variations, by skill and by space
The core plan scales and shrinks, and most of the questions in the beginner DIY projects index come back to that one fact. The pitch and the bay length stay the same in every variation, because they are set by the bottle, so what changes is the cell count and the way the two grids are held apart.
The 8-bottle rack, for a first attempt. Cut two tiers instead of three, so each face keeps its 5 uprights but drops to 3 rails, and the upright height falls from 18 inches to 12-1/2 (3 x 1-1/2 + 2 x 4 = 4-1/2 + 8). Every other dimension in section 3 stays the same. The build time falls to about 2-1/2 hours, the lumber line to three boards, and one whole glue pause comes out of the schedule.
The single-tier rack, for a kitchen counter or a shelf back. Four cells wide and one tier high, so 5 uprights and 2 rails per face, and the face is 23-1/2 inches wide by 7 inches tall (2 x 1-1/2 + 1 x 4). Four spacers instead of six. This is the version that holds the four bottles a small household actually keeps, and it is the one a complete beginner can finish in a single afternoon.
The 16-bottle rack, for a case buyer. Four tiers instead of three: 5 uprights at 23-1/2 inches and 5 rails per face, and the face becomes a 23-1/2 inch square. Two more boards, one more glue pause, and the mounting question in section 7 gets serious, because a loaded sixteen-bottle rack is nearer 60 pounds and the stud option stops being optional.
The one-board crate version, for a complete first build. Skip the lattice and build a single open box from one 8 foot 1x8, then drop a 1x2 divider in every 5-1/2 inches. The cells are the same width, the bottles rest the same way, and the whole project is one board and one cut list, which is the shortest tool list in the free woodworking plans index.
Cost: $0 to vary the plan, since every version reuses the same cut list at a different count. Time: 2-1/2 hours for the 8-bottle, 90 minutes for the single-tier, and about 6 hours for the 16-bottle. One caveat: pitch and bay stay constant across every variation, because the bottle is the one thing that does not scale.
10. The honest cost and time sheet
The headline number, $35 to $75, is lumber plus fasteners plus a finish. It assumes the drill and the saw are already in the house and that the rack is built from pine rather than oak. Here is where that range comes from, line by line, so the budget can be trimmed or expanded on purpose instead of by accident at the checkout.
| Line | Low | High | What moves it |
|---|---|---|---|
| Five 8 ft 1x2 pine boards | $18 | $33 | Grade, yard, and whether you buy a sixth spare |
| 100 ct box 1-1/4 in screws | $4 | $7 | Brand, interior vs exterior |
| Yellow glue, 4 oz | $3 | $5 | Brand only |
| Sandpaper, 120 and 180 grit | $4 | $6 | Whether the house already has some |
| Finish (oil to stain plus poly) | $9 | $38 | Route chosen in section 6 |
| Two clamps, if bought | $10 | $22 | Bar vs spring, length |
| Mounting hardware | $0 | $14 | Free standing vs toggles vs strap |
Time, in the same honest shape. Marking and cutting is 90 minutes. Assembling the two grids is 4 to 5 hours, with two glue pauses of an hour each that are not work but are on the clock. Finishing is 30 to 90 minutes of work spread over a day of drying. Mounting is 20 to 40 minutes. Total active time, about 6-1/2 to 8 hours, and total elapsed time across a weekend, about 24 hours because of the drying.
Cost: $35–$75 all in. Time: 6-1/2 to 8 hours active, one weekend elapsed. One caveat: the spare board is the cheapest insurance in the list, and skipping it to save $4 is how a single ruined strip buys a second trip to the yard.
11. Five questions that come up on every build
Will a Champagne bottle fit the cells?
A standard 750 ml Champagne bottle is about 3-1/2 inches across, and the 4 inch clear cell clears it with a quarter inch on each side. A magnum, at 4-1/4 inches, will not fit, and the fix is the rule from section 5 applied to a wider bottle: pitch it at the diameter plus about an inch, and rebuild the face at that spacing.
Can I build this without a saw?
Yes, by handing the cut list from section 3 to the lumber desk. Most US yards cut to a marked list for a small fee per cut, and every cut in this plan is a square crosscut. Check each piece at the counter, because a store cut that came out 1/4 inch short is only discoverable at home.
How many bottles does the rack actually hold?
Twelve, in three tiers of four. The count comes from section 1, not from the plan, so if the household keeps six the honest build is the 8-bottle variation in section 9, and if it keeps a full case the build is the sixteen-bottle rack at a 4-tier height.
Does the rack need a back panel?
No. The two grids hold the bottle at the heel and the shaft, and a back panel would only trap dust behind the bottles. The wall behind the rack is the back panel, and a coat of the same paint as the room is all it needs.
What finish is safe for bottles that touch the wood?
A cured film of water-based polyurethane, satin, is food safe once dry and is the standard for wine racks. Oil finishes cure by oxidation and are safe once dry to the touch and odorless. Both need the full drying time from section 6 before a bottle goes in, and the inside of each cell should be sanded smooth rather than film-coated, so a label does not stick.
Save these on Pinterest
Pin the cut list, the lattice geometry, or the renter-safe mounting options and come back to them on a free weekend. If you want a wider set of DIY projects to plan around this one, the full index links to shelf plans, workbench plans, and kitchen builds that share the same tool list.