 Plant As Deco
DIY Home Projects
DIY Herb Garden Planter Ideas: 4 Weekend Builds
By Plant As Deco · Updated 18 November 2026
An herb planter is a small piece of furniture with a hard job: hold wet soil, let the water leave, and stand up to a windowsill worth of weather. Most store-bought versions do one of those three well. The four easy builds on this page do all three, and each one comes in at under $45 in new lumber: a mason jar wall rack for the smallest wall, a tiered stand for a balcony corner, a window trough for the space under the glass, and a crate caddy that needs no wall at all and no saw at any point.
One boundary before the first cut: this page is about the containers. Choosing which herbs to grow, potting them up and keeping them alive is a separate skill, and it lives in the indoor herb garden guide. Every build below assumes the plants are already chosen.
Weekend-ready: $21–$41 per build, one afternoon each. The jar rack and the crate caddy go up in an hour; the trough takes the better part of a Saturday once the liner is cut.
Size and drainage first: the decisions made before any cutting
Three decisions get settled before a single board is cut, and all three are cheaper to make now: how deep the soil sits, where the water exits, and what stands between the soil and the wood.
Depth comes off the board width. A 1x8 board is 7¼ inches wide and builds a box a little over six inches deep inside, once the bottom takes its ¾ inch. That is the target width for this whole family of builds: basil, parsley, chives and thyme settle into six to eight inches of soil, and a box from 1x8 stock lands inside that range. Rosemary wants the deeper end of the run, which is why it gets the trough and never a jar.
Drainage is one drill bit and ten minutes. Quarter-inch holes, six to eight of them along the low end of a tray or the length of a trough, drilled before the box is assembled and vacuumed out after. A hole drilled after assembly still works; it just throws sawdust into a place the vacuum cannot reach. The holes do the work because of gravity, which is also why a layer of pebbles in the bottom changes nothing.
A liner buys the second season. A sheet of 4-mil plastic or a coir mat cut to size keeps wet soil off raw pine, and the difference shows a year in rather than a week in. Punch liner holes wherever the wood is drilled, fold an inch up each wall, and staple or tack the top edge only — the bottom stays loose so water still finds its way out. Untreated pine is the cheap default stock for all four builds, cedar is the upgrade for anything that lives outside, and reclaimed lumber has its own rules, covered further down.
Weight is the quiet constraint. Wet potting mix runs about 50 pounds per cubic foot, which puts a filled 30-inch trough near 40 pounds before the first plant, and three full quart jars near twelve. Every mounting decision on this page follows from those two numbers: brackets and screws land in studs, and never in plaster alone.
Cost: $0 for the planning, about $8 for the drill bit and liner material. Time: 20 minutes. Caveat: depth and holes are the two things a finished build cannot add later.
Build 1: the mason jar wall rack
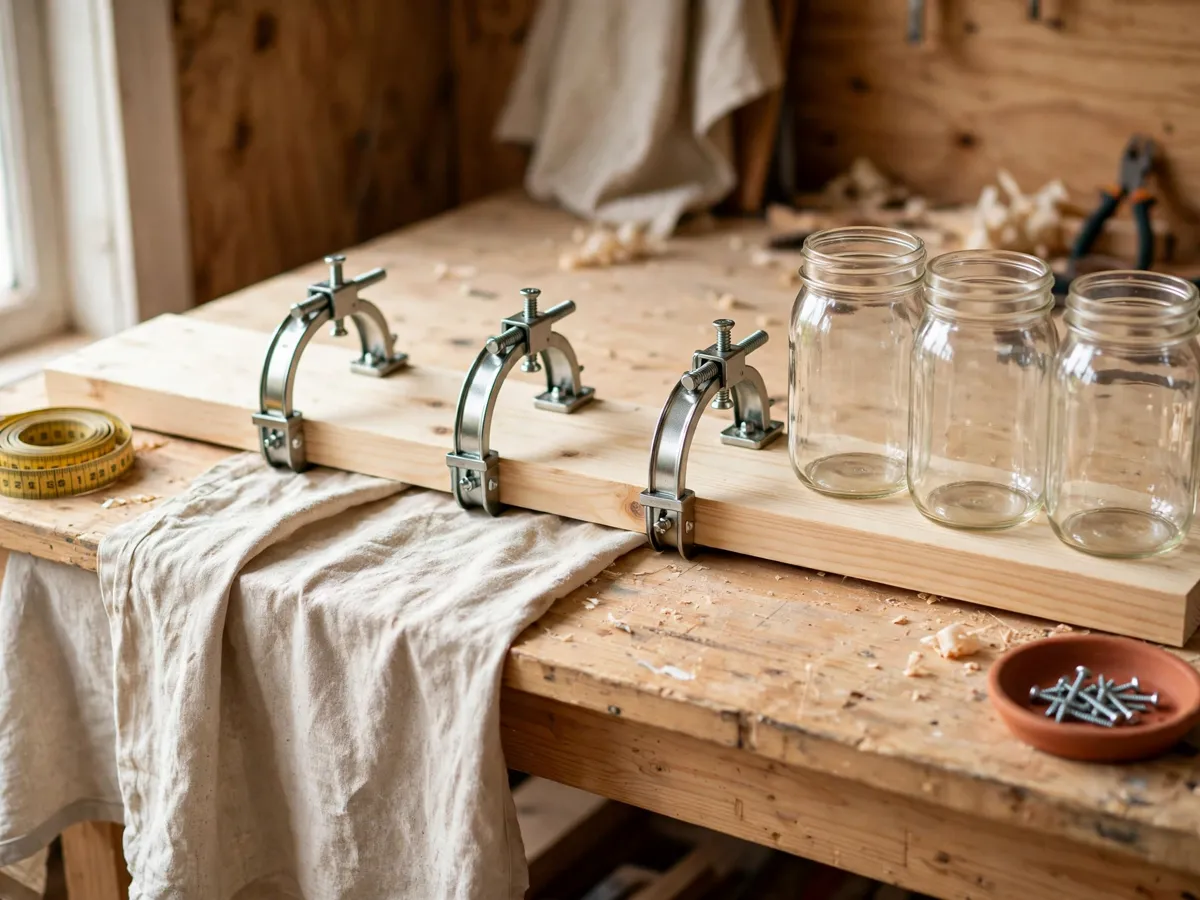
The smallest of the four and the fastest to finish: one pine board, three ring clamps, three quart jars. The clamps are the whole design. They are screw-on rings, sold in hardware stores and craft shops for about $2 each, and they hold a wide-mouth jar by its shoulder so the jar lifts straight out for watering and drops back in.
The parts. A 1x6 pine board 36 inches long, three wide-mouth ring clamps, three quart mason jars at $1.50–$3 each, eight 1¼-inch screws for the clamps and four 2½-inch screws for the wall. There is one cut, and the lumber desk makes it free: ask them to trim the board to 36 inches if it comes long.
Finish first, clamp second. Sand the board and put a wipe-on oil or a water-based sealer on all six faces before any hardware goes on. The clamps bolt through the front face, and a clamp screwed over wet finish traps the wet edge underneath. Then mark the clamp positions — three points on 10-inch centers puts the outer clamps three inches from each end — and drive the clamp screws from the back so the heads hide behind the board. Clamps level with each other is the only accuracy this build needs.
Mounting is easy: four screws and one rule. Find two studs in that 36-inch run — most walls lay studs on 16-inch centers, so a board this length always crosses at least two — and drive a 2½-inch screw through the board into each stud, checking level across the top edge before the second screw lands. Where the studs sit badly, toggle bolts carry the same load. Then set the jars in their rings and fill each one with potting mix to an inch below the rim.
Watering is where glass differs from every other planter on this page. A jar cannot be drilled without cracking, so it holds no drain hole, and the honest routine is the sink: lift the jar from its ring, water slowly until it runs from the top edge, let it stop dripping, and set it back. Light drinks in place are fine between sink trips. Quart jars suit the shallow starters — basil, chives, parsley, mint cuttings — and they double as a propagation station: a jar of water and a cutting at eye level is the cheapest rooting setup there is.
Cost: $21–$28 — board $7, clamps $6, jars $4.50–$9, screws $4. Time: about an hour once the finish dries. Caveat: glass shows every dry day, so the rack rewards someone who waters on a schedule.
Build 2: the tiered herb stand
The stand is the build for a balcony corner, a deep sill or a kitchen counter end where a wall rack has no wall to live on. Three shallow trays step up and back on two rails, so six to nine nursery pots get the sun exposure of one shelf without shading each other. The stand also sidesteps drainage engineering: the herbs stay in their own pots, dropped into the trays, and each pot drains into its own saucer.
The lumber is one cart ride. A 1x10 six feet long ($14–$18) for the three tray bottoms, two 1x3 boards four feet long ($5 each) for the rails, and a 1x2 board ($4) for the cleats.
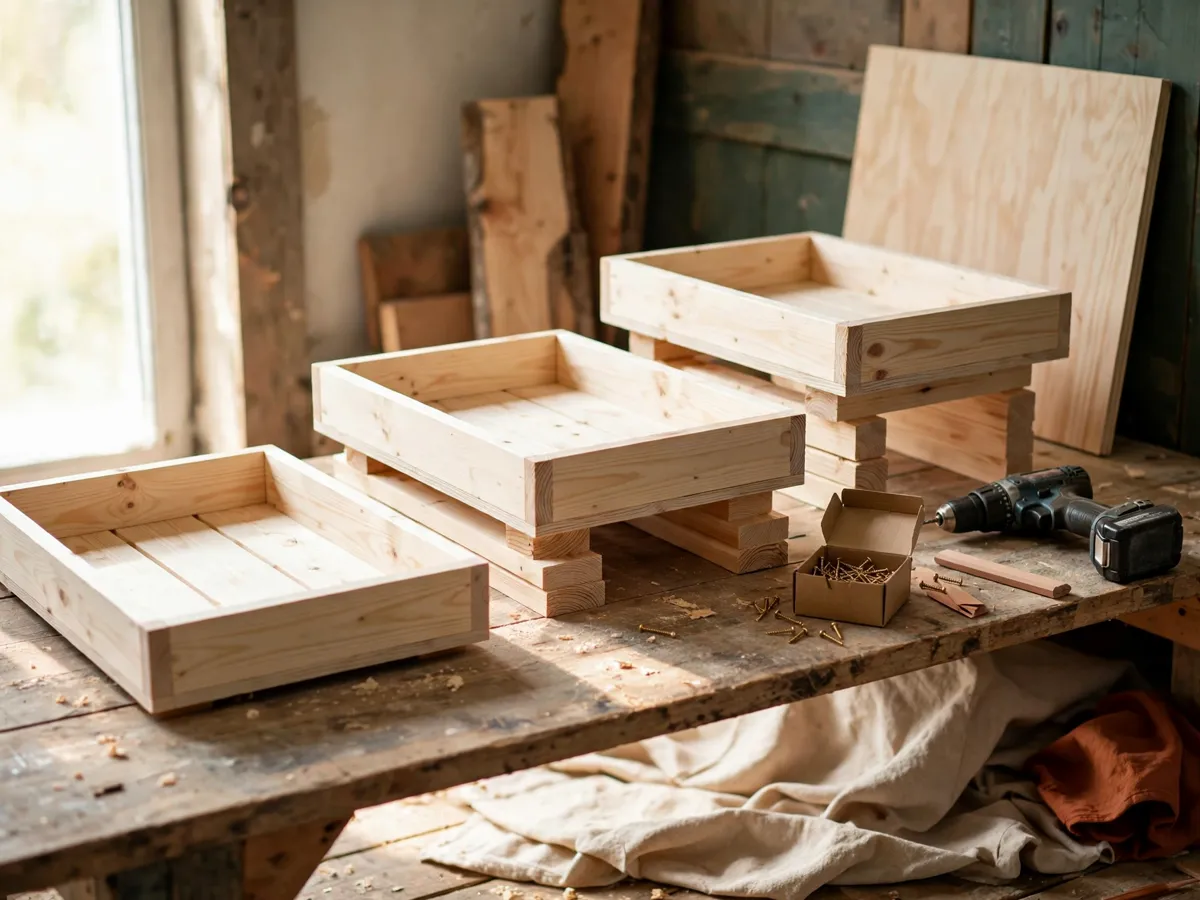
Every cut is straight. Three tray bottoms at 20 inches come off the 1x10 with nothing ripped, each one 9¼ inches deep. Each tray takes a rim: two ends cut at 8½ inches and one front at 20 inches from the 1x2, screwed around three sides with the open side facing back. The rails take the only thinking — two 1x3 boards cut to 32 inches, with cleat marks at 8, 18 and 28 inches up from the floor.
Assembly goes rails first. On each rail, screw a 1x2 cleat at each of the three marks, with a level laid across from rail to rail so the left cleat sits at the same height as its partner. Stand both rails up 20 inches apart at the outside faces and screw each tray down through its base into its cleat pair, two 1¼-inch screws per cleat. Then stand the whole thing on a flat floor and sight the front edges, because a stepped frame shows a lean that a single shelf hides.
Trays, holes and liners. Drill six quarter-inch holes in each tray bottom before the trays go on the rails, and line each tray with a coir mat cut to size if it will hold soil directly, keeping the liner loose at the corners so water still exits. In pot mode, the configuration this build does best, the trays simply hold saucers and the holes are insurance.
The real advantage shows across a season. Light shifts through the year, and a tiered stand lets the rosemary move from the top step in summer to the middle step in winter without moving the stand itself. Step rotation is five minutes of work and the closest thing to a seasonal reset a small garden gets.
Cost: $32–$36 — 1x10 $14–$18, rails $10, cleats $4, screws $4, with three saucers adding about $8. Time: three hours including the cutting bench. Caveat: the trays are shallow by design, so this is a stand for potted herbs rather than a soil-filled tiered planter.
Build 3: the window trough box
The trough is the deep build, the one that earns the rosemary slot and looks made for the window because it was: a window box sized to the glass rather than to a store shelf. A 30-inch box from 1x8 stock holds a little over six inches of soil, hangs from two brackets under the glass, and carries the detail most homemade window boxes skip: a drip edge that sends water clear of the wall.
The parts. Two 1x8 boards four feet long ($7–$8 each), two 6-inch shelf brackets ($3–$6 each), a sheet of 4-mil plastic ($5), and a box of screws ($4). The drip strip comes free from an offcut.
The box assembles around its bottom. Cut the bottom panel 30 by 7¼ inches from the first board and drill six quarter-inch drain holes along its length. Screw the front and back boards to the bottom's long edges, standing on edge, so the box reads 7¼ inches tall. The two ends cut at 5¾ inches wide to sit between the front and back, four screws per end. Every joint is butt-jointed and screwed from the outside, which leaves clean faces inside for the liner.
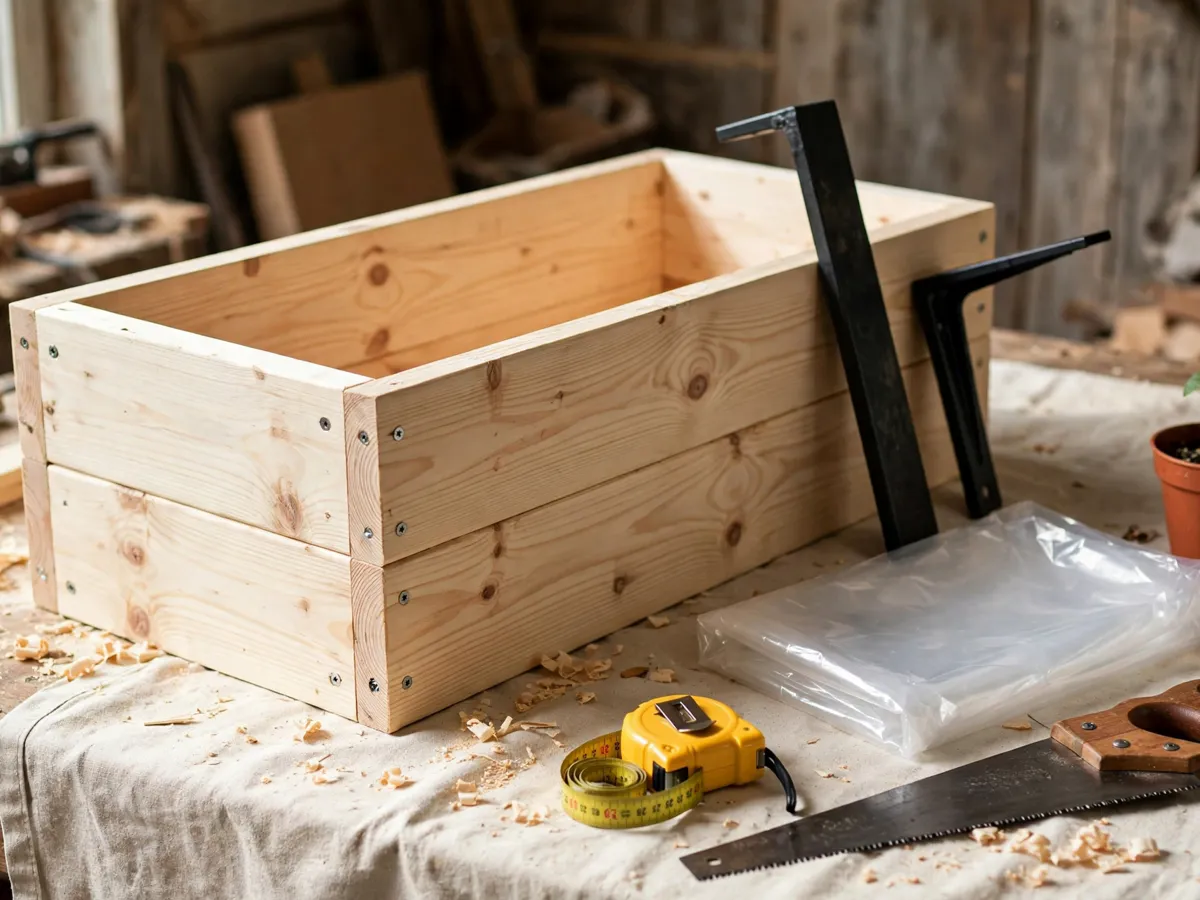
The drip edge and the liner. The drip edge is a 1-inch strip cut from an offcut and screwed to the wall side of the box, angled down and away, so water leaving the drain holes runs off the strip instead of tracking back to the paint. The liner goes in after: plastic cut oversized, pressed into the corners, holes punched wherever the bottom is drilled, an inch turned up each wall and stapled along the top edge where nobody sees it.
Hanging runs on two numbers. The first is the bracket arm, which wants to run at least two-thirds of the box depth, so a 7-inch window box takes a 6-inch bracket and nothing smaller. The second is the wall line: brackets into studs below the window, or into the sill framing when the studs will not line up. The floating shelf placement guide works through the height and clearance math for ledges by room, and the same bands apply under glass. Set the box on the brackets, level it, and screw up through the bracket holes into the bottom panel.
Weight decides where it hangs. A filled trough weighs more than the box and the brackets combined — about 40 pounds once the mix is wet, which is why both brackets land in structure and both sets of screws run long enough to reach it. On a covered balcony the same box hangs from a railing clamp instead of the wall, and weather-rated building is a different job. For a whole wall of greens rather than one box, the vertical garden wall guide lays out the pocket and frame systems that scale past a windowsill.
Cost: $28–$37 — boards $14–$16, brackets $6–$12, liner $5, screws $4. Time: half a Saturday including the liner. Caveat: measure the window first, because a 30-inch box wants an opening at least 34 inches wide.
Build 4: the crate herb caddy, no cuts and rental-safe
The caddy is the renter's build in the strictest sense: nothing mounts to a wall, nothing drills into a sill, and nothing in the build requires a saw. Two wooden crates, one 1x4 board and a handful of screws make a herb garden that rolls to wherever the light is.
The parts. Two wooden crates at $8–$12 each, or free from a produce department if you ask on the right morning. A 1x4 board three feet long, cut at the lumber desk from a longer board. Screws, a screwdriver and an hour finish the list, and a set of casters ($8–$10) turns the caddy into something that moves without lifting.
The board is the whole joinery. Set the two crates side by side with a two-inch gap, lay the board across both bottom rims, and drive four screws down through the board into each crate's bottom rail. Turn the pair over and repeat across the top rims; the top board doubles as the handle that lets the caddy tilt and roll on one corner. If casters are going on, screw the four plates to the underside of the bottom board before the crates come back upright.
Pots inside, liner between. A coir liner or a sheet of plastic dropped into each crate finishes the job, with the herbs standing inside in their own nursery pots. Pots-in-crates is the smarter setup for this build: the pots keep their drain holes, the crate slats stay dry, and re-potting happens by lifting one pot instead of digging. A standard crate runs about five and a half inches deep, and the pots do the depth work above that.
The caddy earns its keep twice a year — once when the summer sun pushes to the far side of the room, once when winter pulls it back — so it deserves real screws rather than the brad nails that hold the crates together. Anyone who would rather cut their own crates than buy them should start with the one-board crate woodworking plan: one board, a short cut list, and a crate that matches the rest of the furniture instead of the produce aisle.
Cost: $33–$41 — crates $16–$24, board $6, casters $8–$10, screws $3. Time: under an hour with a screwdriver. Caveat: crates sold as decor are often stapled rather than screwed, so check the joints before loading one with wet pots.
What the four builds cost, side by side
The ranges below are early-2026 US big-box prices for new stock, rounded to the dollar, and they assume a drill, a screwdriver and a saw are already in the house. A first tool purchase changes the math, but it is a one-time line that every later build reuses.
| Build | Lumber | Hardware and extras | Weekend total |
|---|---|---|---|
| Mason jar wall rack | 1x6, 3 ft — $7 | 3 ring clamps $6, 3 jars $4.50–$9, screws $4 | $21–$28 |
| Tiered herb stand | 1x10 6 ft $14–$18, two 1x3 rails $10 | 1x2 cleats $4, screws $4, saucers $8 optional | $32–$36 |
| Window trough box | two 1x8 boards — $14–$16 | 2 brackets $6–$12, liner $5, screws $4 | $28–$37 |
| Crate herb caddy | two crates $16–$24, 1x4 board $6 | casters $8–$10, screws $3 | $33–$41 |
The pattern worth noticing: the lumber is the cheap part of every build. Boards run $7–$18 across all four, while the parts that carry weight or roll — brackets, casters and clamps — run $6–$24. Buy those new and rated for the load, and buy the board a size up from what the drawing says, because the offcut becomes the drip strip, the cleats and the third tray rim.
Cost: $21–$41 per build as tabled. Time: one hour to half a day each. Caveat: lumber prices move with the season, so treat these ranges as a budget line rather than a quote.
What we would skip
- Planters that sit outside through the weather. Rain, freeze and summer sun move the whole conversation to treated stock and outdoor hardware, and the outdoor pallet projects guide already owns that ground for anyone building from reclaimed wood.
- Fabric pocket walls for a first vertical garden. The top pockets dry out while the bottom ones stay wet, and balancing the two by hand every week is a skill built after the boxes rather than before them.
- Deep half-barrel planters on a windowsill. Thirty pounds of wet soil on a sill built for a curtain is a bad trade, and the herbs on this page do not need the volume.
- Self-watering inserts on a first build. Each gadget adds a reservoir, a wick and a failure point, and a watering can with a finger in the soil covers the same ground with nothing to clog.
- Mint sharing a tray with anything else. It runs, it wins, and the rest of the tray pays for it, so mint gets its own jar or its own pot.
- Glass jars in a spot that bakes in afternoon sun. Soil in thin glass heats and dries faster than soil in a board box, so a hot south-facing wall wants the trough, and the jar rack wants the bright but gentle wall.
Cost: $0 to skip. Time: the ten minutes of thinking that keeps each of these off the build list.
Weekend checklist: copy this before the first cut
- Depth checked against the deepest herb before the board is cut
- Drainage holes drilled and cleaned out before assembly
- Liner cut and punched to match the holes
- Board finished on all six faces before hardware goes on
- Bracket arm at least two-thirds the box depth
- Brackets and screws into studs or sill framing, never plaster
- Jars, pots and saucers dry-fitted before any soil is opened
- Watering plan decided: sink for the jars, can for the boxes
Cost: $0 to check. Time: two minutes at the bench, and it catches the hole that was never drilled before the soil goes in.
Questions the four builds raise
How deep does a herb planter actually need to be?
Six to eight inches of soil covers basil, parsley, chives, thyme and the mints, which is why the 1x8 boxes on this page are the default stock. Rosemary, sage and bay want more root run, so they belong in the trough or a full-depth pot of their own. A build that lands shallower than six inches is a propagation station rather than a home: it roots cuttings happily and disappoints a full-grown plant by midsummer.
Do mason jars need drainage holes?
The jars hold no holes of their own, and drilling glass invites cracks, so the drainage happens at the sink instead. Lift the jar out of its ring, water slowly until it runs from the top edge, let it drip, and set it back. That routine keeps the mix from souring the way a sealed, over-watered jar will. A jar that lives on the rack should hold shallow starters and cuttings, with everything bigger moved to a box that has real holes.
What wood is safe for a herb planter?
Untreated pine is the budget default for every build here, and cedar is the upgrade for anything that sees real weather. Reclaimed lumber is the complicated case: pallet boards carry stamps that say what treatment they have seen, and the rules for reading those stamps, plus how to break a pallet down without splitting it, live in the pallet beginners guide. This page builds in new stock so the question never comes up, and new pine needs nothing more than a coat of oil on the cut faces.
Can I build these in a rental?
Three of the four, yes. The crate caddy touches nothing but its own crates and rolls out at move-out day, the trough hangs from brackets that leave six screw holes, and the rack leaves four. The stand leaves none. Screw holes patch with spackle and paint in an afternoon, which is the usual rental arithmetic, and anything that would need a landlord's permission first is not on this page.
How many plants fit in each build?
The rack holds three quart jars, one plant each, and three is the right number for the wall it hangs on. The tiered stand takes six to nine nursery pots across its three trays, three per step in 4-inch pots. The 30-inch trough fits three bushy herbs, or four if one of them is chives. The crate caddy holds four to six pots depending on crate size, with room left for a trowel.
Save these on Pinterest
Pin the depth rule first: six to eight inches decides which herb goes in which build, and no amount of hardware fixes a box that was cut too shallow. The rest of the weekend builds, from wall shelves to cut-list crates, sit in the DIY Home Projects collection, and the planting side of the year lives in the Gardening & Planting Tips collection.