 Plant As Deco
Gardening & Planting Tips
Seed Starting Containers DIY: Upcycle What You Have
By Plant As Deco · Updated 18 November 2026
Seedlings started in the recycling bin cost about as much as one bag of mix, and for most crops they grow just as well. The catch is that a container is a small system, not just a cup: it has to hold moisture, shed the extra, give the root room and stay upright. This page runs those four jobs across what you already own — egg cartons, toilet paper rolls, coffee and yogurt cups, glass jars, a milk jug — and marks where each one stops working. Where a bought tray is genuinely better, it says that too.
Weekend-ready: $2–$14, one afternoon. The containers are free; the money is the mix. Renter-safe, drill-free, and everything packs into one box at move-out.
Four jobs every seed container has to do
Forget the shape and look at the function. Every vessel that works — a nursery plug, a six-cell tray, a cut-up milk bottle — does four things, and a seedling fails the moment one is missing.
1. Hold moisture for five to ten days. A seed needs a film of water around it until it sprouts, and a vessel that dries to bone in two days costs the whole sowing. 2. Drain the excess. The same wall that holds water must let the surplus out, or the mix stays saturated and the stem collapses. 3. Give the root depth. Fine seed — lettuce, basil, petunia — wants about 2 inches of mix; tomato and pepper 2 to 3; sunflower, pea and squash 3 to 4, which is why a shallow carton cell fails them. 4. Stay steady. A cup that tips takes the seedling with it.
Run those four down the bin and the sorting takes ten minutes: depth plus a wall you can pierce makes a candidate; sealed and shallow makes a holder. The rest of the indoor setup — the shelf, the light, the watering habit that keeps damping off away — is the seed starting indoors guide’s job, and this page assumes you have read it.
Cost: $0. Time: 10 minutes. Caveat: measure depth inside the container — the top half inch of a full cup is water space, not root room.
Egg cartons: the real pros and the mold
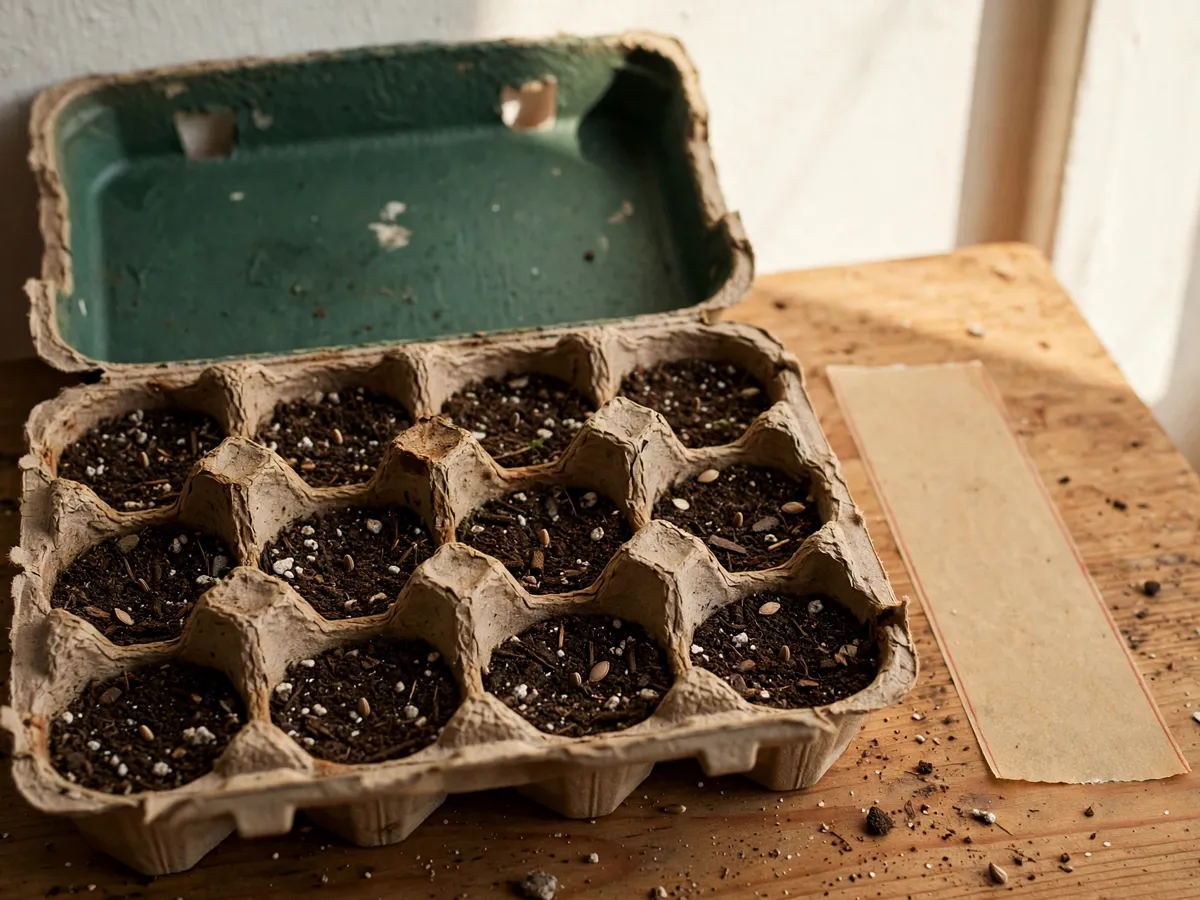
The carton wins because it arrives pre-divided: each cell is one seed, one plant, one address, and thinning is snipping two sprouts and leaving the third. The pulp is thin enough that a toothpick goes through the wall, so roots do not fight plastic, and a dozen cells of lettuce, basil or marigold starts cost nothing.
The cons are just as real. Pulp is paper, and paper held wet for three weeks grows mold on the inside walls; by week four a carton can look grey and feel like a wet napkin. It will not wash, so a carton that grew a diseased seedling is scrap, and it lasts one sowing. With nothing beneath it, a carton also dries faster than you can check — water wicks through the pulp and evaporates from every side at once.
The routine that keeps it alive: peel the lid off, press a pencil into the bottom of each cell to open a drain, stand the carton in a baking pan, fill the cells with damp mix, drop two seed per cell, and water from below. The lid halves go in the pan as domes. When a wall goes soft or fuzzy, do not plant through it — push the plug out and bin the pulp.
"Plant the whole carton, it composts" does not survive contact with a moldy, root-bound cell — clean thin pulp breaks down in a hot pile, a dead cell does not. Shred it into the apartment compost instead of burying a cell whole.
Cost: $0. Time: 20 minutes for a dozen. Caveat: most cells run 1 to 1.5 inches deep — fine for lettuce and herbs you transplant young, not for a taproot.
Toilet paper rolls: depth for straight stems
A cardboard roll is about 4.5 inches tall and 1.6 across — the deepest free cell in the house, and the right one for the crops a carton ruins: sunflower, pea, zinnia, anything that sends a taproot straight down before it bothers with leaves. Stand a dozen rolls upright in a shallow tray, pinched closed over a scrap of newspaper, and fill.
Two things to know first. The thick wall does not drain by itself, so pierce the folded base twice with a pencil or the roll becomes a cup of standing water. And this pulp breaks down slowly in garden soil — it does not vanish in a season. So at transplant time, tear the roll away: slit it down the side, peel the paper off the root ball, and set the bare plug in the ground. Leaving the tube on makes a sleeve the root refuses to cross. The lighter use is as a transfer sleeve: sow in a roll, grow four weeks, slide the tube into a yogurt cup with a drain hole, and tear the paper off at planting.
Cost: $0. Time: 15 minutes for a dozen. Caveat: rolls soften after three weeks of bottom watering; move them while the wall is firm.
Coffee cups, yogurt cups, and the truth about jars
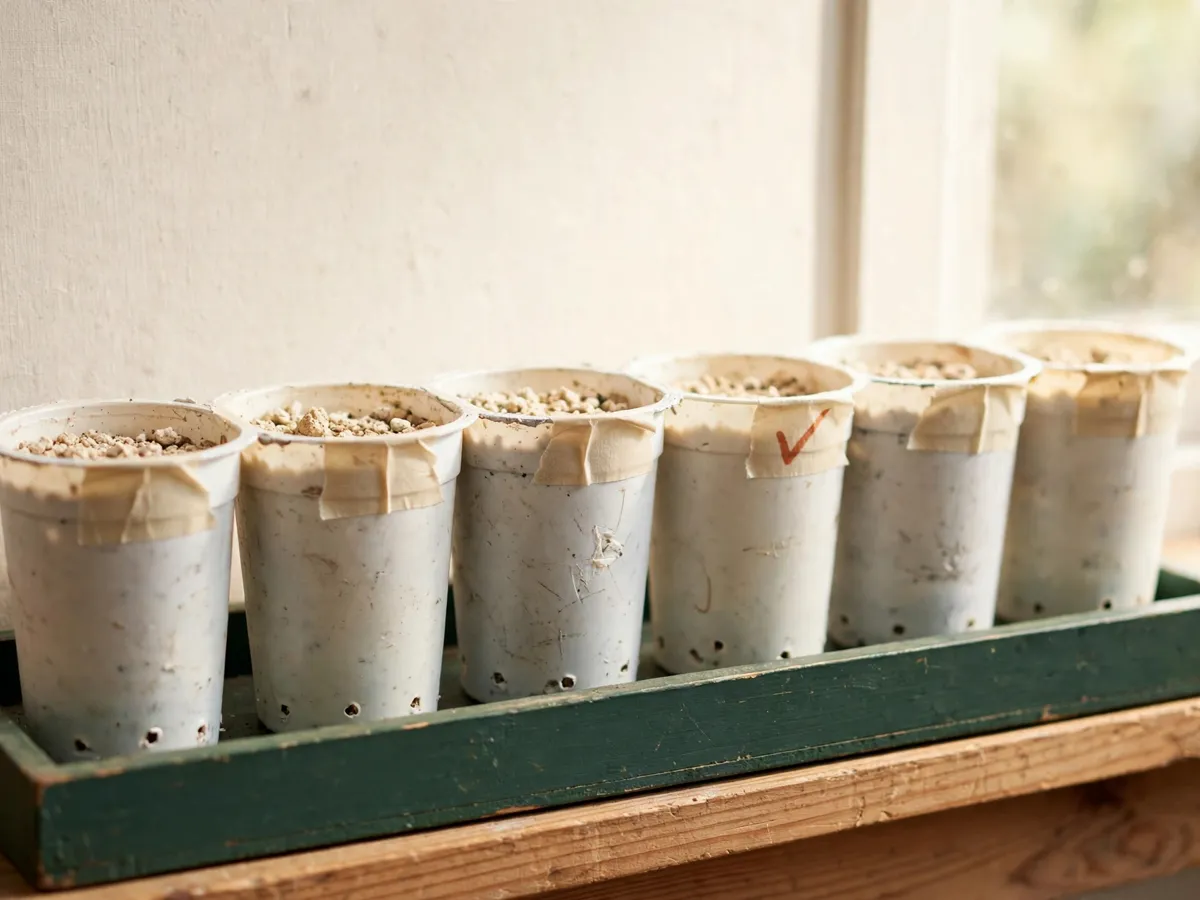
Clear plastic cups are the closest free thing to a nursery pot. An 8 oz coffee cup is about 3 inches deep, holds one tomato or pepper plug for five or six weeks, and its wall does not rot, so it washes and returns next spring. Punch three 1/8 inch holes in the bottom, fill, sow one seed, and grow it to transplant week. A 16 oz cup takes a pea or a squash and wants four holes.
Yogurt cups work with one condition: rinse them. Sugar and milk film in a warm, damp cup grows a film of mould within days — the same damp that invites damping off. Two rinses and a night upside-down is enough. The plastic is thicker than a coffee cup, so the holes want a sharper point. Yogurt cups are also the best free home for herbs: basil, cilantro, parsley and dill start well in one and live there until they are big enough for a windowsill pot, the plan in our indoor herb garden guide.
Glass jars are the upcycle to be careful with. A jar has no drain and no way to get one without a drill, a ceramic bit and a real risk of shattering it, so a jar is not a seed container. It is two other things: a holder that keeps a flimsy cup upright on a slippery sill, and a sprouting vessel for large seed — a wide-mouth jar with a mesh lid soaks peas nicely.
Cost: $0. Time: 25 minutes. Caveat: dark plastic runs hot on a south window; clear cups show the water level.
The milk jug greenhouse with a wick
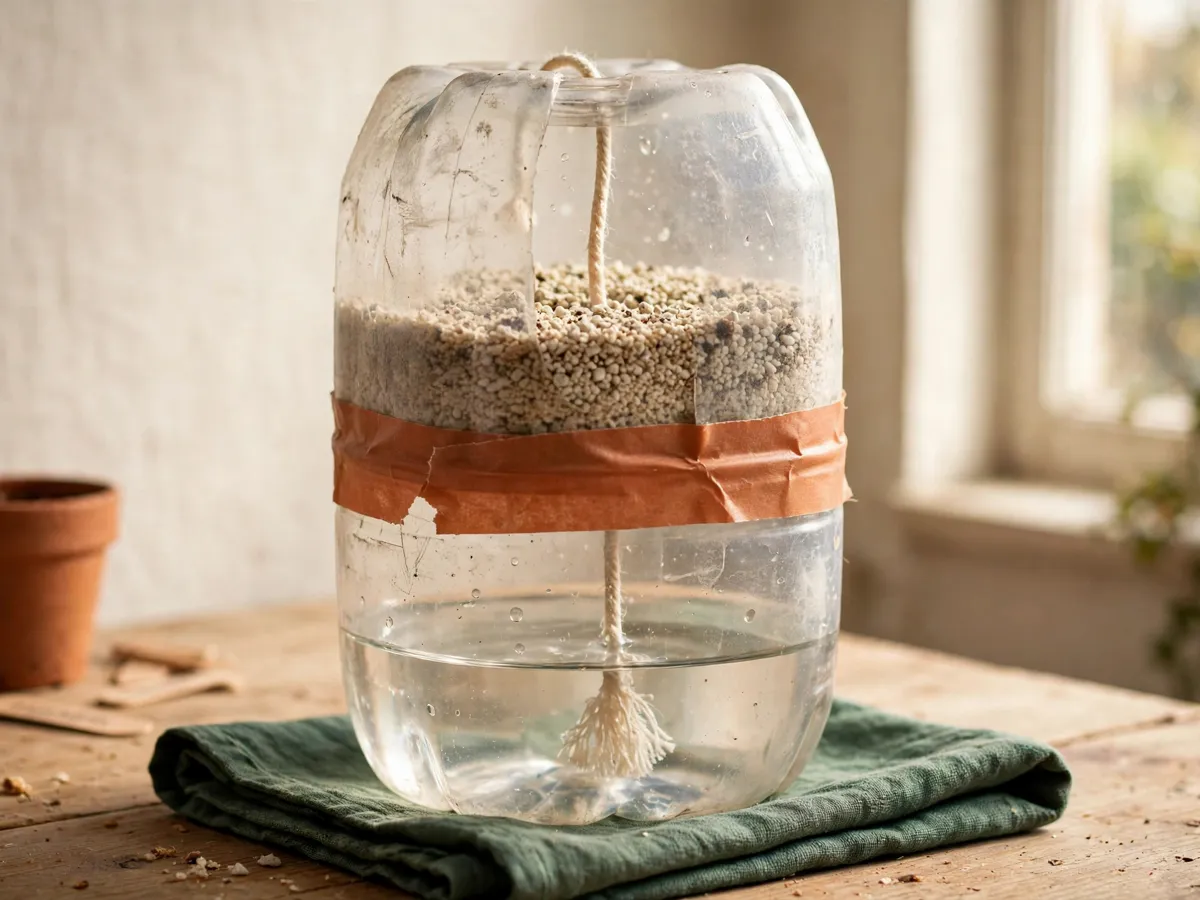
A gallon jug — 3.8 litres of one-piece plastic — turns into two objects: a humidity dome and a self-watering pot. Wash it, cut it around 4 inches below the cap, and you have a top cone and a bottom reservoir. Punch one 1/4 inch hole in the cone’s floor, thread cotton string through and knot it underneath, nest the cone in the base with 1 to 2 inches of water, and fill the cone with mix. The cap stays on loose the first week, then off.
The wick pulls water up the string as the mix dries, so the surface stays loose while the bottom stays damp — the opposite of the crust that stops small seed from emerging. For a forgetful week it is a genuinely good deal.
Its limits deserve equal space. A wick this thin supports small seed for three or four weeks and nothing after: once a tomato is drinking, the string cannot keep up and the plant wilts in a reservoir that is still half full. Roots reaching standing water go brown, so move the plug up the moment a root shows at the wick. And a closed jug on a sunlit sill runs far hotter than the room — above about 85°F a seedling cooks in its own dome — so vent it or pull it back from the glass.
Cost: $0 plus $3 for cotton string. Time: 20 minutes. Caveat: jugs that held flavoured milk smell for weeks; use plain and rinse twice.
Drain-hole math, and how to punch one cleanly
Every container here except the carton needs holes, and the count is not a guess: about one 1/8 inch hole per 3 ounces of volume, spread across the floor. An 8 oz coffee cup takes three, a 16 oz cup four to five, a yogurt cup three, a jug half one 1/4 inch hole because its floor is wider. A vessel with no drain is a fish tank with soil in it — the water table sits near the surface, the roots below suffocate, and damping off starts at the soil line.
The cleanest hole is a melted one. Warm a nail over a flame, hold masking tape against the outside of the bottom, and press through from the inside out. The tape catches the burr so no shaving drops into the soil, and the smooth side ends up inside the cup where it cannot nick a root. Peel the tape and the hole is done.
Two cautions: melted plastic fumes are unpleasant, so work at an open window; and a cold knife twists a star-shaped tear that opens wider once the cup is squeezed — without heat, press a Phillips screwdriver straight down instead of twisting.
Mix, not dirt from the yard
This is the one place an upcycled container still needs a purchased input, and it is the corner people cut. Garden soil in a cup loses four ways: it is heavy, so a small container compacts into a brick; it carries the fungi that cause damping off; it holds a bank of weed seed; and it crusts after the first watering, trapping sprouts under a lid they cannot lift. Seed-starting mix is the opposite on all four — pale, almost weightless, soilless, and clean enough that a tomato and a marigold can share one tray. The container can be free because the soil inside it is doing the precise, perishable part of the job.
Wet the mix before it goes in, not after. Tip it into a bucket, add water, and squeeze a handful: two or three drops at the knuckle is right, a stream is too wet. Filling a hundred cells with dry mix and then watering from above floats half of them out and forms the crust. Fill, firm lightly, sow at two to three times the seed’s diameter, and cover.
A coarse DIY blend stretches the bag: two parts soaked coco coir, one part perlite, half a part vermiculite. It is cheaper per cell and drains faster, which suits a wick jug and a yogurt cup. The same logic — a light sterile medium that dries between waterings — is what our propagation guide uses for cuttings in soil and water alike.
Cost: $8–$14 for a three-quart bag, or about $12 for a coir brick plus perlite. Time: 15 minutes. Caveat: mix stored damp in a closed bag goes sour; wet only what this weekend uses.
Labels that survive three weeks of wet
An unlabeled seedling is a mystery by week three, and the mystery costs more than the label: you cannot water a tomato and a lettuce the same way, or tell which cup moves outside first. The label goes on the container wall — never on a lid, never on a paper sticker, which is pulp by day seven in a damp carton.
On plastic, a permanent marker on the side lasts the season and cleans off with alcohol in autumn. On carton and roll, wrap masking tape on the wall and write on it in pencil — pencil outlives ink on a wet surface. Keep the code short: three letters and a date, TOM 02-11 for a tomato sown 2 November, and copy the line into a notebook, because a sun-faded marker is gone and the notebook is not. The second sowing date is the point of the exercise; the sowing calendar tells you which batch is running out of room indoors.
Cost: $0. Time: 5 minutes. Caveat: label before you sow — a cell holding two look-alike seed cannot be identified afterwards.
Transplanting without tearing the root
Upcycled containers make transplanting slightly harder than a plug tray, because the walls grip. Water the mix an hour ahead so it is damp rather than bone dry, dig the receiving hole first with a finger or a chopstick, and only then lift. Never pull a seedling by the stem: a crushed stem above the seed leaves does not recover. Grip the leaves or the root ball itself.
From a cup, push up through the drain hole with a chopstick and the plug comes out whole instead of in halves. From a carton, squeeze the wall and lift the cell out; if the wall is soft, take the plug and scrap the pulp. From a roll, tear the paper. Set the plug in the hole and firm the soil around it with two fingers.
Depth is where people go wrong. A tomato transplants deep — bury the stem up to the first true leaves and it roots along the buried length, which is the whole reason a tomato tolerates the move. A pepper, an eggplant and every herb want the surface level where it was before; burying a pepper stem invites the rot it is prone to anyway. Cucumber, squash and melon hate any transplant at all, so start them in a roll or a cup you can cut open and plant the plug without disturbing the root. Water in, keep each transplant out of hard sun for a few days, and move it up at the first root showing at the drain hole. What size the next pot needs is the subject of our vegetables in pots page, and where the finished pots go is the container layout guide.
Cost: $0. Time: 5 minutes per transplant. Caveat: a root already circling the bottom of a cup was moved too late — no careful lift fixes it.
What goes wrong, and the fix for each
1. You forgot the drain hole. The mix stays glossy, the stem goes water-soaked at the soil line and then thin as thread. Tip the cup, blot the plug on a towel, reset it in drier mix, and stand a fan on the tray for a day. Nothing saves the seedlings already collapsed.
2. The carton walls mold over. Grey fuzz on the pulp is not the same failure as fuzz on a stem, and the crop is usually fine. Stop bottom watering for a week, water lightly from the top, and move the tray where air moves. Plant the plug, not the wall.
3. Seed sowed too deep. A lettuce pellet buried three quarters of an inch down spends two weeks reaching and then dies short of the surface. Re-sow at the right depth and scrap the old cell; a sprout that ran out of energy under the mix cannot be rescued.
4. The jug dome overheats. Seedlings under a closed milk jug on a south window go limp and pale in an afternoon even though the mix is wet. Take the cap off, prop the cone open, and pull the jug an inch back from the glass.
5. The label floated off. You now have two crops in one tray and no way to tell them apart until they flower. Guess from leaf shape, write the guess down with a question mark, and label the next batch on the wall.
6. Small flies off the surface. A fungus gnat breeds in the top layer of damp mix, so let the surface dry to the first knuckle, water from below only, and scrape any algae film off a clear cup. Six weeks of that and the bin containers match the tray you would have bought.
Cost: $0 for every fix above. Time: 10 minutes when caught early. Caveat: one diseased seedling spreads along a carton row, so pull the bad cell the day you see it.
What we skip
- A new 72-cell tray, when the bin already holds forty containers. The exception is honest: if you need 50 plus plugs ready the same day, buy the tray — punching forty cups is an afternoon you did not budget.
- A heat mat for six seed. Most vegetable seed sprouts at a normal 70–75°F room, and the top of a refrigerator sits in that band anyway.
- A grow light for a dozen cups. A south window with something white behind the tray carries seedlings to transplant size; the shelf-and-light decision belongs to the indoor setup page.
- Any "biodegradable" pot you plant whole. If the wall tears with a thumb, it holds shape for three weeks, not four months.
- Yard soil, pest sprays and rooting powder. None of the three does anything a damp, clean, drained cup is not already doing.
Cost: $0 saved. Time: 2 minutes.
Weekend checklist: copy this and run it in order
- Sort the bin by depth: cartons and shallow cups go to lettuce and herbs, 3 to 4 inch rolls and cups go to sunflower, pea and squash.
- Punch the drains — three 1/8 inch holes in an 8 oz cup, one 1/4 inch in a jug half, a pencil press in every carton cell.
- Rinse the yogurt cups twice and dry them upside-down overnight so the sugar is gone before the mix goes in.
- Wet the mix in a bucket to the knuckle test, then fill. Never fill dry and water from above.
- Sow two seed per cell, cover at two to three times their diameter, and thin to the stronger sprout once it has a pair of leaves.
- Label the container wall — pencil on masking tape, with the date — and copy the line into a notebook.
- Stand everything in a tray, water from below, lid on, and keep the mix near 70–75°F until the first sprout shows. Then the lid comes off and the light goes on the seedlings.
- Transplant at the first root out of the drain hole or the first true leaf, whichever comes first, and harden off over a week before your last frost date.
Cost: $2–$14. Time: one afternoon, about 90 minutes for thirty containers. Caveat: if the afternoon runs long, stop after step six — a labeled, sown tray beats a perfect setup with nothing in it.
Seed starting container questions
Do egg cartons really work, or do they just mold?
They work, within a limit. For lettuce, herbs, marigold and any crop you transplant at three weeks, a punched carton standing in a tray is a fine cell and costs nothing. The mold is a real end-of-life problem rather than a deal-breaker; the answers are airflow, lighter watering near the end, and planting the plug instead of the wall. For a taproot crop or a six-week grow, use a roll or a cup.
Can I start seed in a jar with no hole?
Not in soil, no. Glass holds a water table near the top of the mix and stems rot from the surface down. A jar earns its place as a sleeve that keeps a punched cup upright, as a rinsing vessel for sprouts, or as a tray for labels and toothpicks. If you want glass holding soil, drill one hole with a ceramic bit, keep the glass wet while you drill, and go slow — a rushed jar cracks at the rim.
How deep does the container need to be for tomato versus lettuce?
Lettuce and other fine seed do well in 2 inches, which is a carton cell. A tomato or pepper sown as seed wants 2 to 3 inches and then, by week five, closer to 4 — a coffee cup covers both. Pea, sunflower and squash want 3 to 4 inches from the start, so give them a toilet roll or a 16 oz cup and skip the carton entirely.
Can I reuse yogurt cups for herbs more than once?
Yes, and they are the best reuse container here because the plastic is thick. Two rinses, an overnight dry and a wipe with rubbing alcohol between crops, and a cup runs three or four seasons. Retire any cup whose drain holes have torn into slits, because a slitted wall sheds mix and keeps the plug wet.
I already bought a tray. Is all of this pointless?
No — the tray handles the seed stage better than anything here, and the upcycle lane starts after it. Move the strongest plugs from the tray into punched cups and rolls for the grow-on weeks, then wash the tray and shelve it for next year’s sowing. That is the pairing worth having: one bought tray for sprouting, free containers for everything after.
Save these on Pinterest
Pin the depth list and the drain-hole counts first — those two numbers decide which bin item is a pot and which is scrap. The rest of the Gardening & Planting Tips collection holds the indoor shelf, the sowing calendar and the potting-up guides this page hands off to.